⟿ eggyeuls' hair tutorial

"T R A U M A"
..how eggyeuls does hair.

˓ ִֶָ𓄲 ☁️ BEFORE WE START 𖦹 ࣪˖ ˒
So, I know I said I will not do full on tutorials within this book but here we are. Just recently I set up my own shop on ko-fi and also decided to work on some (future) hair stocks for it. And I thought it may be interesting to give some insights on how I usually go on editing/drawing hair. BUT: if you want to safe yourself from all the troubles of drawing hair, keep an eye on my shop and get your hands on my hair stock (should start to be added around the end of September), all linked on my profile hah!
Disclaimer: not everything that works for me has to work for you too and something that may not work for me could still work for you. We all have different techniques and styles, use different devices and programs, nothing will ever be the exact same. So do not expect any in depth explanations and do not be afraid to experiment or adjust informations to your needs.
⛓
˓ ִֶָ𓄲 ☁️ WELL... HAIR STUFF 𖦹 ࣪˖ ˒
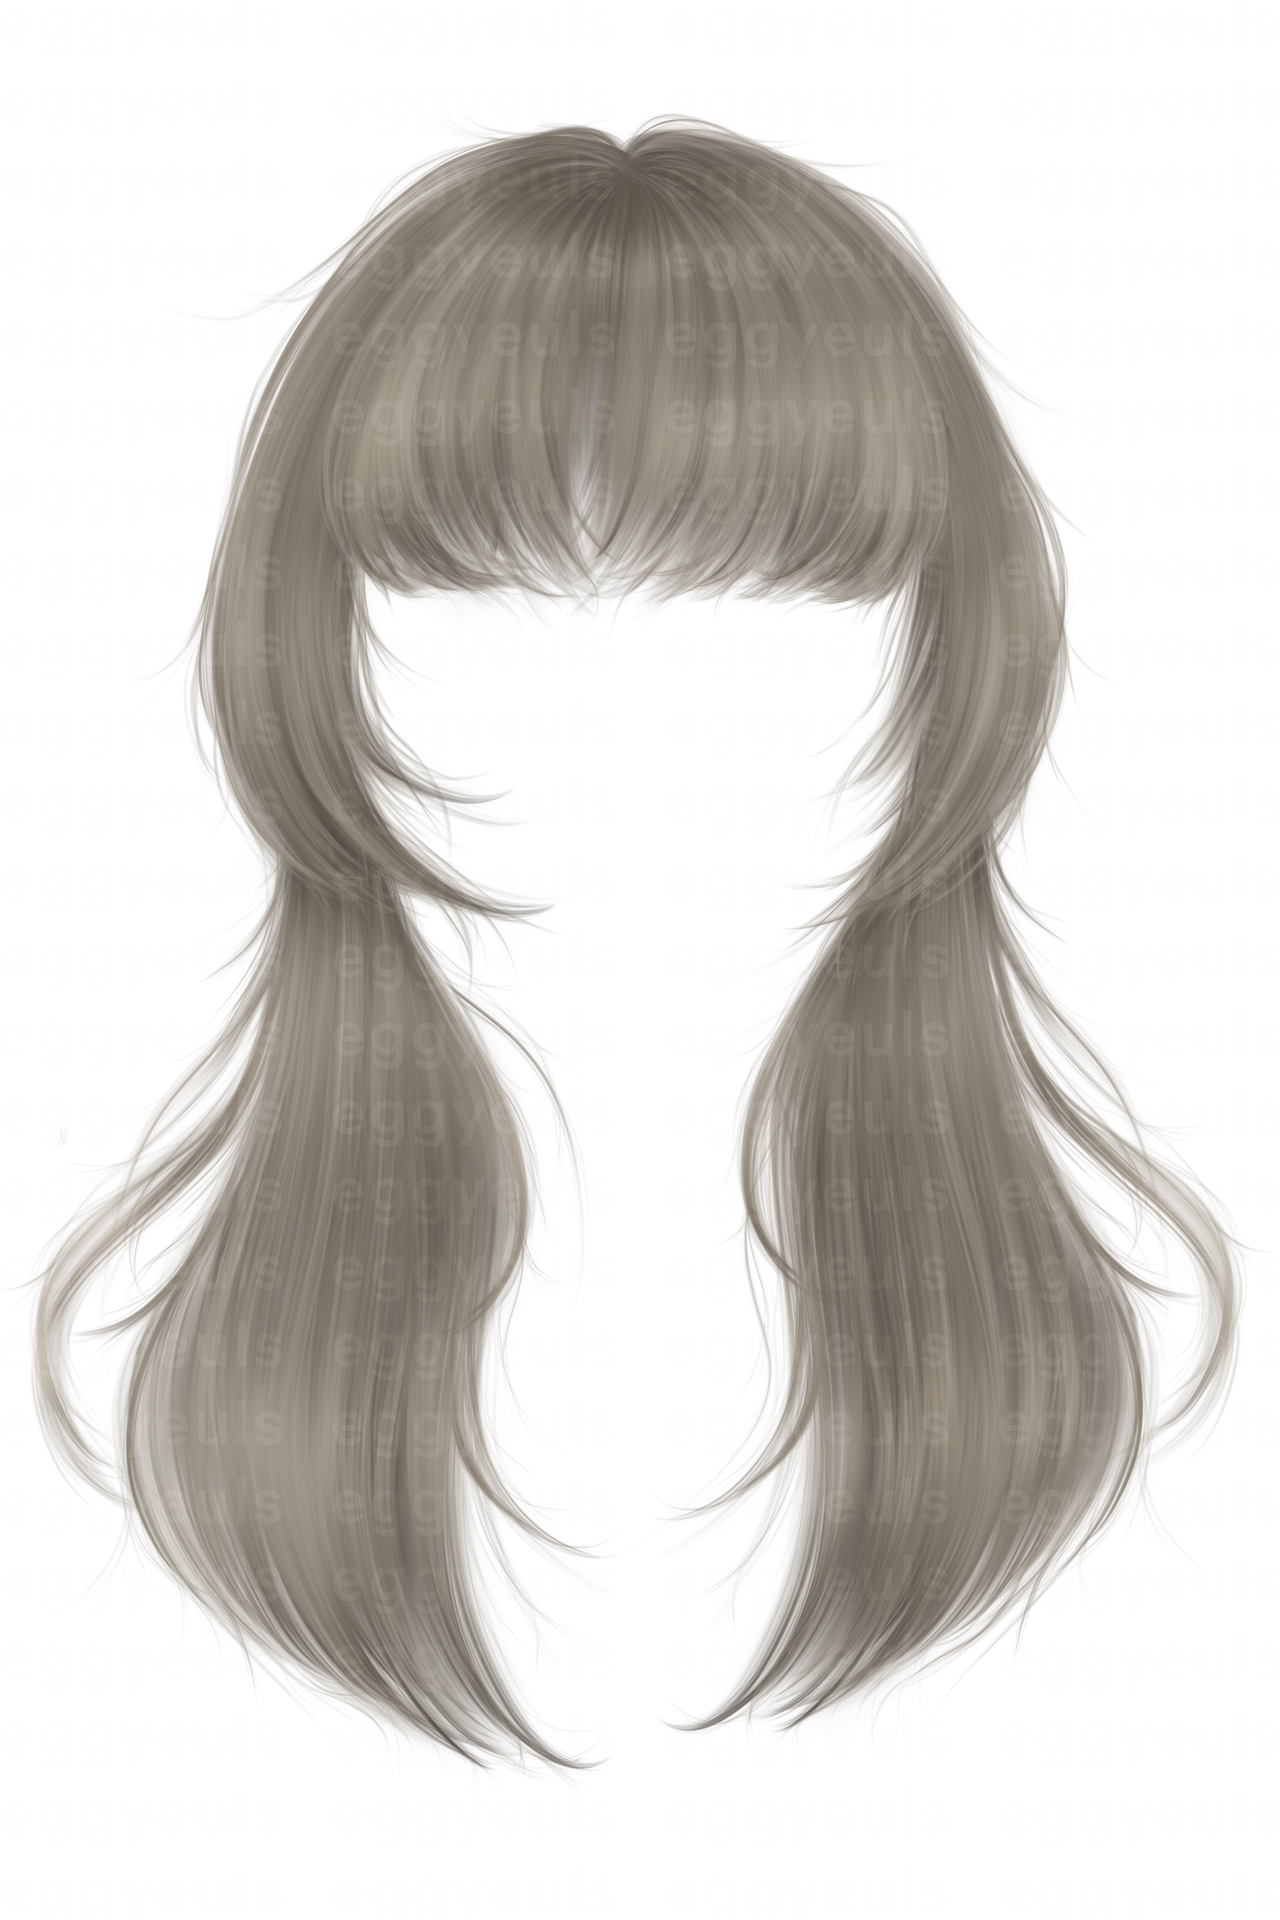
I have to mention right away, that this specific stock was drawn from complete scratch. No model reference or whatsoever. So the process is slightly different to what I usually do, when I work with models for covers (for example) because, obviously, those models do have hair on their heads already. Sometimes I do cut away hair and draw it all by myself again, or I smudge and blur the heck out of the already existing hair to draw over it — it really depends.
So, just keep that in mind. Every situation is different and requires different ways to do/handle things. PLUS, this is just a bare hair stock, obviously you would still need to adjust it to what you are using it for (e.g. change hair length, warp it around to match your respective model, adjust lighting, add highlight, shade some more areas and aaaaaaall that stuff).
Good, now let's look at how I drew this pretty little thing:
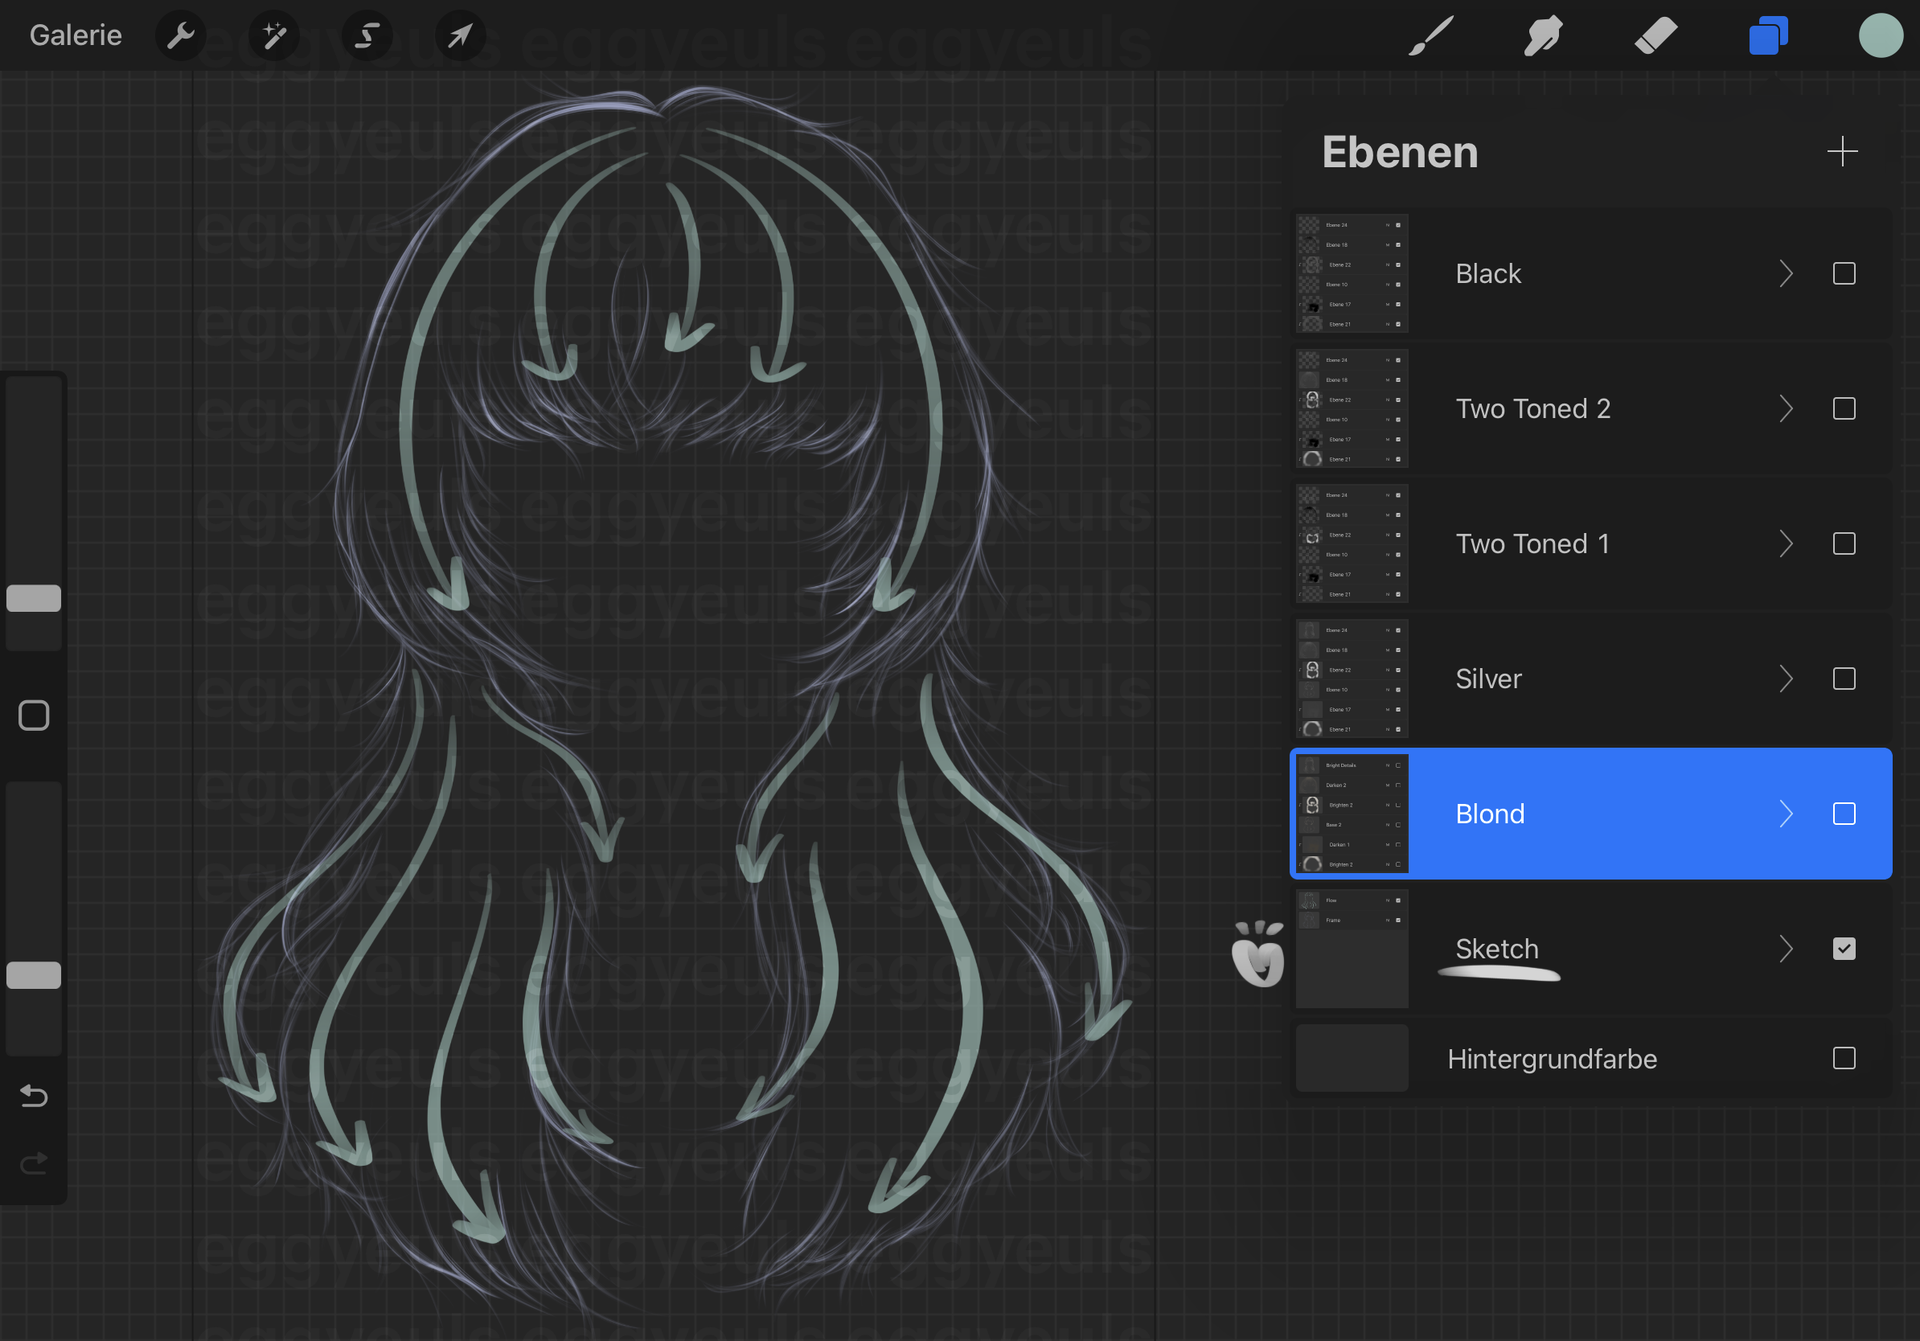
₀₀₁ step one:
Whether you start from complete scratch or want to draw over already existing hair, help yourself out with a little sketch. Whether you draw some loose wiggly lines, a "frame", "flow lines" or a full on raw plain solid first draft.. does not matter. Do the sketch however you need it and however it could help you most.
₀₀₂ step two:
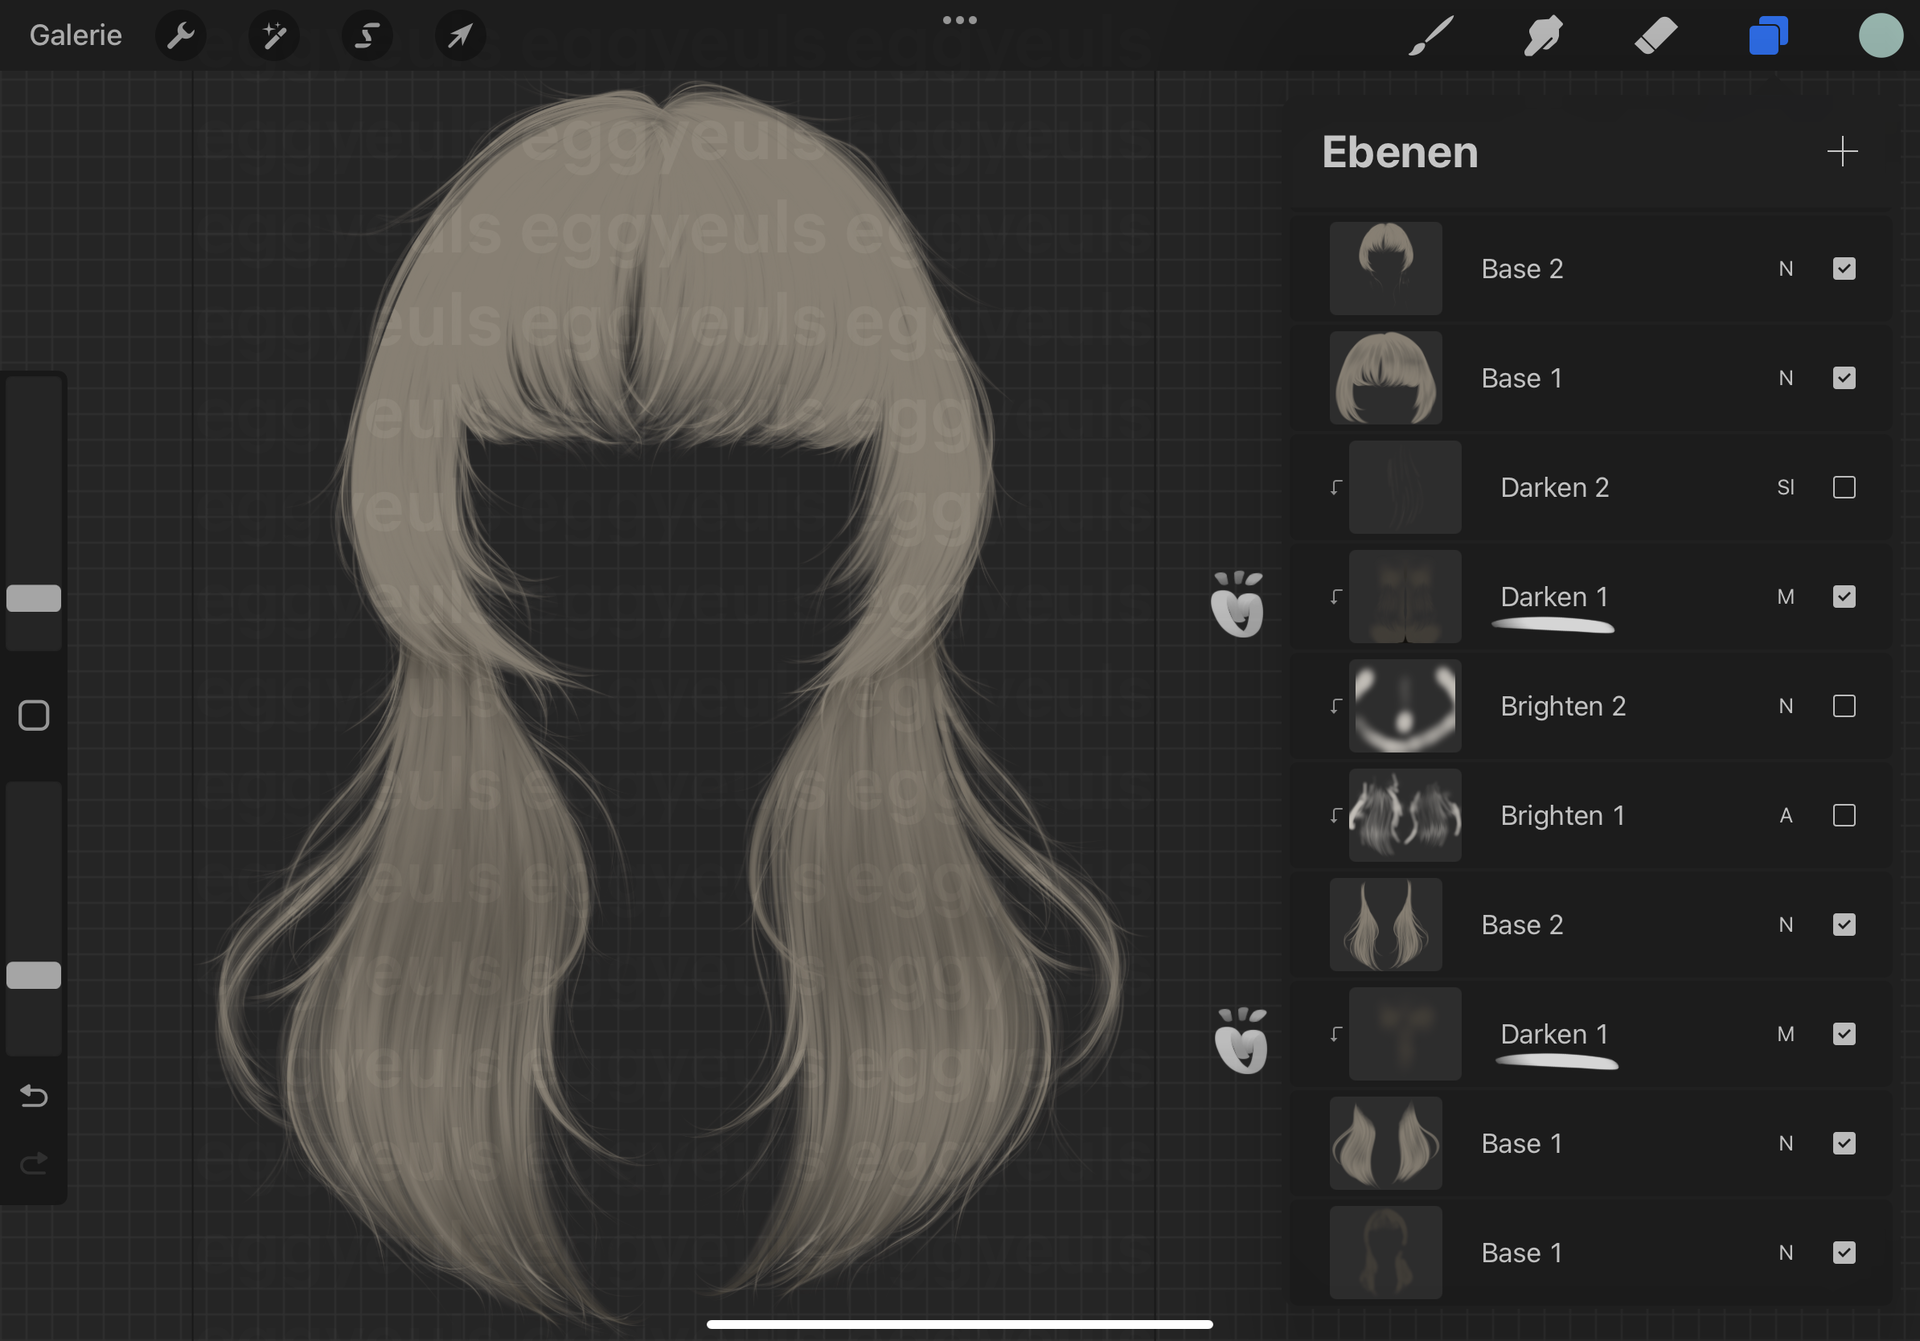
With the help of your sketch, you can now move on to a more solid and "useful" draft/base layer. This could technically also be the already existing hair of a model, smudged/blurred/simplified. For this hair stock in specific I made a base layer that already comes pretty close to what I want for the end result and set the opacity to around 65% (which is not necessary per se, but can help give a more natural base look later on). A tip: separate the layers of your base according to the different parts of the hair. For example, here I separated the lengths form the shorter frame pieces. Technically i could have also separated the bangs from the frame pieces on the side, but I kinda forgot about that.
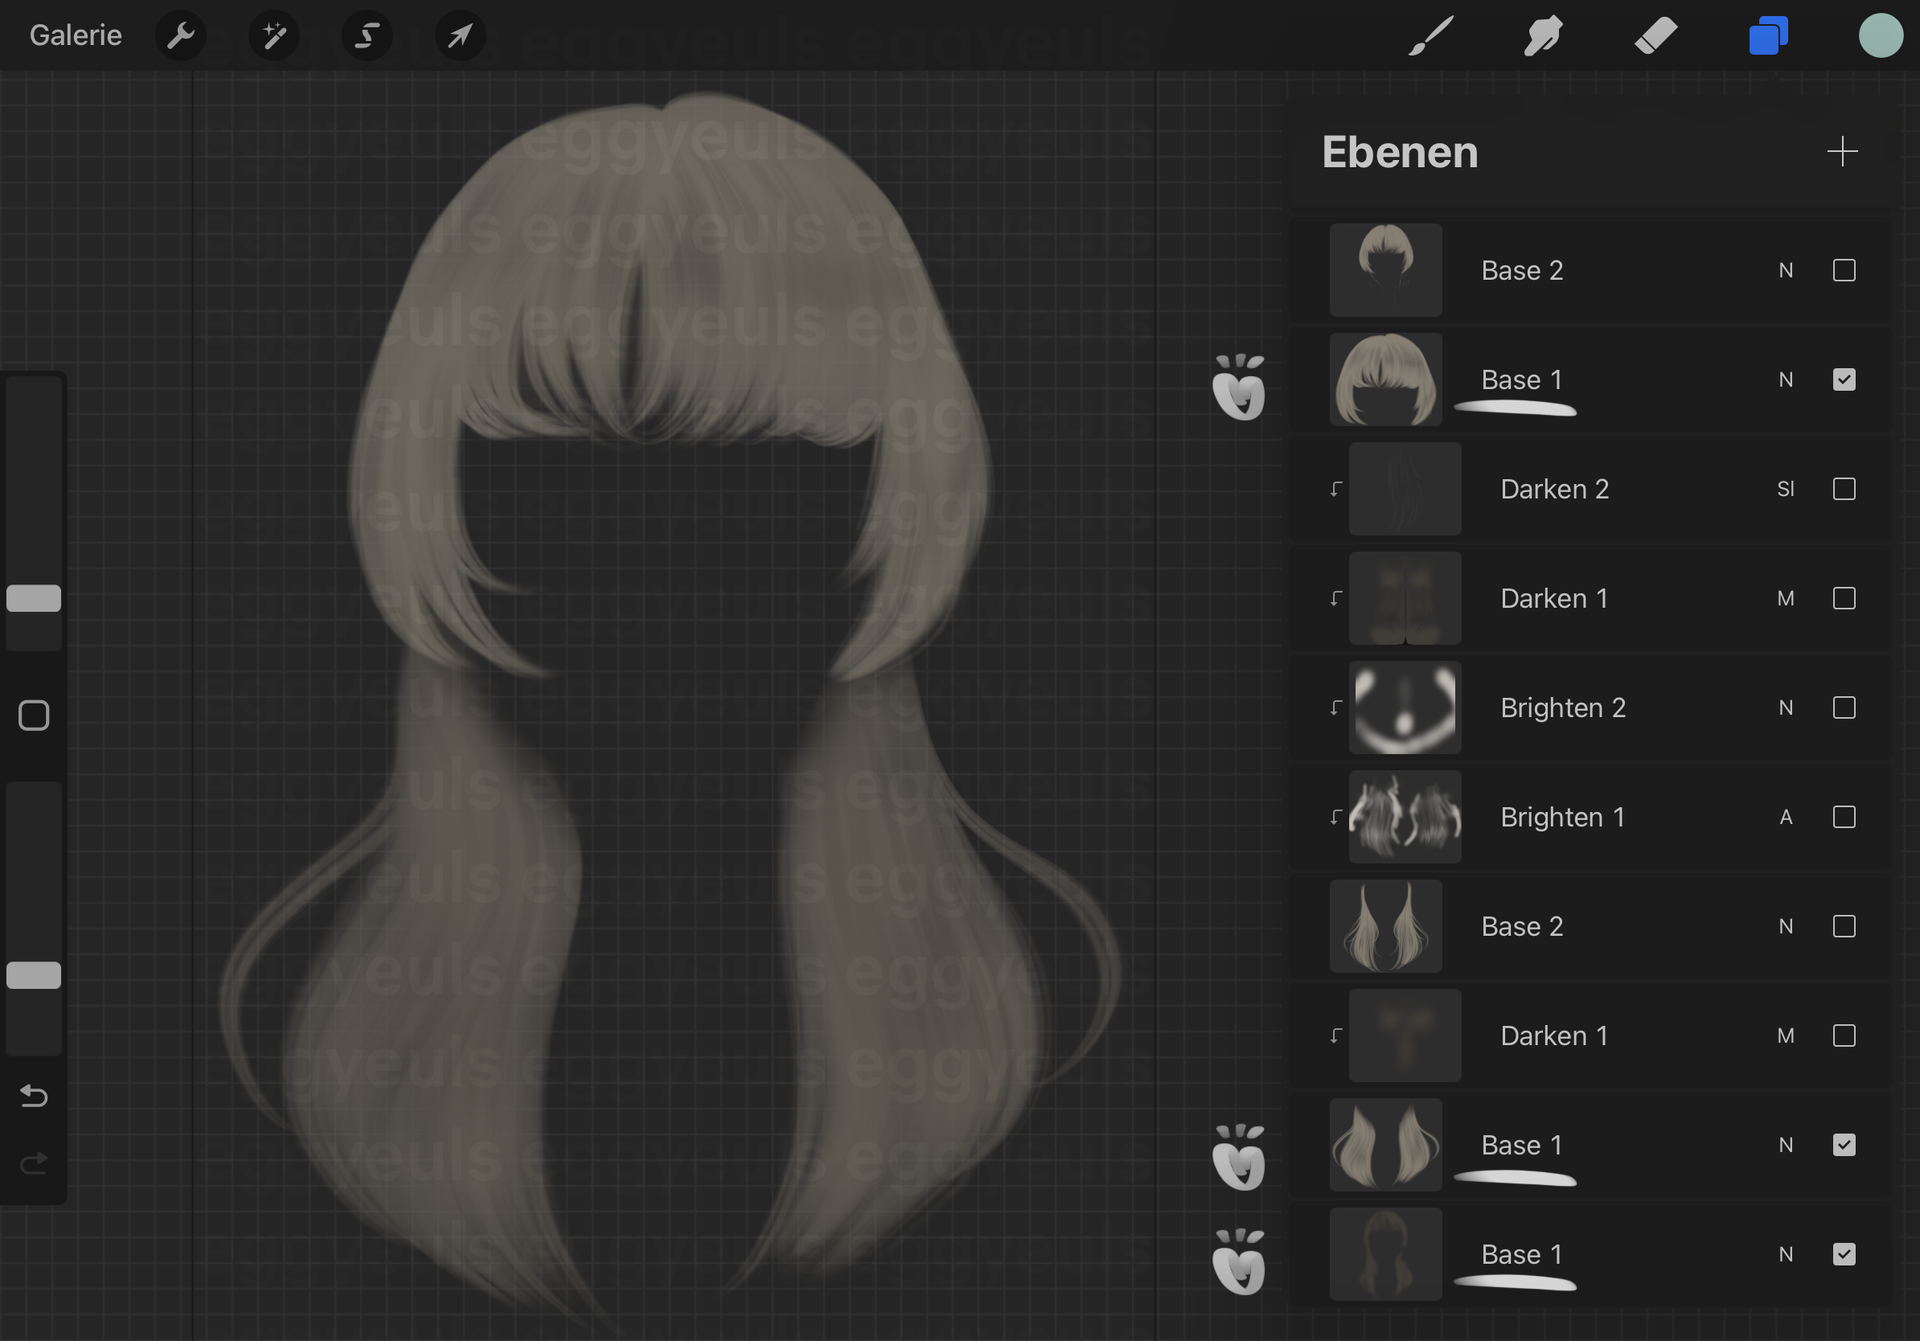
₀₀₃ step three:
Basically repeat the process from before, but do it more accurately, in order to create a more detailed base. Once again, separate the different hair "layers"/parts on to different editing layers, which will also help with "masking" layers later on (for shading and creating depth especially).
₀₀₄ step four:
Do the same as in step four, for all the other hair layers/parts. This time I also kept the opacity at 100%, but you can definitely experiment around to see what works best for you. Maybe you even want to do more base layers than just the two I did here.

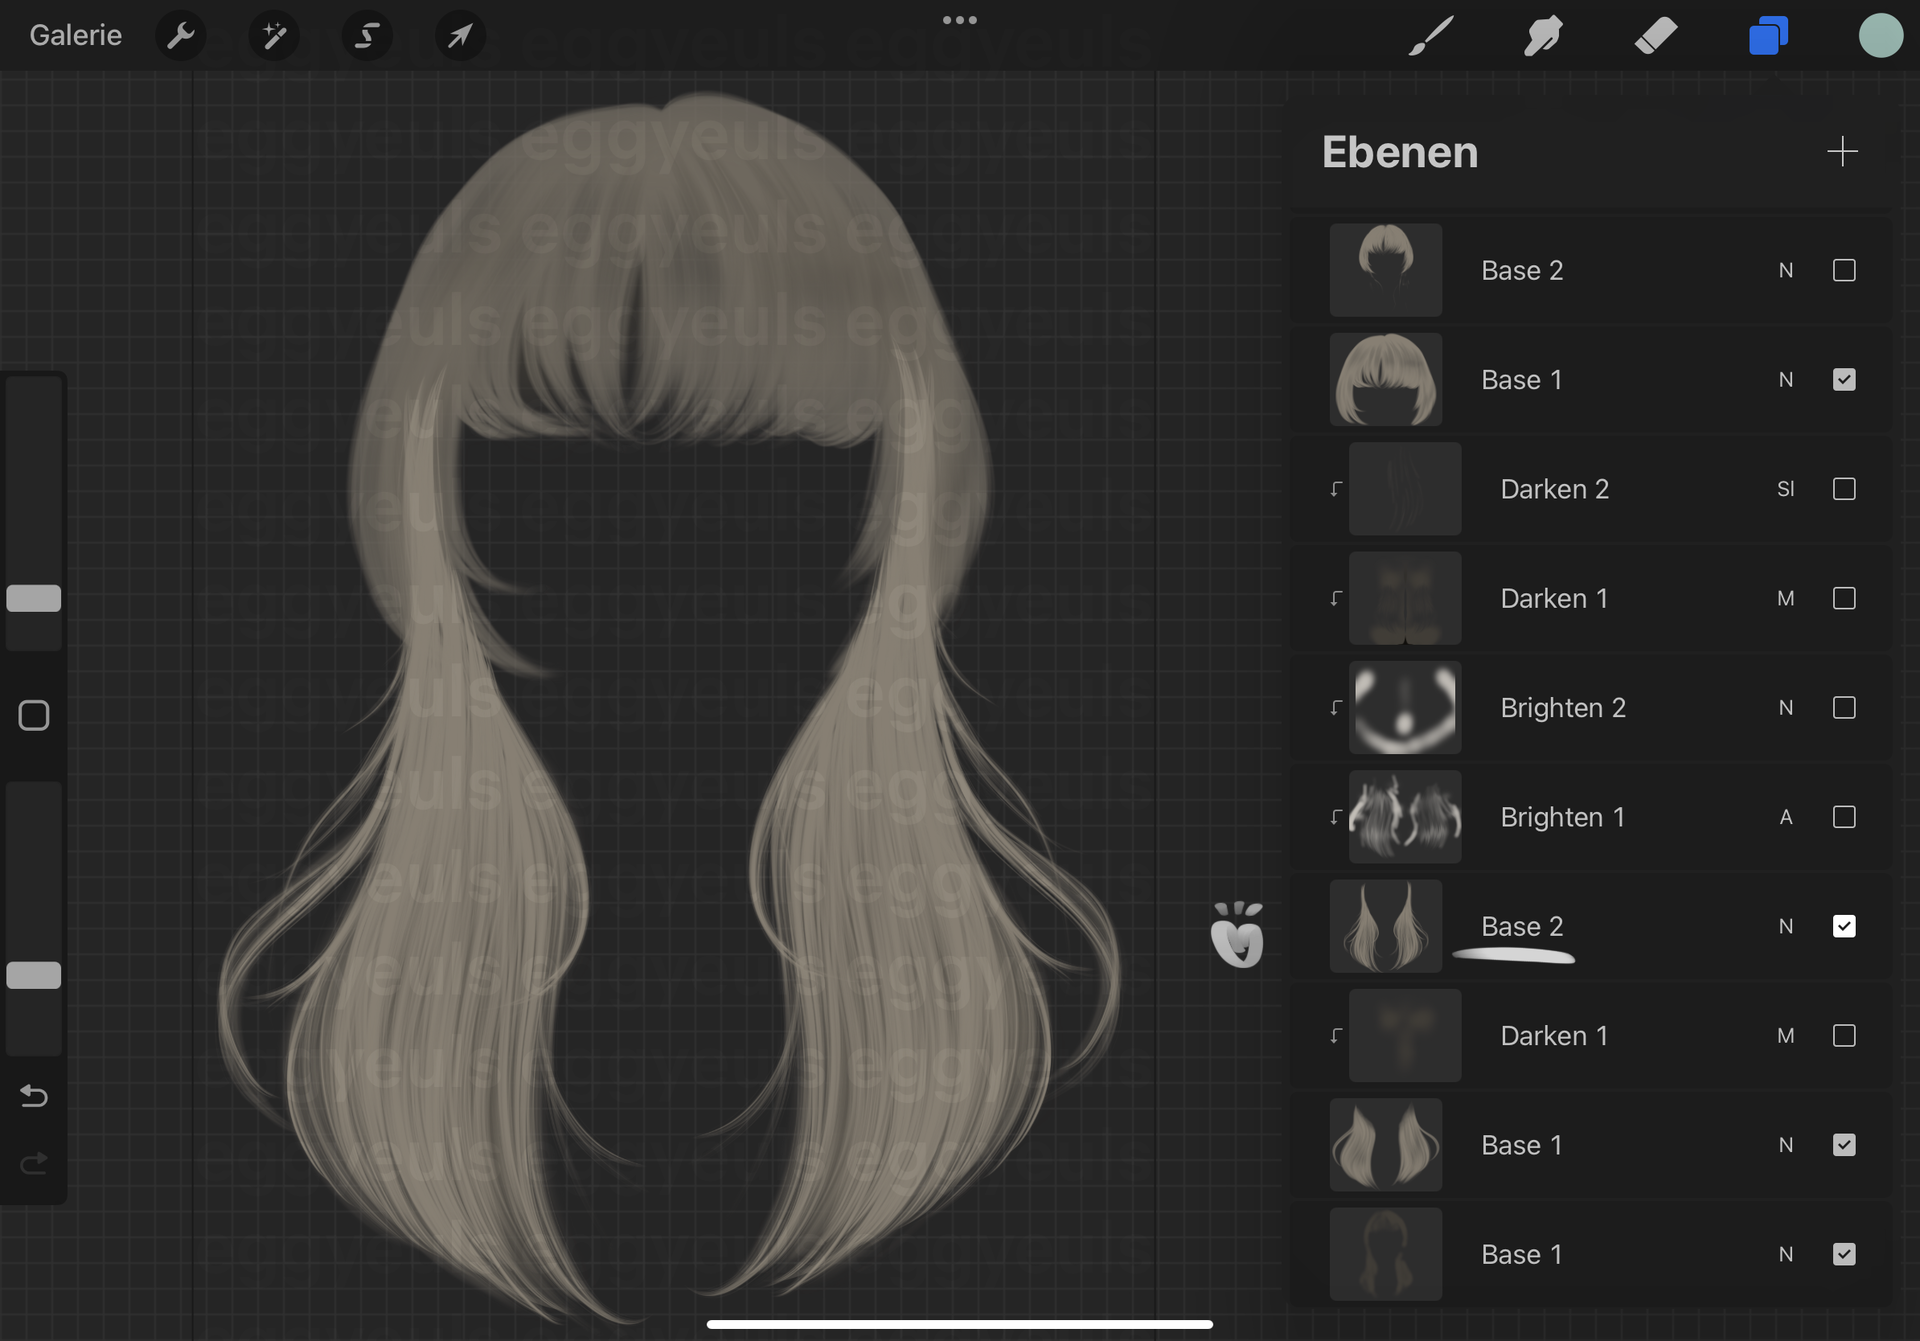
₀₀₅ step five:
Once you are happy with your hair base, you can move on to fine tuning. Which is basically nothing else than adding details all around — loose strands, some semi-transparent and with less pressure and some more prominently. Just go wild to breathe some "more life" into your hair haha!
₀₀₆ step six:
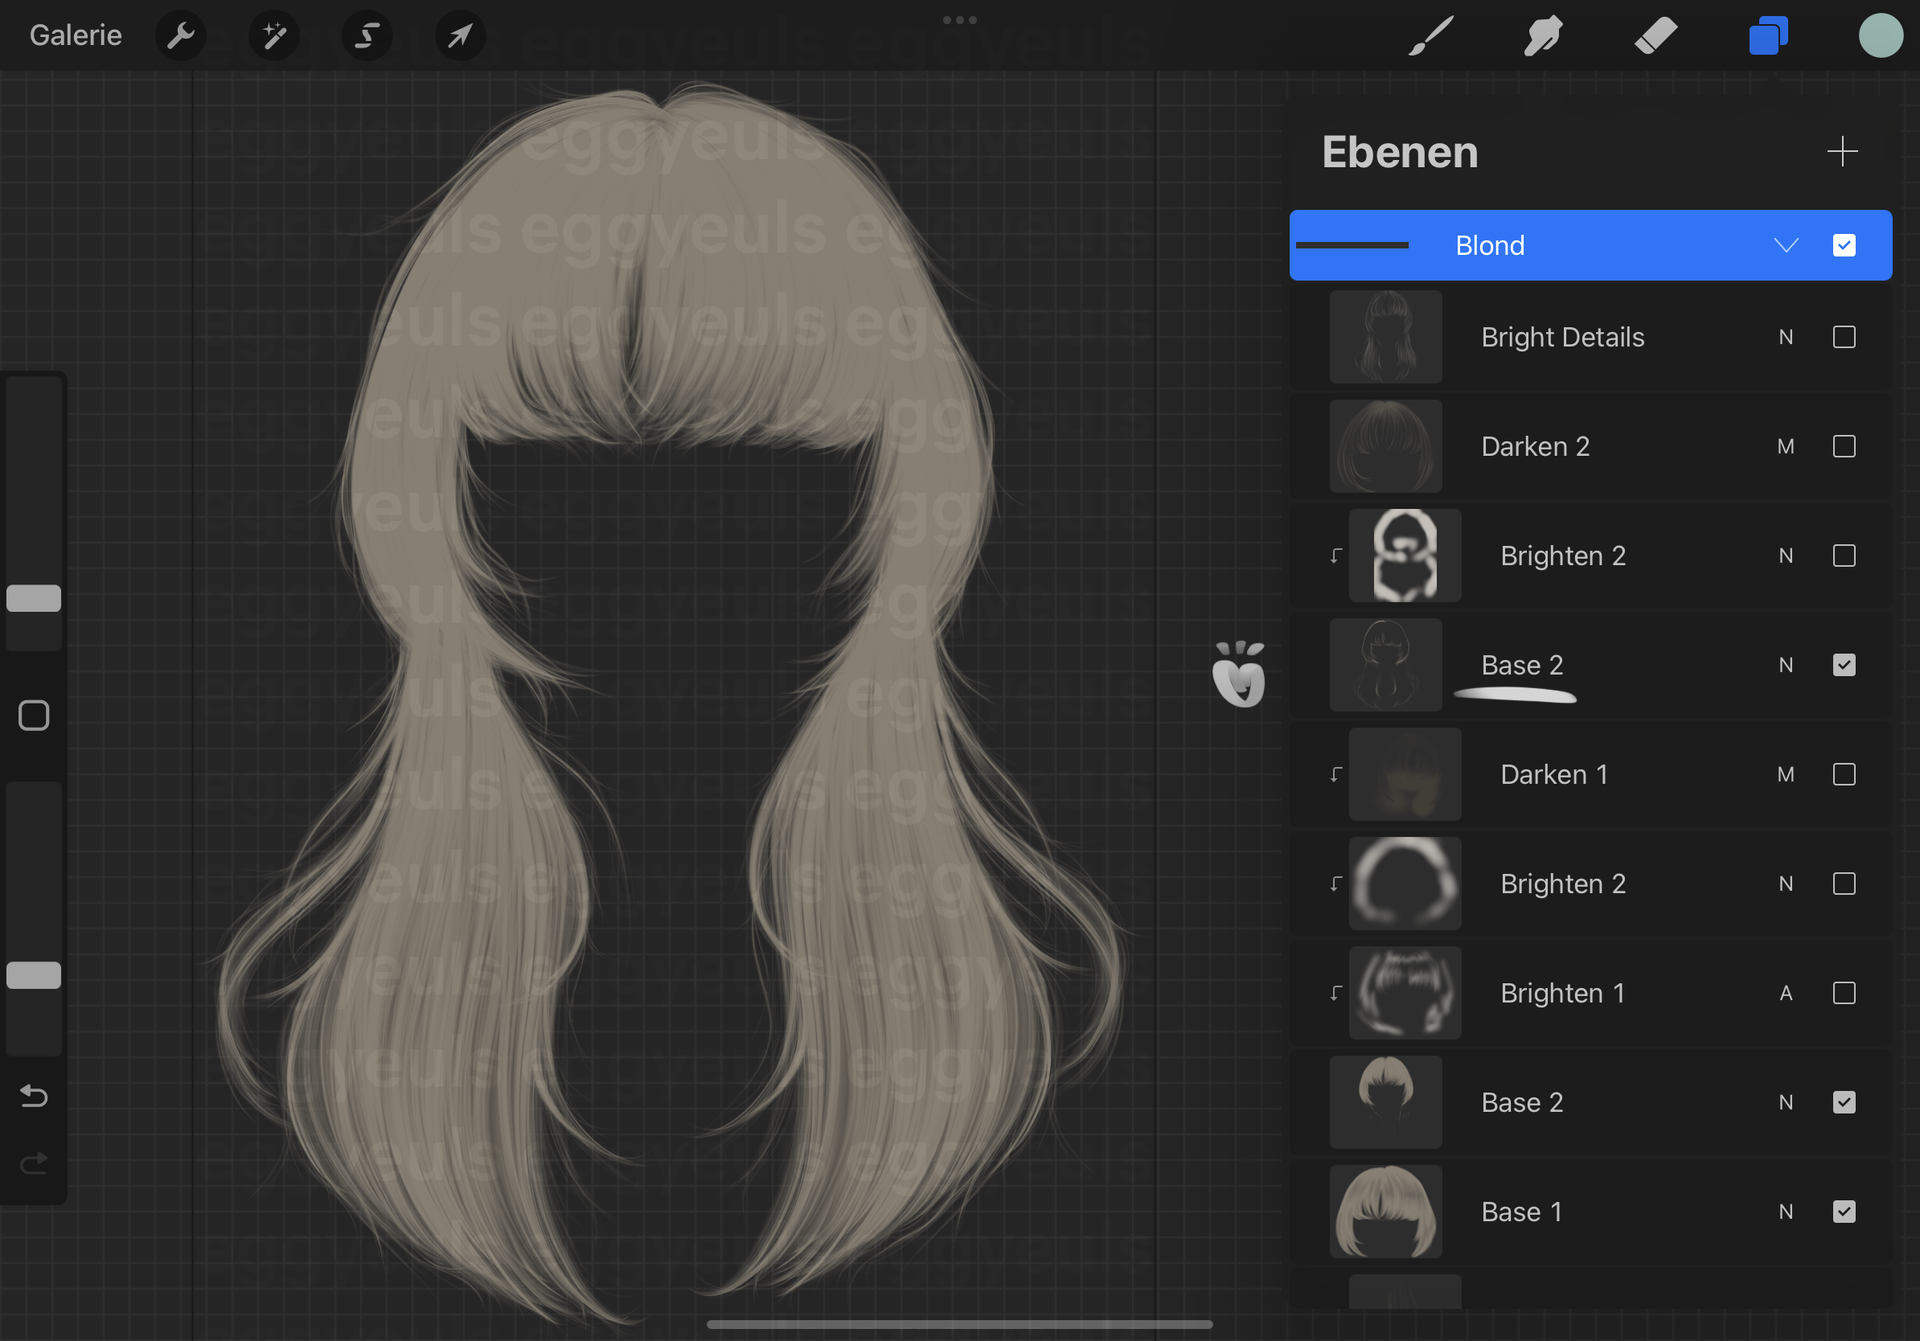
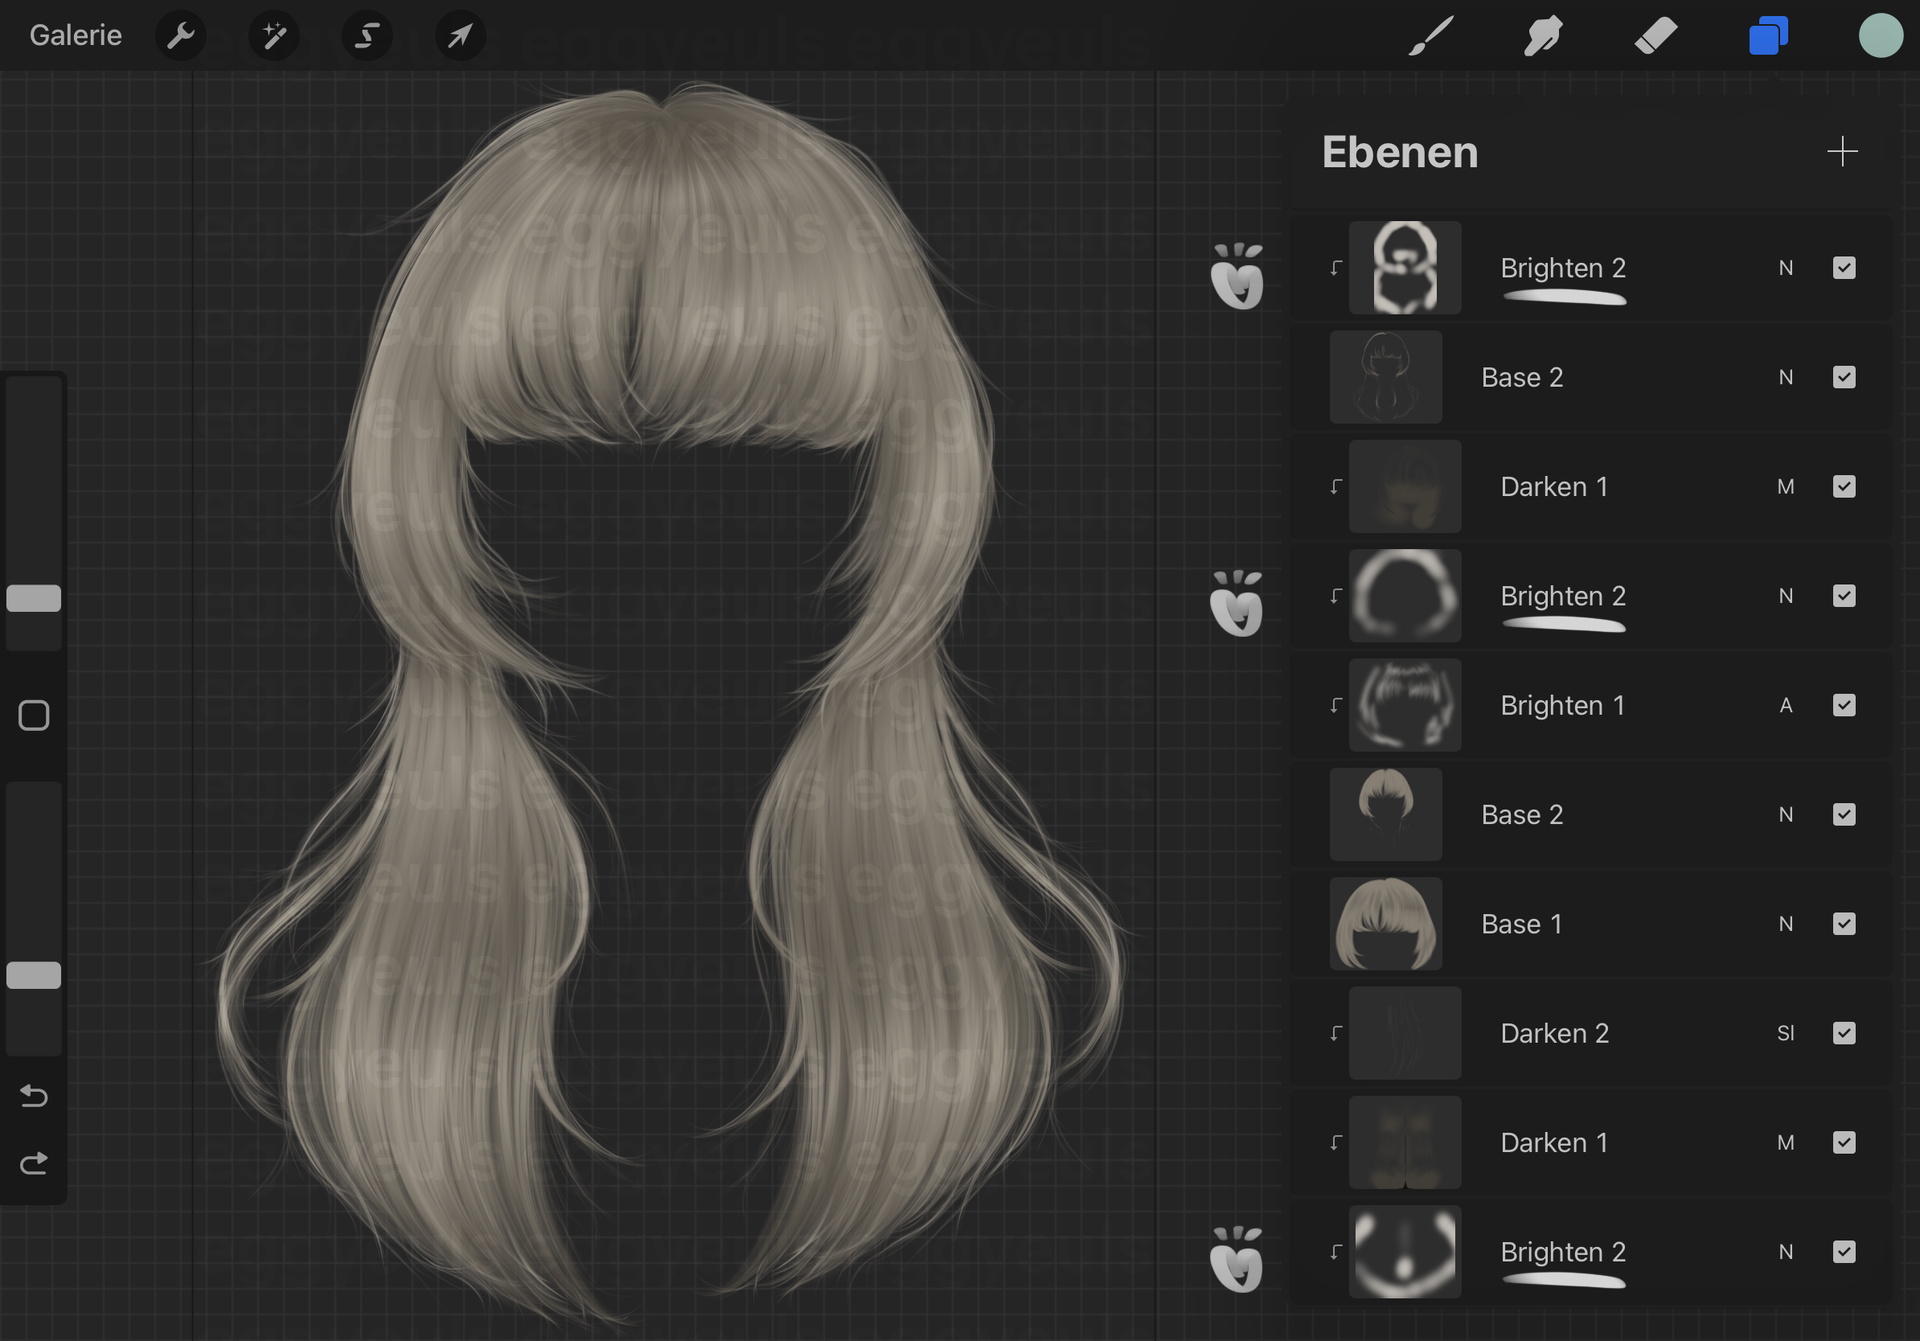
Now we move on to shading, sort of. What I usually like to do is using a very soft air brush, and very subtly go over the areas I want to make darker (as you can see on the side of the screenshot, where all the layers are being shown), soften them out even more with some Gaussian blur (so it get gradually less or more intense) and then use the brush(es), that I also use for drawing hair, to smudge out those "shading" areas. That way it gets a more "hair-like" form? Texture? If you look at the step "side note one" you may understand better what I am trying to say here. Oh and make it "mask(ing) layers", so it only is visible on what you have drawn before, you know?
₀₀₇ step seven:
Same as in step six, for all the other hair parts. Usually I do this for the parts where hair overlaps each other (which naturally creates shadows), is covered by other stuff/hidden away or is "set deeper"/further away form the camera (e.g. wavy/curly hair).
₀₀₈ step eight:
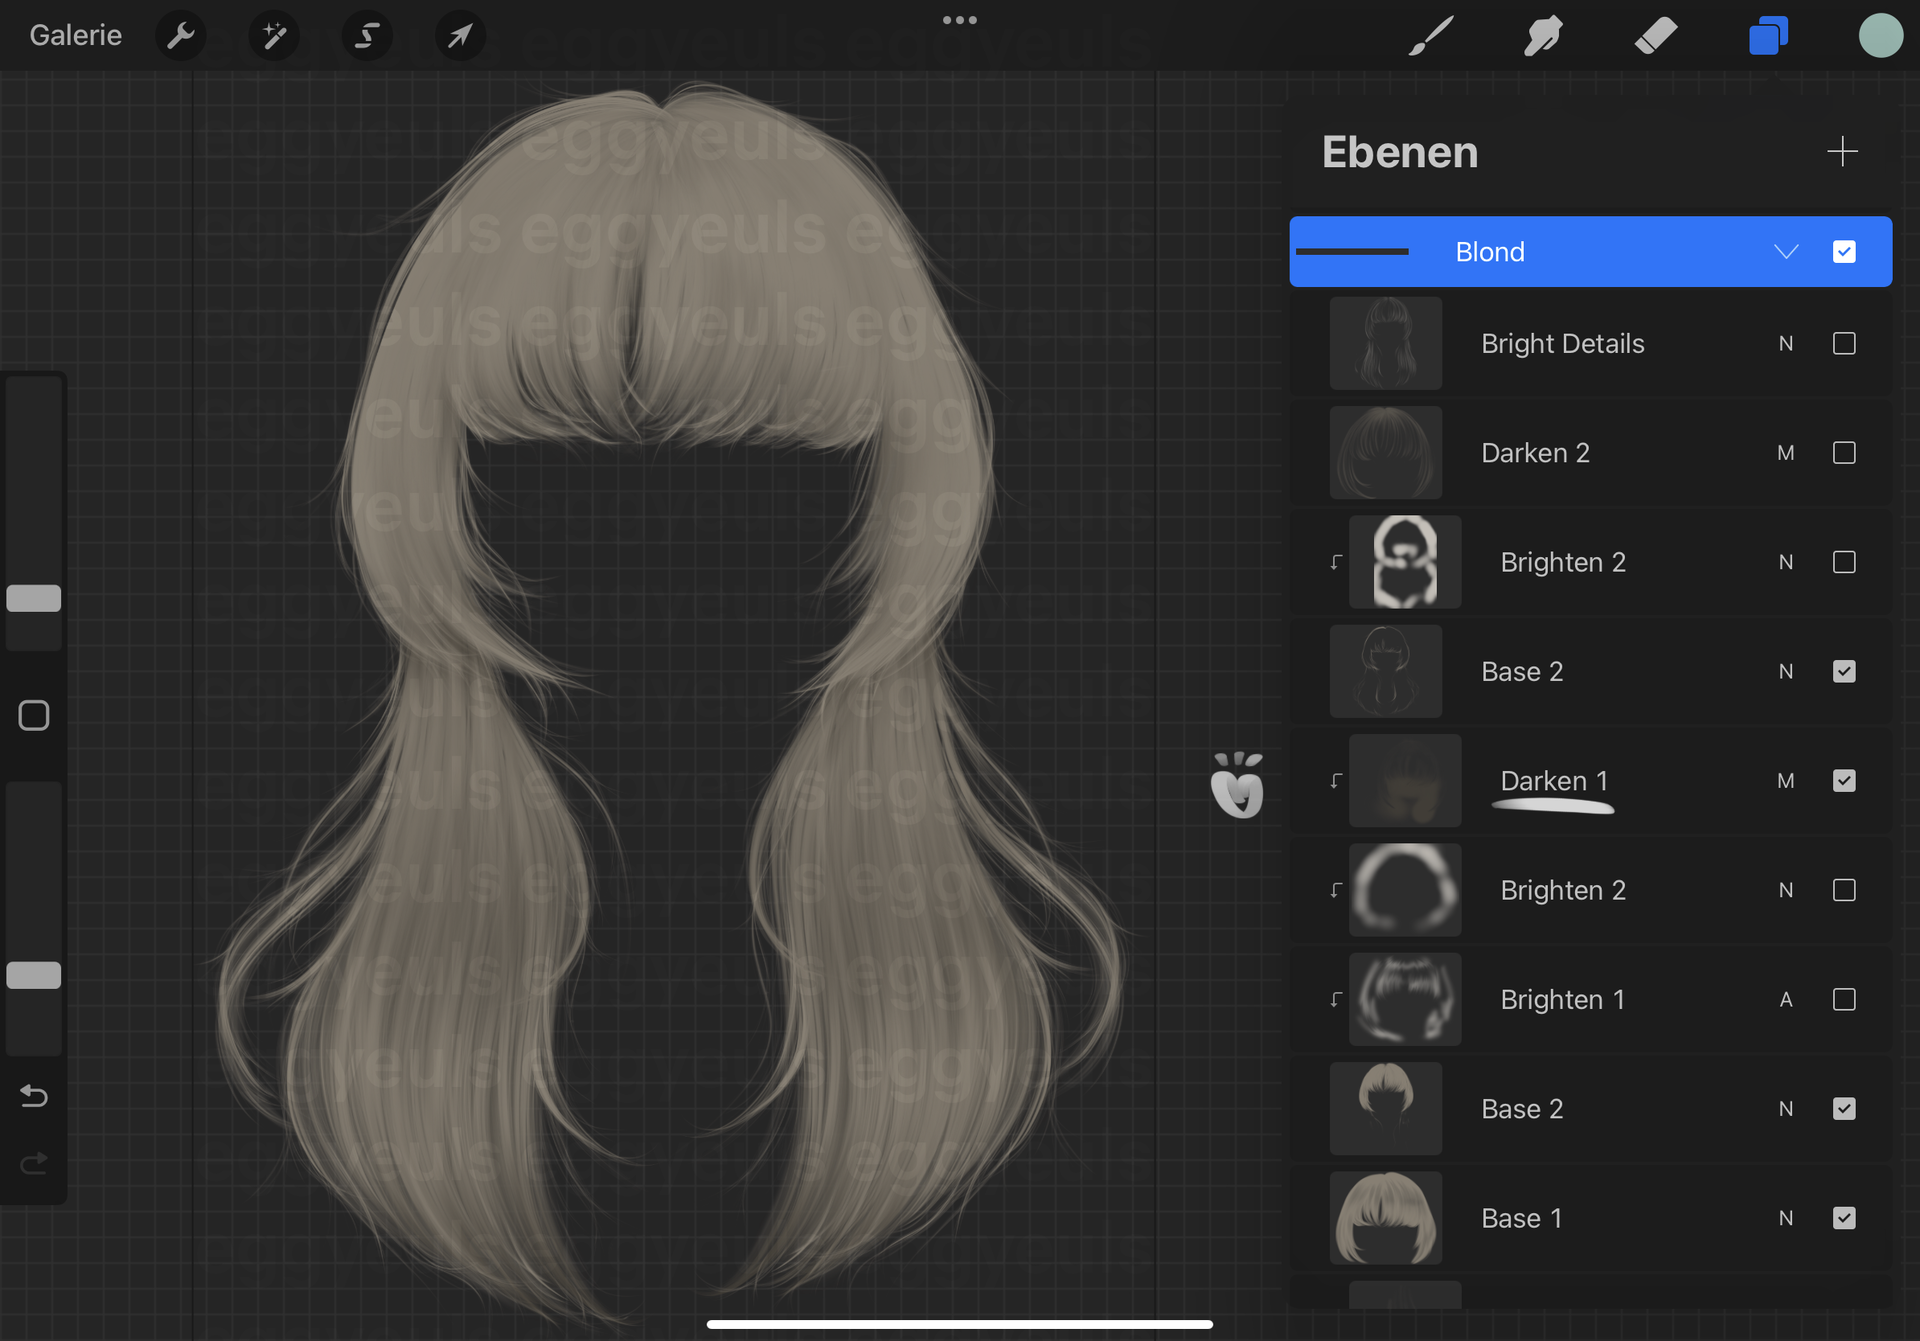
Now we add some more detailed depth through using our hair brush normally again (no smudging). Simply drawing darker strands and areas wherever we need them (e.g. the roots, parts hidden or being overlapped by other hair etc.), emphasizing the shading we did previously.
₀₀₉ step nine:
On to highlights and shiny areas! Something I probably enjoy the most. It works the same as with the shading, using a really soft air brush where I want the brighter parts, use some Gaussian Blur and then smudge it out with a more detailed hair brush, for a more "natural" look. Once again adding it as "mask(ing" layers".

₀₁₀ step ten:
Depending on the light source and overall setting, I sometimes (quite often actually) add additional rim light (not sure if that is the right term) on the outer parts of the hair, or whichever parts are hit by light.
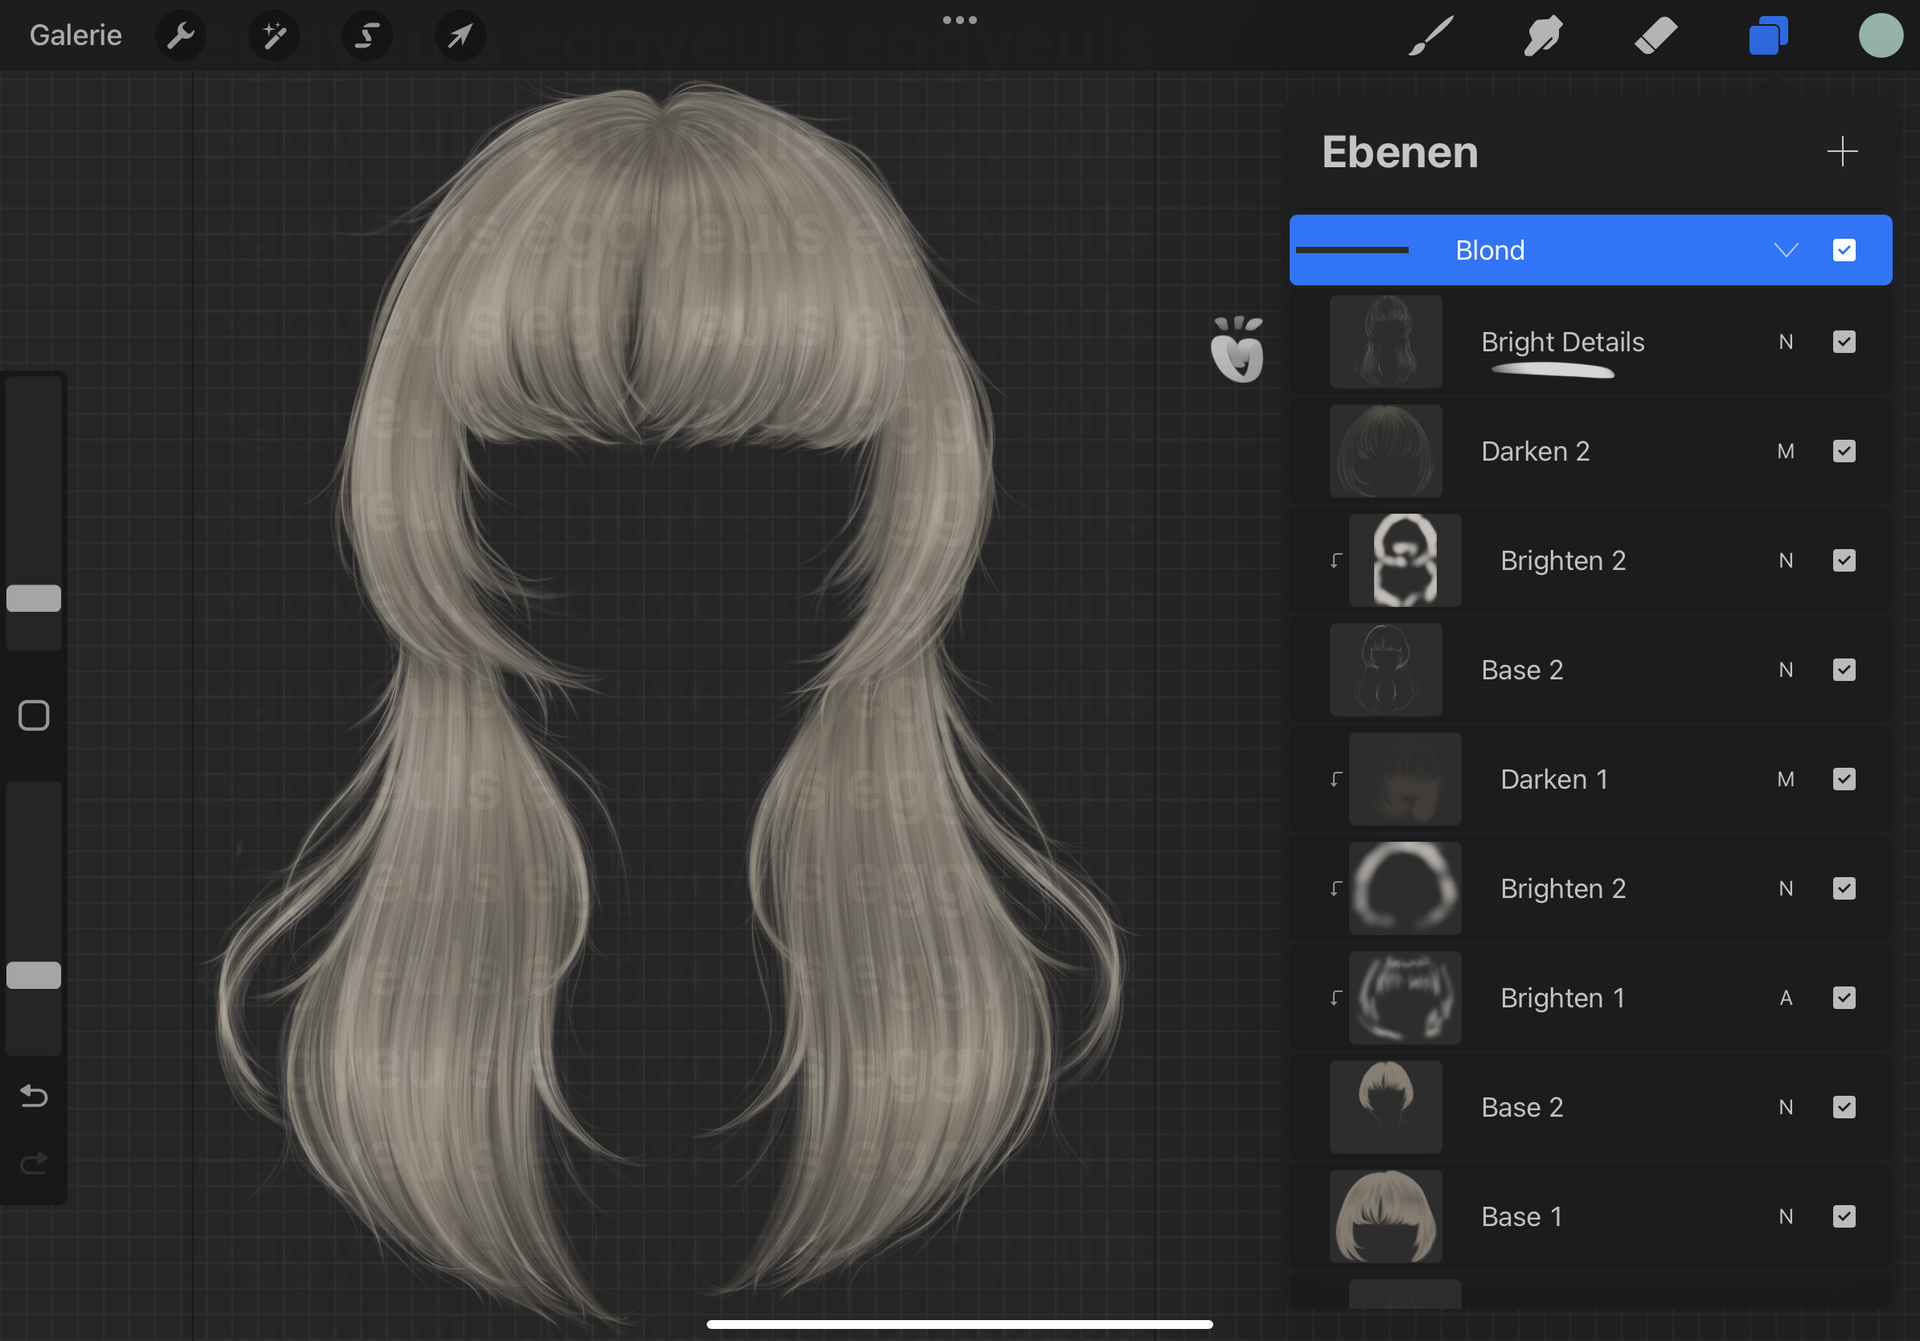
₀₁₁ step eleven:
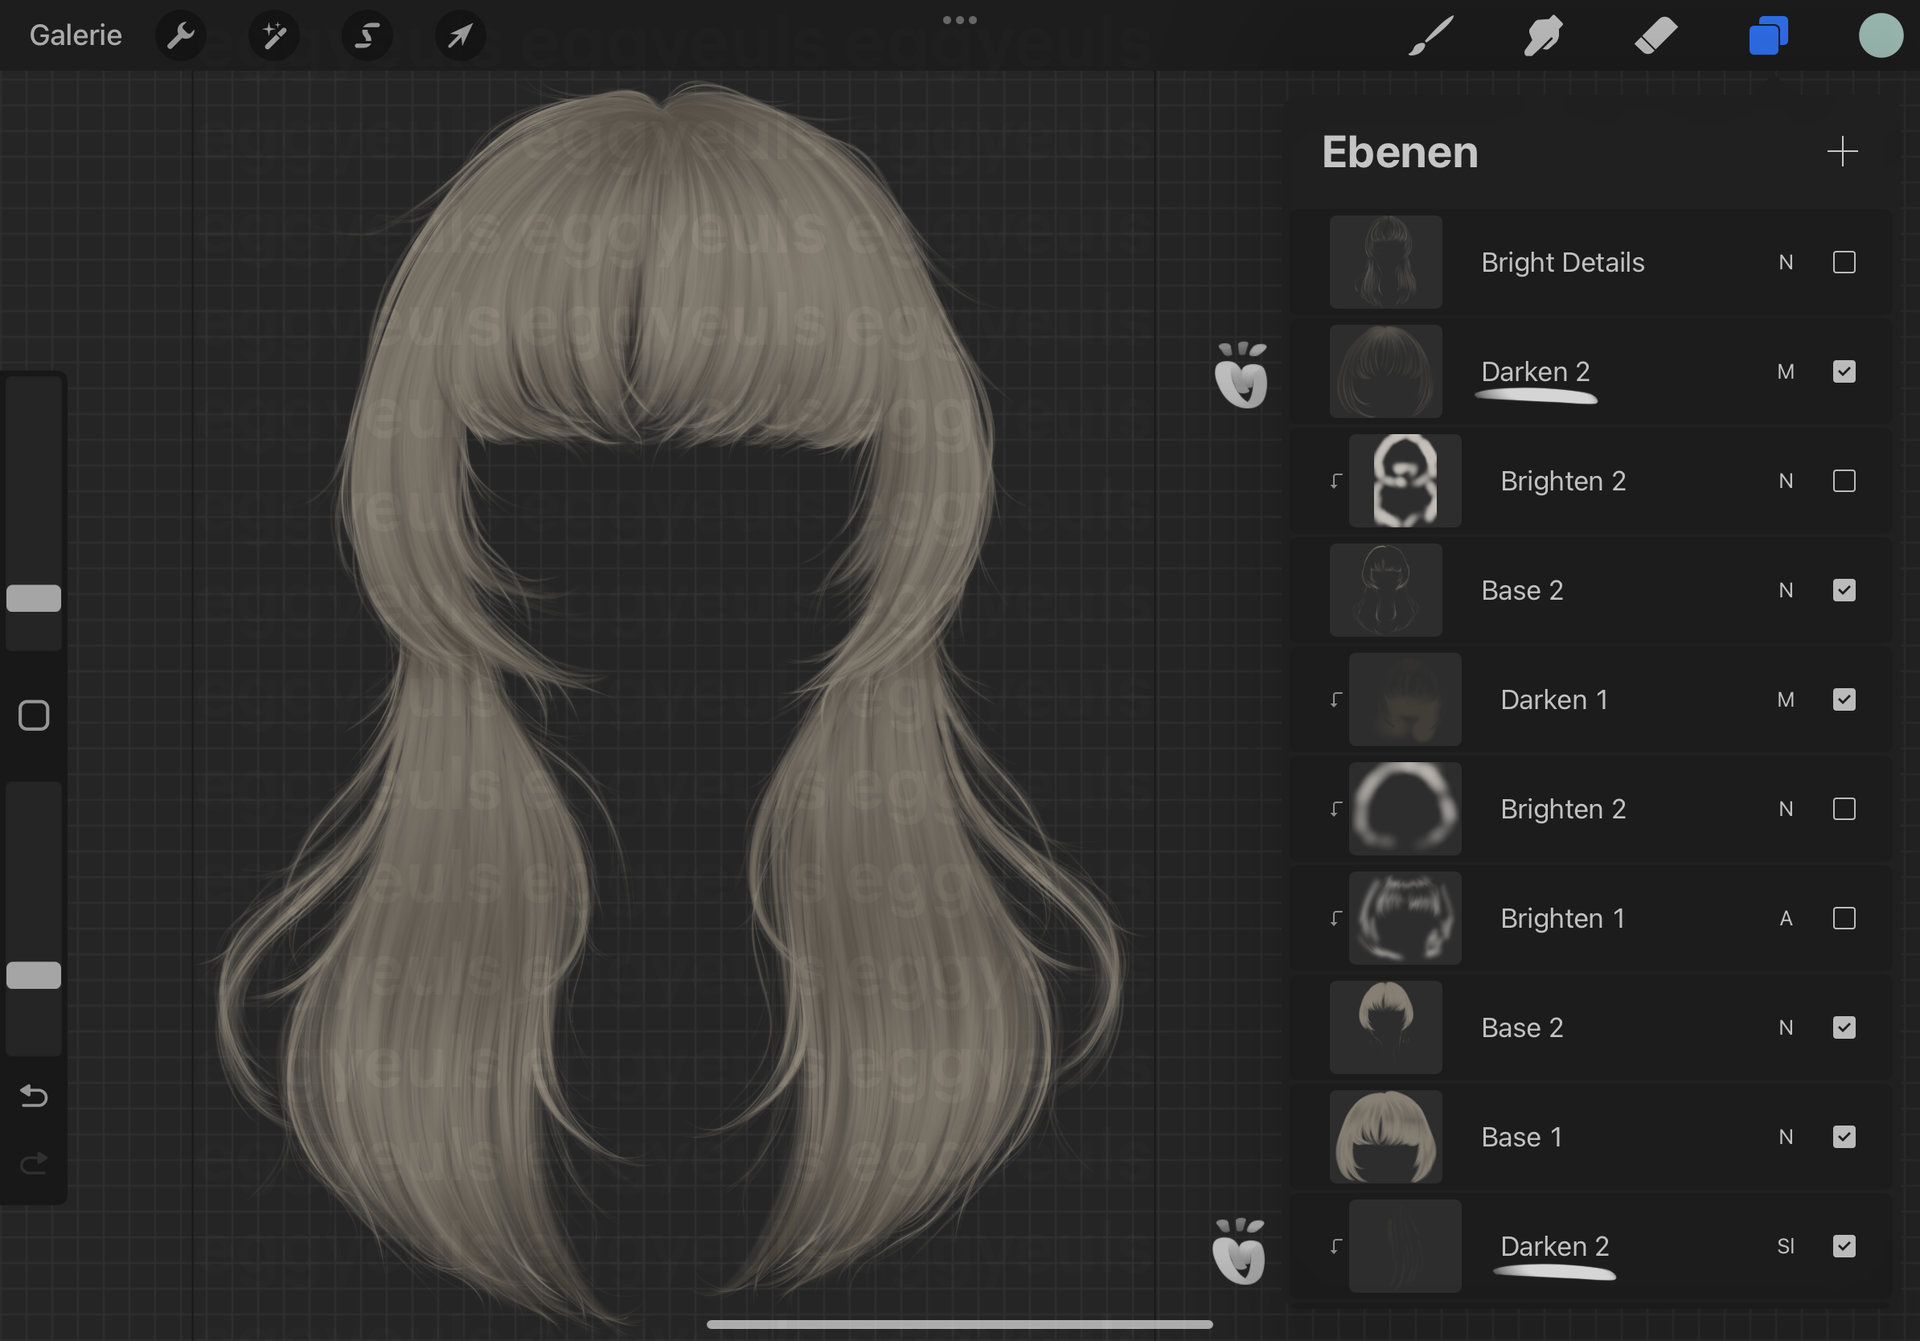
Last step on the list (for me and for this generalized hair stock) is to add details. I usually do actual highlights and brighter details here, but sometimes I also need to go over the hair with darker details again too. Could be some more loose highlighted strands all around, or some more spiky ends on the bangs and yada yada yada. Basically all the previous steps but simplified, just to accentuate what already exists. Does that make sense? Obviously I am really good at explaining.
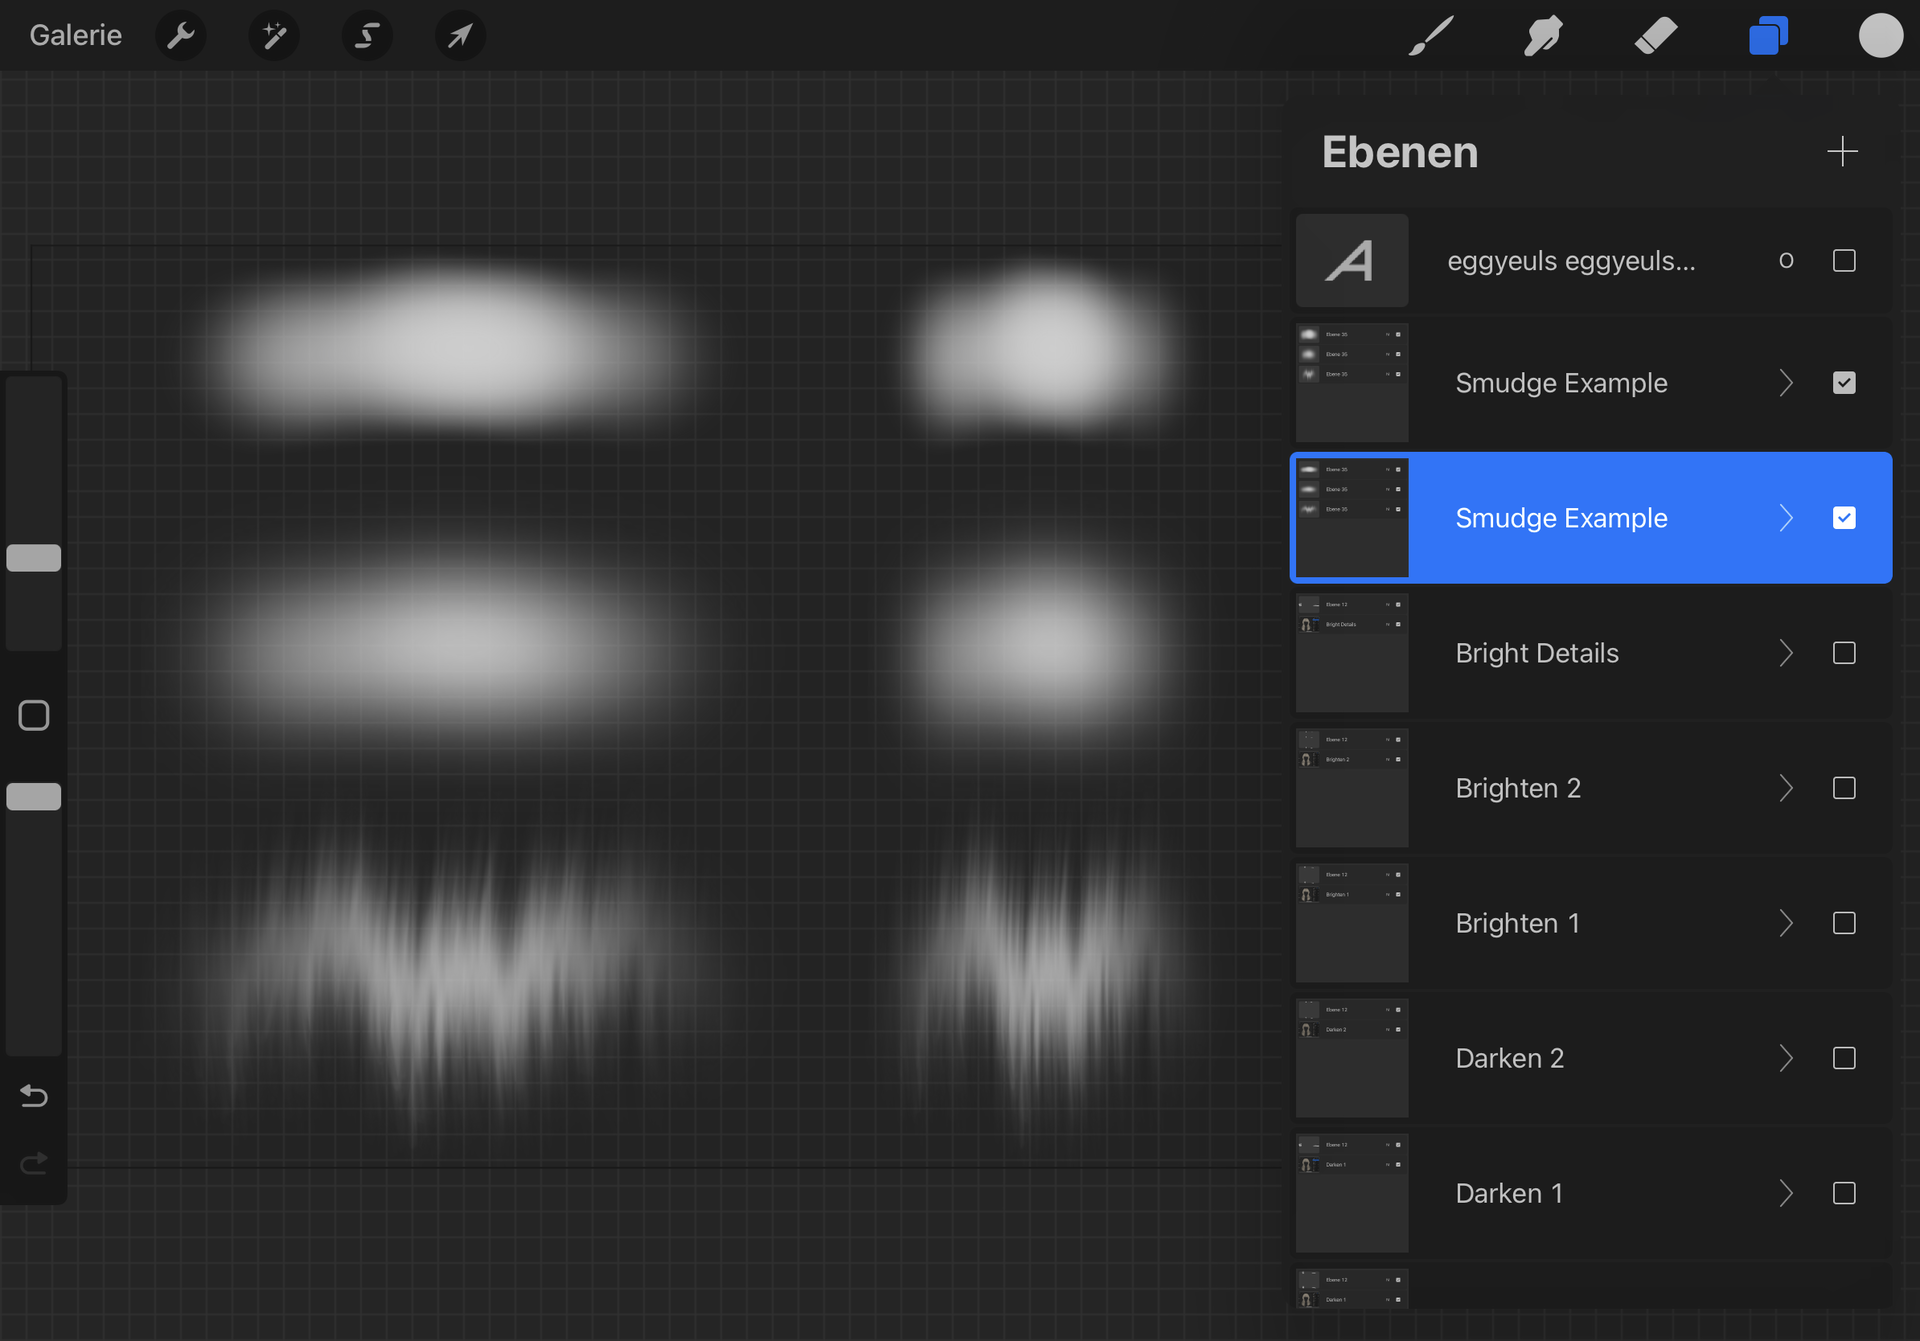
₀₁₂ side note one:
Now here is what I mean by "use a soft air brush, Gaussian blur and then smudge it out with a detailed hair brush". The screenshot shows exactly that, from top to bottom. Air brush, blurring, smudge. For the smudging you can do one coherent long stroke, e.g. press on the screen, go up-down-up-down-up etc. and then lift the pen/mouse/finger again. Or you do individual strokes — press, move down, lift. Press, move up, lift and so on. Totally depends on the hair style you are going for, the brushes you use and all that.
₀₁₃ side note two:
I know I did not really explain the colors I used or what way I mixed the layers (e.g. setting them to multiply/overlay or whatsoever). The reason is that even those steps can vary a lot and work out differently for different programs/apps, even if they are named the same way. But I can show you the colors I used for this hair stock in specific and the ways I mixed the canvas' layers. Just keep in mind: it works differently for every program/app and also for every hair color. What works for blonde hair may need be done differently for bright blue or dark/black hair.
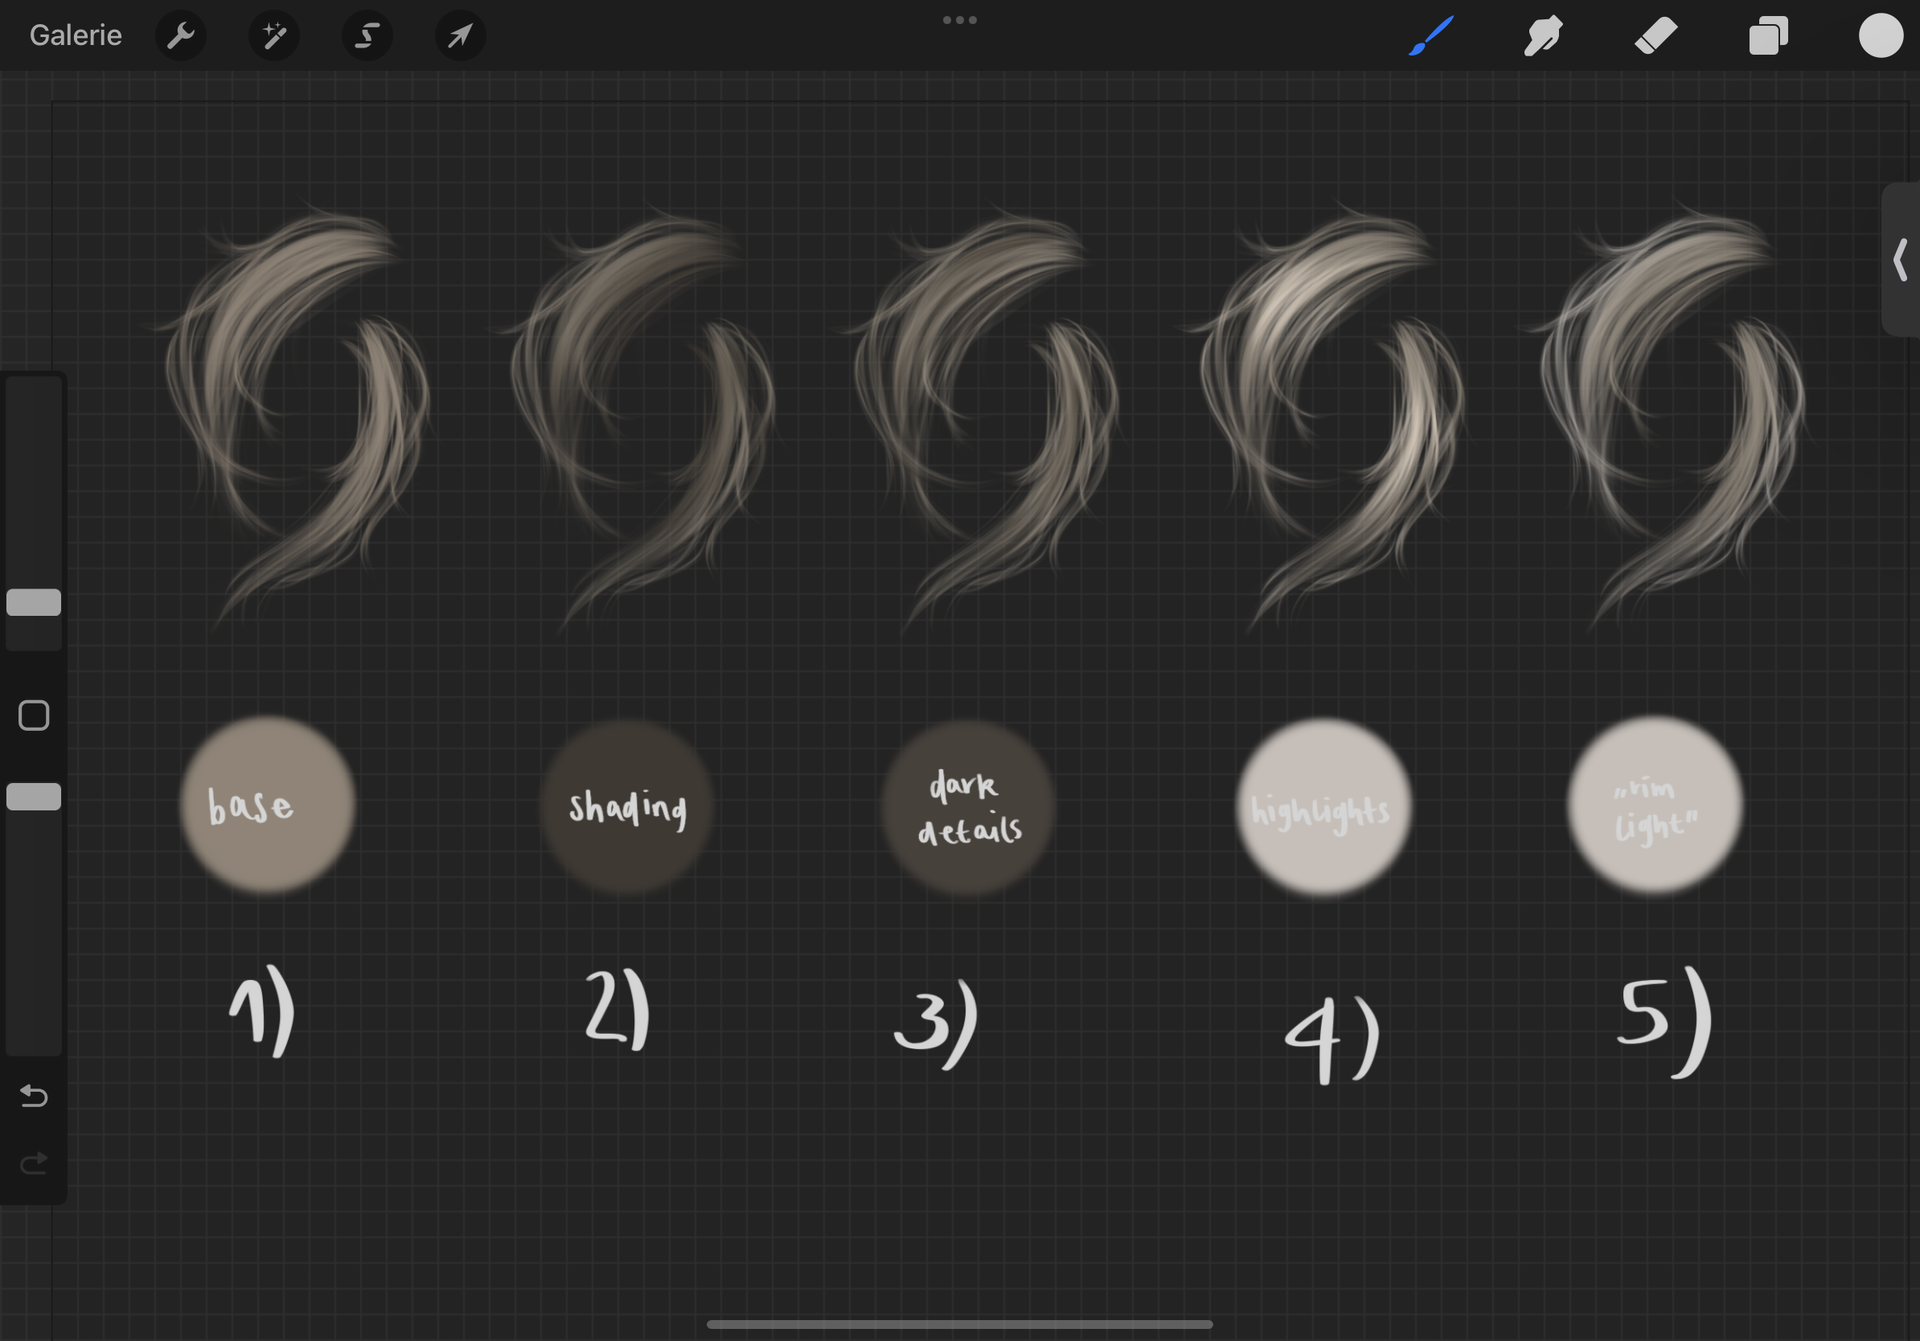
So overall I tend to stay close to my base color and just make it darker or brighter (sometimes just a tad bit less saturated/more washed out) for the shading and highlights etc. You really gotta experiment around tho. For the shading and most of the darker details I set the layers to "multiply" and play around with the opacity, depending on what works best (sometimes it is barely 35% and sometimes I go up to 65%), rarely I try out "overlay" or "soft light", depending on what overall color palette I work with. For anything around highlights and rim lights (or generally brighter details) I use "add" or "soft light", sometimes even just "normal" and then play around with the opacity (usually moving between 15% to 35%) once again. But yeah, you have to try for yourself and see what works best for the look you want to achieve in the end.
Long story short: play around and find out what works best for you. It is all trial and error to be honest.
Nonetheless this was actually quite fun, not gonna lie. So, is there anything else you would like some "insights" on? Could be another hair stock or whatever else. I could try and see if I can arrange some more chapters around it.
⛓
˓ ִֶָ𓄲 ☁️ SOURCES 𖦹 ࣪˖ ˒
SOURCES 𖦹 ࣪˖ ˒
Down below is a summary of all sources used for this chapter.
₀₀₁ Text(s):
No external ones actually, everything said are my personal opinions/experiences
₀₀₂ Image(s):
Examples are my very own (intellectual) property unless stated otherwise.
⛓
© eggyeuls, 2023
Bạn đang đọc truyện trên: Truyen247.Pro