
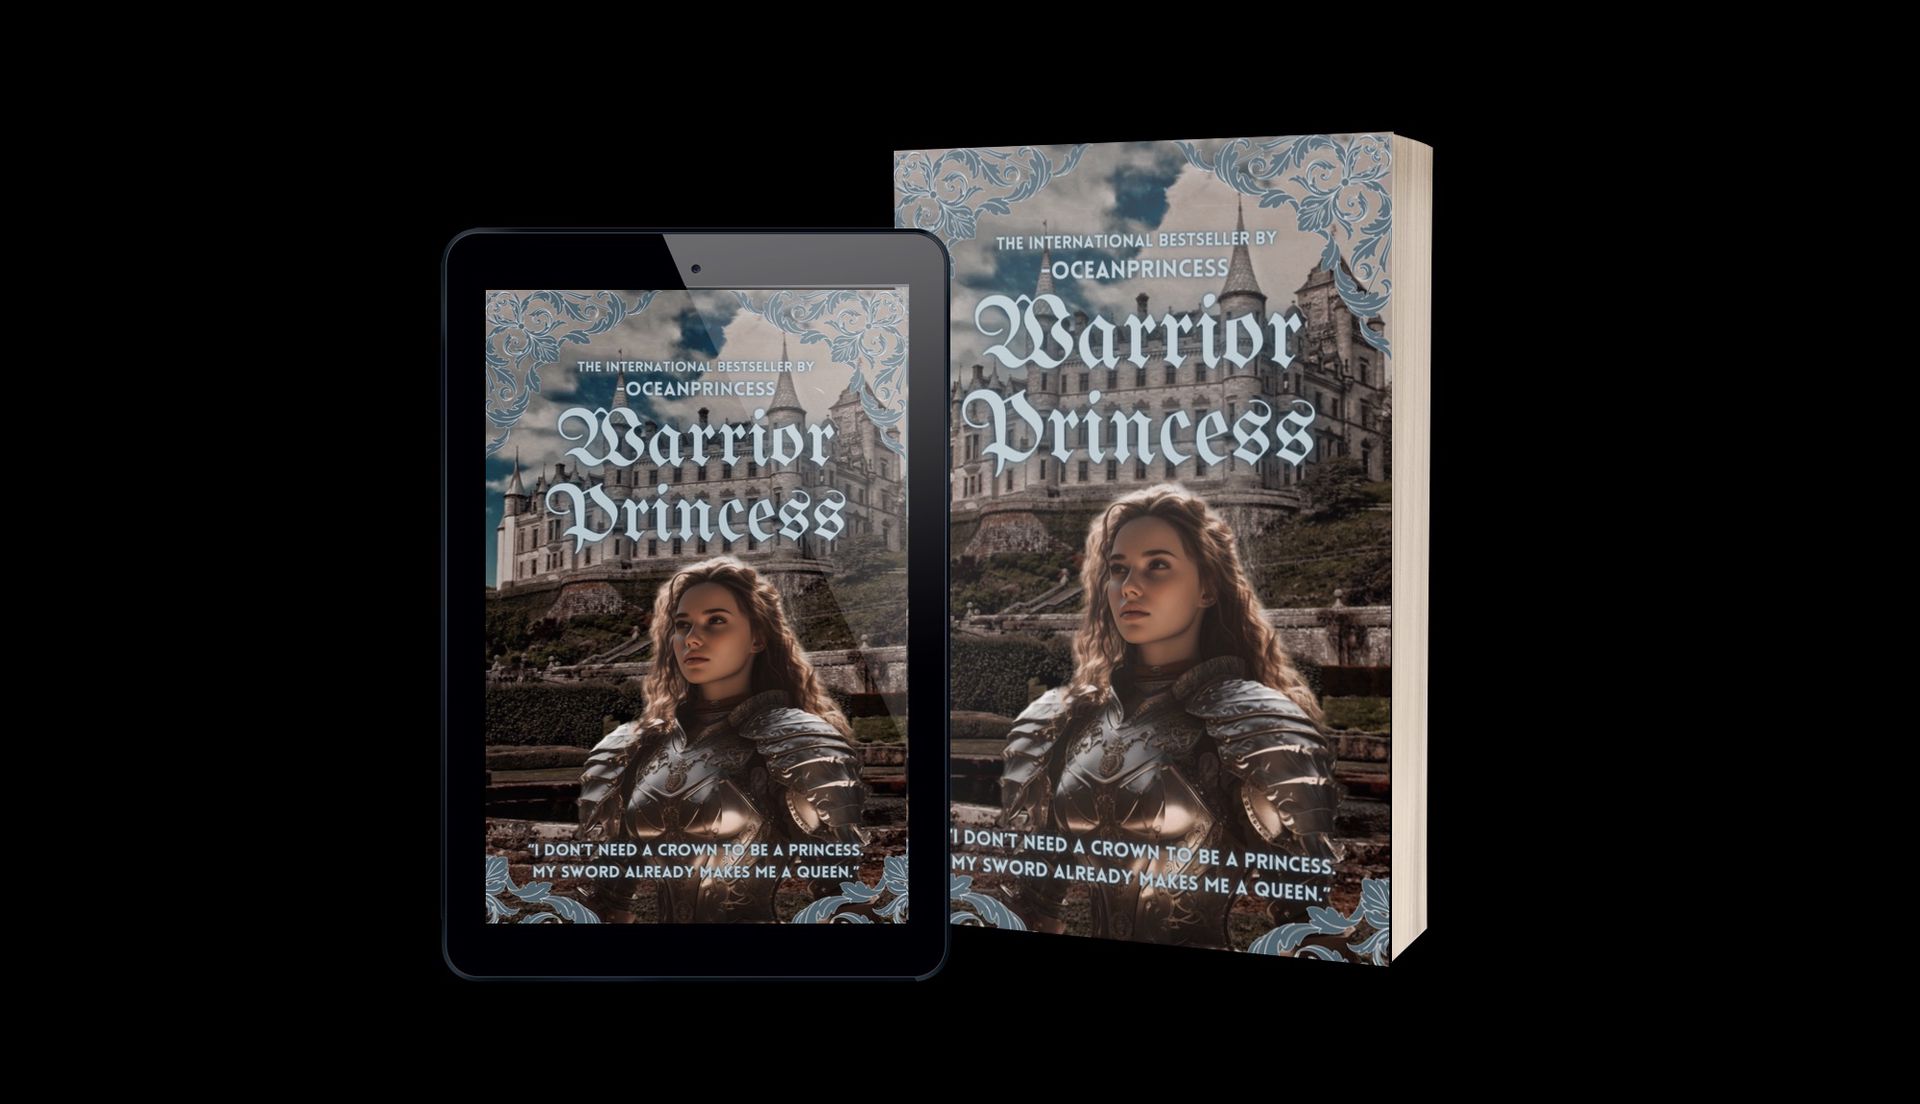
╰┈➤ 𝐖𝐚𝐫𝐫𝐢𝐨𝐫 𝐏𝐫𝐢𝐧𝐜𝐞𝐬𝐬 𝐂𝐨𝐯𝐞𝐫 (𝐡𝐚𝐫𝐝)

- COVER TUTORIAL -
Level: hard
Time: 1-2 hours
Resources: (links in comments)
- https://pixabay.com/illustrations/ai-generated-woman-warrior-armor-8584175/
- https://pixabay.com/photos/dunrobin-castle-garden-453164/
Language: English
Required Apps: Picsart, Canva
Hey pearls! Today I'm going to show you how to design this cover. But before we start, if you were wondering why I haven't updated this book, that's because for the past few months I've been using Photoshop to design. As most people don't have Photoshop because it's quite expensive (I'm lucky my dad has a subscription for work so I can use it), I didn't want to make any tutorials for it.
But today I was really bored (I'm ill and couldn't do anything), so I decided to make a tutorial for you guys, using Picsart and Canva. It definitely was fun using these apps again as I haven't used Picsart in months and only use Canva to edit my mum's Instagram posts to help her promote her books. So it was great to explore these apps again to make covers.
Anyway, have fun designing! I hope you can follow my steps, I tried to describe them as detailed as possible. If you have any questions, don't be afraid to put them in the comments!
PS: Falls jemand die Übersetzung braucht, einfach melden!
Step One: Download the following images!
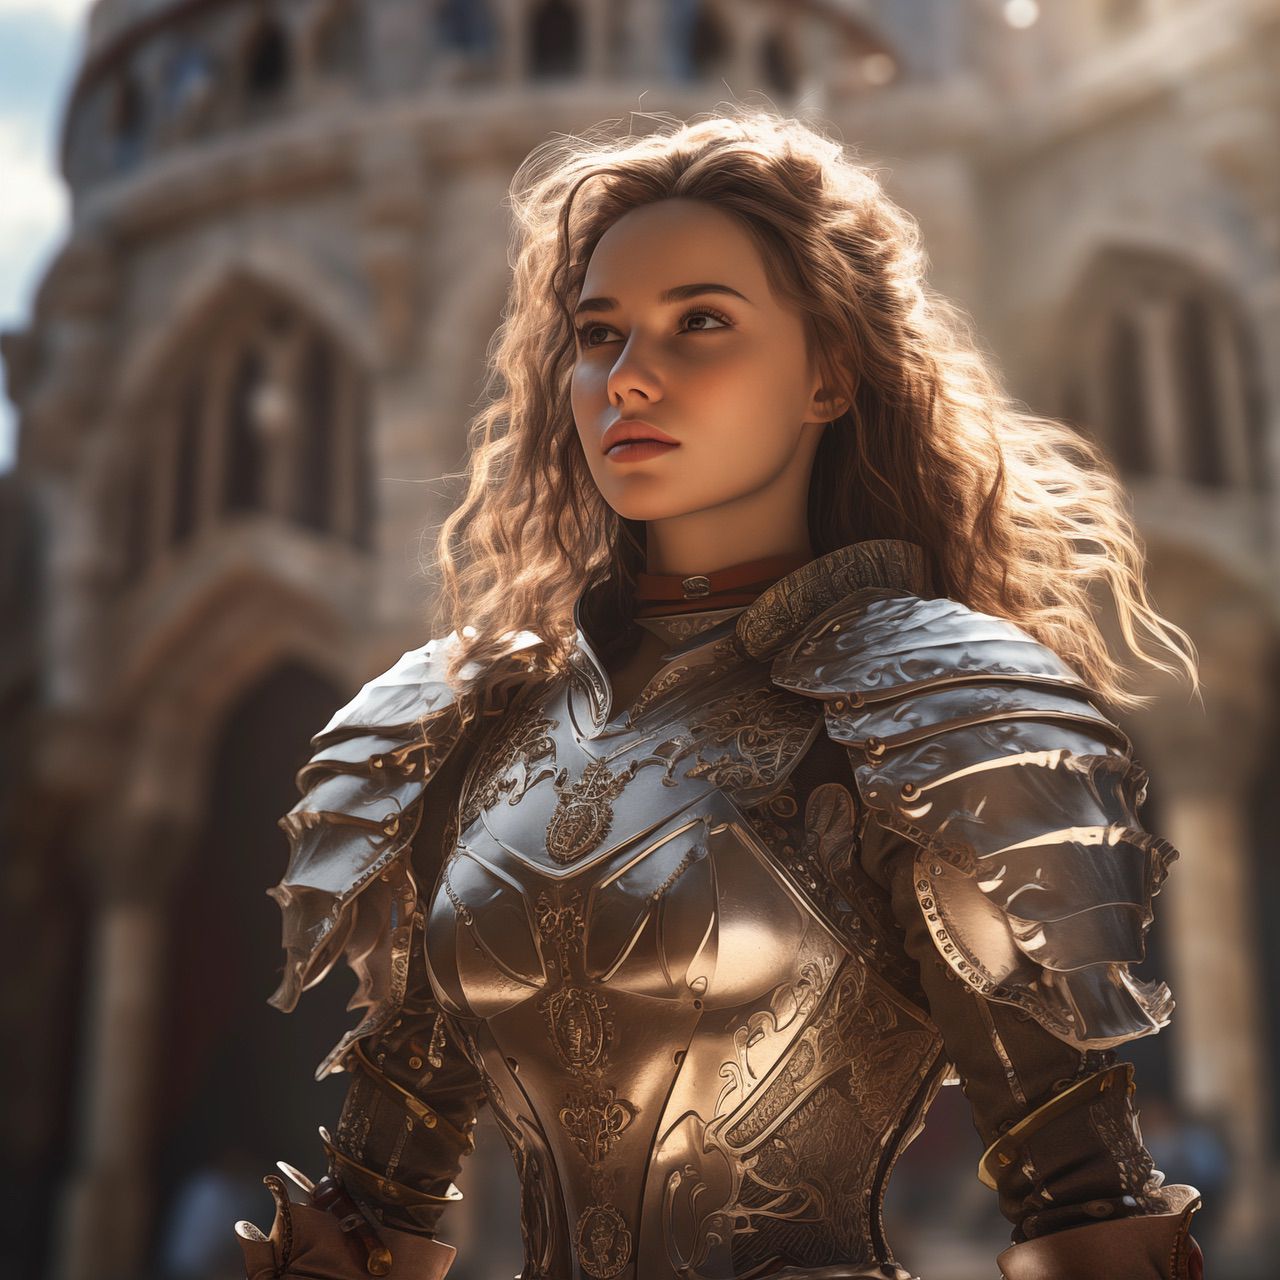
https://pixabay.com/illustrations/ai-generated-woman-warrior-armor-8584175/
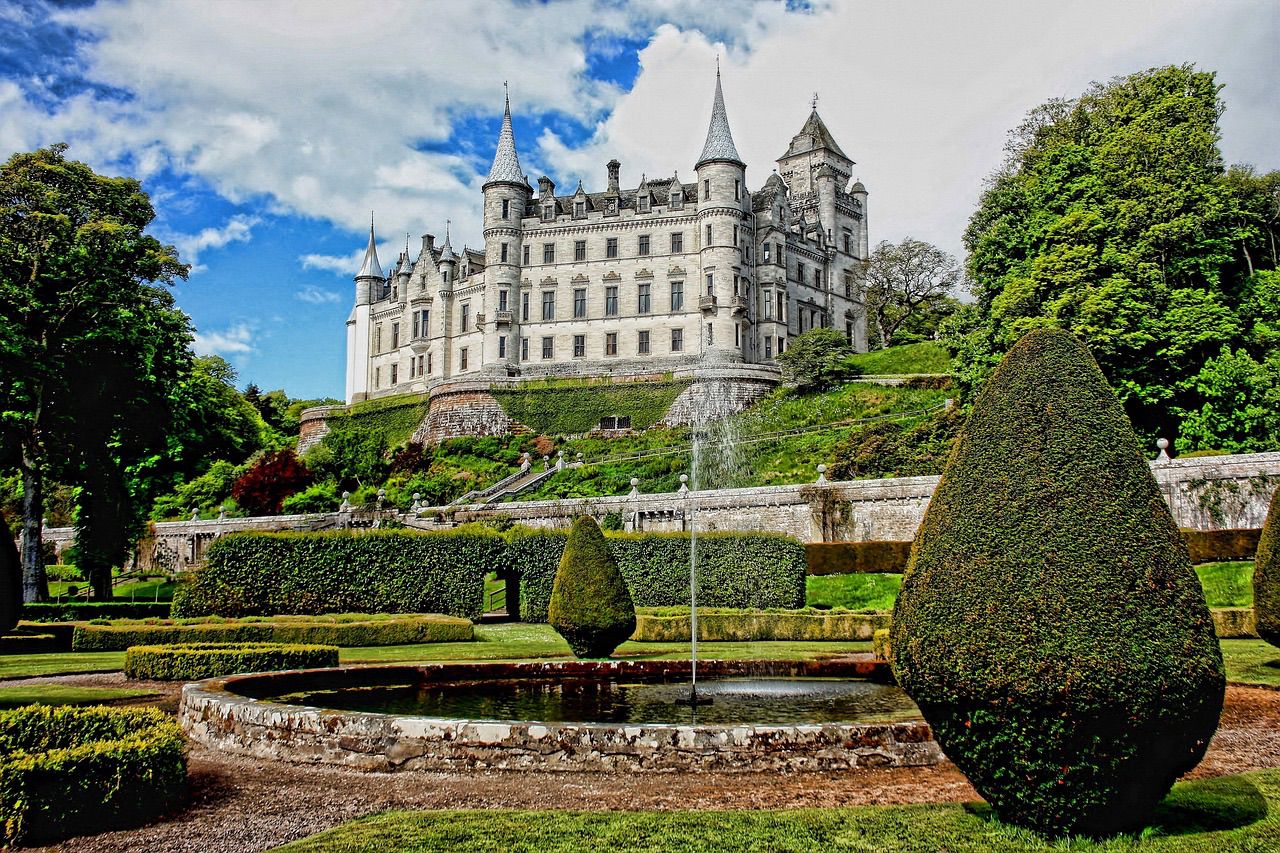
https://pixabay.com/photos/dunrobin-castle-garden-453164/
Step Two: Open the castle in Picsart! Click on „tools" and then select „crop". Change the ratio to 512x800, then zoom out of the picture. This is what it should look like:
Step Three: Click on „add foto" and select the picture of the warrior. Then go to „cutout" and choose „person". Select the preview and refine the image by erasing/restoring any parts it didn't cutout right. Then click „save" and move the warrior to the bottom of the picture. Click „apply". This is what it should look like:

Step Four: In the layers menu, select the castle and go to „fx effects". Choose the effect „brnz2". Click on „apply". As you can see, the two pictures already harmonise better with each other. The background is still too light though, so go to „adjust" and set the brightness to about -25 and the contrast to about 20. It should now look like this:
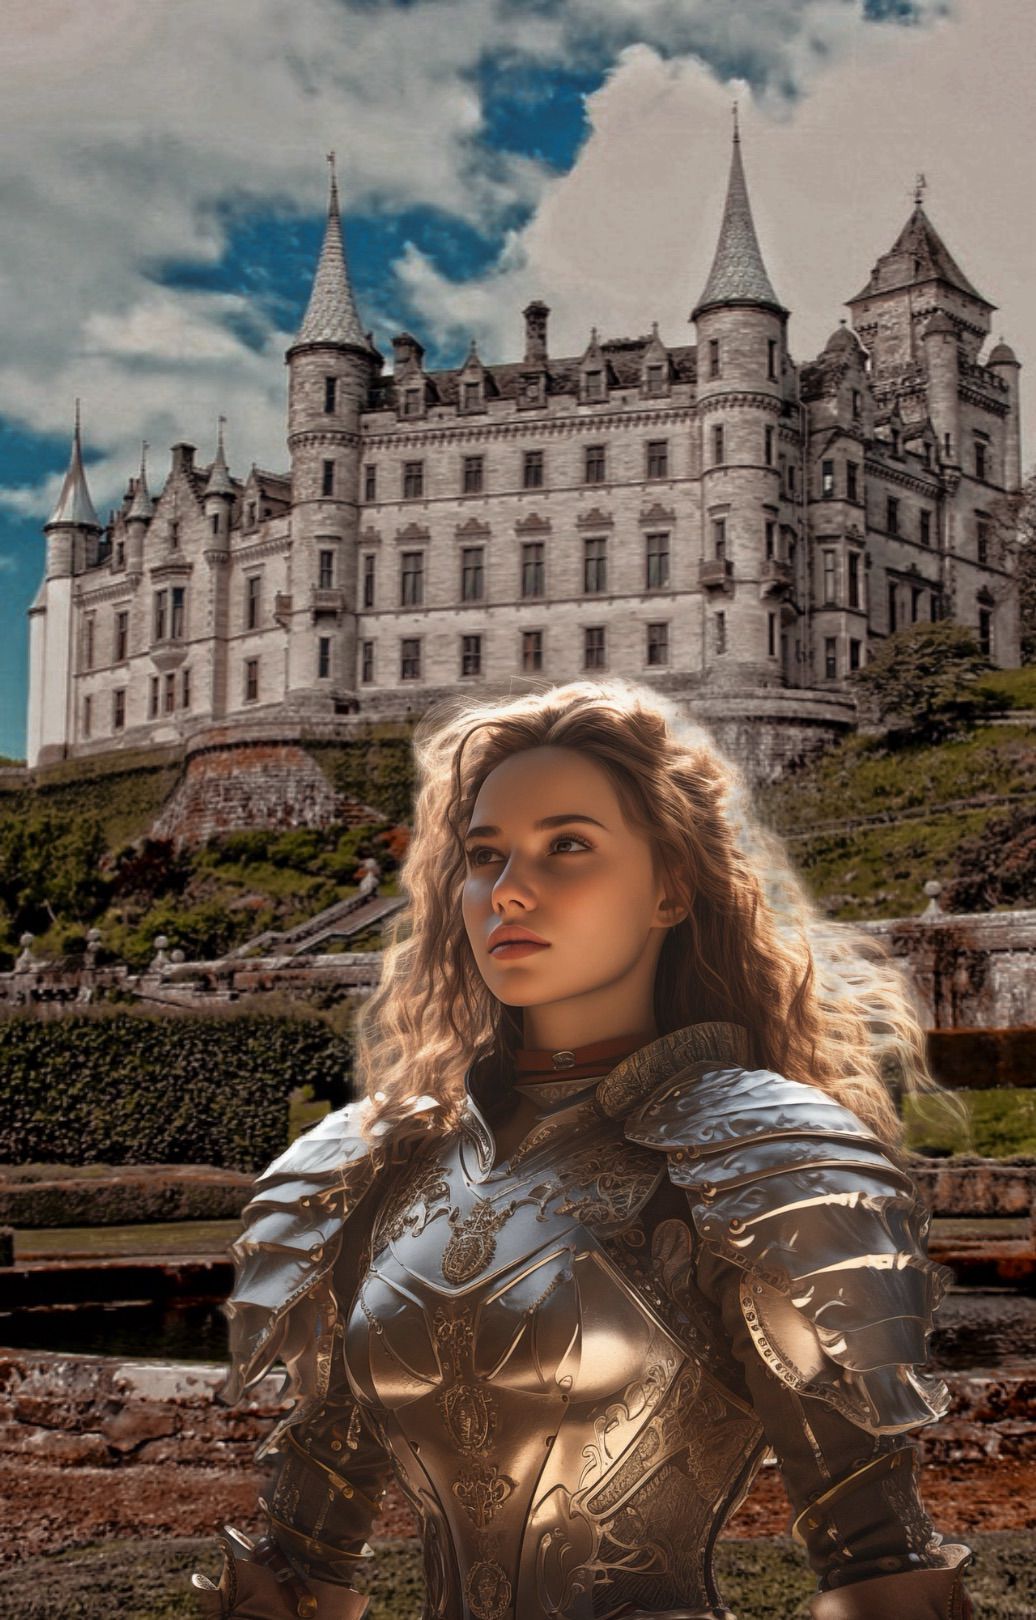
Step Five: If you're not entirely happy with something in the picture, make the changes (for instance I erased some of the girl's hair to make it seem like she really is in front of the castle more). Then press „apply" without having any layer selected. Now go to „fx effects" and choose „BRL2". Press it again and you can adjust the „fade" to 30. Apply. Go to „tools" and then „adjust" and change the brightness to around -15. Apply that and then download the image. It should look like this now:
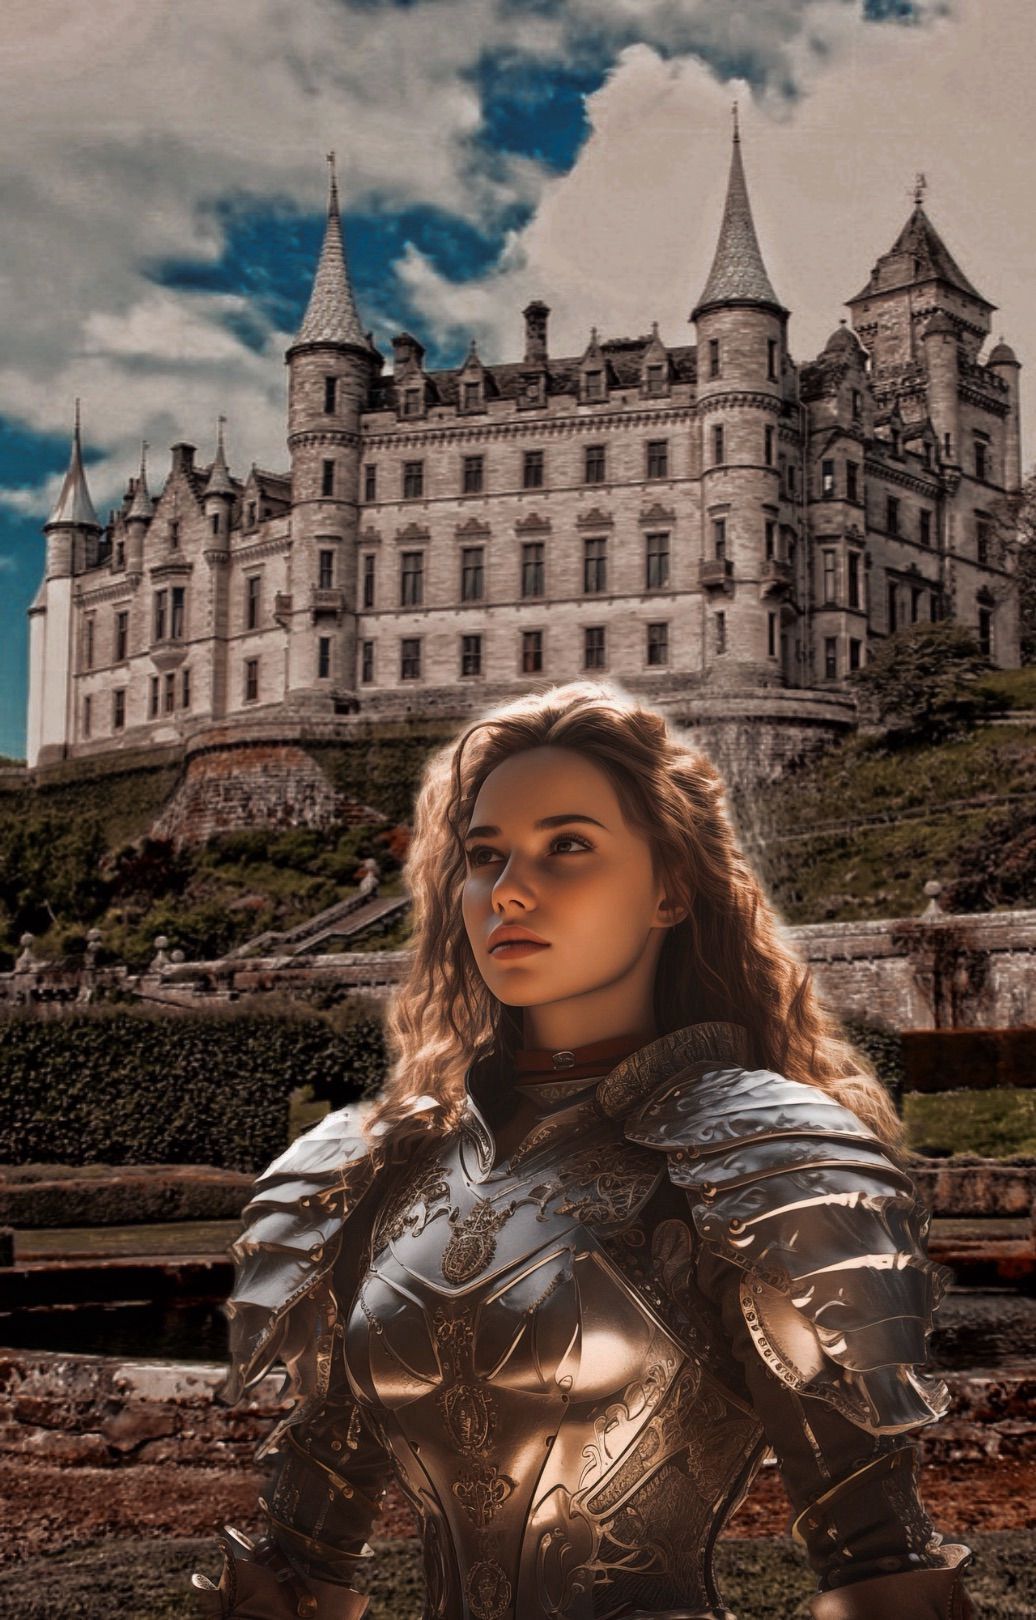
Step Six: Move to Canva and create a new design with a ratio of 1024x1600 or 1536x2400 pixels (it's the same as 512x800 but you'll just get a higher resolution. Go to „uploads", upload the image and then drag it to the blank canvas.
Step Seven: Add some text. I chose the font „UnifrakturMaguntia" as I thought it went well with the medieval style. Change the size to around 230 and the line spacing to 1.92. Then click on the colour. It should come up with a shade of blue from the picture. If not, type in the hex code „3E5967". Then go to „effects" and select „glow". Set it to 70. Then add some more text such as author, subtitle or quote. I chose the font „Lovelo" and used the same colour and effects as for the title. This is an example of how it could look like:

Step Eight: Go to „elements", type in „medieval frame" and select „graphics". Canva has many beautiful frames, I'm sure you'll find one you like. This is what I chose for instance:
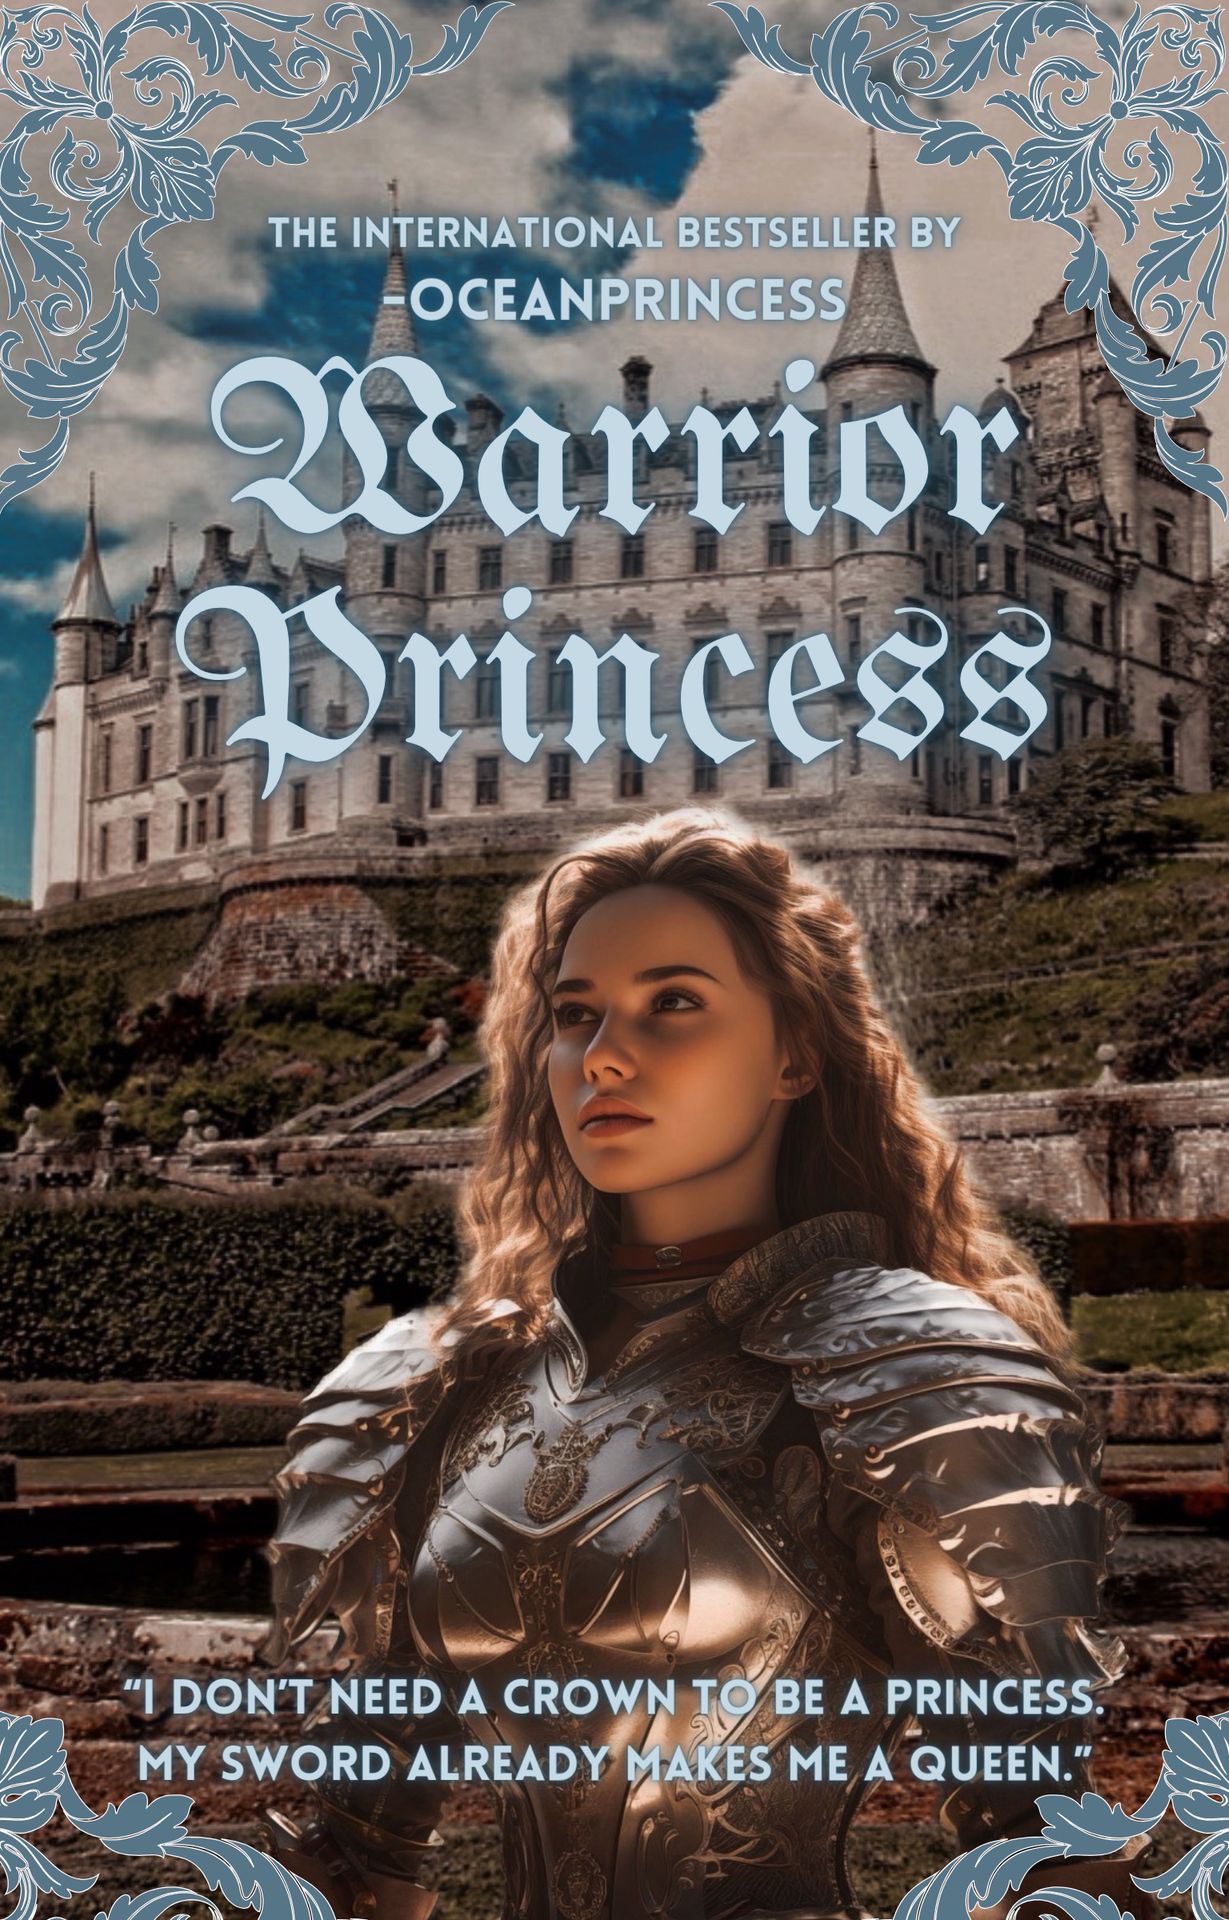
I simply took a frame, changed the colours and cut it so that only the top part was visible, then I duplicated it and made the second one bigger and only made a small part of it visible so that it doesn't cover up any of the text.
Step Nine: Download the cover and move back to Picsart. Go to „adjust" from the tools and change both the brightness and the contrast to -15, the saturation to -25, the highlights to 30 and the shadows to -30. You're done!
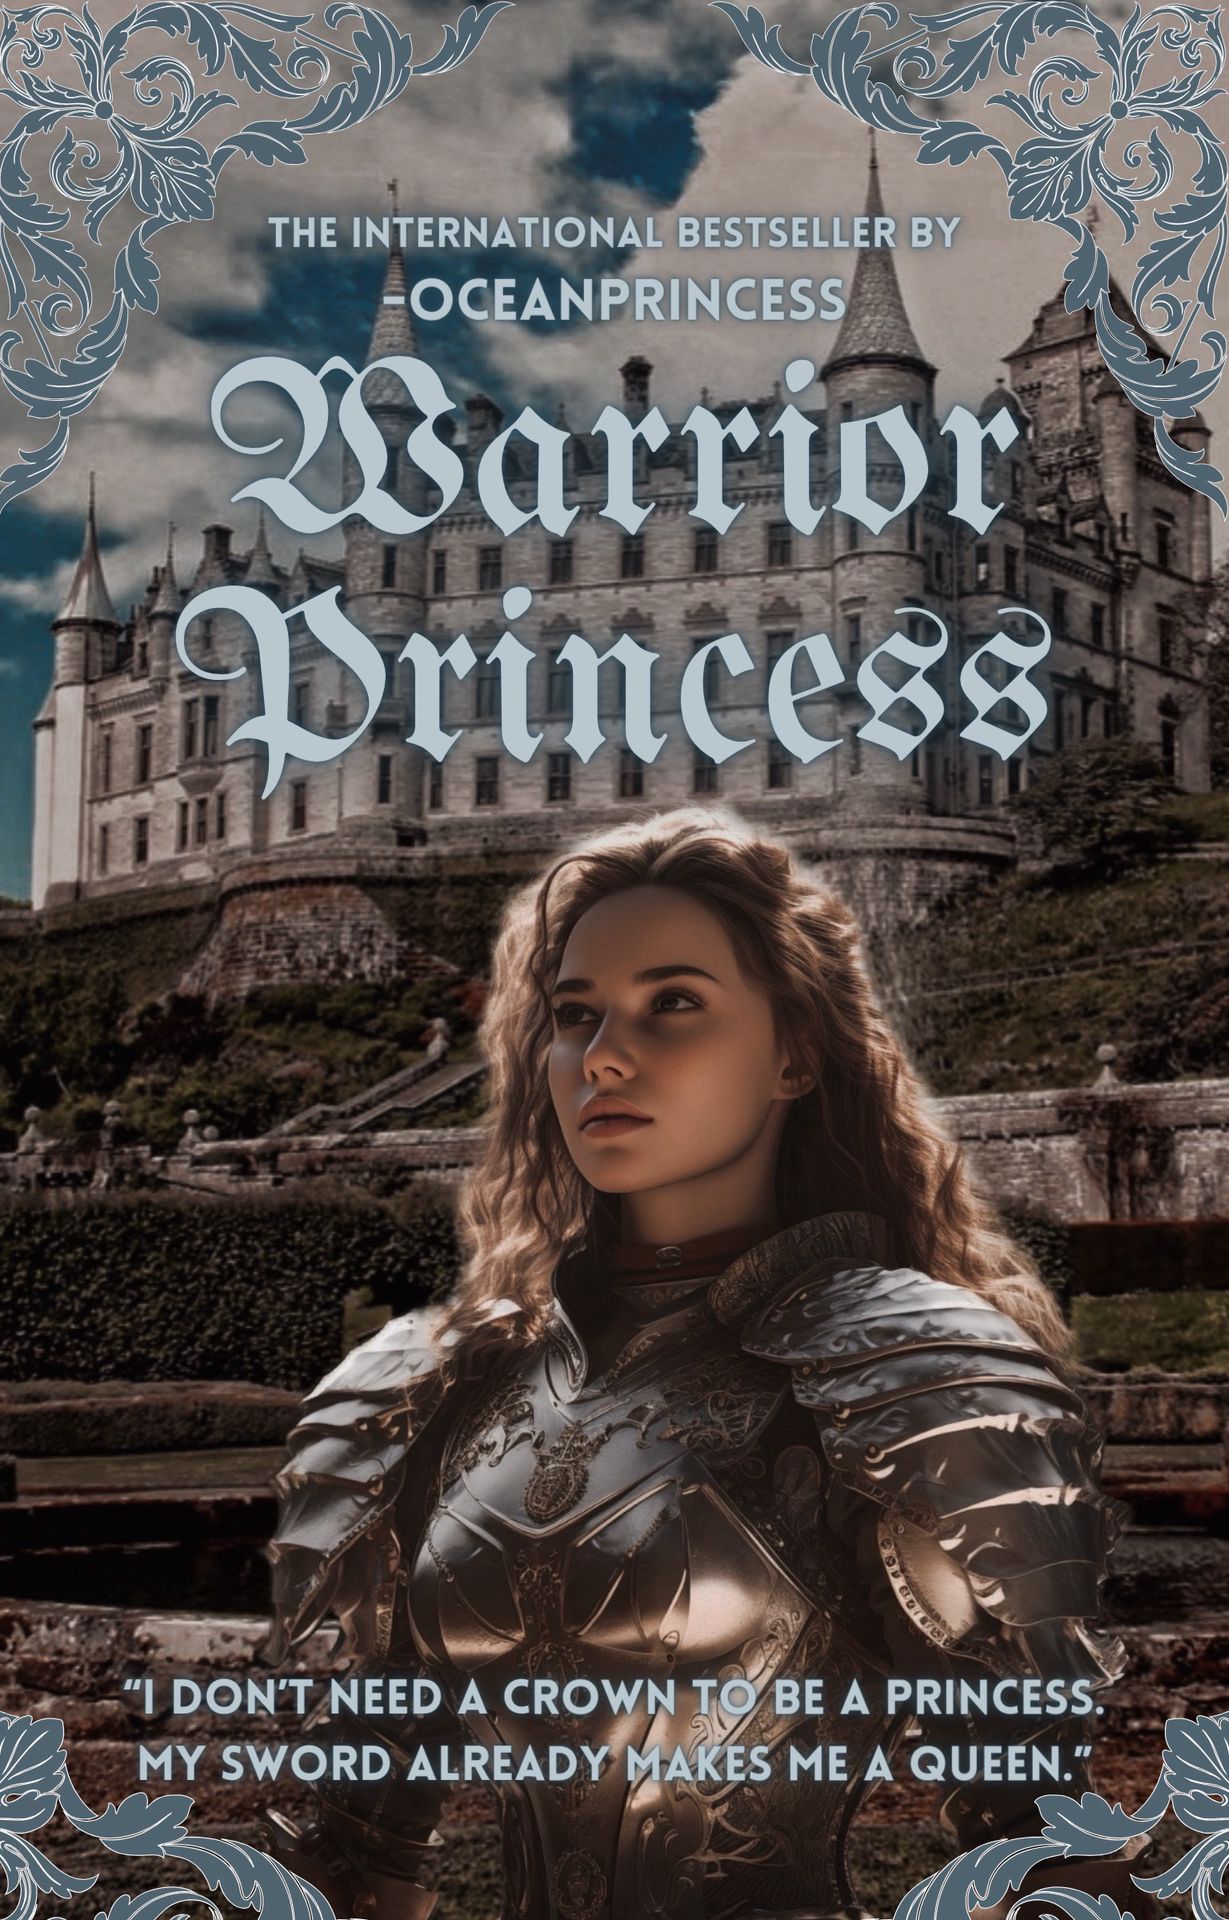
I hope it worked and that you like the result! Feel free to send me your covers, I'm always happy to see them!
Thanks for reading and have a nice day!
Love, Amy
Bạn đang đọc truyện trên: Truyen247.Pro