
[2] how to make a manip gif without photoshop
To start: don't mind if the gifs change every now and then lmaooo. There used to be a bunch of different chapter explaining the different steps, but I decided it would be best to just put it all together.
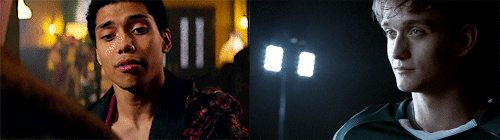
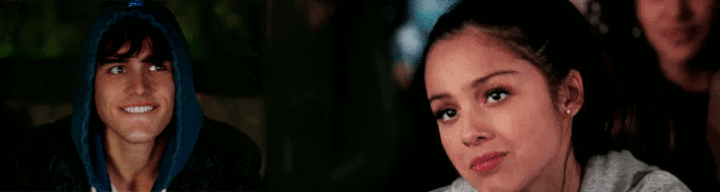
So we start with these gifs:


If the gifs aren't the same size just head on over to ezgif.com and resize your gifs so that they're the same size! They need to be because of the way we are going to put them together.
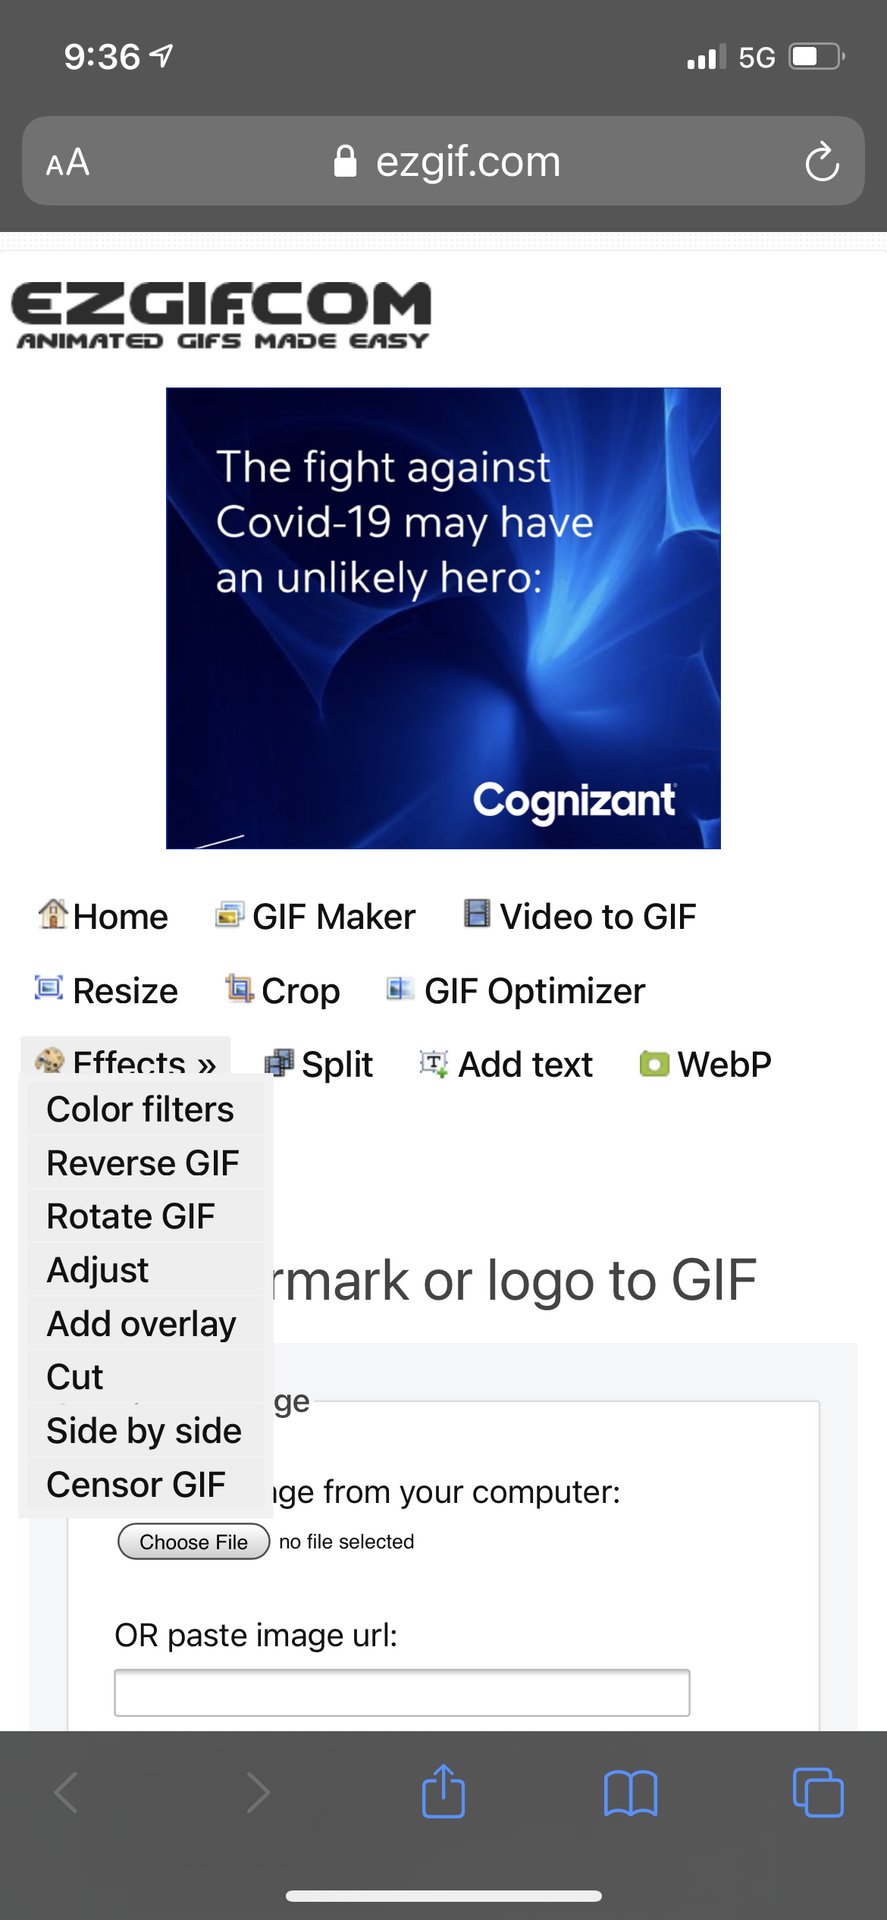
Anyways go to Ezgif.com and click the effects button Then click side by side
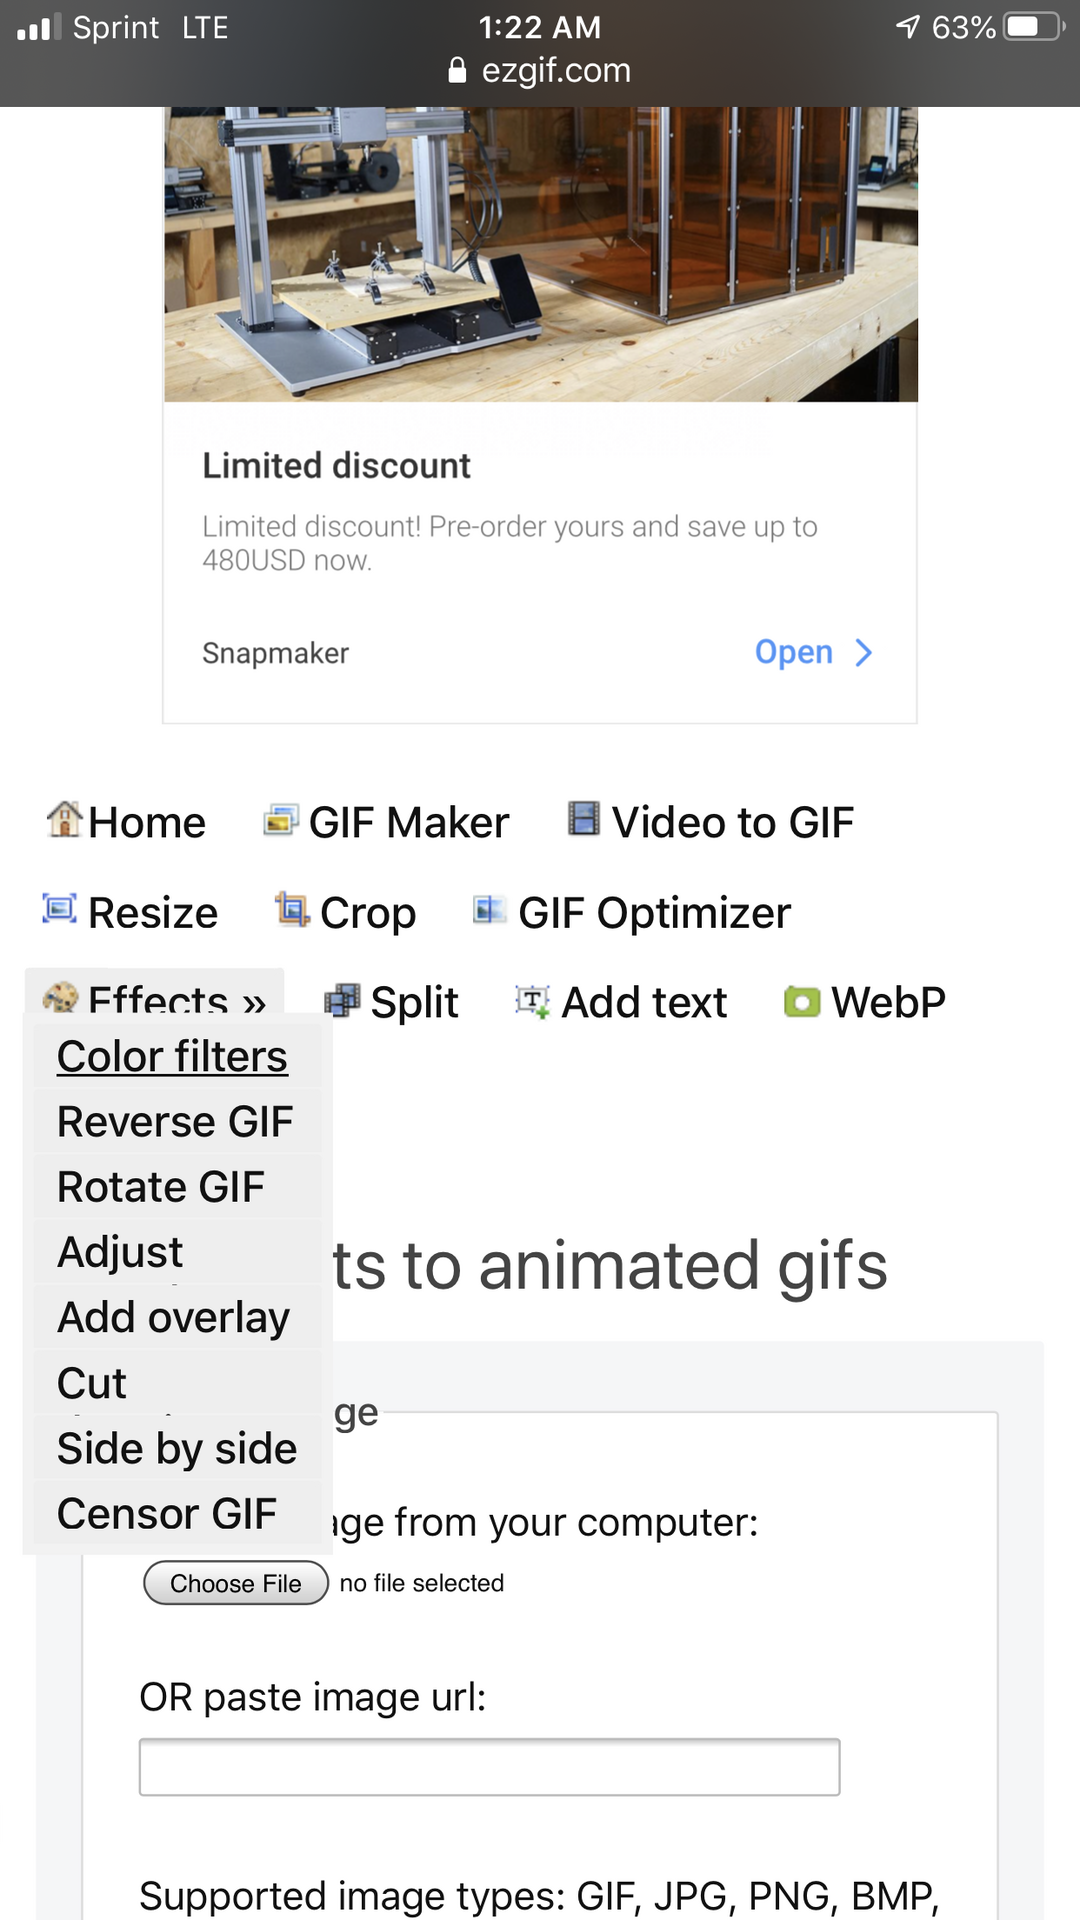
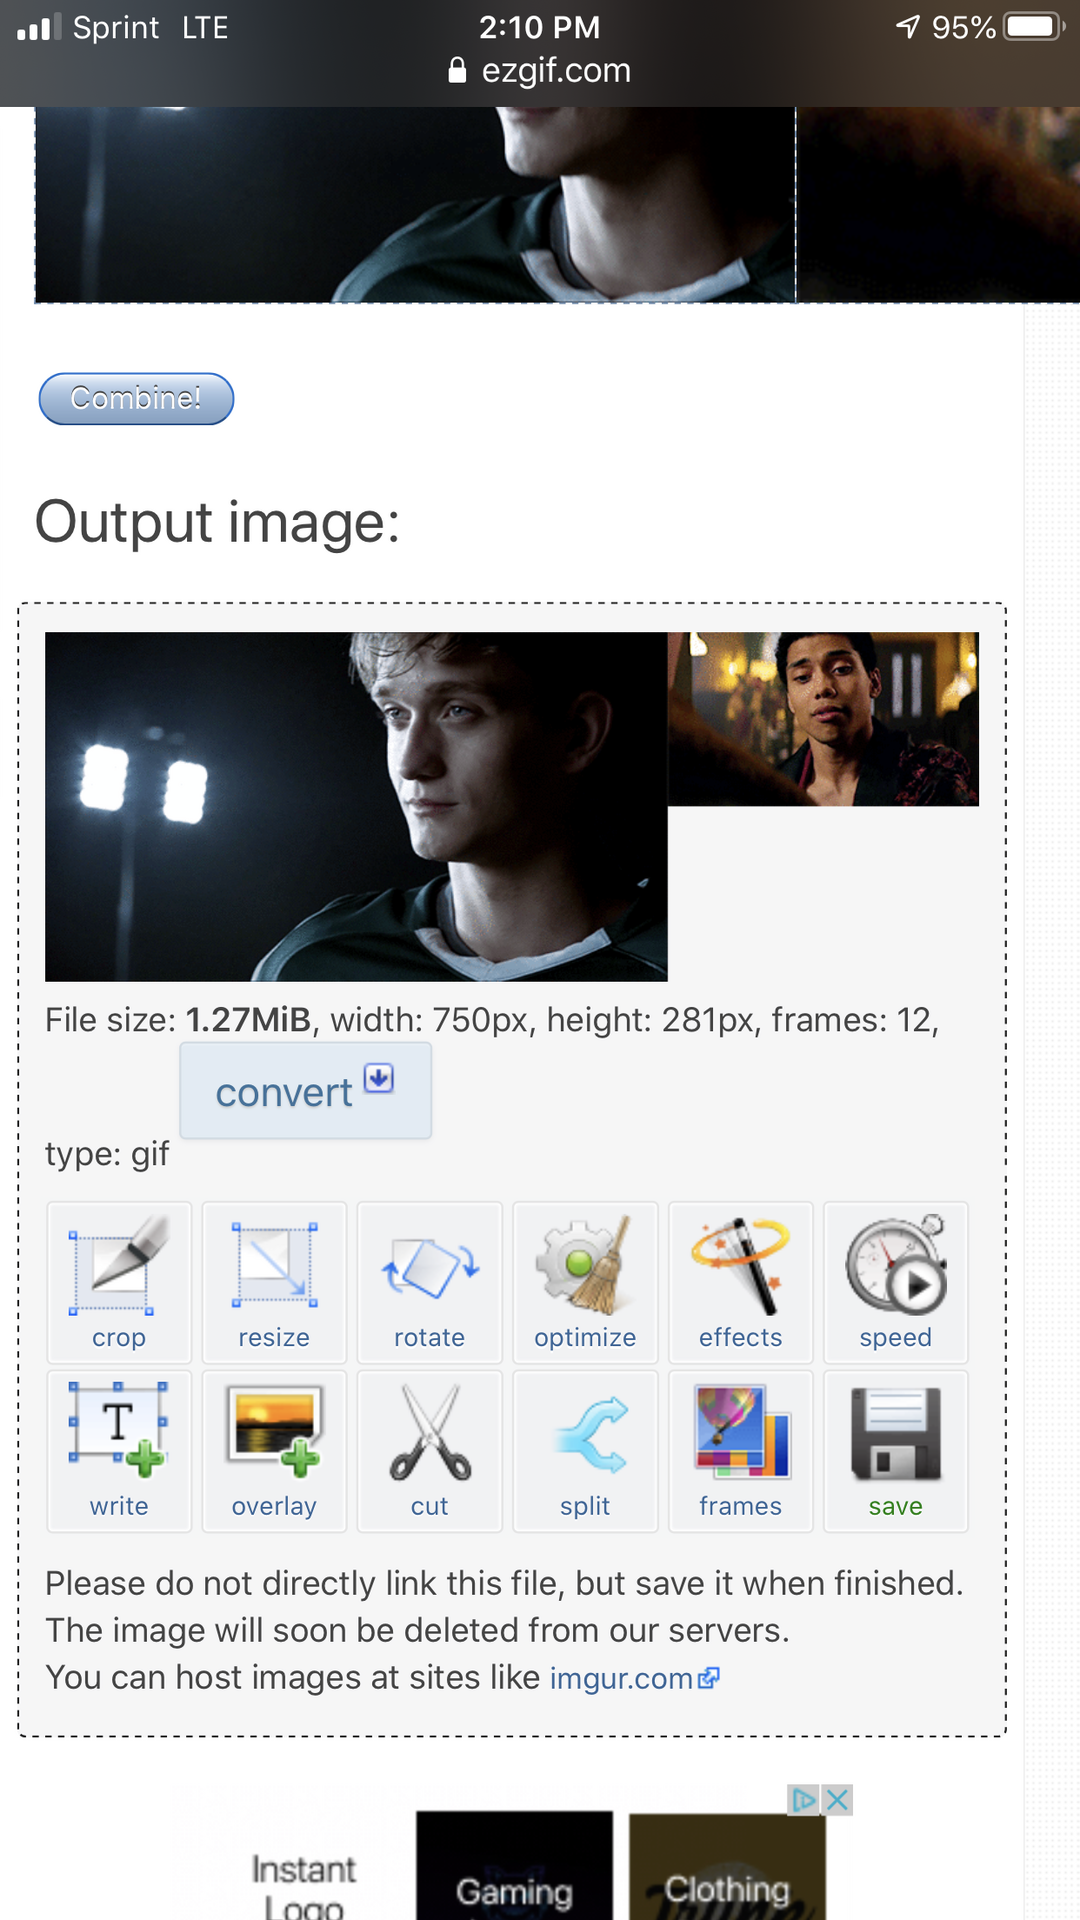
Choose your two gifs and place them in the boxes then click combine.

So now that you know how to put the gifs together here are some things to remember if the gif is looking weird:
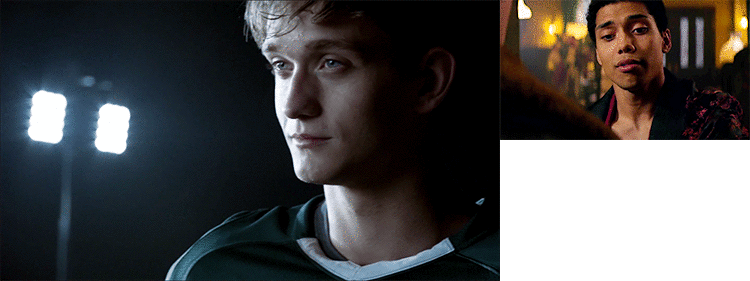
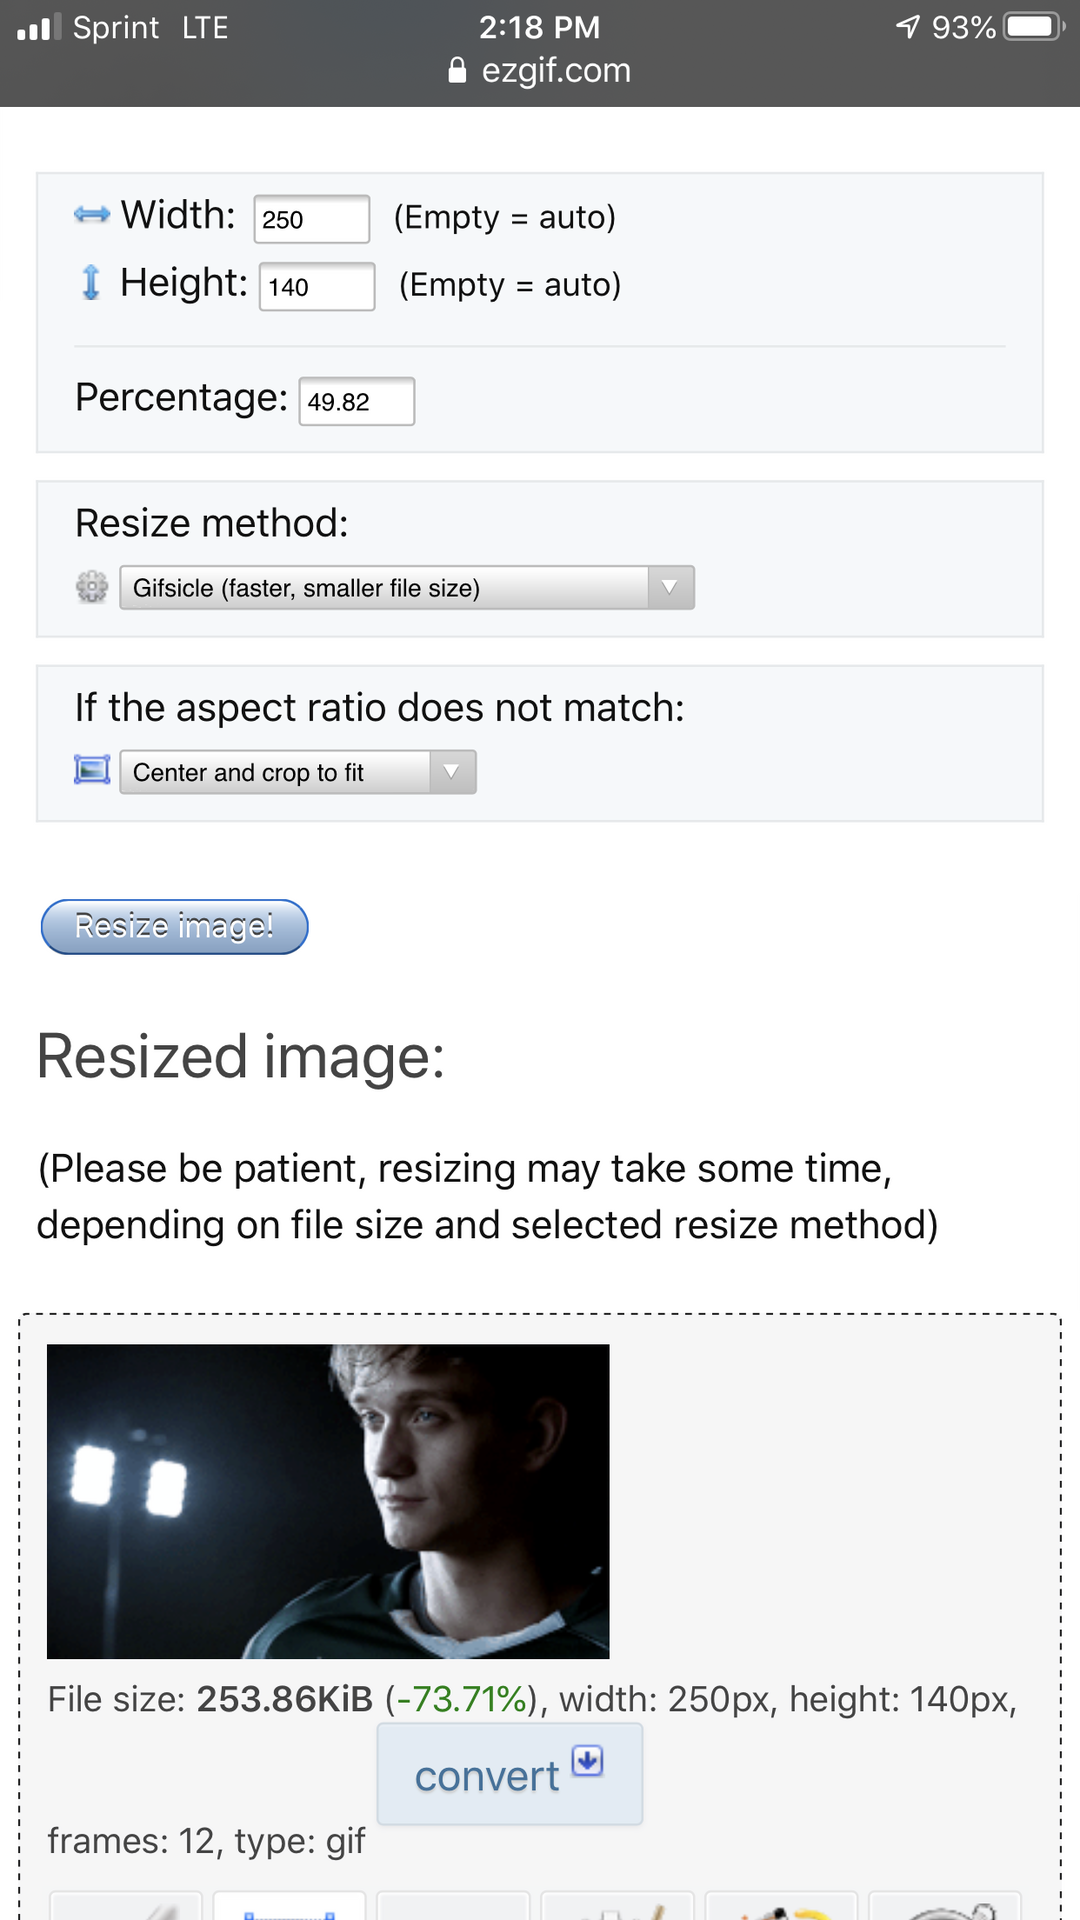
We'll start with talking about the sizing of the gifs. This is important because if you don't do it, your gif will end up looking like this:
To fix this go to ezgif.com on two tabs and click resize. See how both gifs have a different width and height size?
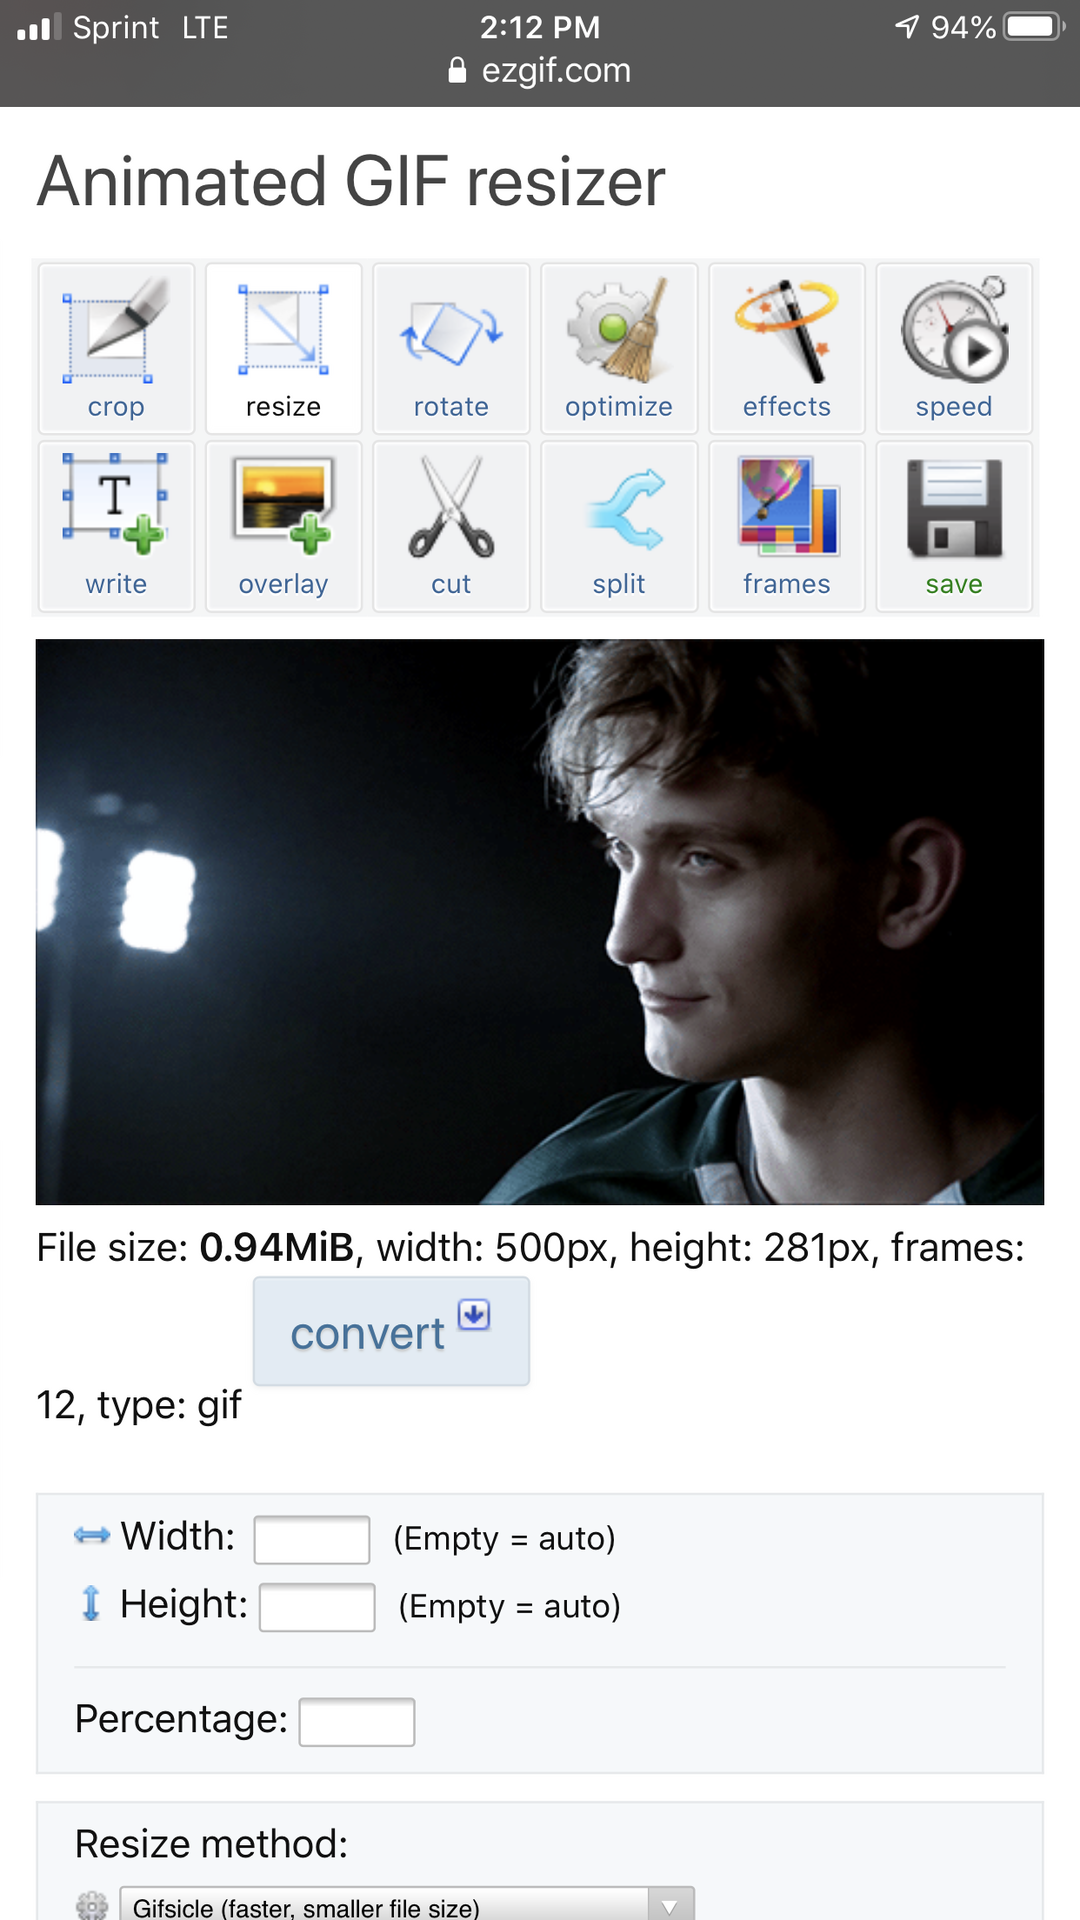

Usually I make the bigger gif smaller because when you smaller gif bigger it gets blurry. I made the big gif the same size as the smaller gif.
Another thing is sometimes you'll need to make the frames of the gifs the same so that one doesn't stop while the other is still going.
So since the one on the right ends faster I'm just going to go to ezgif, click cut, then choose the picture on the left. There are only twelve frames in the short gif so I'm going to have to cut the other gif down until it has 12 frames. You can choose any 12 frames.
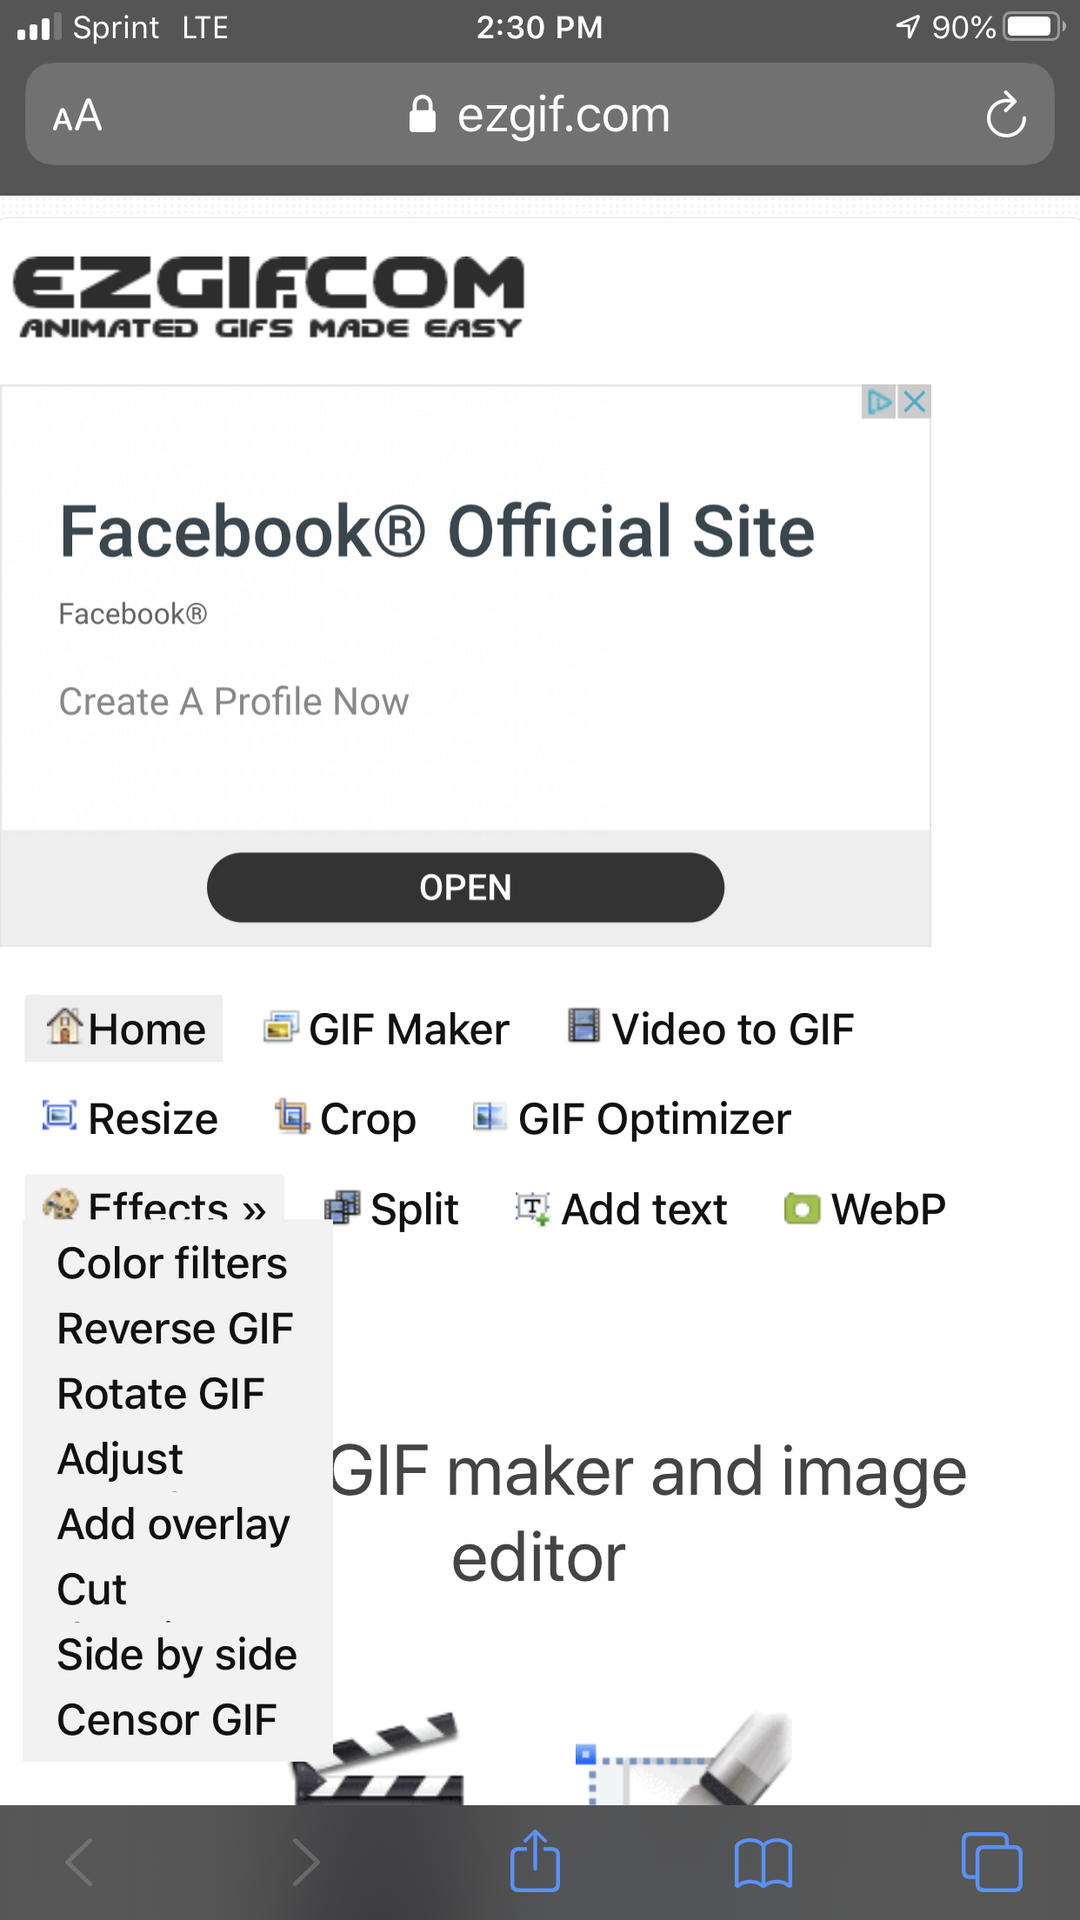

Now as you can tell both of the gifs are facing the same way so what were gonna have to do is reverse one of the gifs. Click effects then click rotate gif.
Choose your gif and click horizontal.
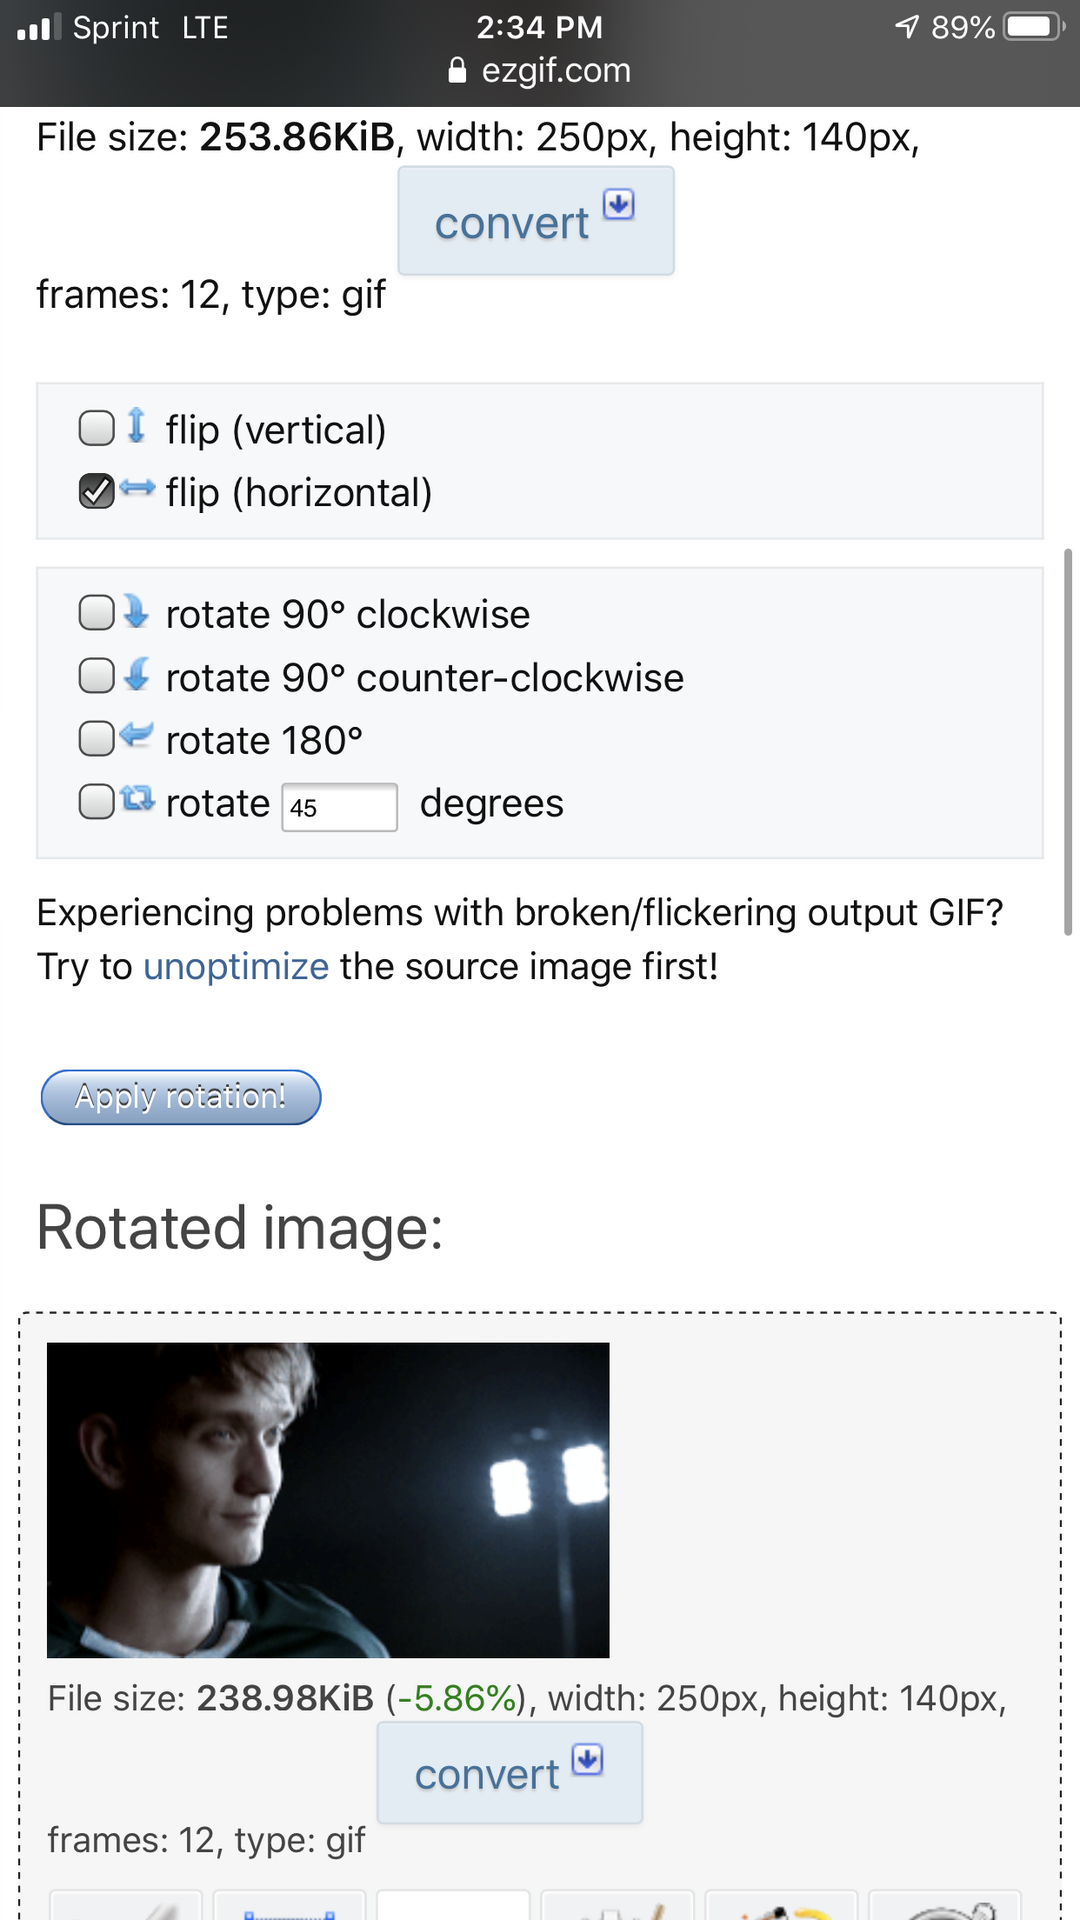
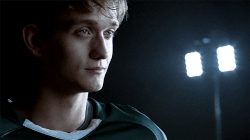
And there's your new gif!
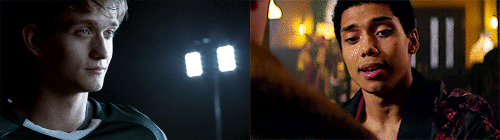
Now just put them together and there you go!
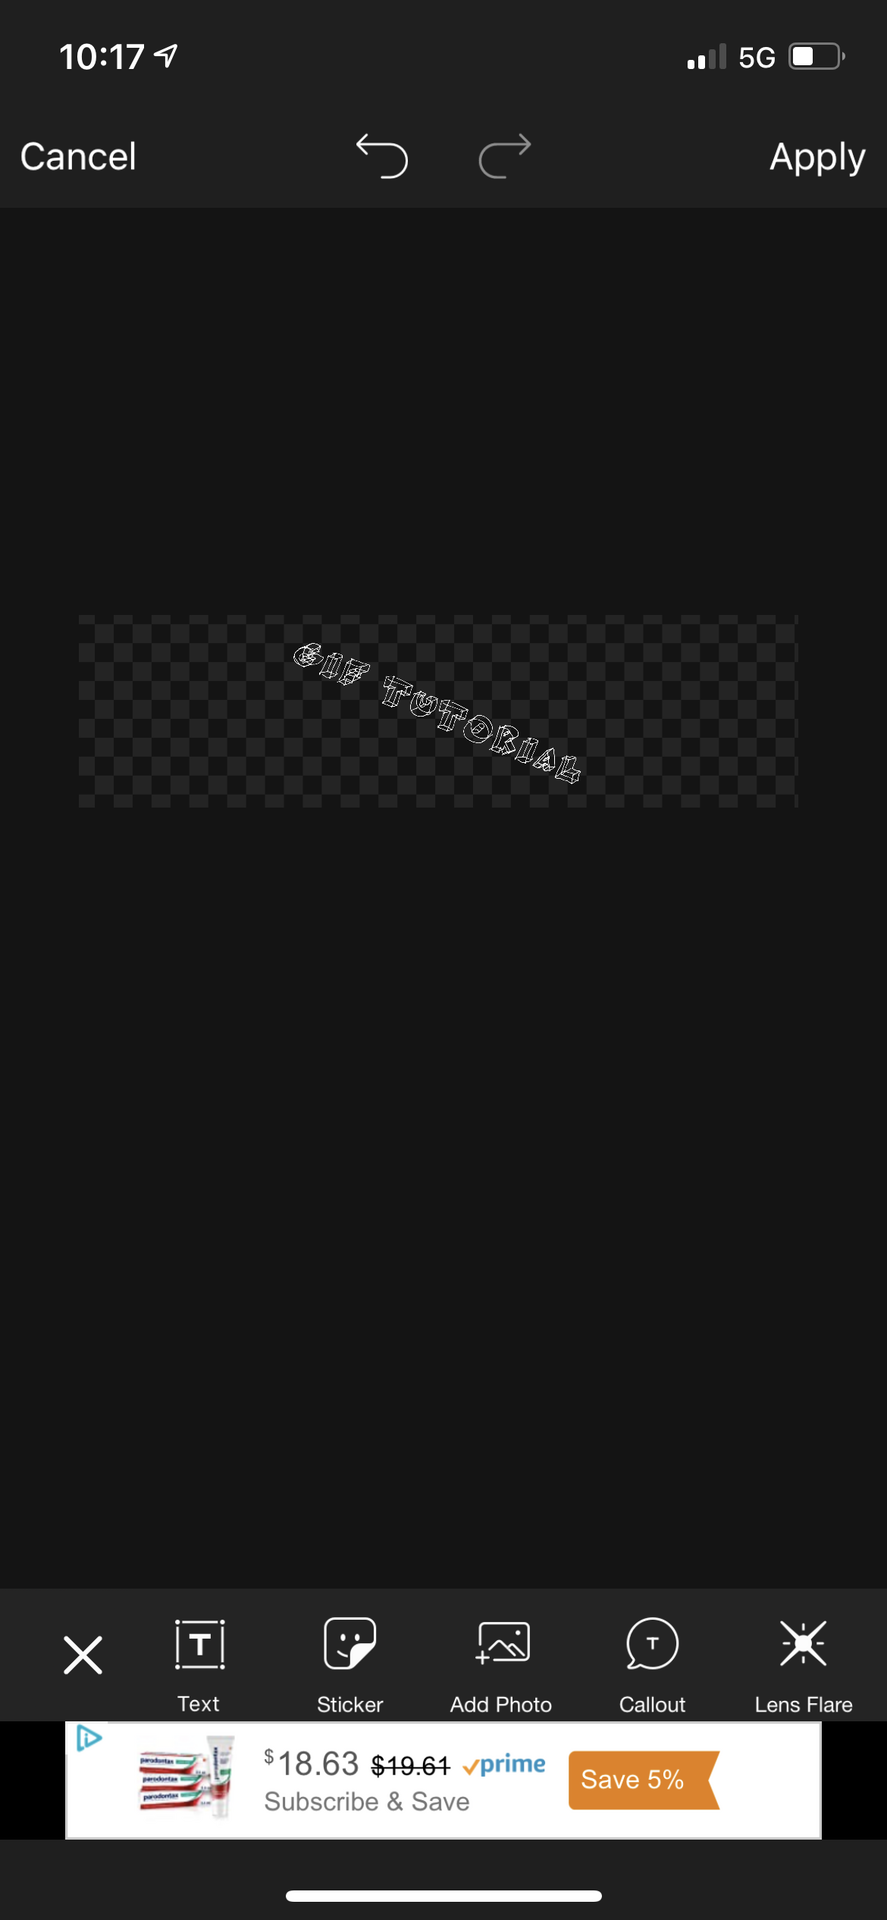
Before we do anything with the gif, here is how you put your text into a PNG format:
Okay so here's a hack I just found out about! And this also made me very excited. So head to picsart and scroll down all the way to the bottom. Click the background with the squares and just save the photo, this will help you make a png!

Then head over to phonto and pick your png picture, this is how it should show up: as if nothing is there:
Click anywhere on the screen and type your text. I put the text in the middle and I decided to put the text closer together and add a shadow.

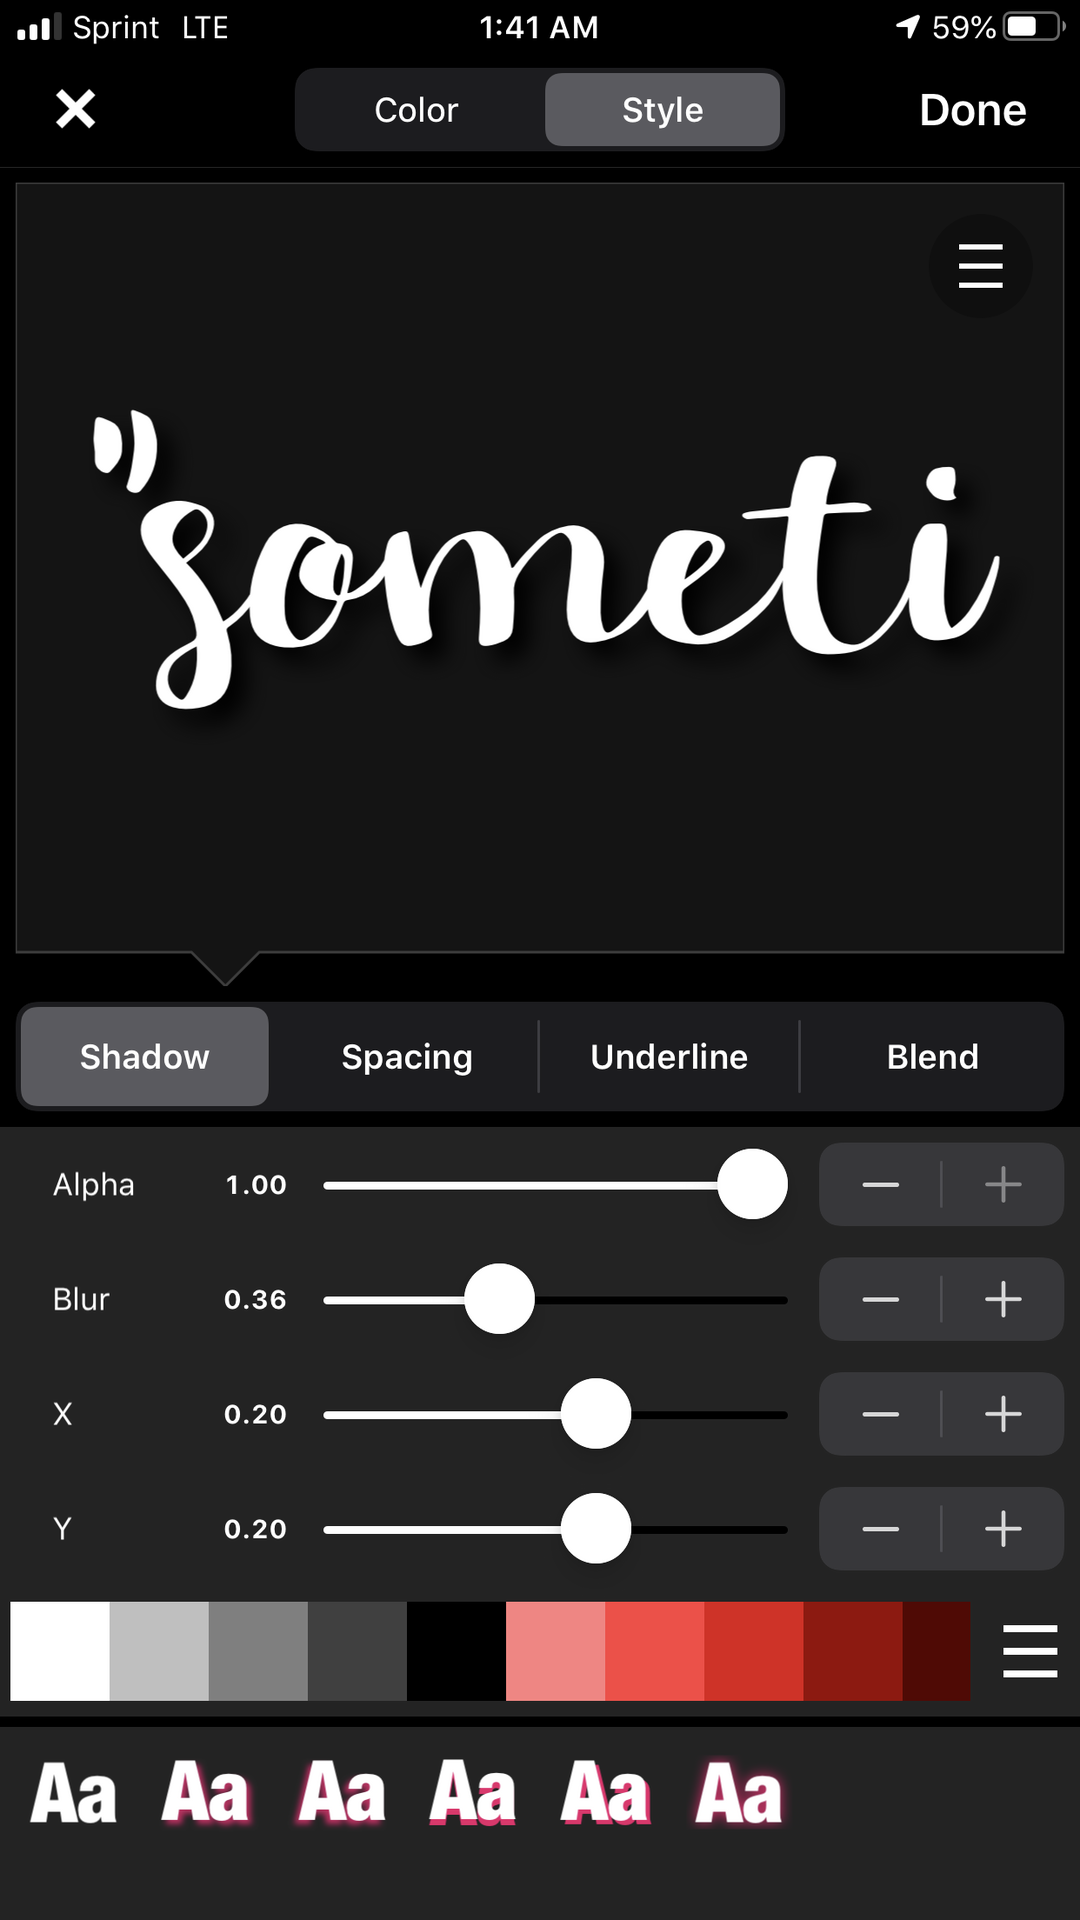
When you save make sure to click save as png!!!!!!! It won't work unless you click save as png.

How to blend the gifs and add the text:
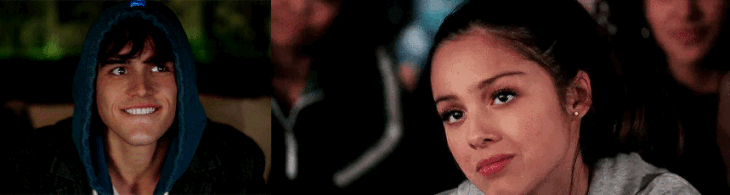
So here is the manip i am starting with:
Now after you've gotten here we will be using a new app i just found out about called ibis paint x
So open up the app and click my gallery then click the plus sign at the bottom left corner then click import picture at the top.
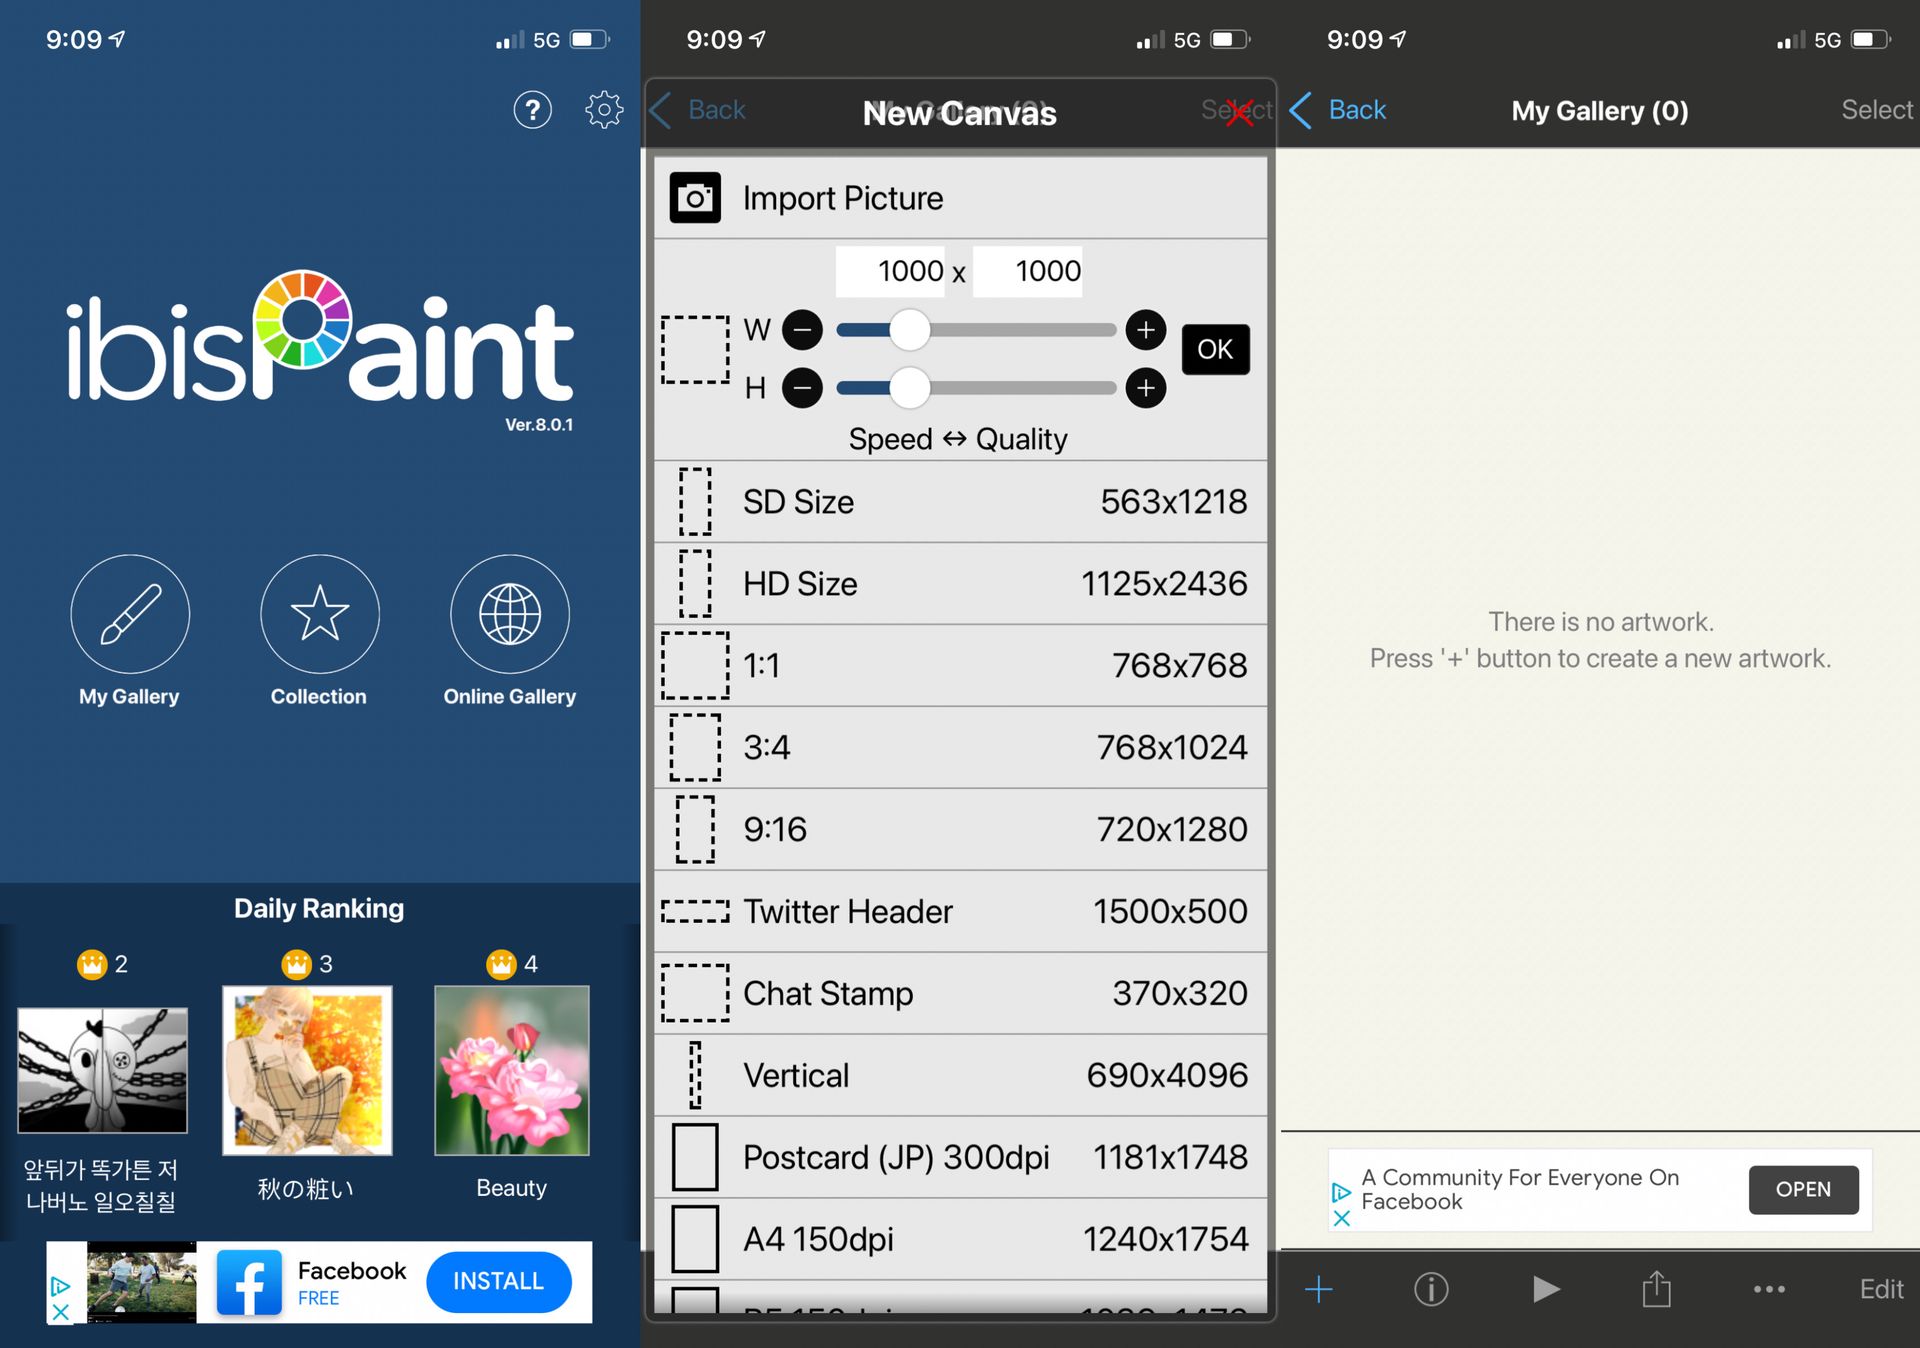
Click your manip gif and when that one thing pops up just click cancel
Now click the little square on square thing at the bottom and click the plus button to add a layer

Now click the brush at the bottom and click the brush again. And choose dip pen (soft)
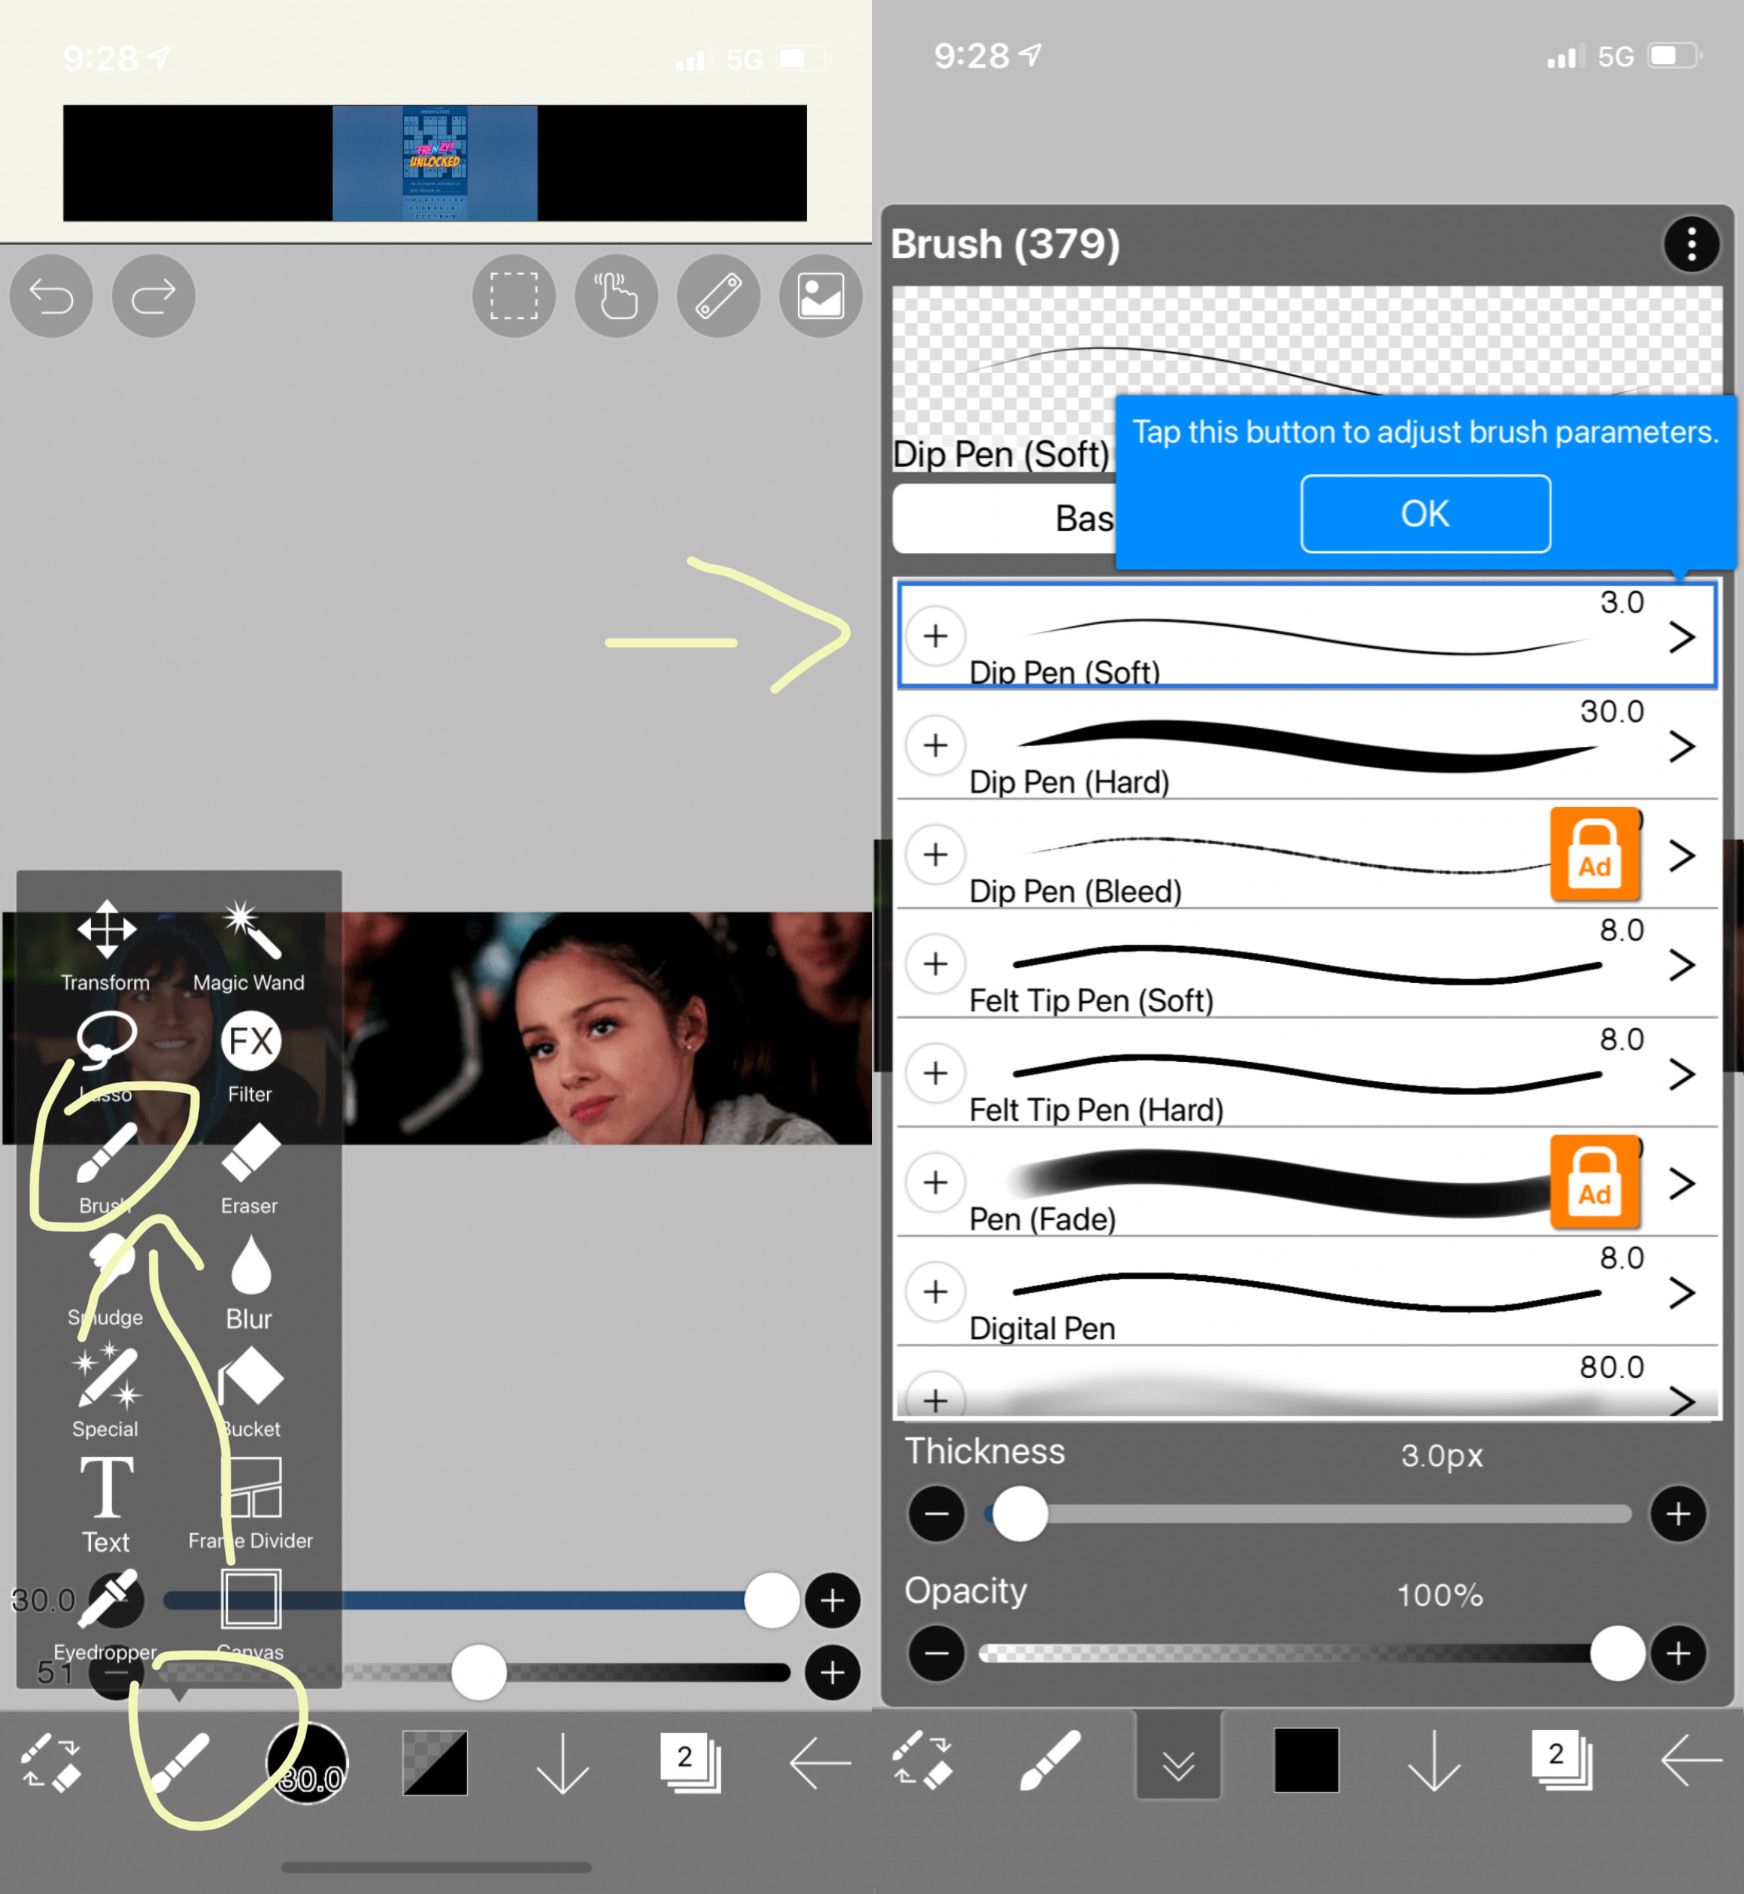
Then click the brush at the bottom again and click the eye dropper tool
With this you can choose any color from the background of the gifs.
And then start drawing! You can change the size and opacity of the brush at the bottom! I ended up covering that guy in the background of the girl's gif and some of the background of the guy's just so it looks better blended.
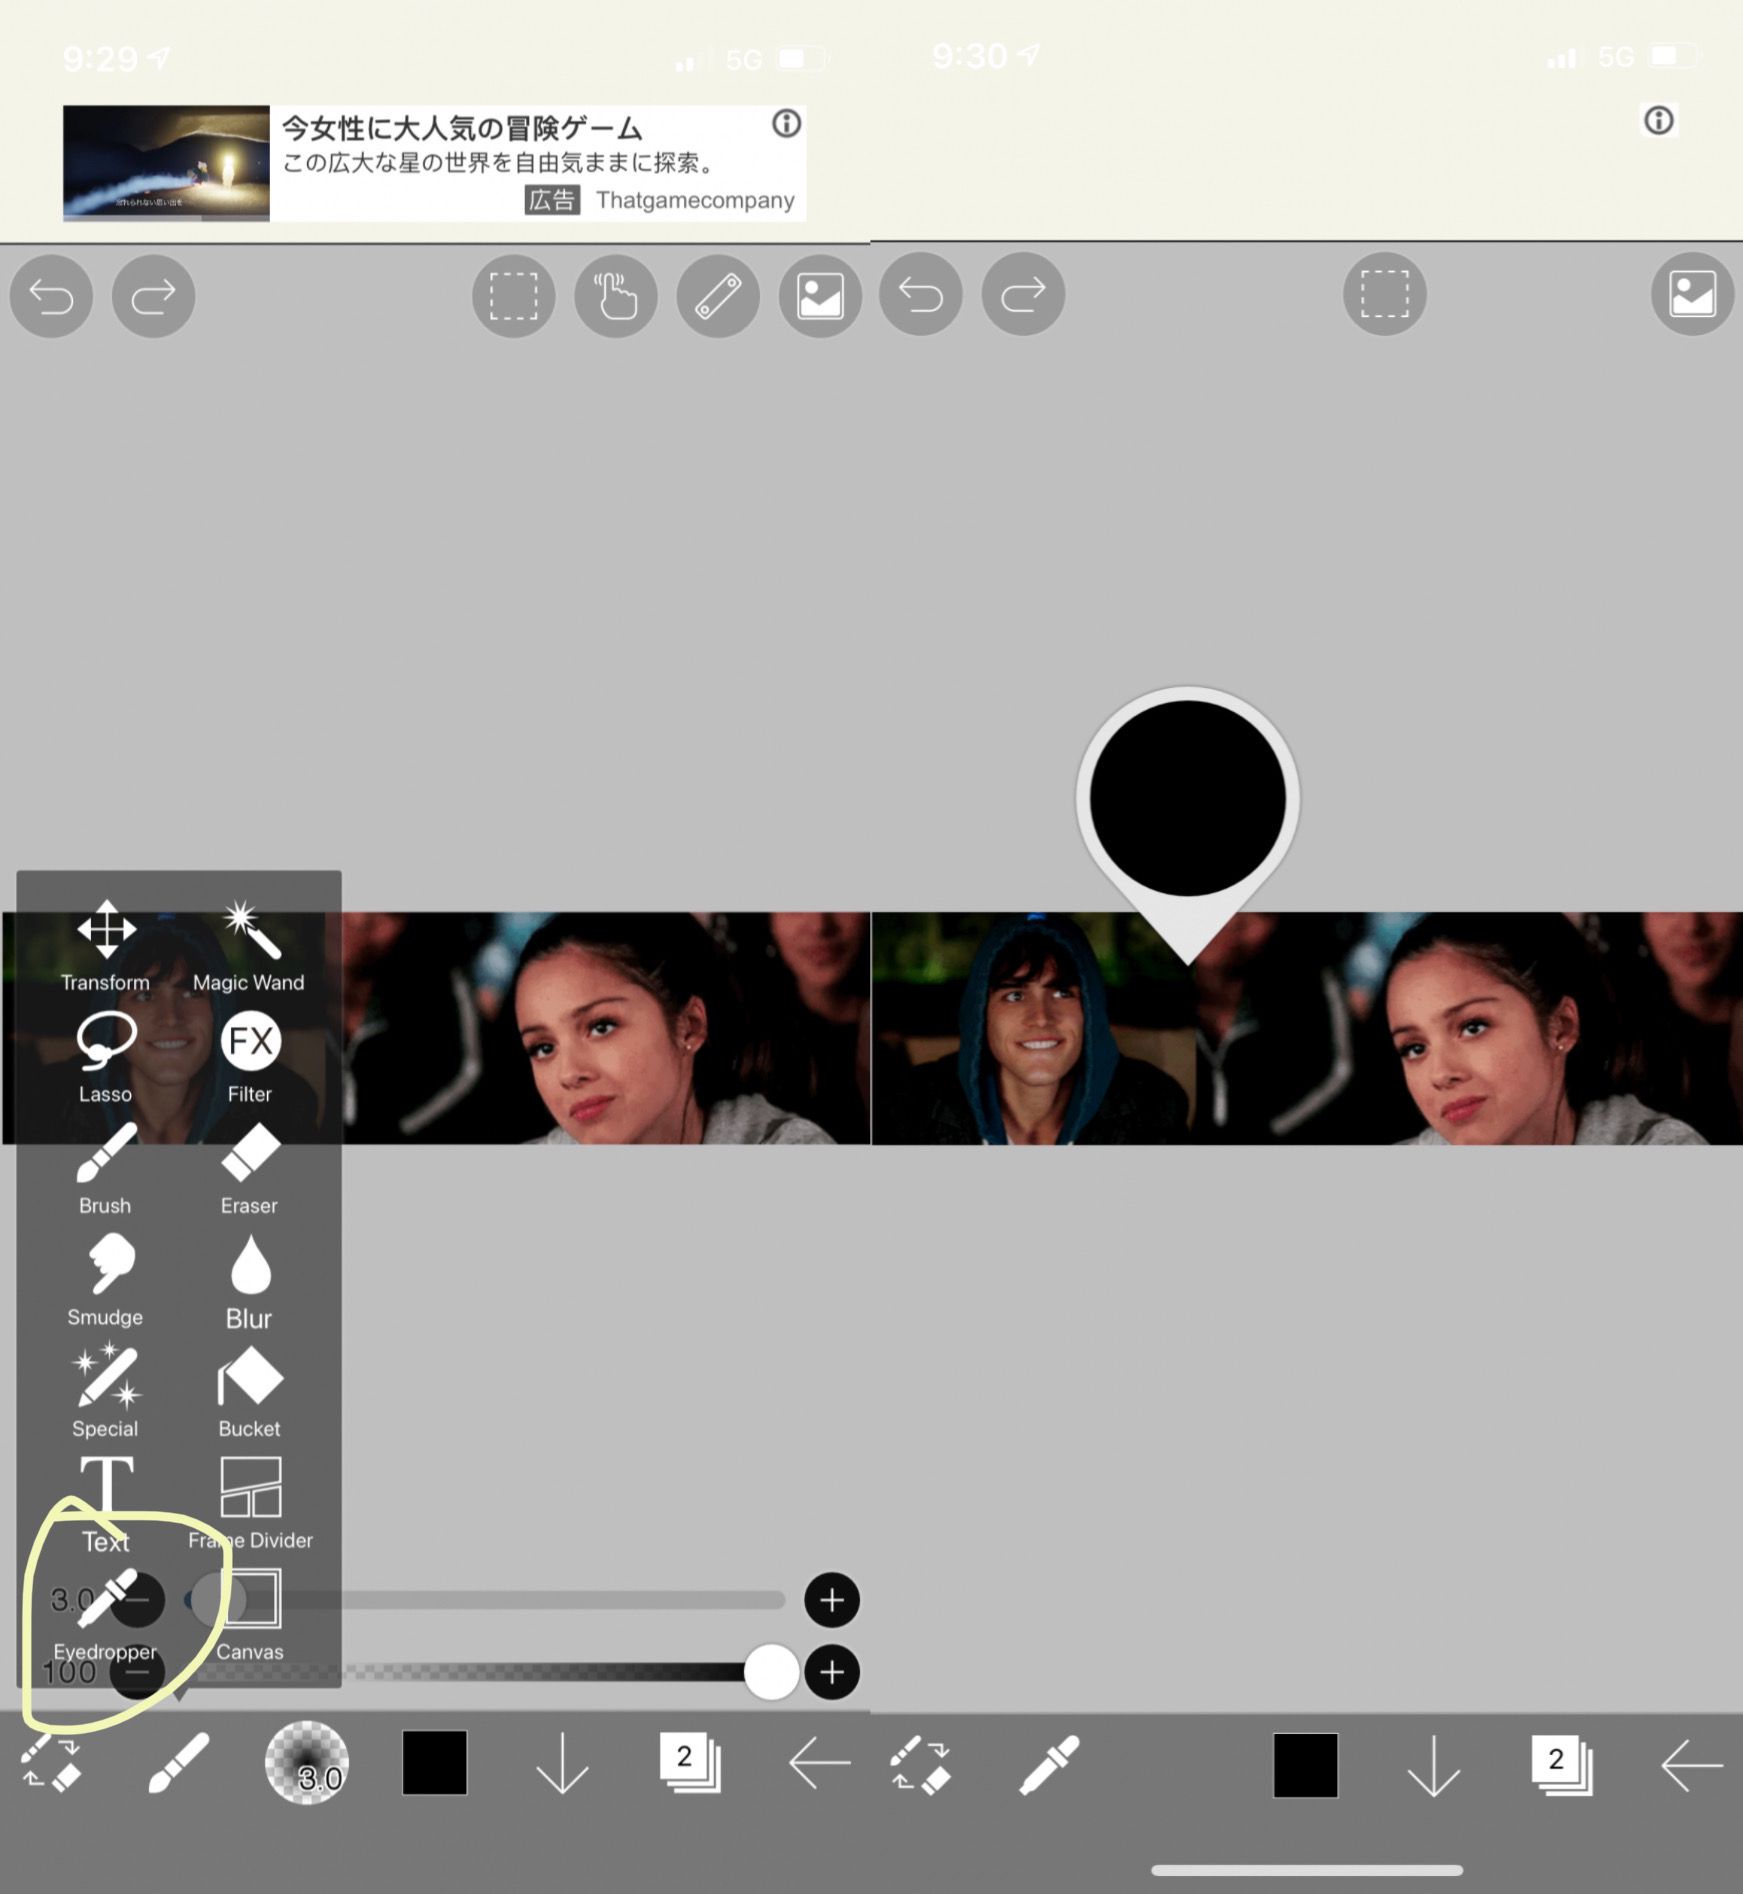
And now click that little square on square thing again and make sure you click the little eyes button on the layer the gif is in.

Now i know it looks crazy, but trust me! Click the arrow on the bottom right and click "save as transparent png"

Now head to Ezgif.com. Click effects, then click add overlay upload your gif then upload the image we just made on top of your gif!
Now obviously the gifs move, so make sure your drawing isn't covering up your faceclaims. Then click generate image and save that!!
I always make sure to do those steps before adding the text just so I can make sure everything goes well together, because if it doesn't , you can just go back to ibis paint x and fix what you need to!
Now we can finally add the font onto the gif. To do this you need to go to picsart and scroll over until you see the draw button. Click that.

After that click the little squares stacked on each other in the bottom right and make sure you click the eye next to the layer you gif is in.

Then click apply and scroll over until you see the add photo button in the bottom

Add the png of your text and put it wherever you would like!
After you save this, go back to ezgif.com and redo the overlay steps on top of the gif you overplayed with the drawing!! And that's your final result!!

And that's it! I hope this works for you guys, let me know if you have an questions!!
Reminder!!!! You guys don't have to credit me but if someone asks how you made it please don't take the credit!! I worked hard to figure out how to do this and I would love if you let them know that this book helped you!
Have fun creating ✨
Bạn đang đọc truyện trên: Truyen247.Pro