
My New Recipe!!!
I've always liked baking, but quarantine has taken this to a whole new level. I've been baking every weekend now, mostly brownies and cookies and the like (I have a serious addiction XD), and I wanted to try something new. So what better way to put my skills to the test than making my own recipe?
I now present to you... Chocolate Cookie Cups!!
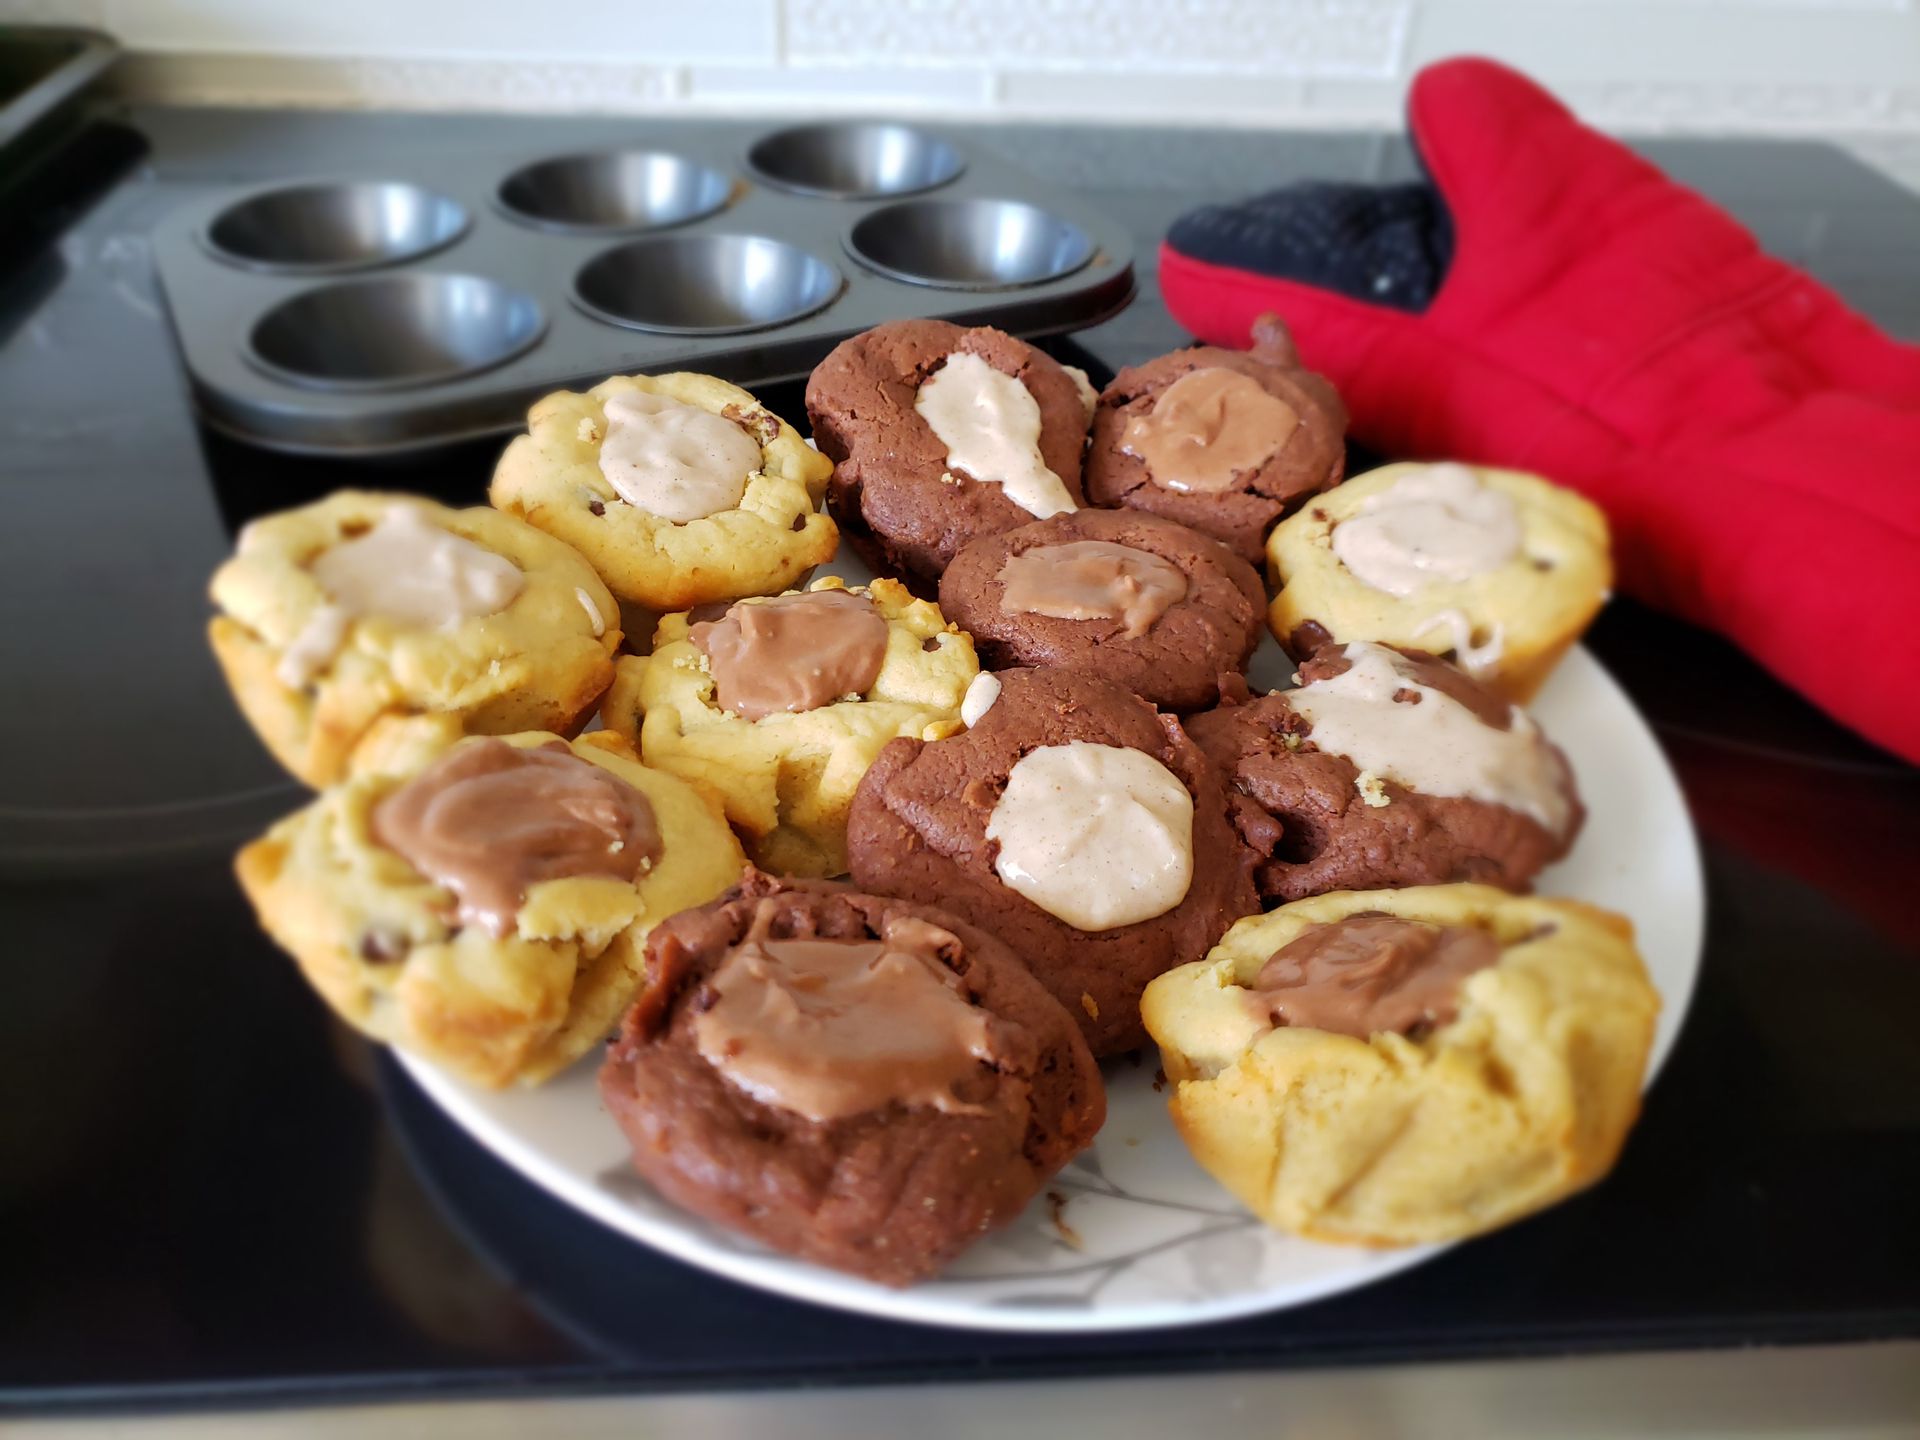
My family and I taste tested them two weeks ago now (spent a nice relaxing Friday baking!! :D), and they loved them!! They are basically little brownie / cookie cupcakes with a sweet sugary filling in the center.
As you can see I made two variants: chocolate chip cookie and chocolate brownie. There are also two kinds of fillings that I wanted to try: chocolate, and cinnamon sugar. As you can see I've mix and matched the cups and fillings because I wanted to try each possible combo.
I decided to share the recipe on here. Why not? You can try it out if you want. Or maybe I've just made you hungry.. hehe ;)
Before I forget: There were a couple recipes that I used to get inspiration and proportion sizes for this recipe. I will credit them in a comment below. Go check those out too!!
1 batch yields six of these goodies.. however if you're making both types at once, you'll get 12.
Baking time for chocolate chip cups: 20-25 minutes
Baking time for brownie cups: 23-30 minutes
Ingredients (Chocolate Chip Cookie Cups)
1 1/2 cup self-rising flour*
1 teaspoon cornstarch
1/2 cup margarine** ***
1/2 cup brown sugar, loosely packed
1/4 cup granulated sugar
1 large egg***
1 1/2 teaspoon vanilla
1 cup chocolate chips
Ingredients (Chocolate Brownie Cups)
1 cup plus 3 tablespoons self-rising flour*
1 teaspoon cornstarch
1/4 cup natural cocoa powder
1/2 cup margarine** ***
1/4 cup brown sugar, loosely packed
1/4 cup granulated sugar
1 large egg***
1 tablespoon vegetable oil
1 teaspoon vanilla
1 cup chocolate chips
*All-purpose flour can be used. For each cup of all-purpose flour, add 1 1/2 teaspoons of baking powder, and 1/4 teaspoon of salt.
**Butter can be used instead of margarine.
***Must be room temperature.
I'll go over the ingredients for the filling later in this part. Let's get to it!! Below are the instructions for the chocolate chip cookie cups. The instructions for the brownie cups are relatively the same but I will add any changes in underlined font.
1. Preheat your oven to 350 degrees Fahrenheit (175 degrees Celsius).
2. Mix the flour and cornstarch together in a separate bowl, then set it aside.
Mix cocoa powder with the ingredients above. In ANOTHER separate bowl, melt 1/4 cup of the margarine with 1/4 cup of the chocolate chips, let the mixture cool to room temperature.
3. In a larger bowl, mix together the margarine and sugars.
If you're wondering why we're mixing these before anything else, it's because they will form a nice cream when they mix together. You'll know when to stop when the mixture forms a nice creamy paste.
Add the remaining 1/4 cup margarine instead of the full 1/2 cup.
4. Mix the egg and vanilla to the margarine mixture. Do not overmix!
Add the oil, and margarine/chocolate mixture at this time also.
5. Add the flour mixture to the wet ingredients.
Make sure not to overmix the batter at this part. If you do, the consistency will thin out and the cups will have a cake-like texture instead of a cookie/brownie-like texture. Just stir it nice and slow (or set your mixer on low speed) and just let it go until it is all mixed together. If there is a little bit of flour left, that is okay- the chocolate chips still need to be added!
6. Add the chocolate chips to the dough.
Don't mix them, just fold them into the batter until they are evenly spread throughout it. When you're done, your dough should be thick and a little sticky, but it should feel like cookie dough. If your dough is too runny, it may have been overmixed. That's okay- the finished texture will just be a bit more cake-like; it will still taste the same.
The brownie batter will be more runny than the cookie batter, however, it should still be thick.
7. Line a regular-sized muffin tin with cupcake liners, muffin papers, or parchment paper.
This part can be a bit tricky if you're working with parchment paper, but once you get the hang of it, it's not so bad. If you're using muffin papers or cupcake liners, just put them in as usual and spray them with a bit of non-stick cooking spray. If you're using parchment paper, first spray the spots in the muffin tin with non-stick cooking spray. Then, cut the parchment paper into small squares (mine were about 5 by 5 inches, but there should be enough parchment paper to go up and beyond the sides of the muffin tin), and spray them with non-stick cooking spray. Hold them in the tin and fill them with batter to weigh them down. When filling them, just shape the parchment paper around the batter into a circle-like shape. If it cuts into the batter, that's fine, you get some interesting shapes out of it (like mine!).
8. Fill each lined space with batter.
You should fill each space all the way full, right to the brim, or as close as you can. Trust me, you will be using ALL the batter, and when I say all, I mean all. I had to scrape the bowl to be able to fill that last one. The reason we're filling them all the way full instead of two-thirds of the way full is simply so they have enough depth to put the filling in, as they don't rise that much.
9. Put them in the oven for about 20-25 minutes.
Bake them for the allotted time or until they have a slight golden colouring on top, and a fork inserted into their centers comes out mostly clean. If your cups turn golden before the 20-25 minute mark, take them out immediately. If 25 minutes has past and they still aren't golden, leave them in and wait until they are. If you like things slightly underbaked, just do the fork test. Leave them in the tin for some time (5-10 minutes, a bit more if needed) so that they can firm up and hold their shape, then take them out and put them on a wire rack or a plate to cool down. Wait about 20 minutes or so, then you can put them in the fridge. To do the filling process, the cups should only be slightly warm (almost room temperature).
The brownies should take up to 30 minutes, or take them out when a fork inserted into the center comes out almost clean.
While the cups are cooling it's a great time to make the filling. The filling for this is actually just a slightly runnier buttercream; it's very sweet, and once it sets it won't make a mess. Here are the ingredients! There are two types- chocolate and cinnamon.
Ingredients- Chocolate Filling
4 tablespoons margarine* **
1/2 cup plus 2 tablespoons icing sugar
2 tablespoons cocoa powder
2 tablespoons milk
1/2 teaspoon vanilla
1/4 teaspoon expresso powder (optional)
Ingredients- Cinnamon filling
4 tablespoons margarine* **
1/2 cup plus 2 tablespoons icing sugar
1 tablespoon ground cinnamon
1/2 tablespoon ground nutmeg
2 tablespoons milk
1 teaspoon vanilla
*Butter can be used instead of margarine.
**Must be room temperature.
1. Combine (cream) together the margarine and icing sugar.
2. Add the dry ingredients (cocoa powder for chocolate filling, nutmeg and cinnamon for cinnamon filling) and mix until combined.
3. Add the wet ingredients, mix until combined.
When making buttercream the resulting cream may either be too stiff/dry or too runny. There's an easy fix however! If it is too dry, add milk, 1 tablespoon at a time, until it reaches the right consistency. If it is too runny, add icing sugar, 1 tablespoon at a time, until it reaches the right consistency.
Now for the final part: filling the cups. This is actually really easy, and then they can be eaten!!
1. Using a spoon or melon baller, dig out a portion of each cup.
You're going to want to be careful to not dig too deep because you don't want a hole! I went about an inch deep when I did mine. And of course, the bits that you pull out are good for eating ;)
2. Scoop filling into each cup until the hole is filled.
Literally, it's this easy. You can use a piping bag to do this, but I just used a spoon and it worked out just fine.
You can mix and match the filling and the cups (like the pic above), or you don't have to fill them at all! Or create your own filling. The possibilities are endless :D
One thing that I will note is that the quantity of filling you get will be more than enough to fill six cups, so you'll probably end up with extra.
Anyways I hope you enjoyed this!! As you can see quarantine has given me too much time on my hands XD
Oh! These will last for a couple days (around 3ish) in an airtight container. Or they might not, depending on how fast they get eaten.
I guess I'll see you in the next chapter then. Stay safe everyone!! :D
Question: Has quarantine given you the time to do things that you couldn't before? If so, what? :O
Bạn đang đọc truyện trên: Truyen247.Pro