
FAKE TOPAZ - TUTORIAL
Hello friendsies, I'm baaaaack! Missed me? Doubtful. But I return with a tutorial, one of which many of you may find useful. Fake topaz on Photoshop. As of now, I do not know how to do this on any other software unfortunately, but I will be searching for a way. If you know a way, feel free to let me know & I'll add it in with credit :-)
BEFORE & AFTER:
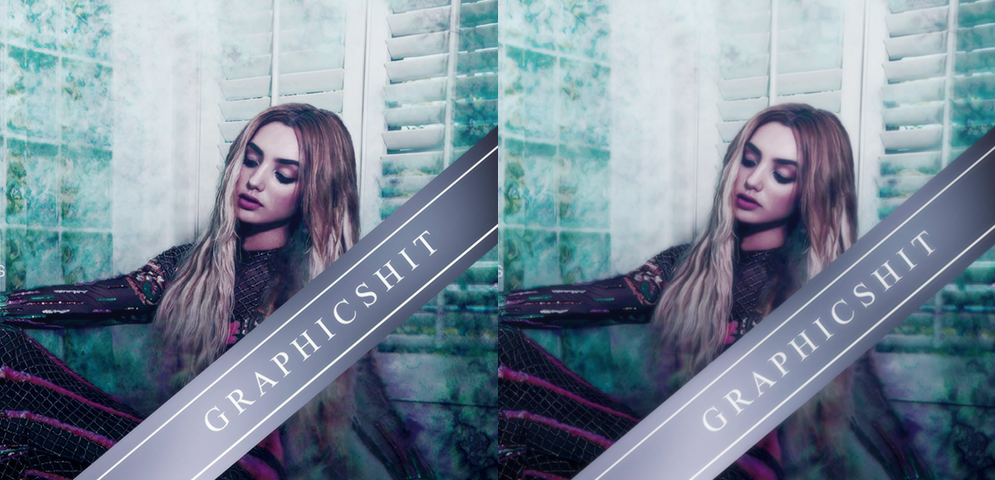
I did it on one of my old icons, the difference is extremely slight but definitely noticeable to me. I personally love the after way better. You can see it has more of a softness to it, this is great for fantasy themed designs & dark, mysterious designs.
STEP ONE
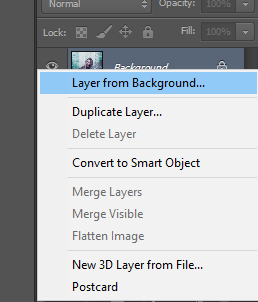
Duplicate your background layer.

It will then look like this. Do not change anything about this. I guess you can rename the layers if you feel like it, but there's no point because they're not going to last long.
STEP TWO
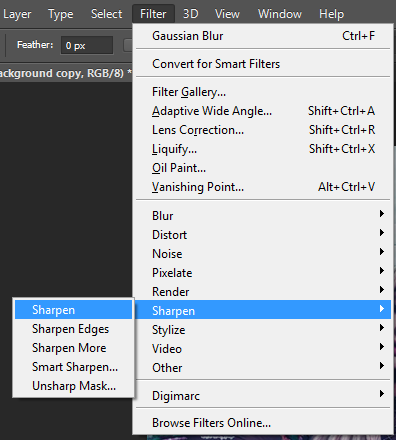
Find the Filter tab at the top of your screen. Locate the Sharpen section, and select the first option in it as I have.
STEP THREE
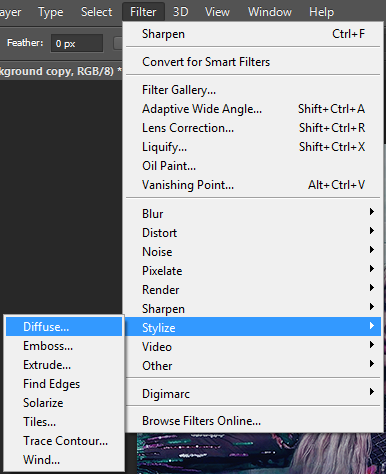
Go back to the Filter tab & find Stylize. Select Diffuse.
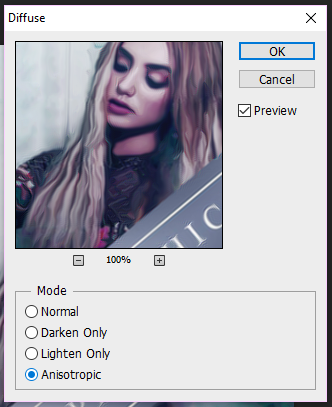
Once this pops up, make sure to select Anisotropic. It won't be preset to this & the tutorial won't work on anything else.
STEP FOUR

Change the opacity & fill of your copy layer to match this. Your fill can be slightly more or less, whatever looks best to you but keep in mind this is not the final step & more will be added on top of this, so don't make it too intense or your design will be blurry as hell.
Flatten the image.

Then duplicate it again. Do not skip this step or it won't work.
STEP FIVE
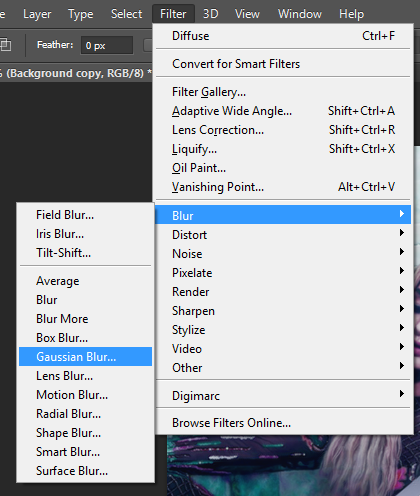
Filter > Blur > Gaussian Blur.

You can set it to a little more or less if you want to experiment, but I find this works best.
STEP SIX
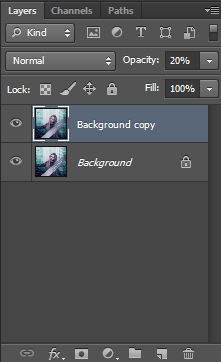
Set your opacity to this. Leave the fill at 100%. Again, you can definitely experiment & play around with the numbers to find a result you like, I just find this always works best for me. Usually my opacity for this layer ranges from 10%-30% (anything over 30 is too blurred, in my opinion)
You can flatten the image again if you like, or you can just save it.
Bạn đang đọc truyện trên: Truyen247.Pro