[14] tear effect
This is similar to the paper tear. But, instead, it's going to look like a rip in your image itself. Probably makes no sense, so I'll just get right into it.
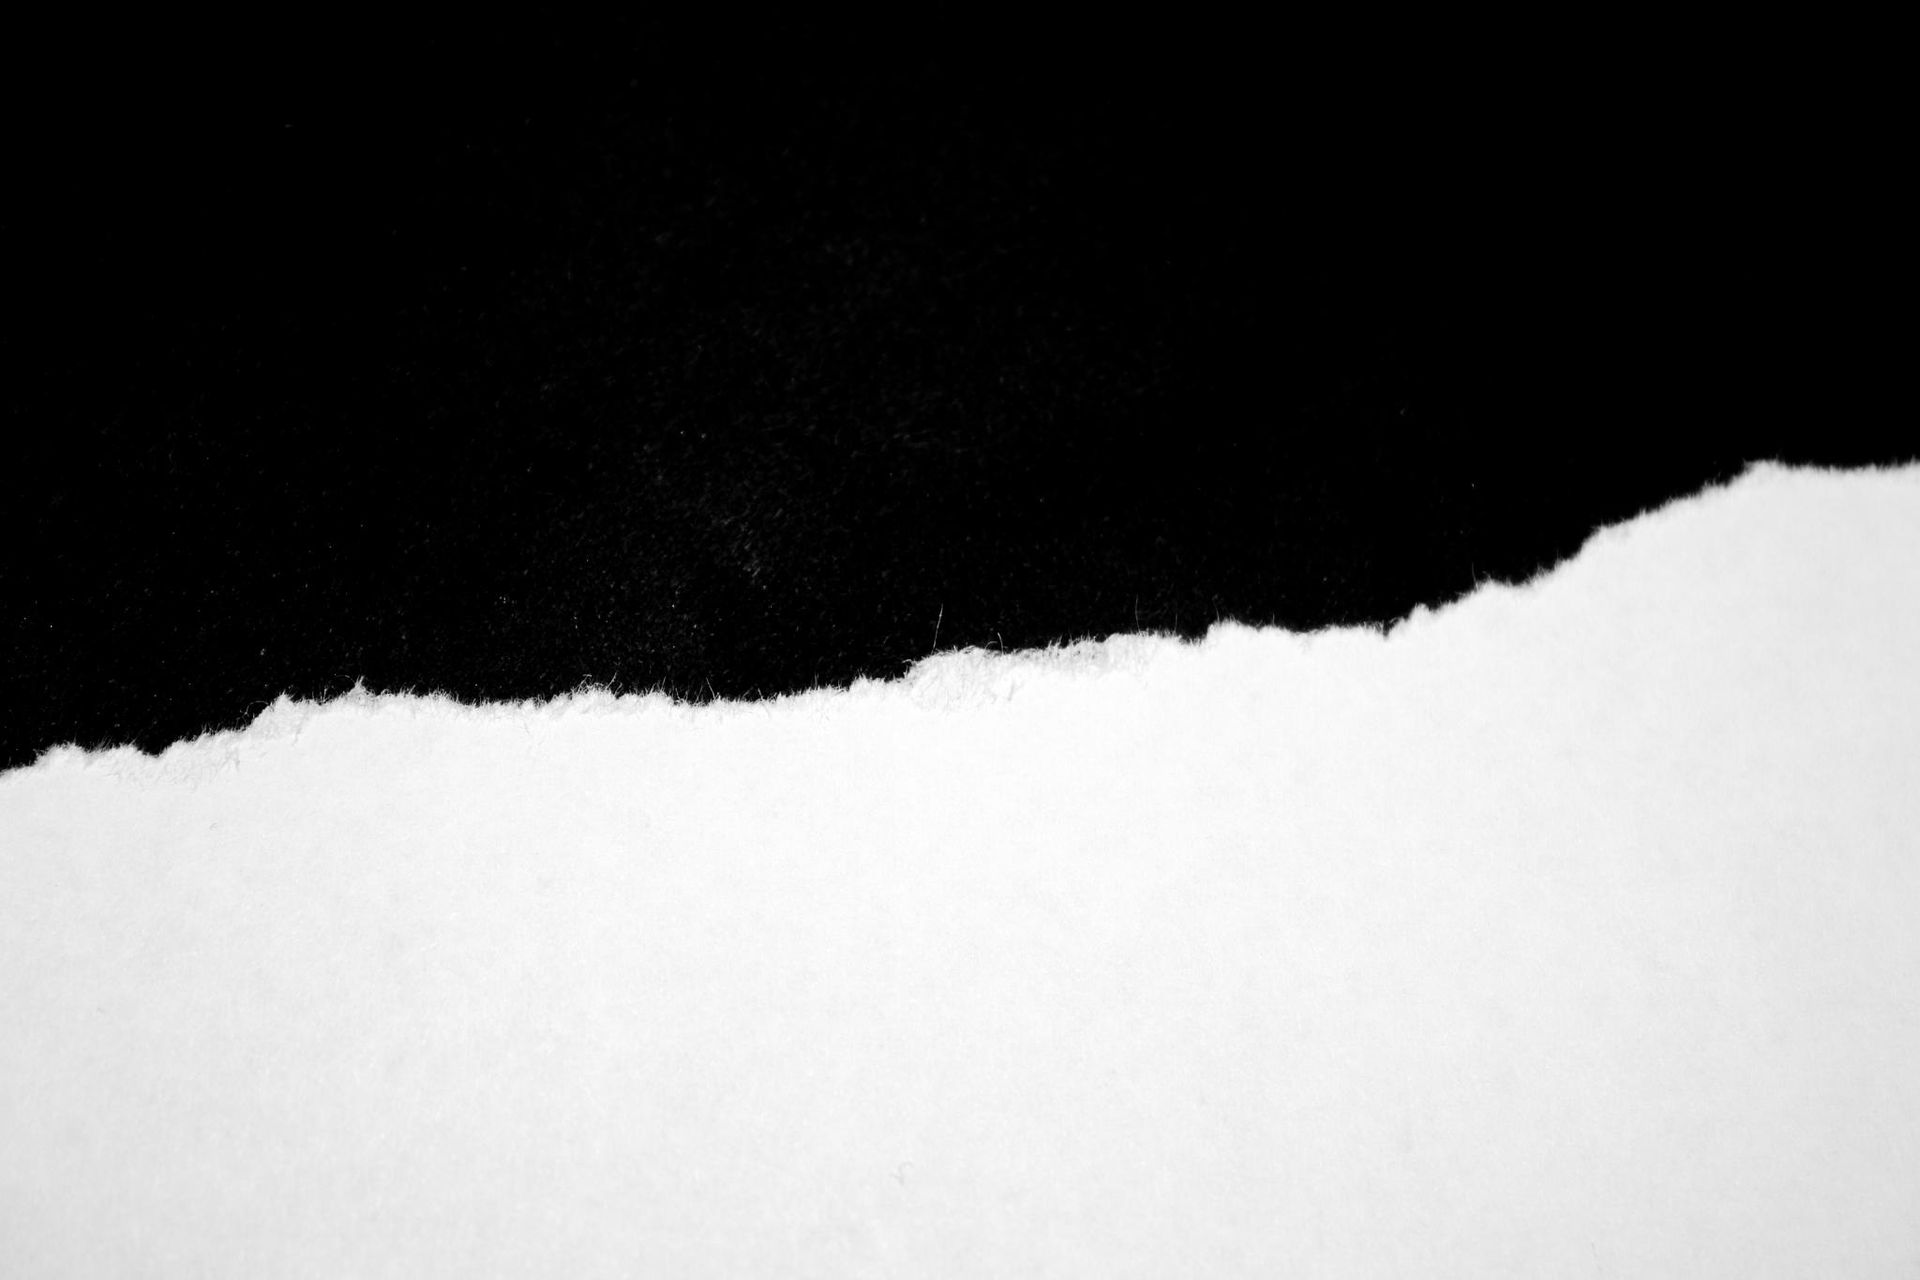
EXAMPLE TEXTURES:


s t e p - o n e :
Open your image in Pixlr Editor. I prefer to use this on a person.
s t e p - t w o :
Open a new image as layer. This will be the paper tear. I have provided you with a few. If you choose not to use one of those, keep in mind this paper tear should not be a transparent. You want there to be a black side to it (if that makes any sense).
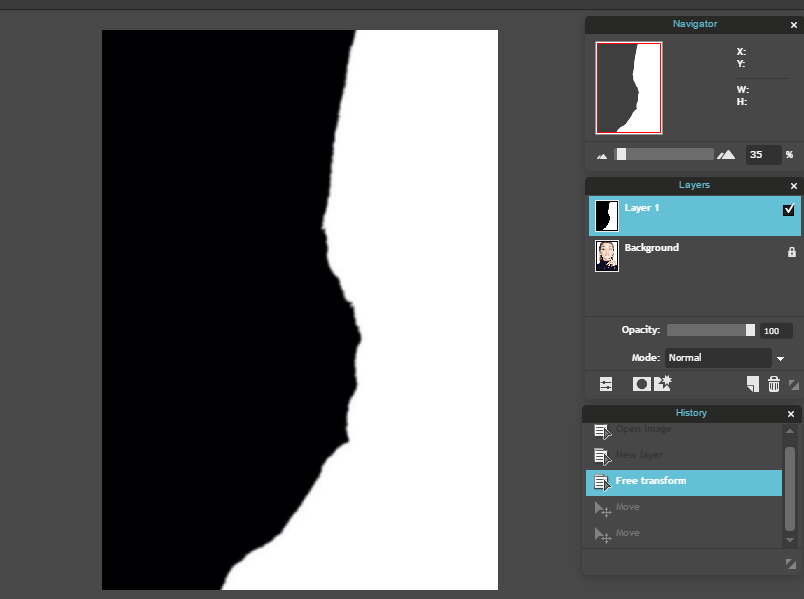
Go up to "Edit" then "Free transform..." and move it around until it fits your image.
s t e p - t h r e e :
Select the Wand tool in your toolbar. You can leave the tolerance at about 21, which is usually the preset. It does not matter if it is perfect or not.
Select the white part of the tear. Once the selection is complete, press the Backspace key on your keyboard (or manually erase it, if that does not work for you).


s t e p - f o u r :
Deselect by pressing CTRL+D (or command) or by going up to "Edit" then "Deselect all".
s t e p - f i v e :
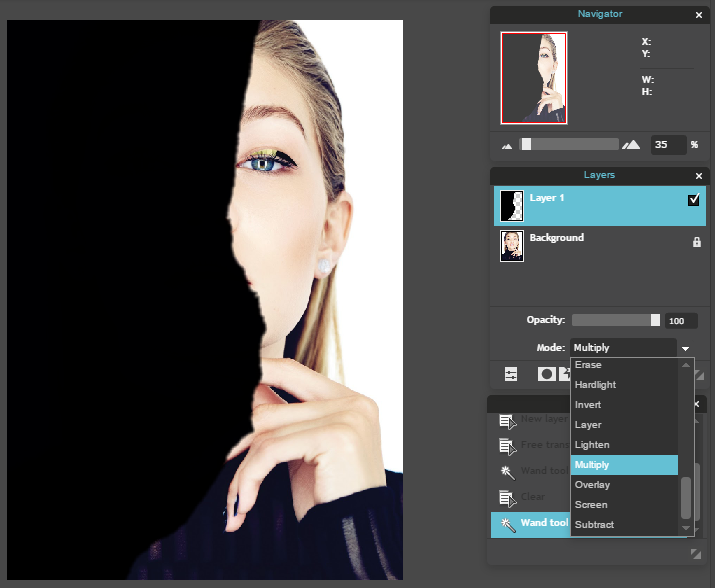
Change the Mode of the layer to "Multiply".
s t e p - s i x :
Select the Eraser tool. Change the size to about 200 to start with - you can go smaller as you get closer to the edge. Make the hardness around 80.
You want to erase the black part until it is just a somewhat thin and ragged line.

s t e p - s e v e n :
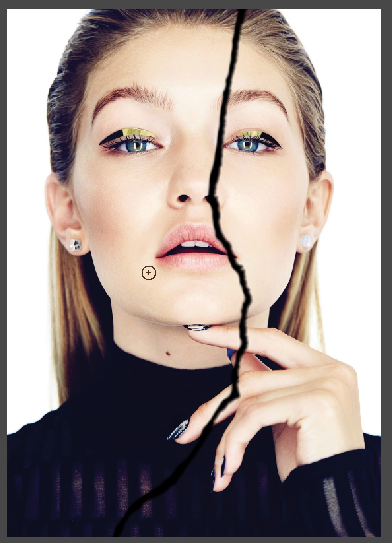
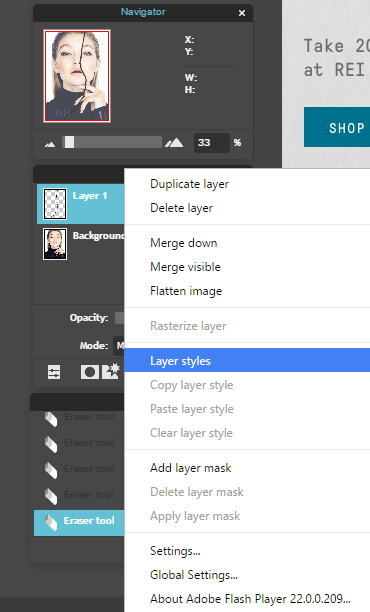
Right click on the tear layer and select "Layer styles".
Check the box next to "Drop shadow" and click on the words so more options show up to the right of the window.

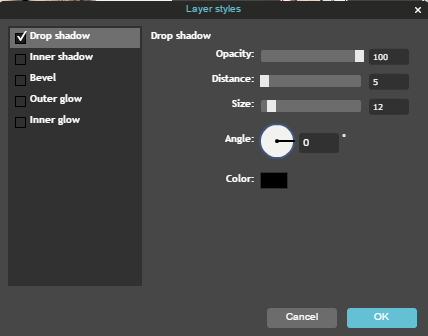
s t e p - e i g h t :
Play around with the bars until you have the desired look. You're wanting it to look as if the other side of the image is popping out at you. Below is what I have mine set to.
s t e p - n i n e :
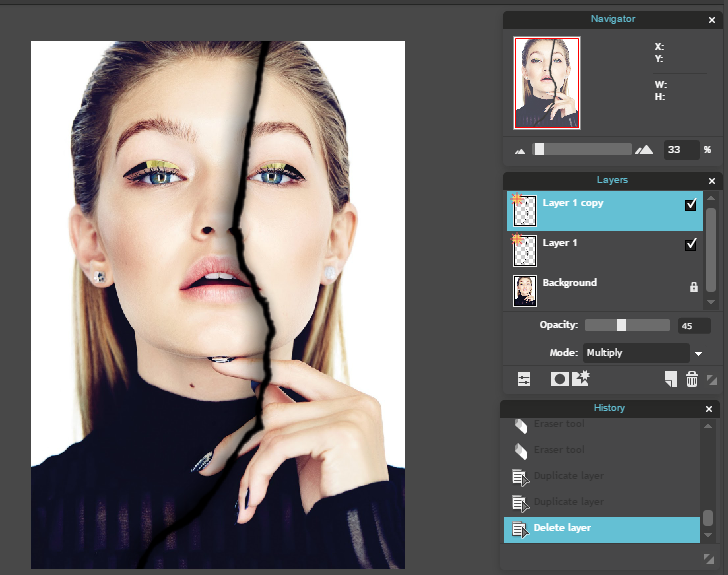
[OPTIONAL] The shadow isn't always dark enough. If this is you, right click on the layer and select "Duplicate layer". If your settings were like mine, now it is too dark. Change the opacity of the layer until it looks right. You can also go back up to the layer styles and alter those.
s t e p - t e n :
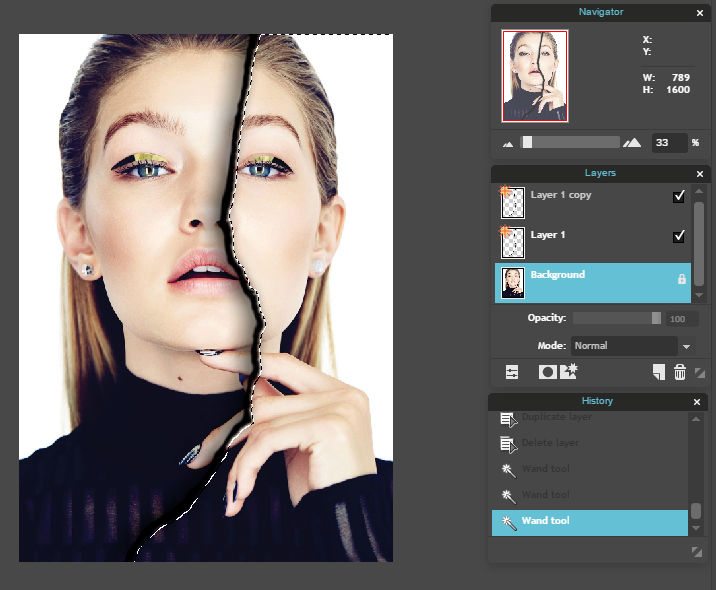
Select one of the tear layers. It does not matter which one. Go up to the wand tool and click on the side of the image that is popping out. In my case, this is the right side.

s t e p - e l e v e n :
While this is still selected, go down to the original person layer (background for me) and click on it.
s t e p - t w e l v e :
[MAKE SURE YOU ARE ON THE PERSON LAYER] Go up to "Adjustment" and select "Desaturate". This will make that side black and white.
If you want it to be a different filter, go ahead and do that by playing with the Adjustments/Filters available.
When done, deselect.
(side note: If the entire side of the image did not turn black and white, aka there's still a bit of color on the edge of the tear, just select the tear layer(s) and move them over so they cover that part).
And you're done!
Bạn đang đọc truyện trên: Truyen247.Pro