motion blur: tutorial 1
hey guys! alright, since a lot of people have been asking me how I do the font for Shiver, I'll give you a tutorial on photoshop CS6 on how to do it.
If any of you are interested in reading it or supporting it (it's a sci-fi/dystopia with a psycho female lead), I've put the link in the external link section at the end of this chapter.
Anywho:
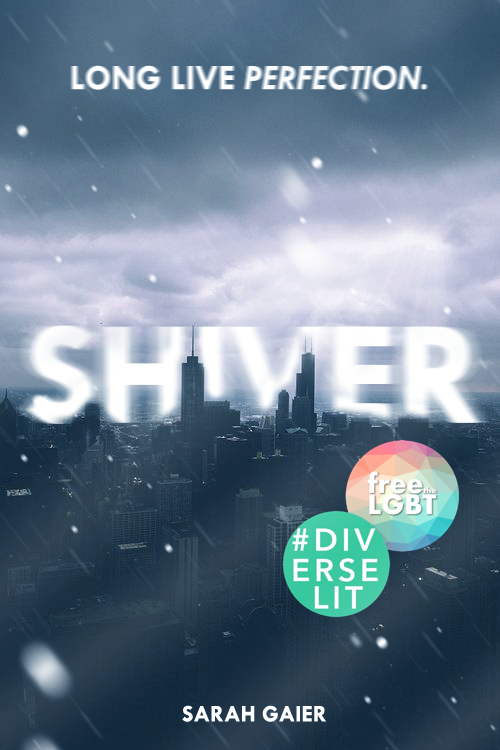
cover-text inspiration ;
( ignore the subtitle )
What is motion blur?
Motion blur is a form of blurring that can go in any direction at whatever angle you want, to give the impression that an object has moved, etc. In this case, I've used it to create a cold, 'shivery' feel for the cover, that fits the story.
let's get started.
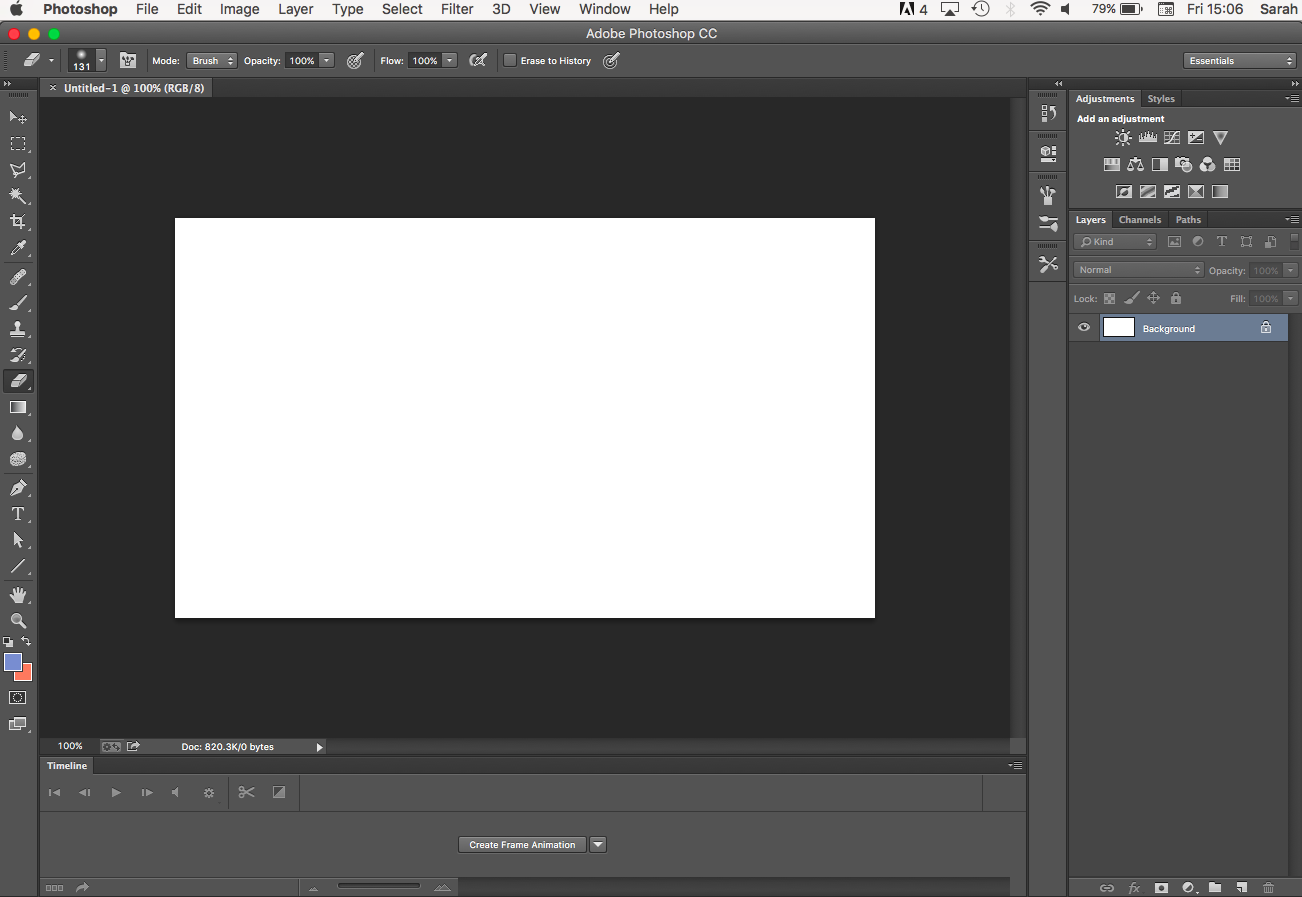
Step 1: open up a new document.
For this one, I've used the dimensions of 700 x 400 [ w x h ]. Dimensions don't really matter here, though, so don't worry about that.
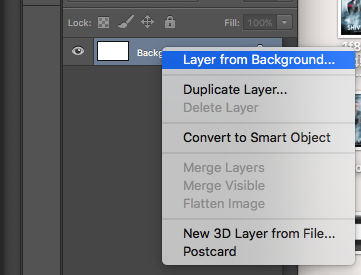
Step 2: Right-click on the layer called 'background' [highlighted in blue above] and select 'layer from background.' This will transform your background into a layer so you can easily move it around or un-see it. This is more of a practicality step.
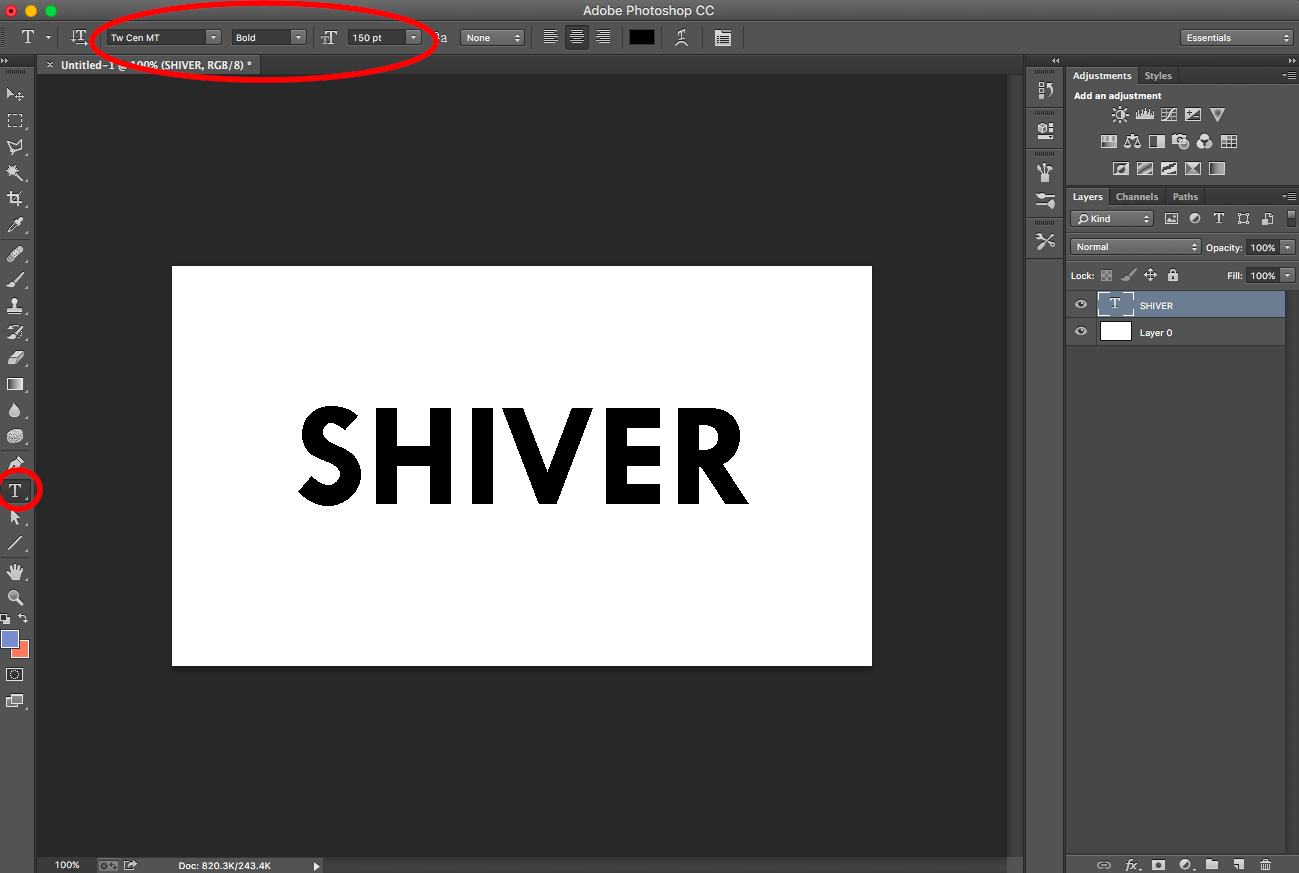
Step 3 (optional): Font
The font I've used in the cover is 'Tw Cen MT'. You don't have to use the same one, but if you don't have it and you want it, download it at www.dafont.com .
Step 4: Writing
Click on the text symbol on the bar to the far left of the page. Pick whatever word/words you like. In this case, I've used 'Shiver,' and made it black and bolded so you guys can see it better than me doing it in white on a transparent background.
The font size is 150 pt. Use a large font size, but make sure it doesn't completely fill the page.
Step 5: Rasterize
Once you're sure about your word choice, rasterize your layer by right-clicking the text layer (highlighted in blue above) and choosing 'rasterize layer' or 'rasterize type.' This will transform it into an image so you can blur it.
warning: rasterizing means that you can't edit your word any longer.

Step 6: Duplication
Because you want to motion blur this but still make it legible, you're going to need to duplicate the text layer several times.
Right-click the text layer and select 'duplicate layer.'
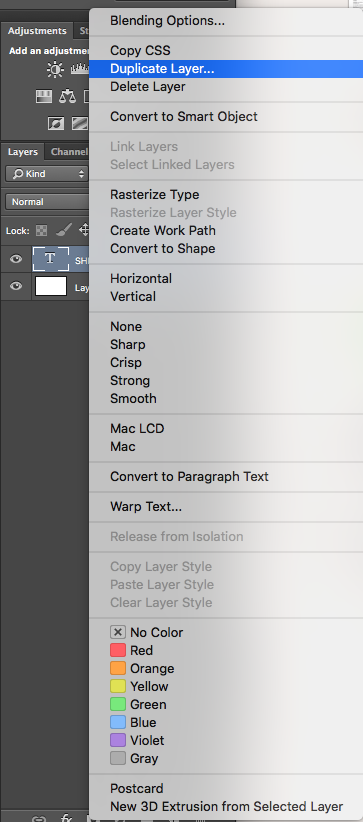
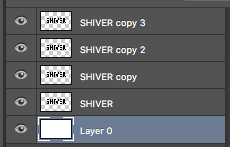
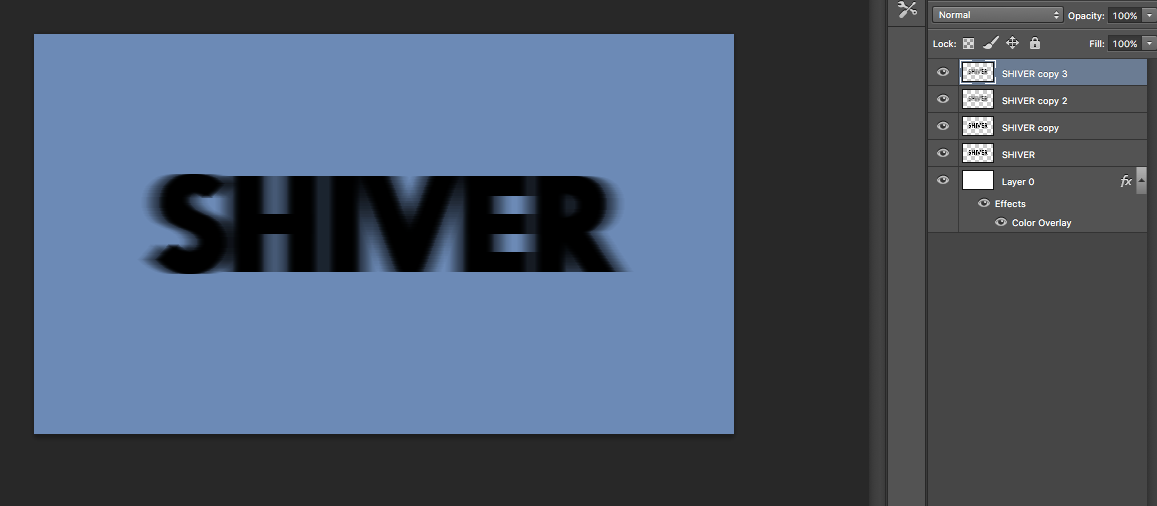
Do this until you have 4 identical layers. Your layer list should look like this:
Step 7: Motion blur
Select one of the text layers.
On the top bar of your screen, select the following: filter > blur > motion blur.
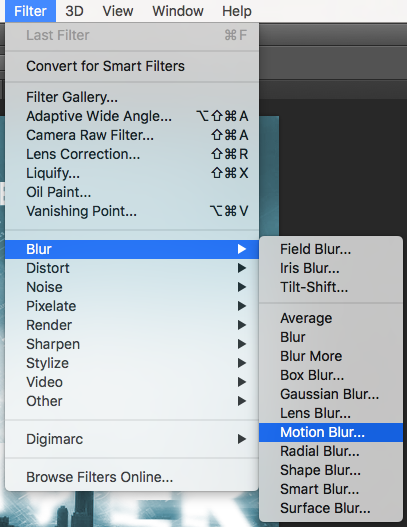
You should get a pop-up like this:

The distance will judge how much the word blurs, and the angle is at what position the blur occurs. Since we're going with a left-to-right blur, make sure the angle is 0º.
For the first layer, select a distance of around 10 pixels. Click OK.
For the second layer, go to filter > motion blur directly. This will duplicate the motion blur of the first layer and give you a bold, blurred text version that will ensure legibility. You should have something that looks like this:

For the third layer, go to filter > blur > motion blur and select a distance of 35-50 pixels. I picked 46.
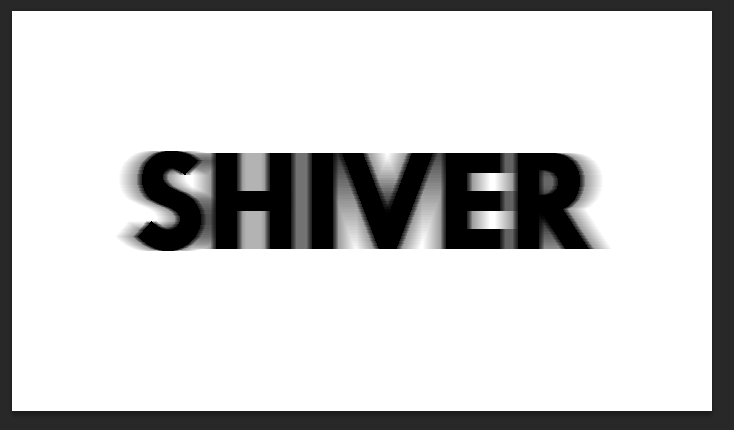
And now, for the final layer, select a distance of a number in-between 10 and your highest, previous value.
I picked 30 pixels.
your final result should look like this:

Step 8: Colour change of the background
This is simple. Don't like the colours you've used?
Double-click on your layer labelled 'Layer 0.' You should have a pop-up like this:

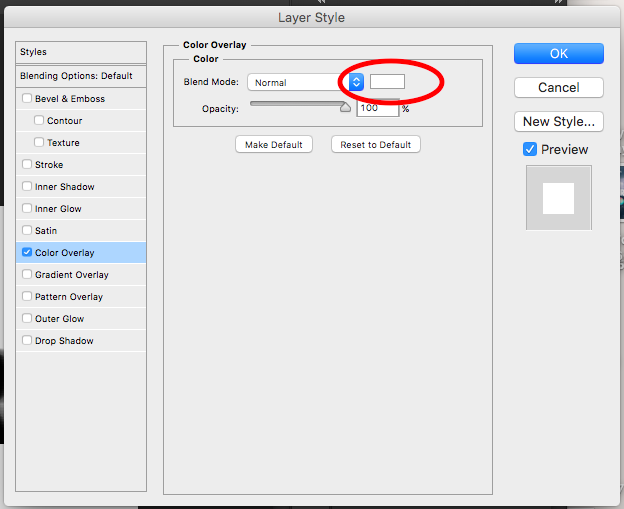
Go to colour overlay
Click on the rectangle I've circled for you as shown in the picture below, and select whatever colour you want. When you're done, click OK.
I picked a shade of blue, and my sample now looks like this.
Now, for the text change.
Step 9: Changing the text colour
Select the 4 text layers and right click. Click the option that says: convert to smart object. This will merge your layers into one.
Double click on your new, merged layer, and repeat the step from above to change the colour.
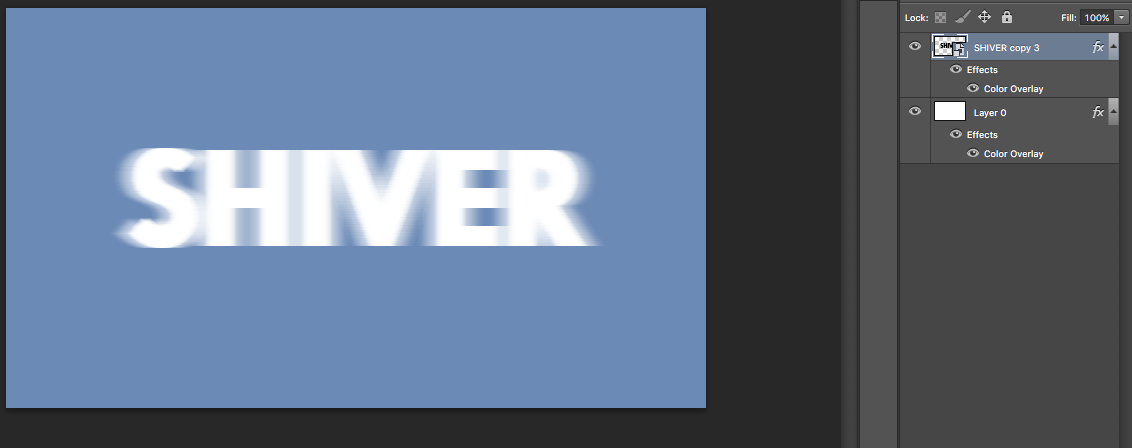
If you want to have a transparent background, simply click the 'eye' button next to 'Layer 0.'
Step 10: Save
Go to file > save as > save as a png > save to save your final picture. Now, use it for whatever graphic you'd like!
I hope this was helpful!
Leave your comments below on what you think I should improve on, and how you found my first step-by-step tutorial!
Also, feel free to pm me or comment the links to your finished artworks. Any story advertising links will be deleted.
For more graphics, don't forget to follow my main account, stardust24601, and thank you to everyone who drops by and takes a look at Shiver!
Love,
Sarah
Bạn đang đọc truyện trên: Truyen247.Pro