xxxix. glow tutorial
GLOW TUTORIAL
heyo y'all! this is a tutorial on how i add a glow effect to my model on photoshop!
STUFF NEEDED!
any version of photoshop, a background, a model, a psd (optional) and basic knowledge of tools and filters
let's get started!
STEP 01. ━ open a new document with any dimensions of your choice, and drag your background and model into it, and rename the layers respectively so as to avoid confusion
here, i'm using a background from pexels, my model is emilia clarke; i got the png as a part of a zip file on deviantart, and my psd is called genius mind!
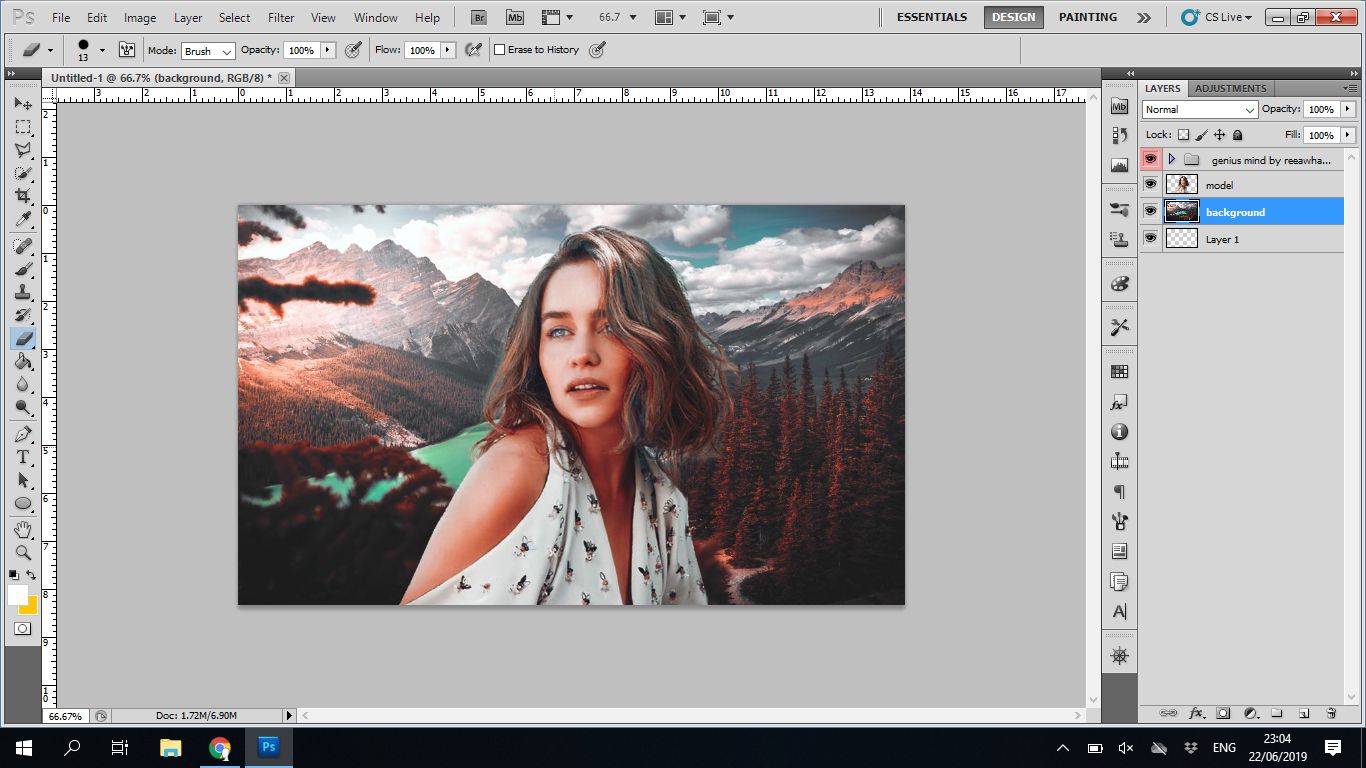
this is the part where you will want to do any desired adjustments to your model, such as changing the eye color, playing around with the contours, etc. but make sure you merge the adjustment layers into your model's layer, this is just to avoid confusion!
STEP 02. ━ create a new layer between your model and background, and call it outer glow.
STEP 03. ━ select your model's layer. now, this will be a tricky part if you don't read carefully. whenever we create a layer, we can see a scaled version of what the layer contains in a rectangle and the layer's name next to it. right-click the rectangle, and not anywhere else. or else you won't get the drop down menu you'll need.
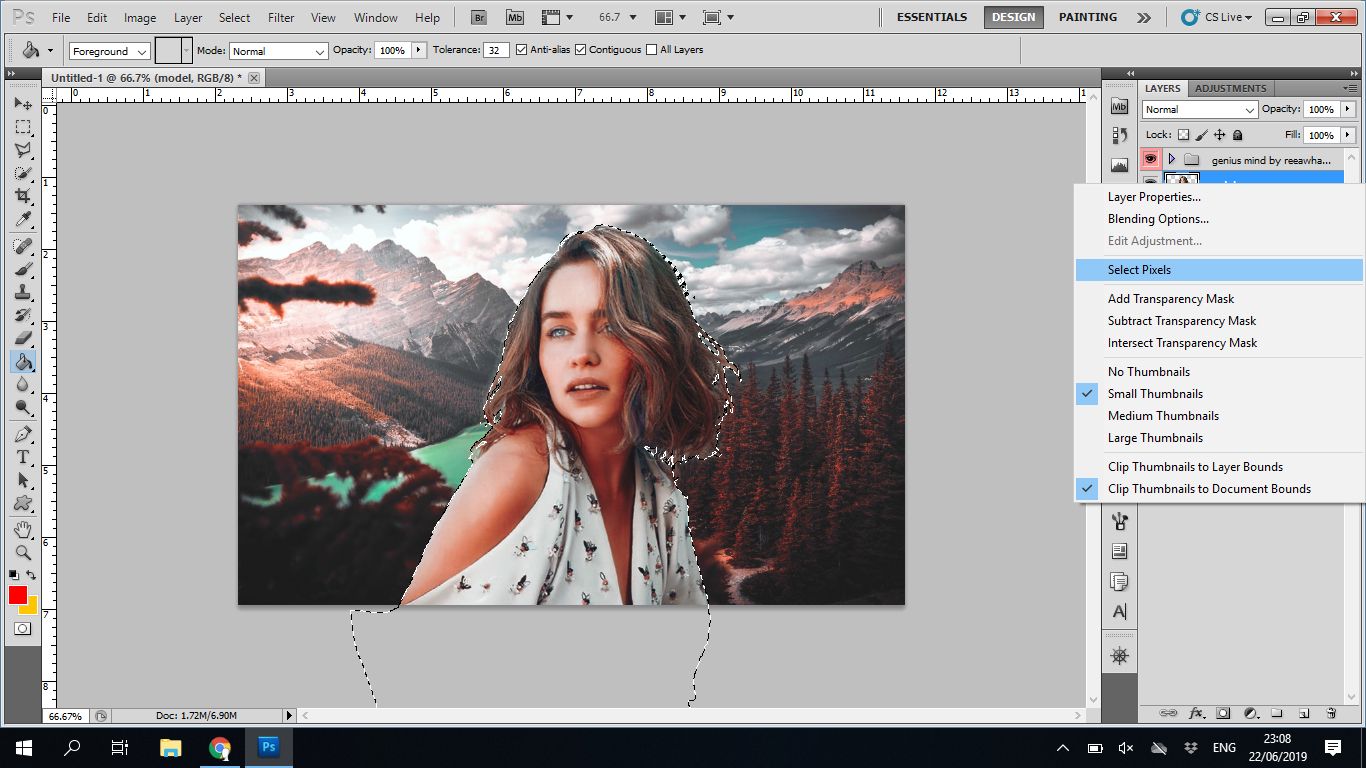
when the menu appears, choose 'select pixels'. you'll then see that your model has been selected on the canvas.
STEP 04. ━ now, select the outer glow layer (this is very important!) and disable the model's layer by clicking on the eye icon. select any cropping tool, such as the lasso tools, the marquee tools, wand tool or quick selection tool. make sure you don't accidentally deselect the model's outline. place your tool within the selection and right-click it. a drop-down menu will appear, and you'll see the option 'fill'. select that.
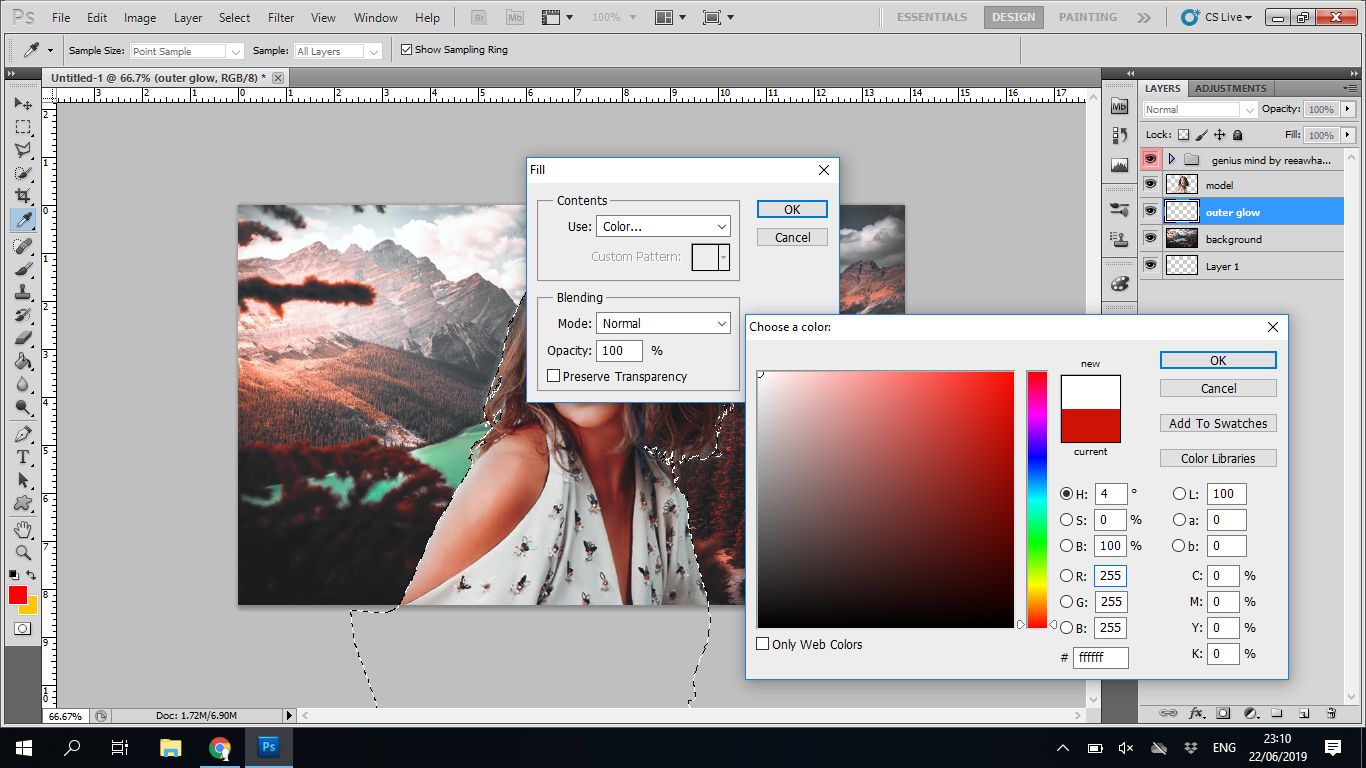
another menu will pop up, where you can control the fill adjustments. under contents, you can see the title 'use:' and an option next to it. click on the arrow and select the option 'color'. do this even if your option came up as color since you'll need the 'choose the color' window to come up. select any bright color you'll need your outer glow to be, and i'm using plain white. after you've done this, click 'OK' and close all the windows. you'll see that a silhouette of the color you chose for you glow on the canvas. deselect the model's selection and make your model's layer visible so that the silhouette is now covered.
STEP 05. ━ go to filter > blur > gaussian blur, making sure the outer glow layer has been selected. play around with the radius options until you get your desired outer glow effect. i suggest the pixels to be somewhere between 25 - 40. i used 34.5
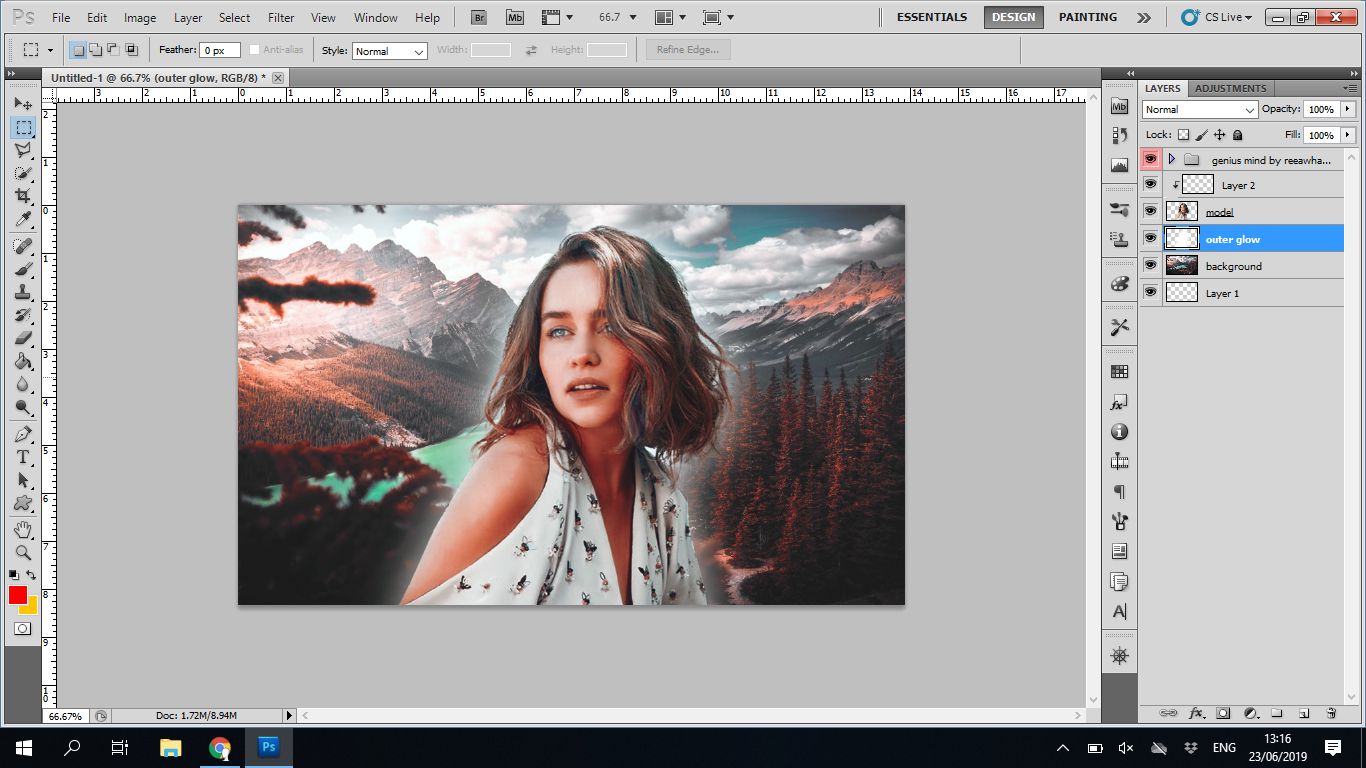
this part is optional, but you can set the layer adjustment to screen. it doesn't really make a difference but believe me when i say that it gives a transparent-ish effect to your outer glow instead of making it look super solid.
STEP 06. ━ create a layer between your psd and model and call it inner glow (i forgot to rename it before i took that screenshot from step five, but i'm talking about layer 2 here if someone needs a reference). when you right-click on the layer this time, you can't have your cursor on the scaled icon of your layer. a drop-down menu'll come up, a select 'create clipping mask' or use control/command+alt+G as a shortcut. creating the clipping mask is really crucial!
STEP 07. ━ repeat step 3, but replace the outer glow layer with the inner glow in the instructions. use any selection tool (examples given in step 4), right-click, and select the option 'select inverse'. this action will select all parts on the canvas excluding the model's layer.
STEP 08. ━ repeat step 4, selecting the inner glow layer instead of the outer glow. you won't have to worry about the color this time, since photoshop automatically defaults the previous selections. but check it just in case the color isn't the same as your outer glow. after you click the 'OK's and close the drop down menu, you won't be able to see the color, but trust me, it's there on the canvas. if someone's curious, this is what it'll look like without the clipping mask

STEP 09. ━ repeat step 5 without using the layer adjustments option. instead, you can change the opacity settings. i suggest the pixels adjustments for the blur somewhere between 15-30. i used 17.6, and set the layer's opacity as 80%.
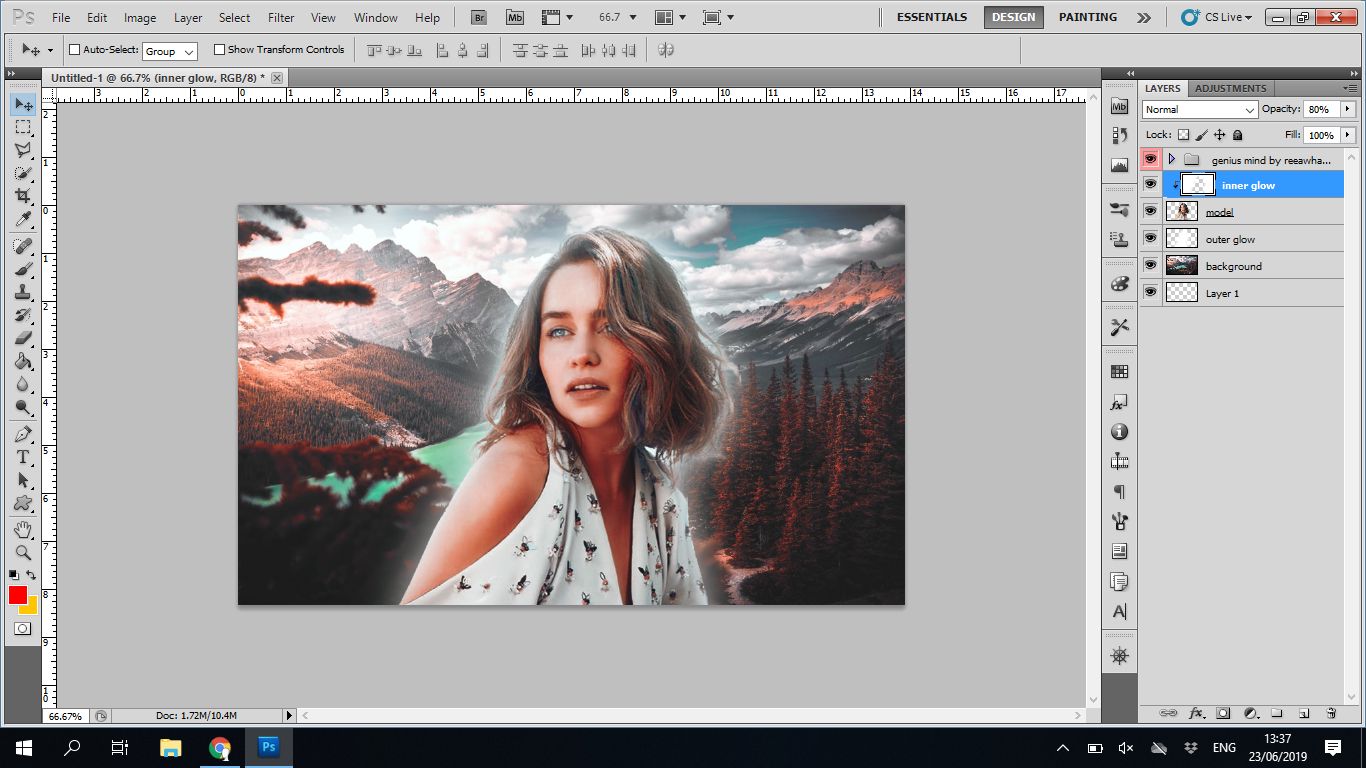
AND THERE YOU HAVE IT! A GLOW EFFECT IN 9 EASY STEPS (that is, if you understood anything from this tutorial, lmao)
ik people usually use the paint brush tool but i feel this method is easier and neater
i'll show a side by side comparison of using the paint brush tool and my method!
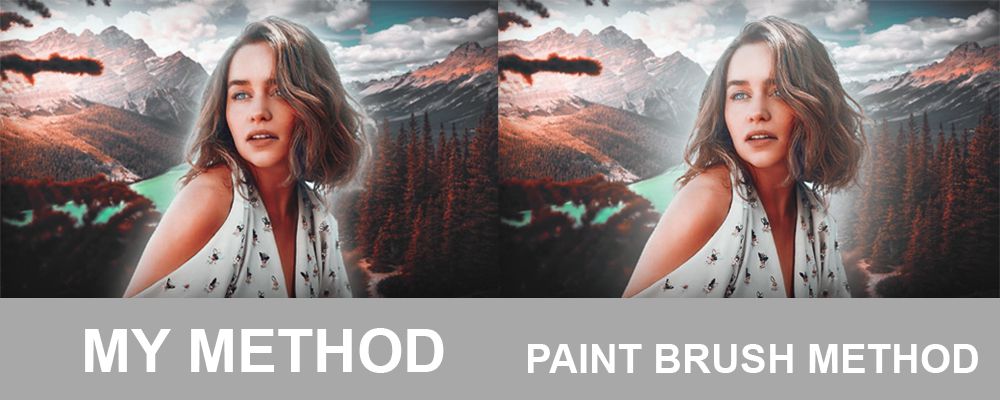
i'm asking you, which one looks better?
i hope you guys will find this helpful! if you have any queries about anything from this tutorial, or want any links, just comment it down, i'll be more than happy to help!
do y'all want any other tutorials?
Bạn đang đọc truyện trên: Truyen247.Pro