
Taylor Swift (process and products)
Hi! So the lovely @Nithalana asked for a tutorial and the list of products I used on my Taylor Swift drawing that I posted earlier. I can't really do video tutorials, but I did take pictures at different steps in the process that I would be glad to share with you! A list of every product used will be posted at the bottom of this chapter.
Step 1: Finding a reference.
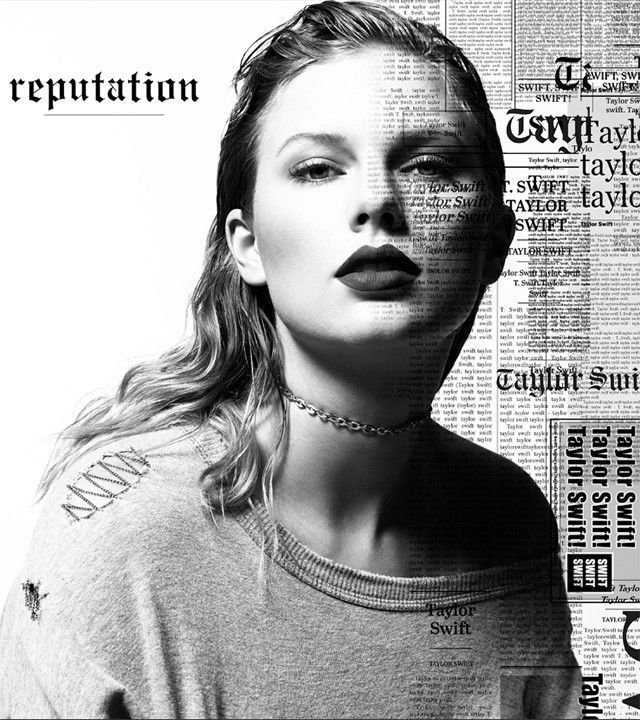
This is basically what I used as a reference as a guide for my drawing. Obviously, I didn't add the words because that would have been crazy hard and would take the attention away from the subject, i.e. Taylor.
Step 2: Rough sketch.
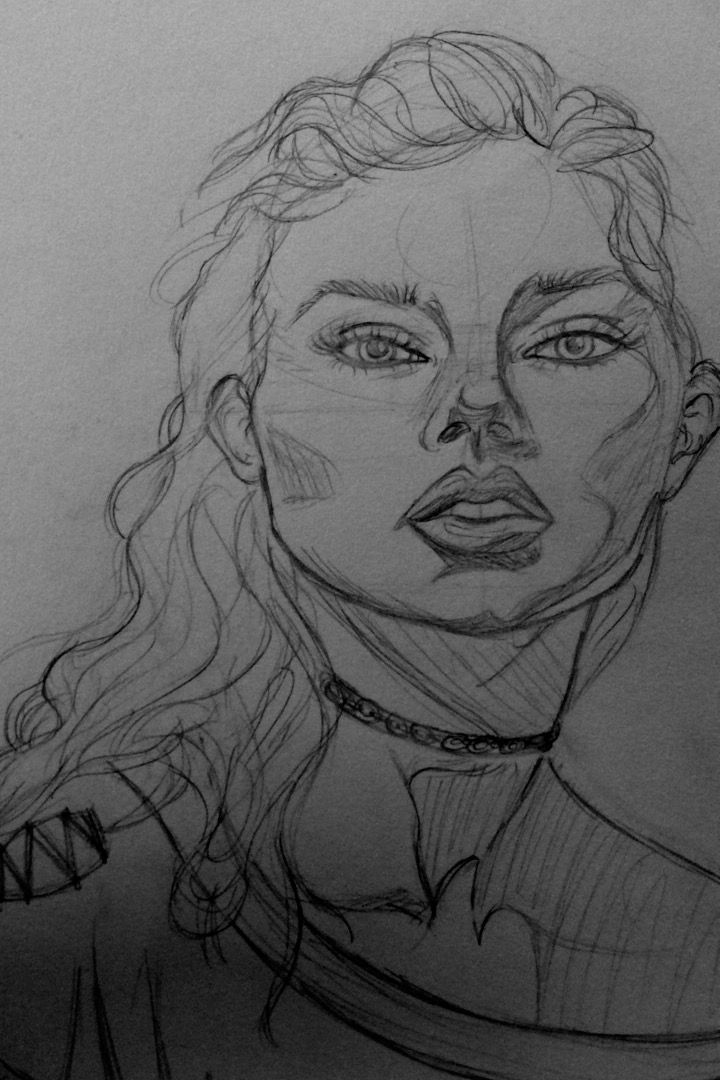
This is the point where I make a ton of mistakes, but I just allow it because I want to be able to see the whole picture. Obviously, one of the eyes is completely disproportioned and it throws the whole drawing off. I'll fix it later. Also, you can see where the choker is, it's just kind of two lines with circles inside. This is me giving myself a guideline so that I don't just try to make everything too detailed too quickly. You can also see I mapped out facial structures here.
Step 3: Clean up the rough sketch.
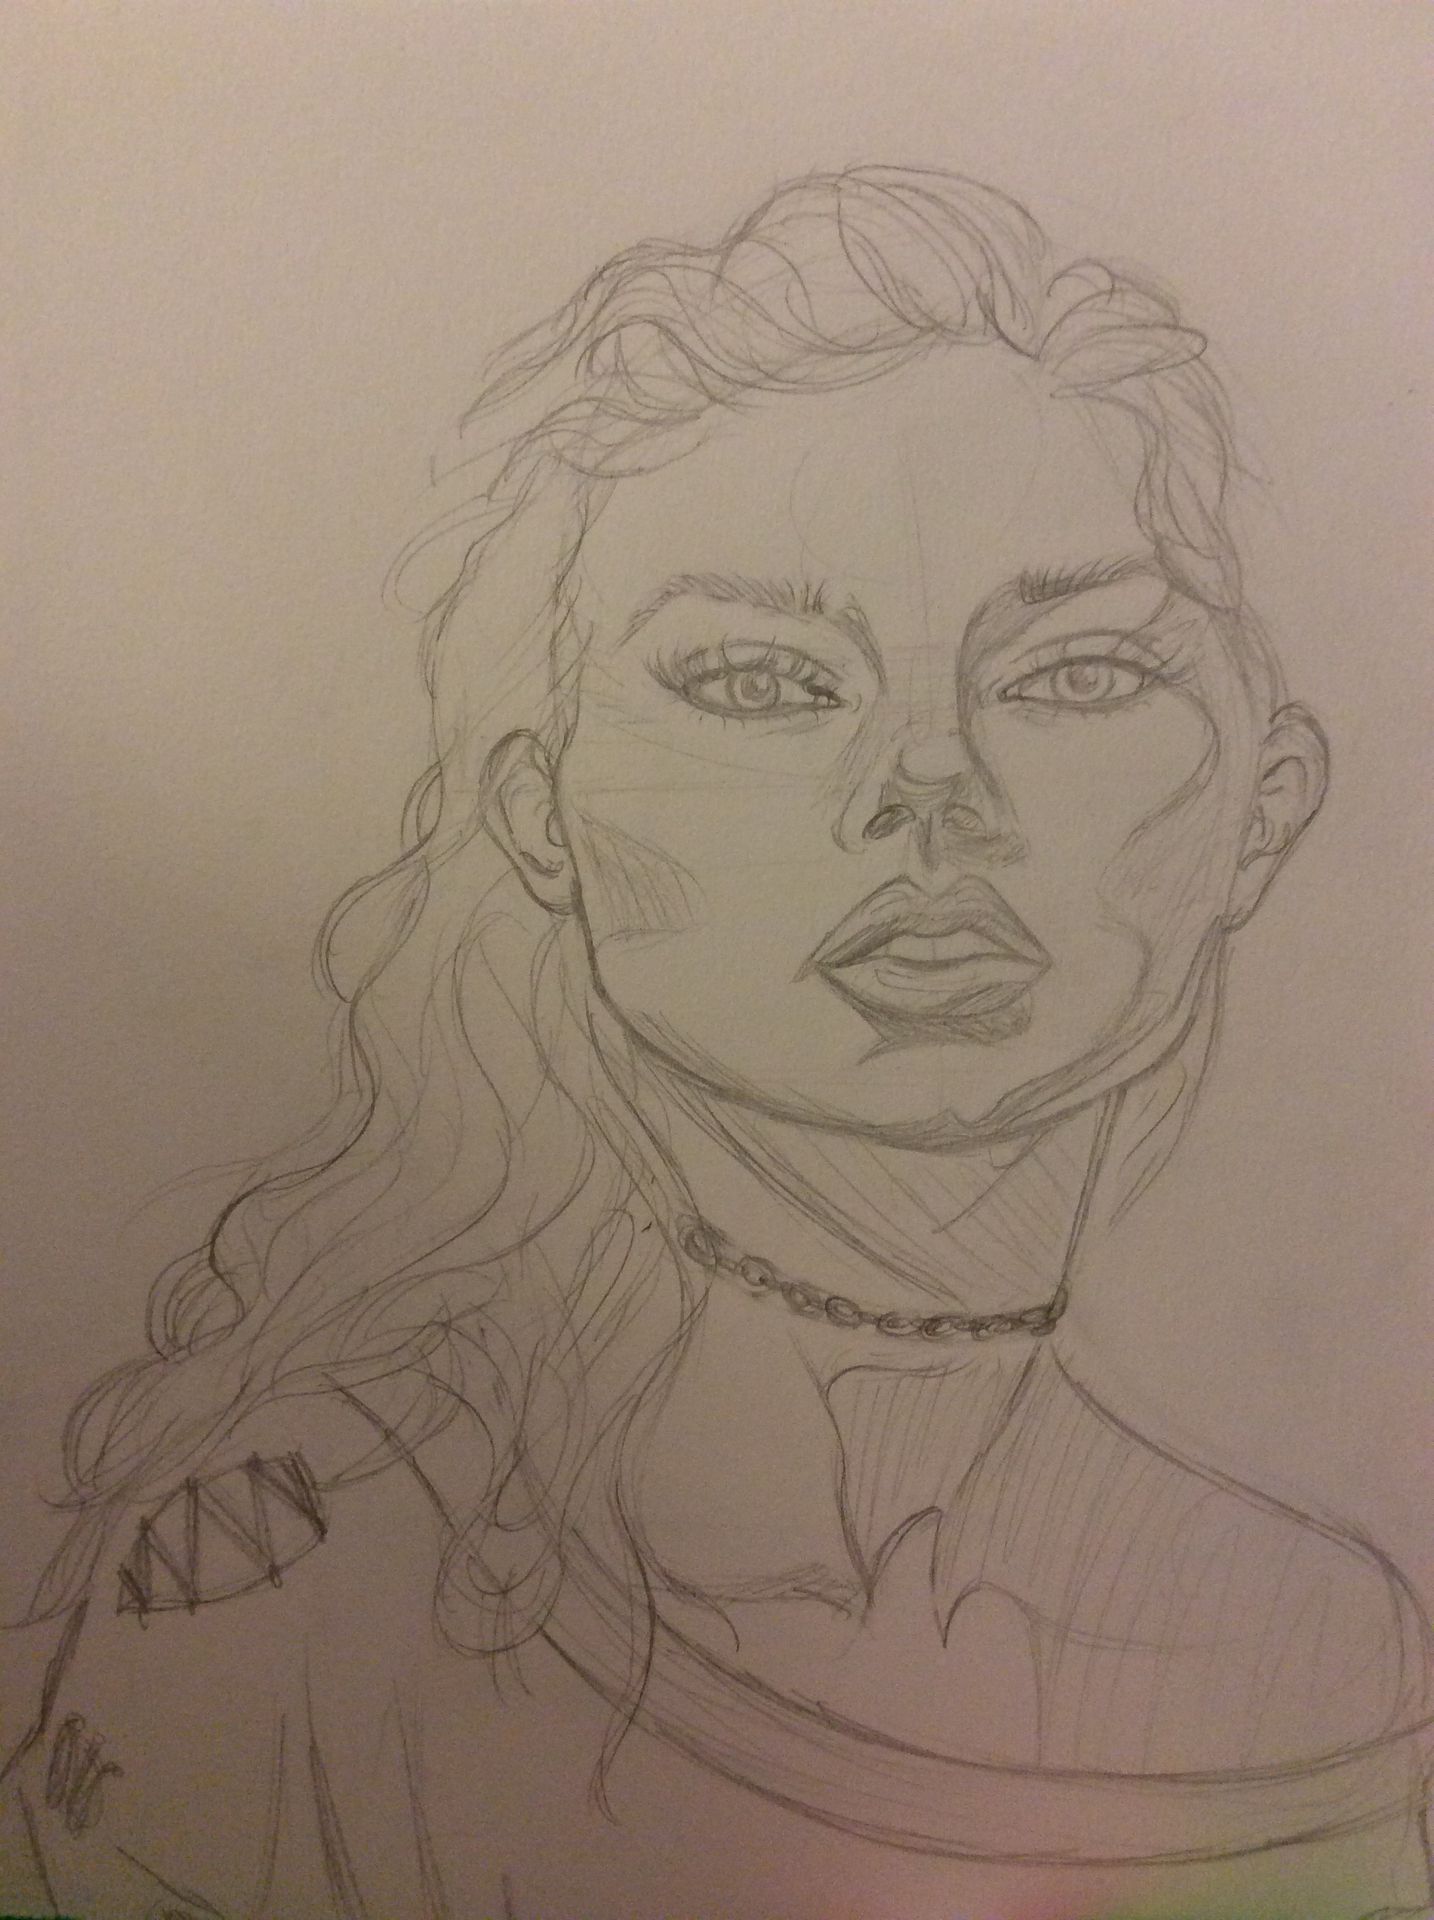
At this point, I realize and and acknowledge that I completely fluffed up the eyes, so this is when I fix that. Also, I put more details on the choker and hair. I also begin to sketch out basic shapes where I'm going to put the shadow.
Step 4: Last cleanup chance with darker pencil
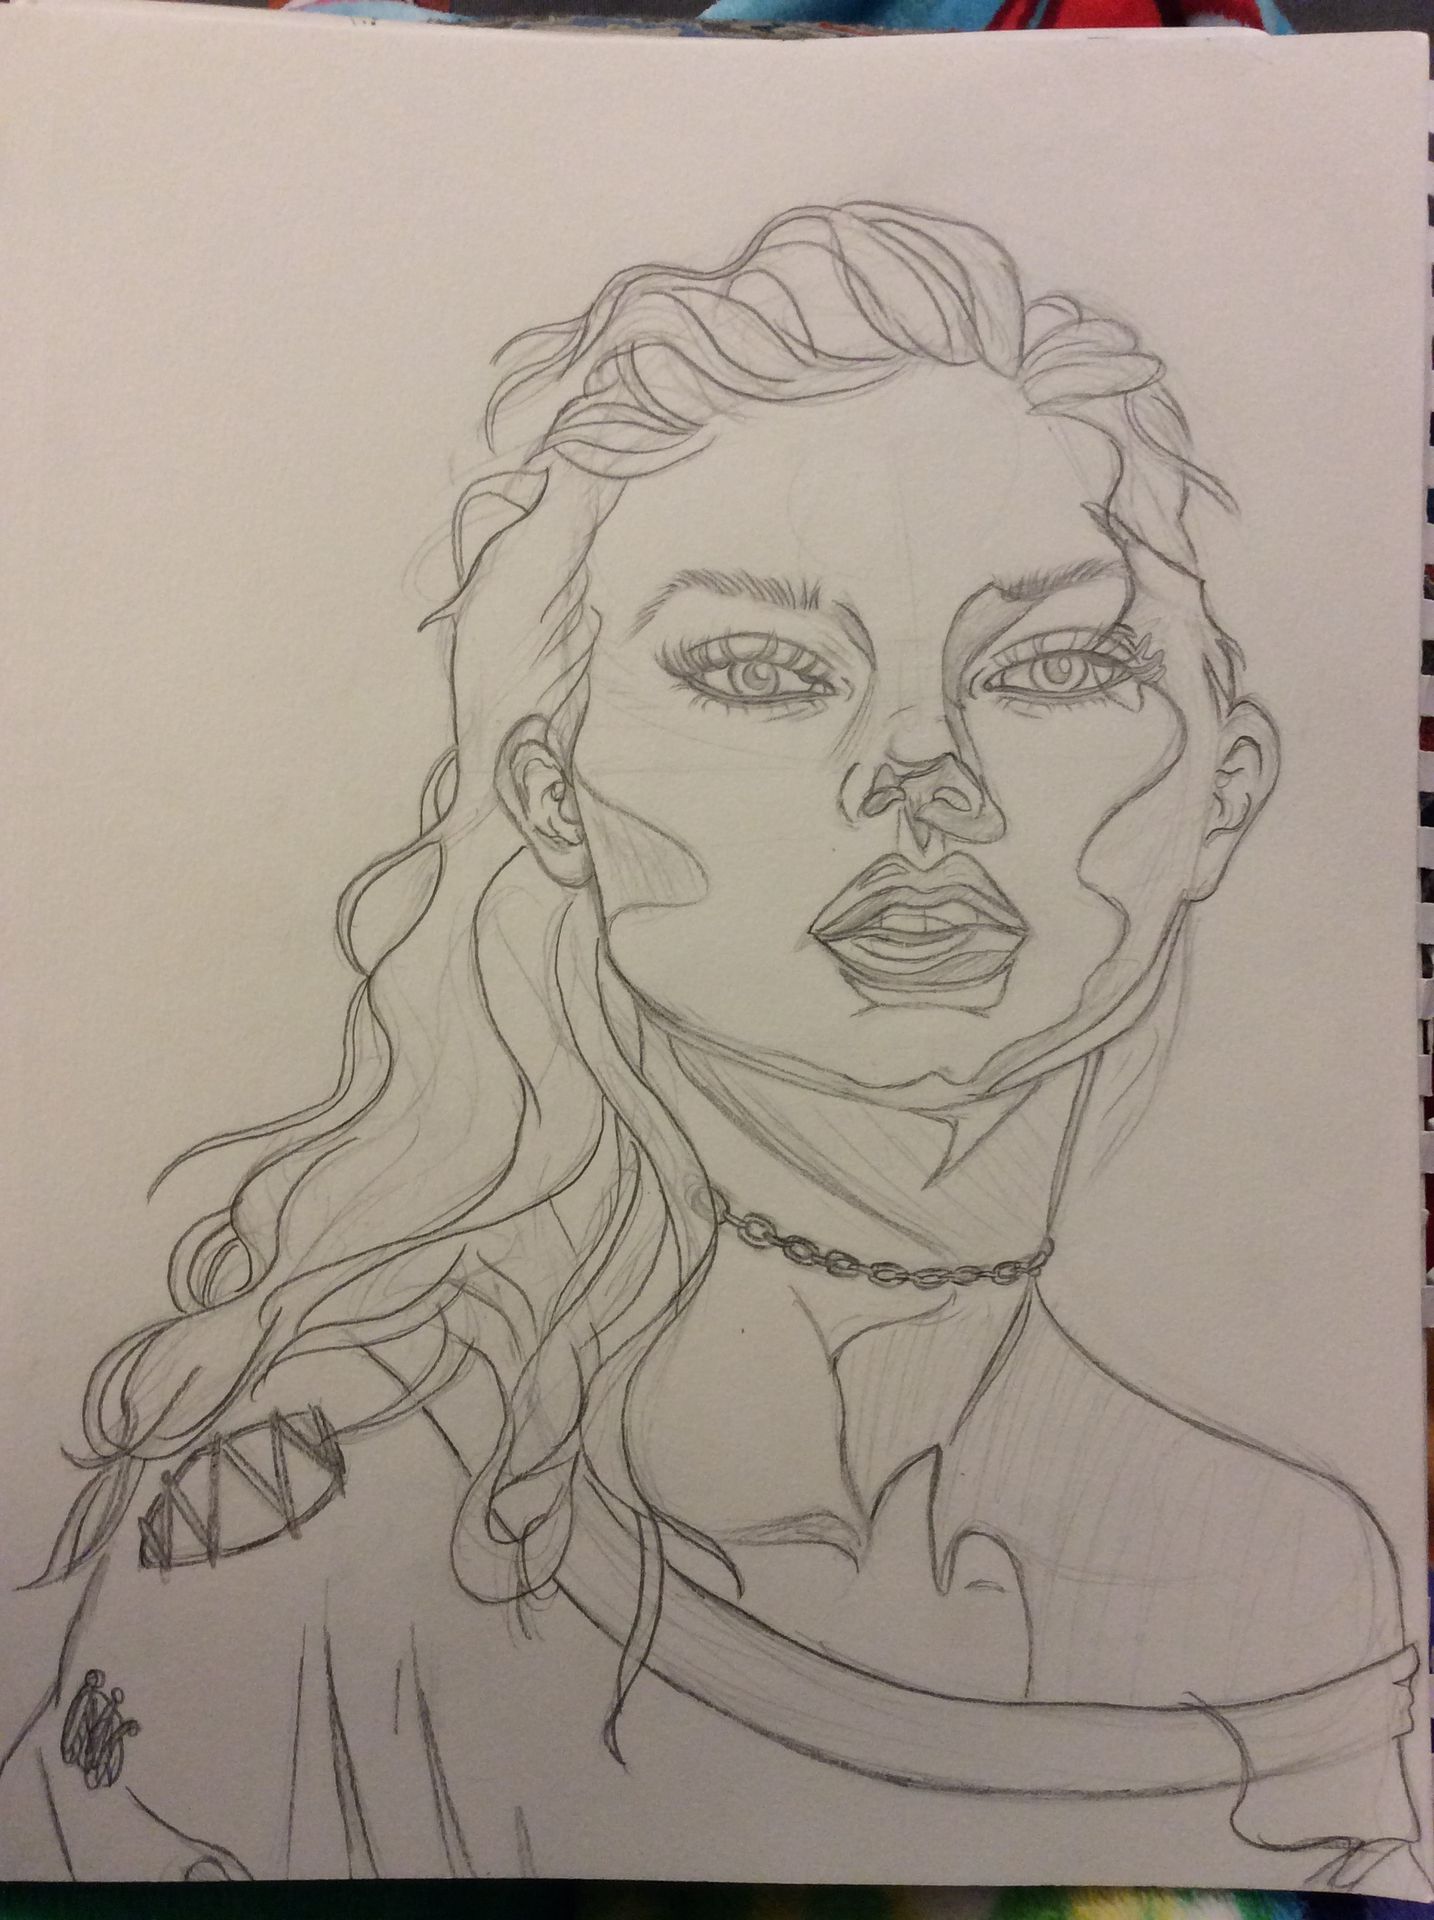
This is my last chance to make any tweaks while I still have the power to erase it. What I do now is draft my outline, and I'm putting every pencil mark where I know I'm going to ink it. This is my last guideline. It's in a darker pencil so I can be sure where I'm going to place my ink.
Step 5: pen outline.
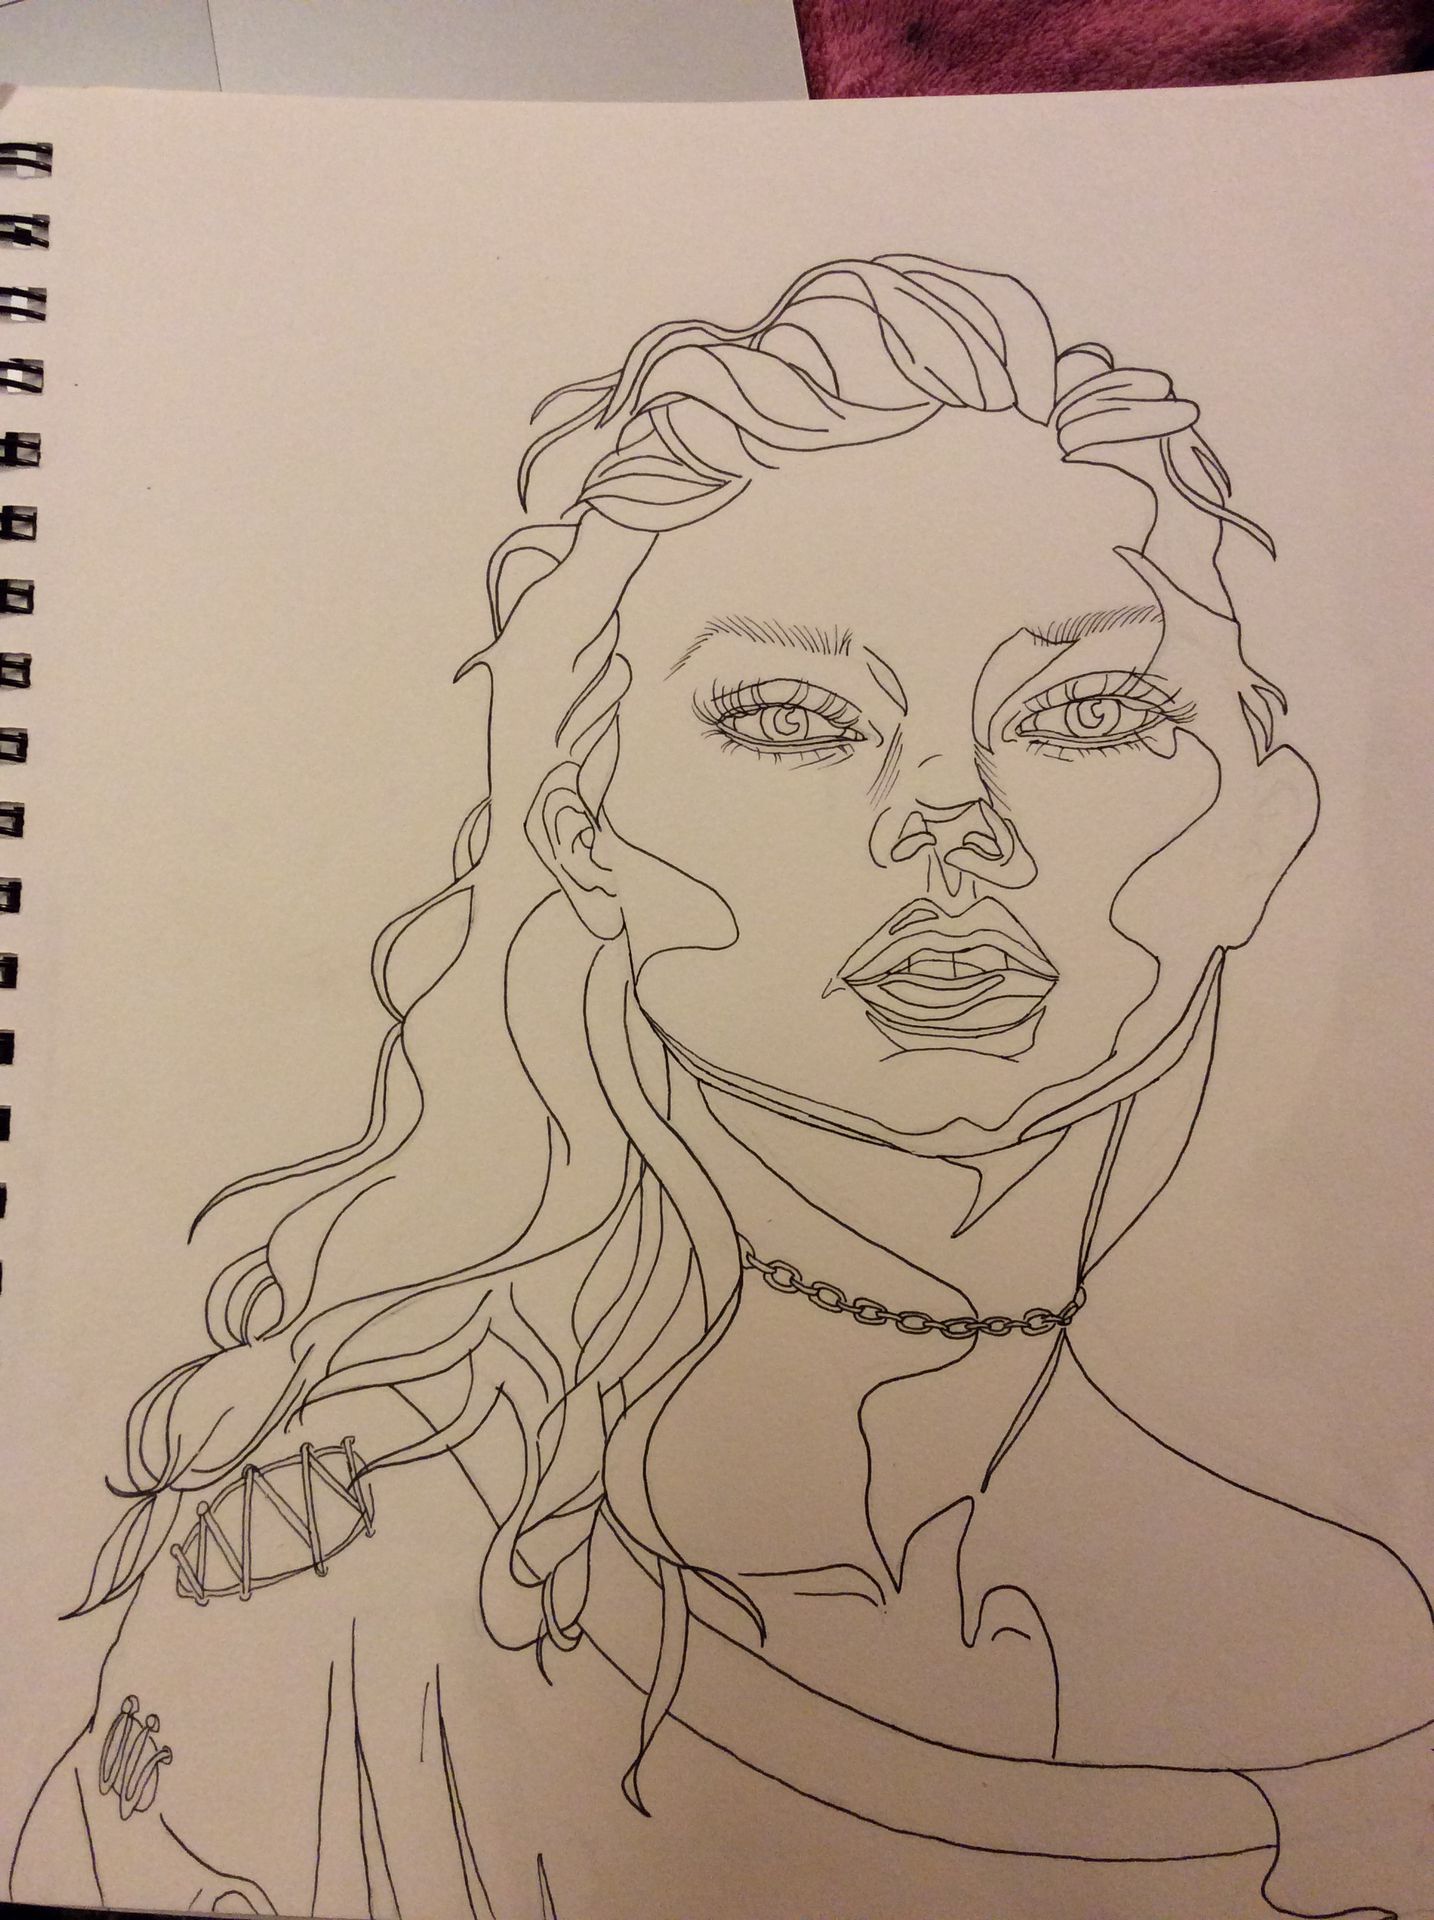
This is when I take a 03 sized pen (products listed below) and I go directly over my pencil outline. I don't erase anything yet. I CAREFULLY make sure this is how I want everything. I don't leave out a single mark from my dark pencil outline. Then, after the ink has dried down (it only takes a few seconds to dry) then I take my eraser and go over the ENTIRE drawing, erasing every single pencil mark. Now, I'm left only with my ink outline.
Step 6: filling in the black.
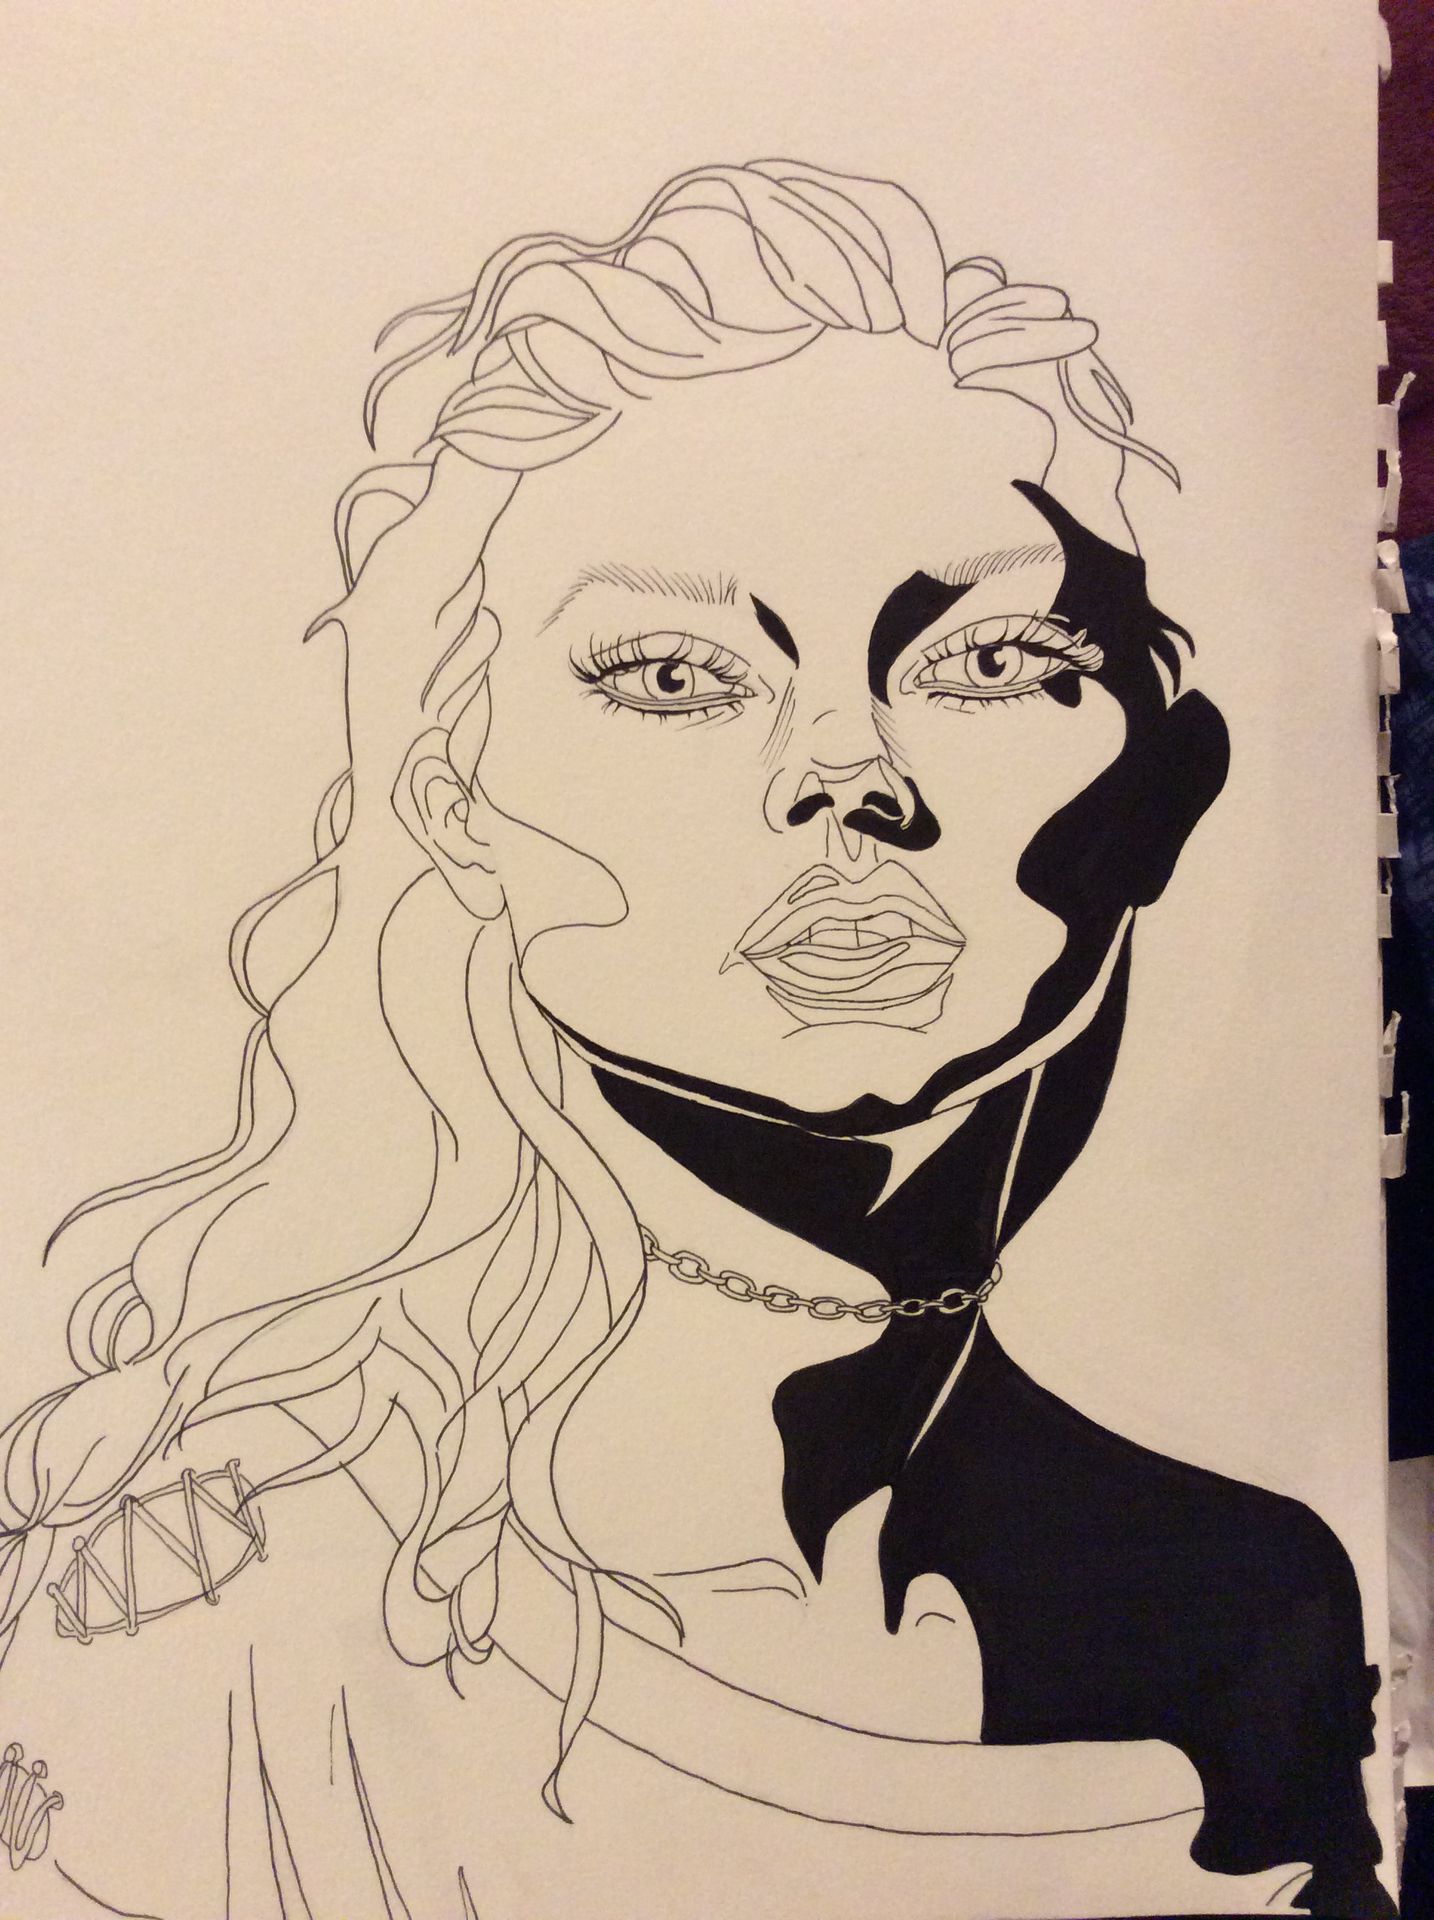
Now, I figure out where everything is going to completely blocked-out Black, and I fill that in. Obviously this is only a progress picture and I didn't fill in every black spot yet, but you get the idea.
Step 7: details.
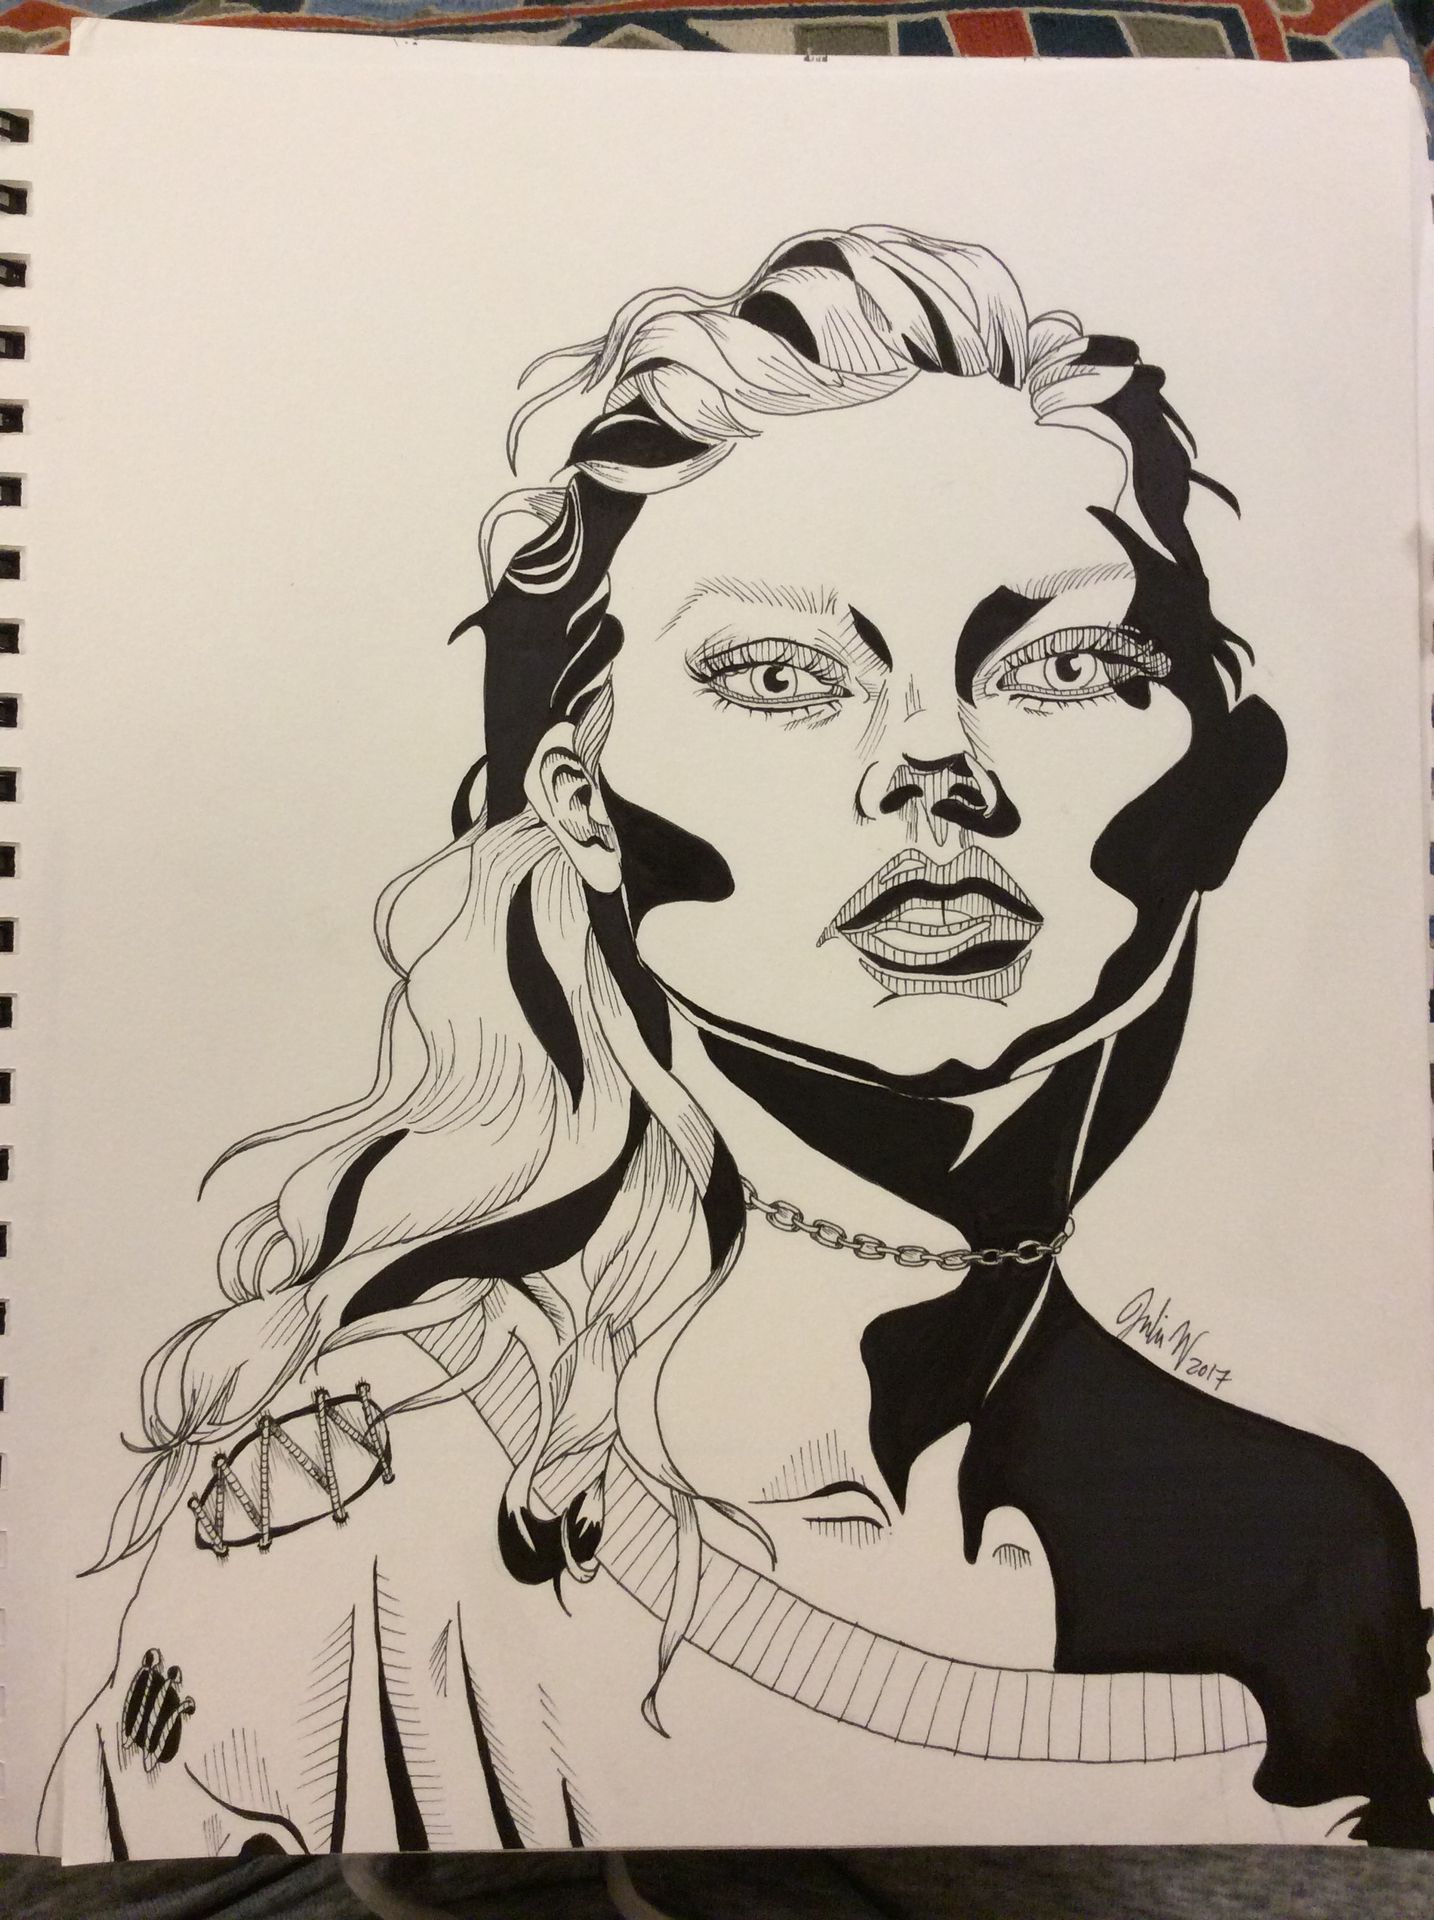
I thought I had more progress pictures, but I guess this is where it ends, sorry! I'll try to explain what I did to get here.
I finished filling in all the black spots, then I focused on the face. I do light hash-marks where there are shadows, but not as intense as the black. I basically have a three-shade value scale: the white of the paper, the stark black, and the middle. The hash mark lines is my middle value. When I'm shading, I like to put my lines in the direction they go on the face, fabric, or hair. With the guidelines and the blacks all filled in, it's not hard to tell where to shade.
And that's it! This is the finished, edited picture I posted.
Hopefully this helped you have a better idea of how I do my black and white ink drawings!
PRODUCTS USED:
Paper:
XL Canson Mix Media paper. (Blue cover) 9 in x 12 in $7.99
Pencils:
Blick Studio graphite pencil in HB (for rough sketch) $0.99
Blick Studio graphite pencil in 2B (for cleaning up sketch) $0.99
Pens and markers: (all black ink)
Pigma Micron pen in 005 $2.89
Prismacolor Premier pen in 01 $2.39
Prismacolor Premier pen in 03 $2.39
Prismacolor Premier pen in 05 $2.39
THE INK WORKS "Black Marker Assorted Sizes" package. Includes markers with 5 mm, 2mm, Brush tip, 1.0 mm, and 0.5 mm sized tips. $10
Eraser:
Prismacolor ARTGUM eraser $0.89
I found all of these at a (relatively high-end) art store called Blick's. Though I'm sure you could find most of these products, if not all, at your local art store or online. I've included prices above, though prices may vary if you get them online or at other stores.
Hope this helps!
Bạn đang đọc truyện trên: Truyen247.Pro