How I Draw: Part 2
Alrighty here comes part two!! Hope you're ready! This is how I draw! Try to guess who I'm drawing for this!
Step one: head.
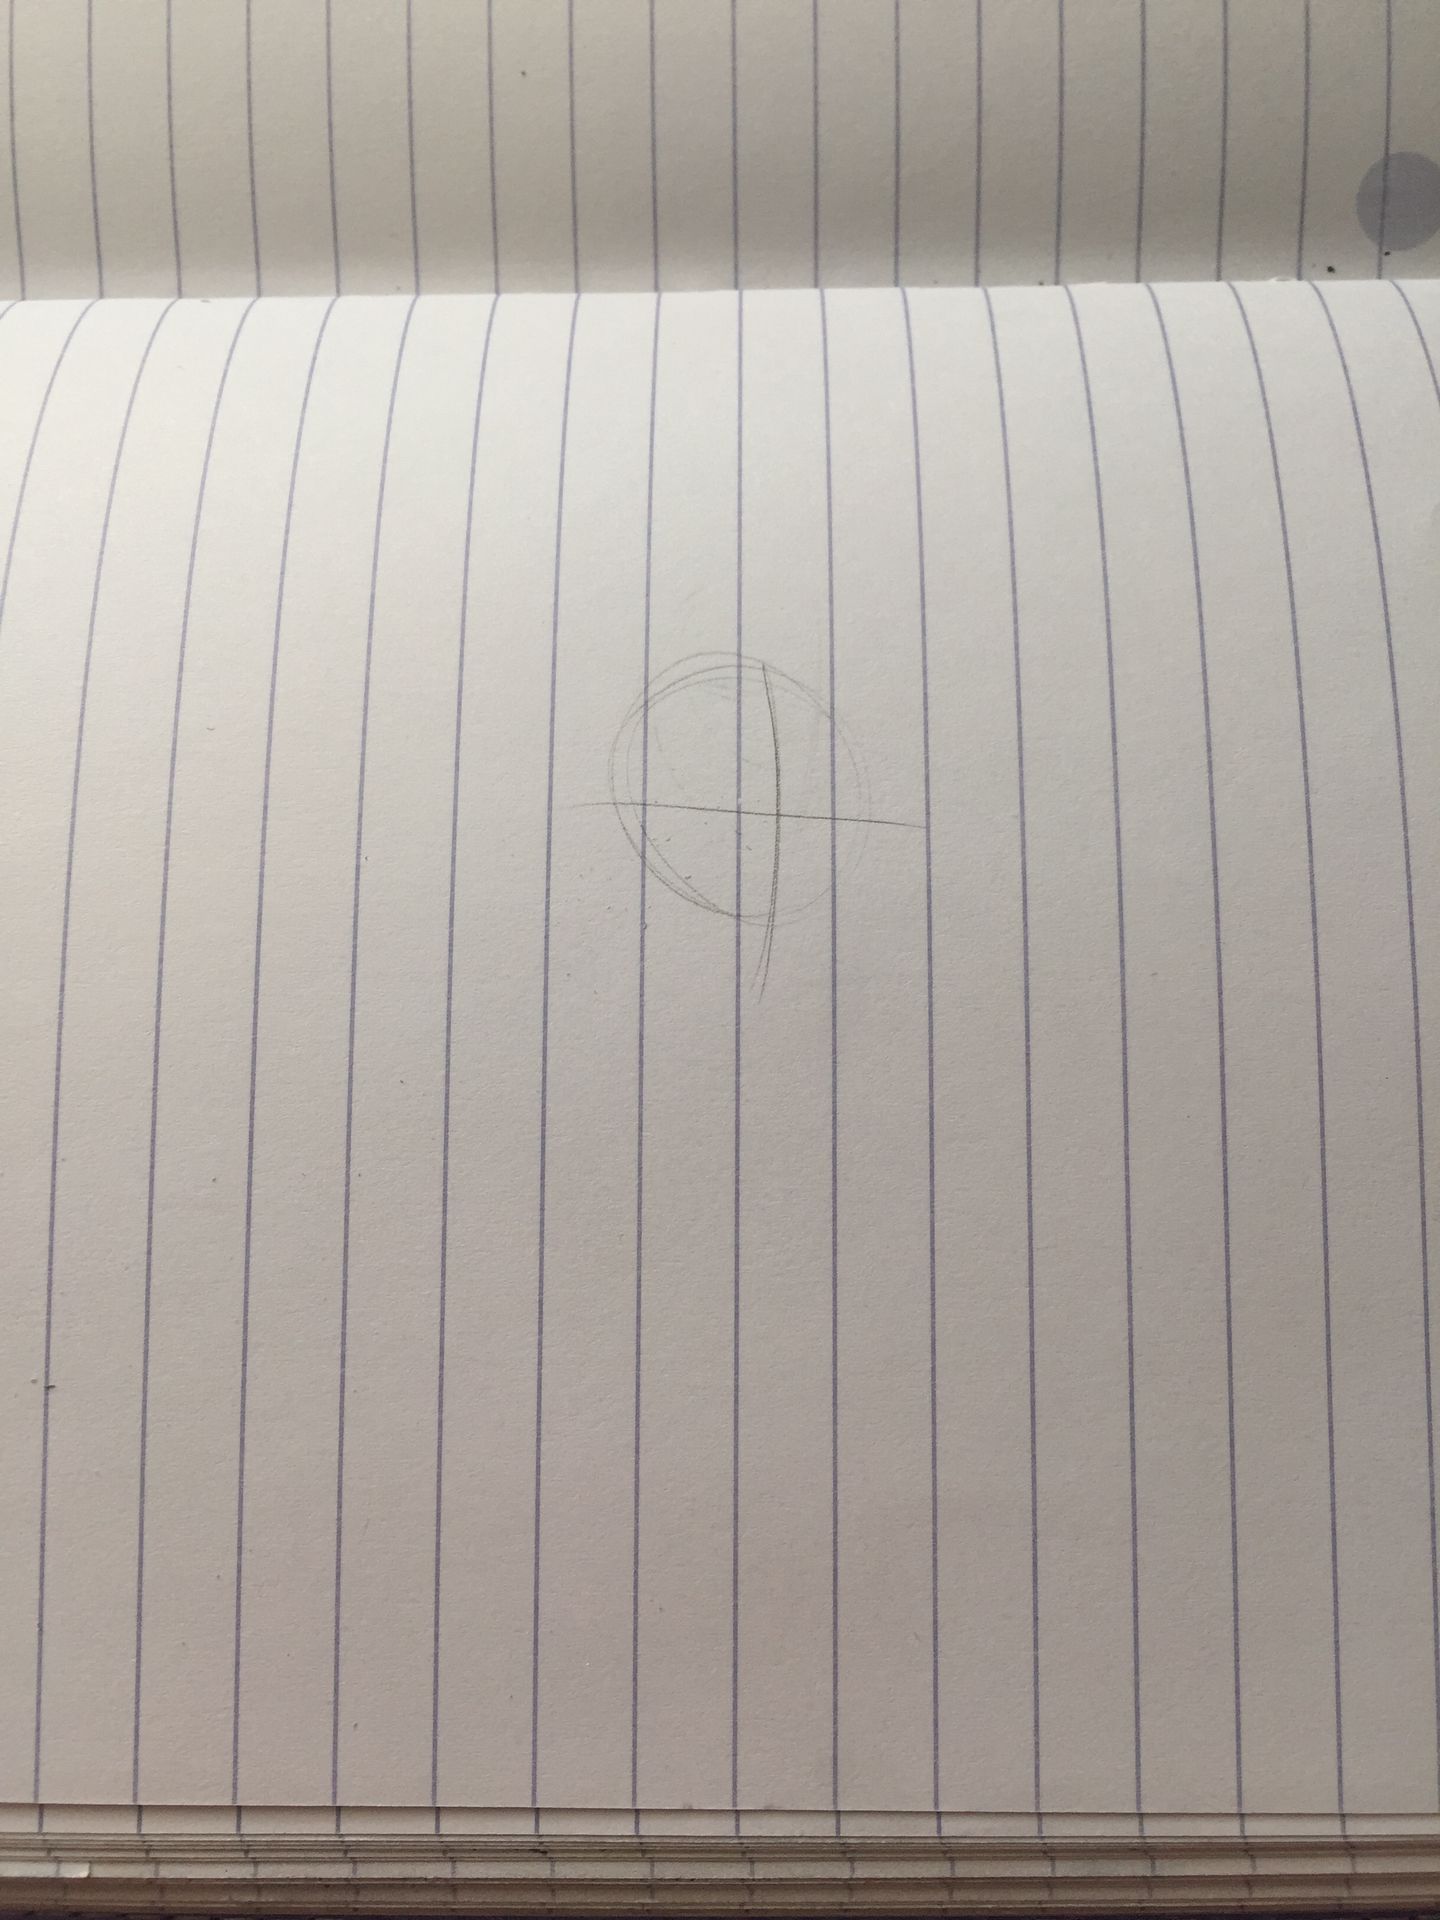
I always start with the head. I know some people say I shouldn't but I do it so that I know the size of the person and how much room they have for the rest of their body.
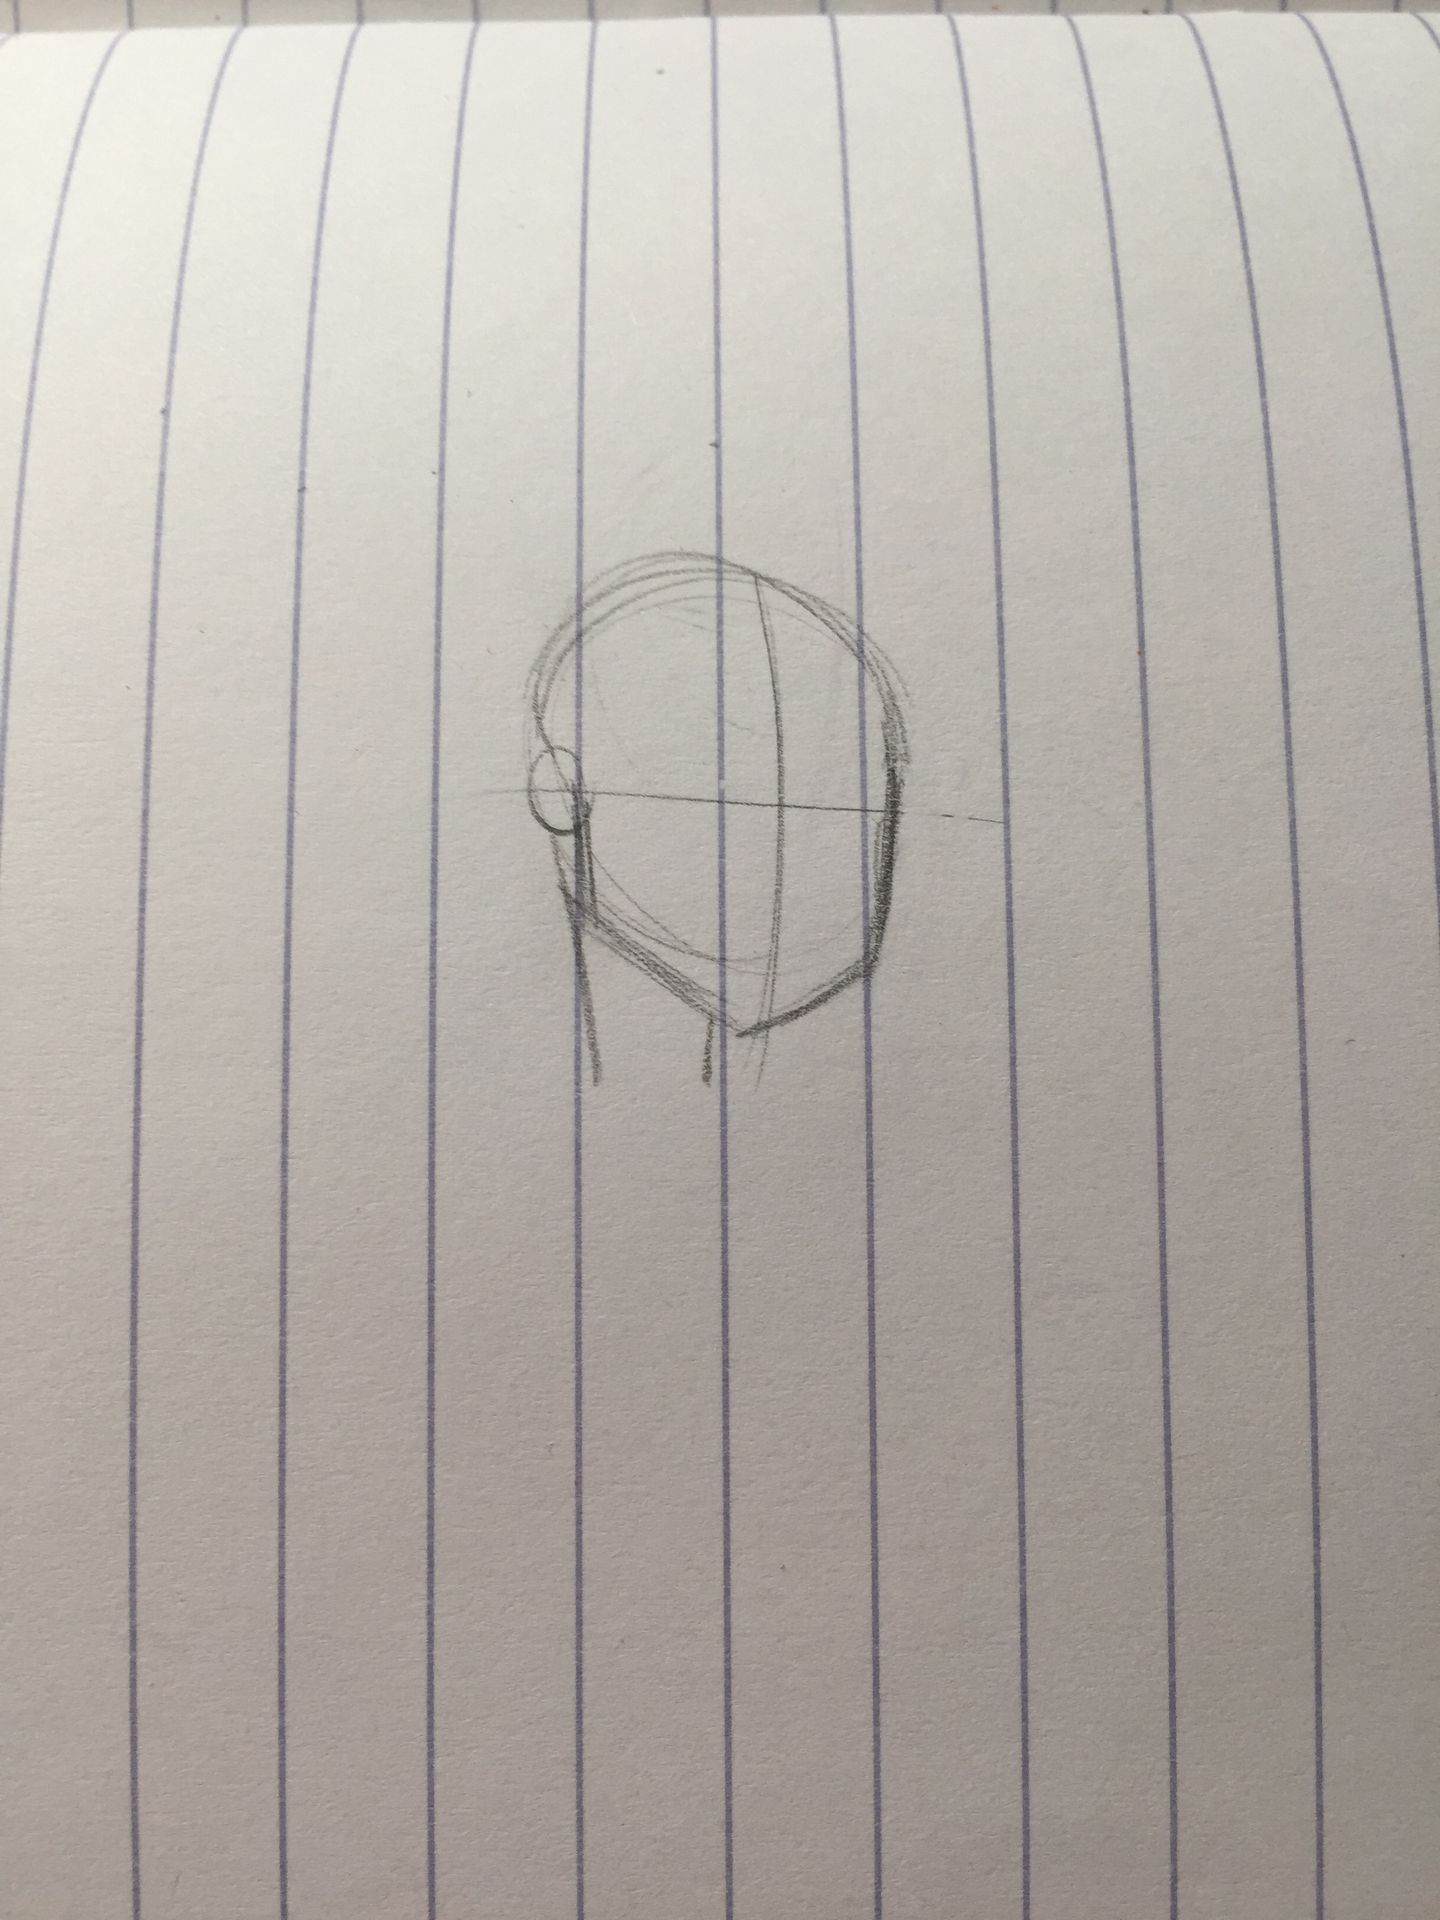
Next I add more to the head. I add the chin, jawline, neck and ears.
Note: The neck has to be connected to the ear. That way at a side angle the head isn't on a pedestal or something. Also note that the top part of the head doesn't line up to the jaw. It's also connected to the ear because you're head isn't flat like that. It has a Brain.
Step two: body.
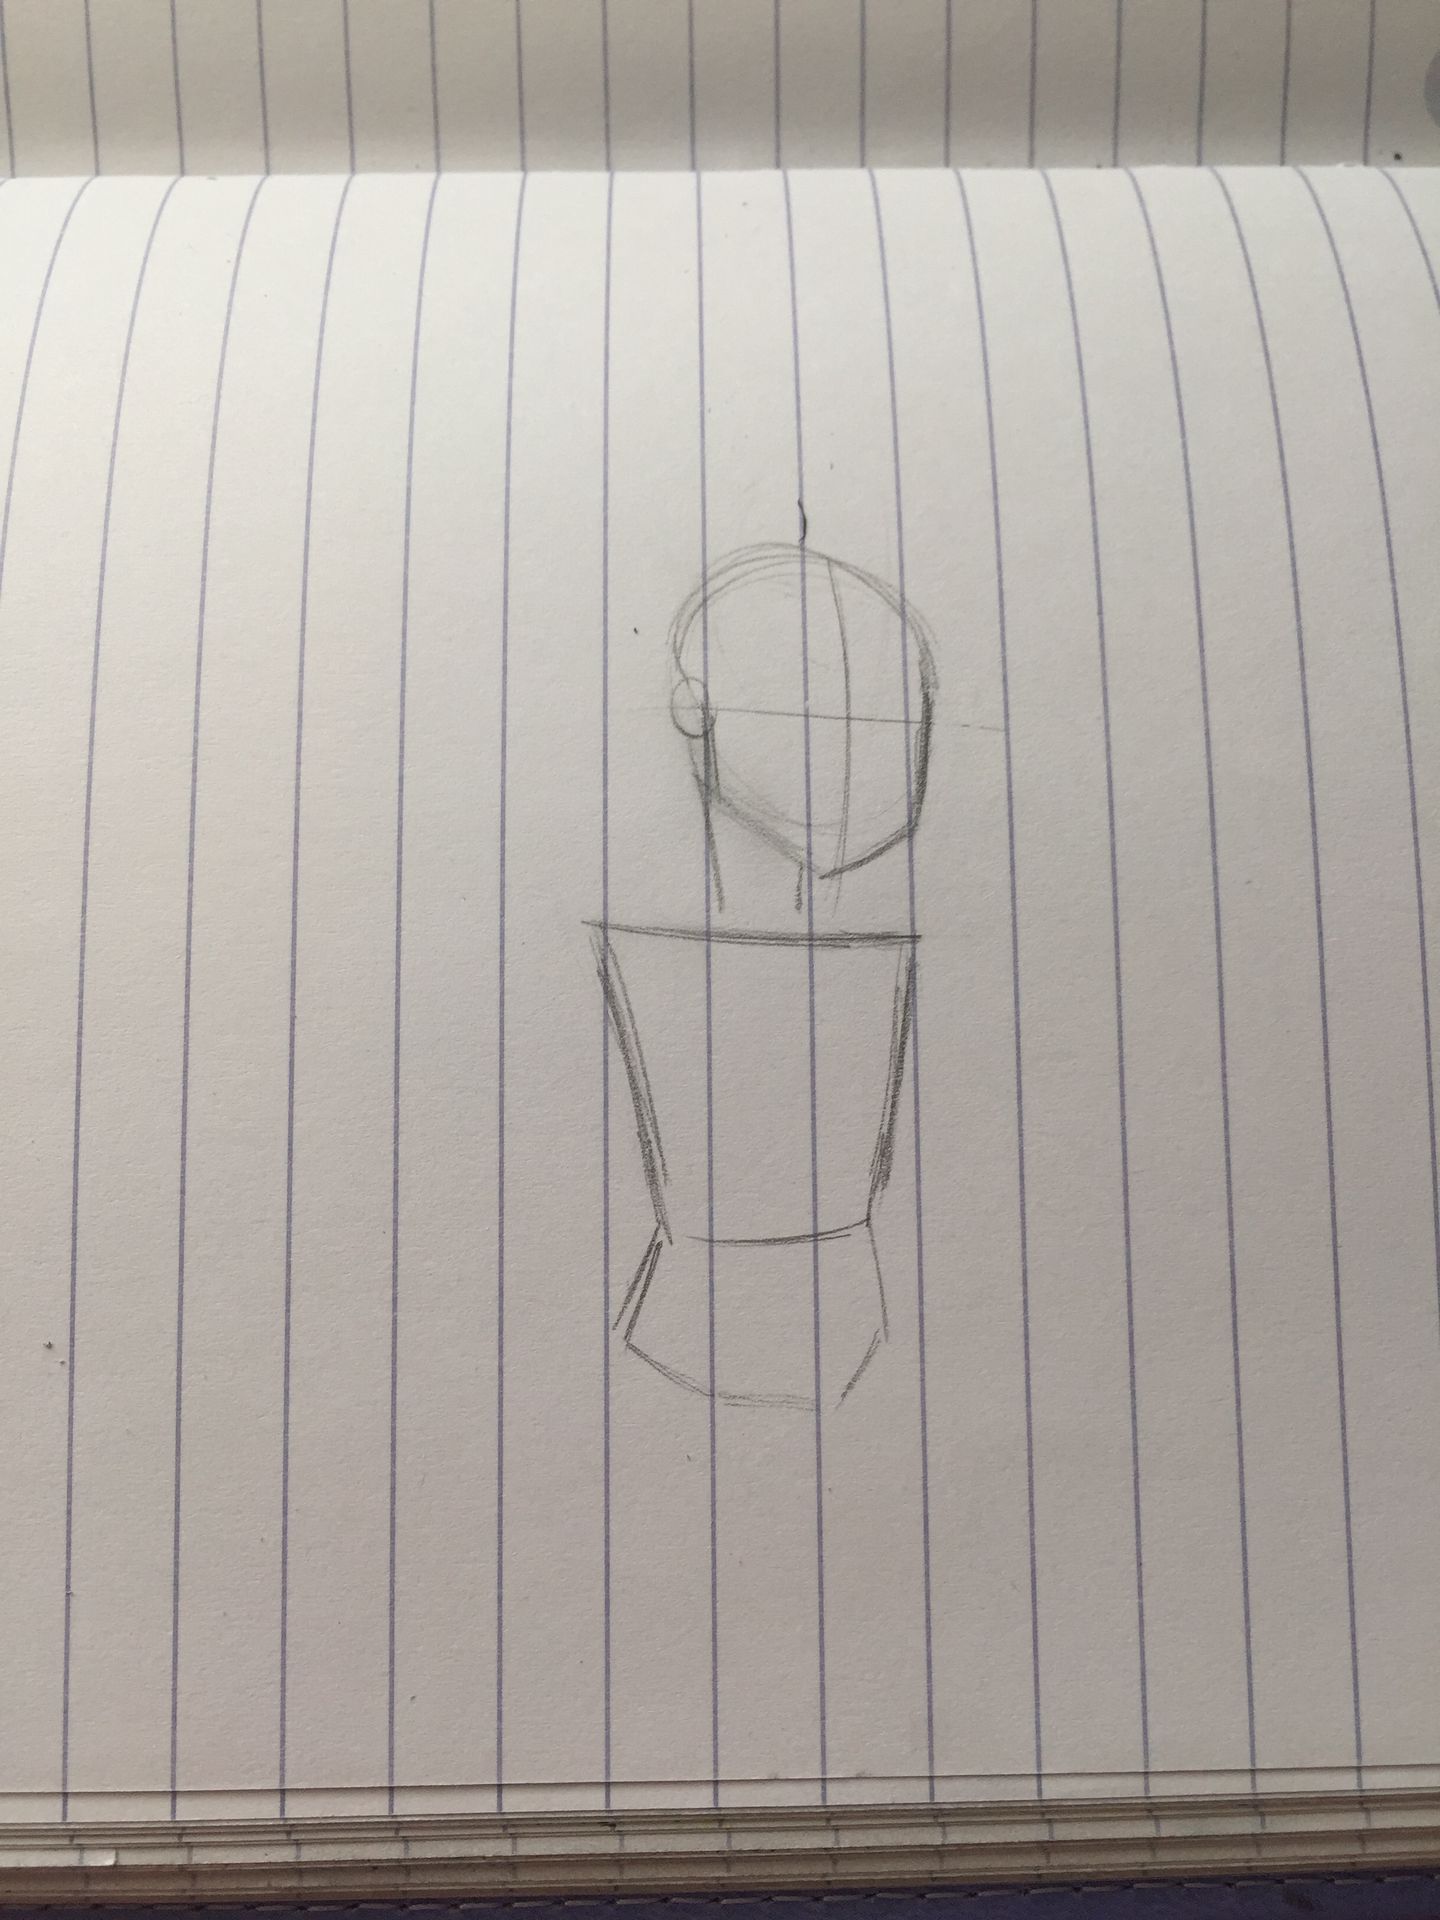
The way I draw bodies is different from the notes in part one. I do things more flat like. I know I shouldn't but I'm too lazy.
Note: remember to have room between the neck and top torso. This is because your shoulders aren't horizontal. From the neck they go downwards in parallel.
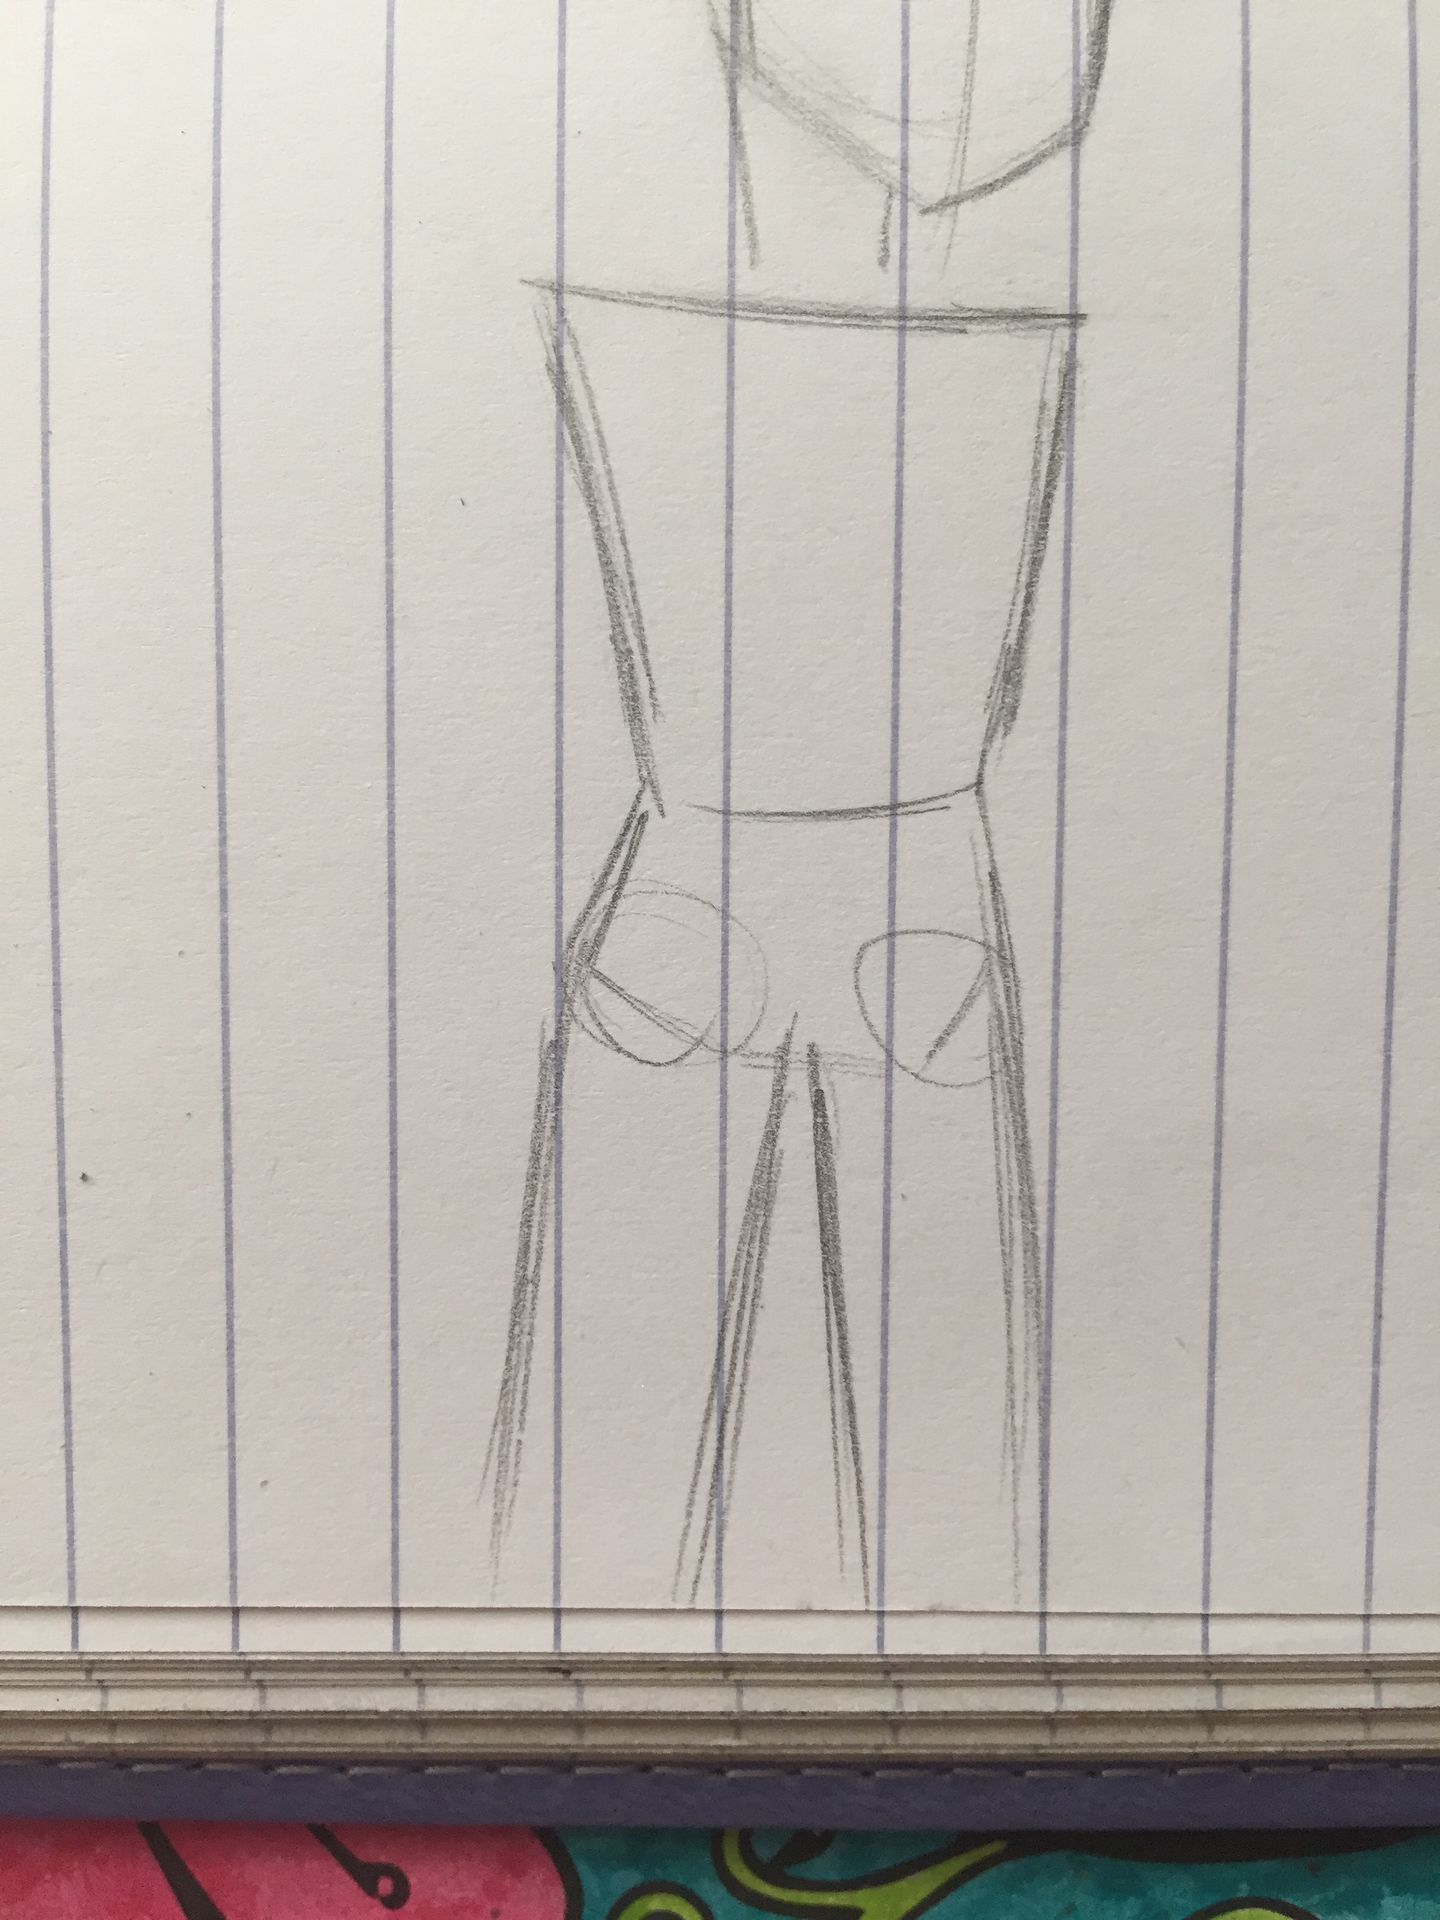
Now I draw the legs. This isn't full body sorry. But if it were I would start with ovals for feet and work my way on those. Look at part one for suggestions.
Also for the hips this person isn't flat. Even if it's male there's still a small curve.
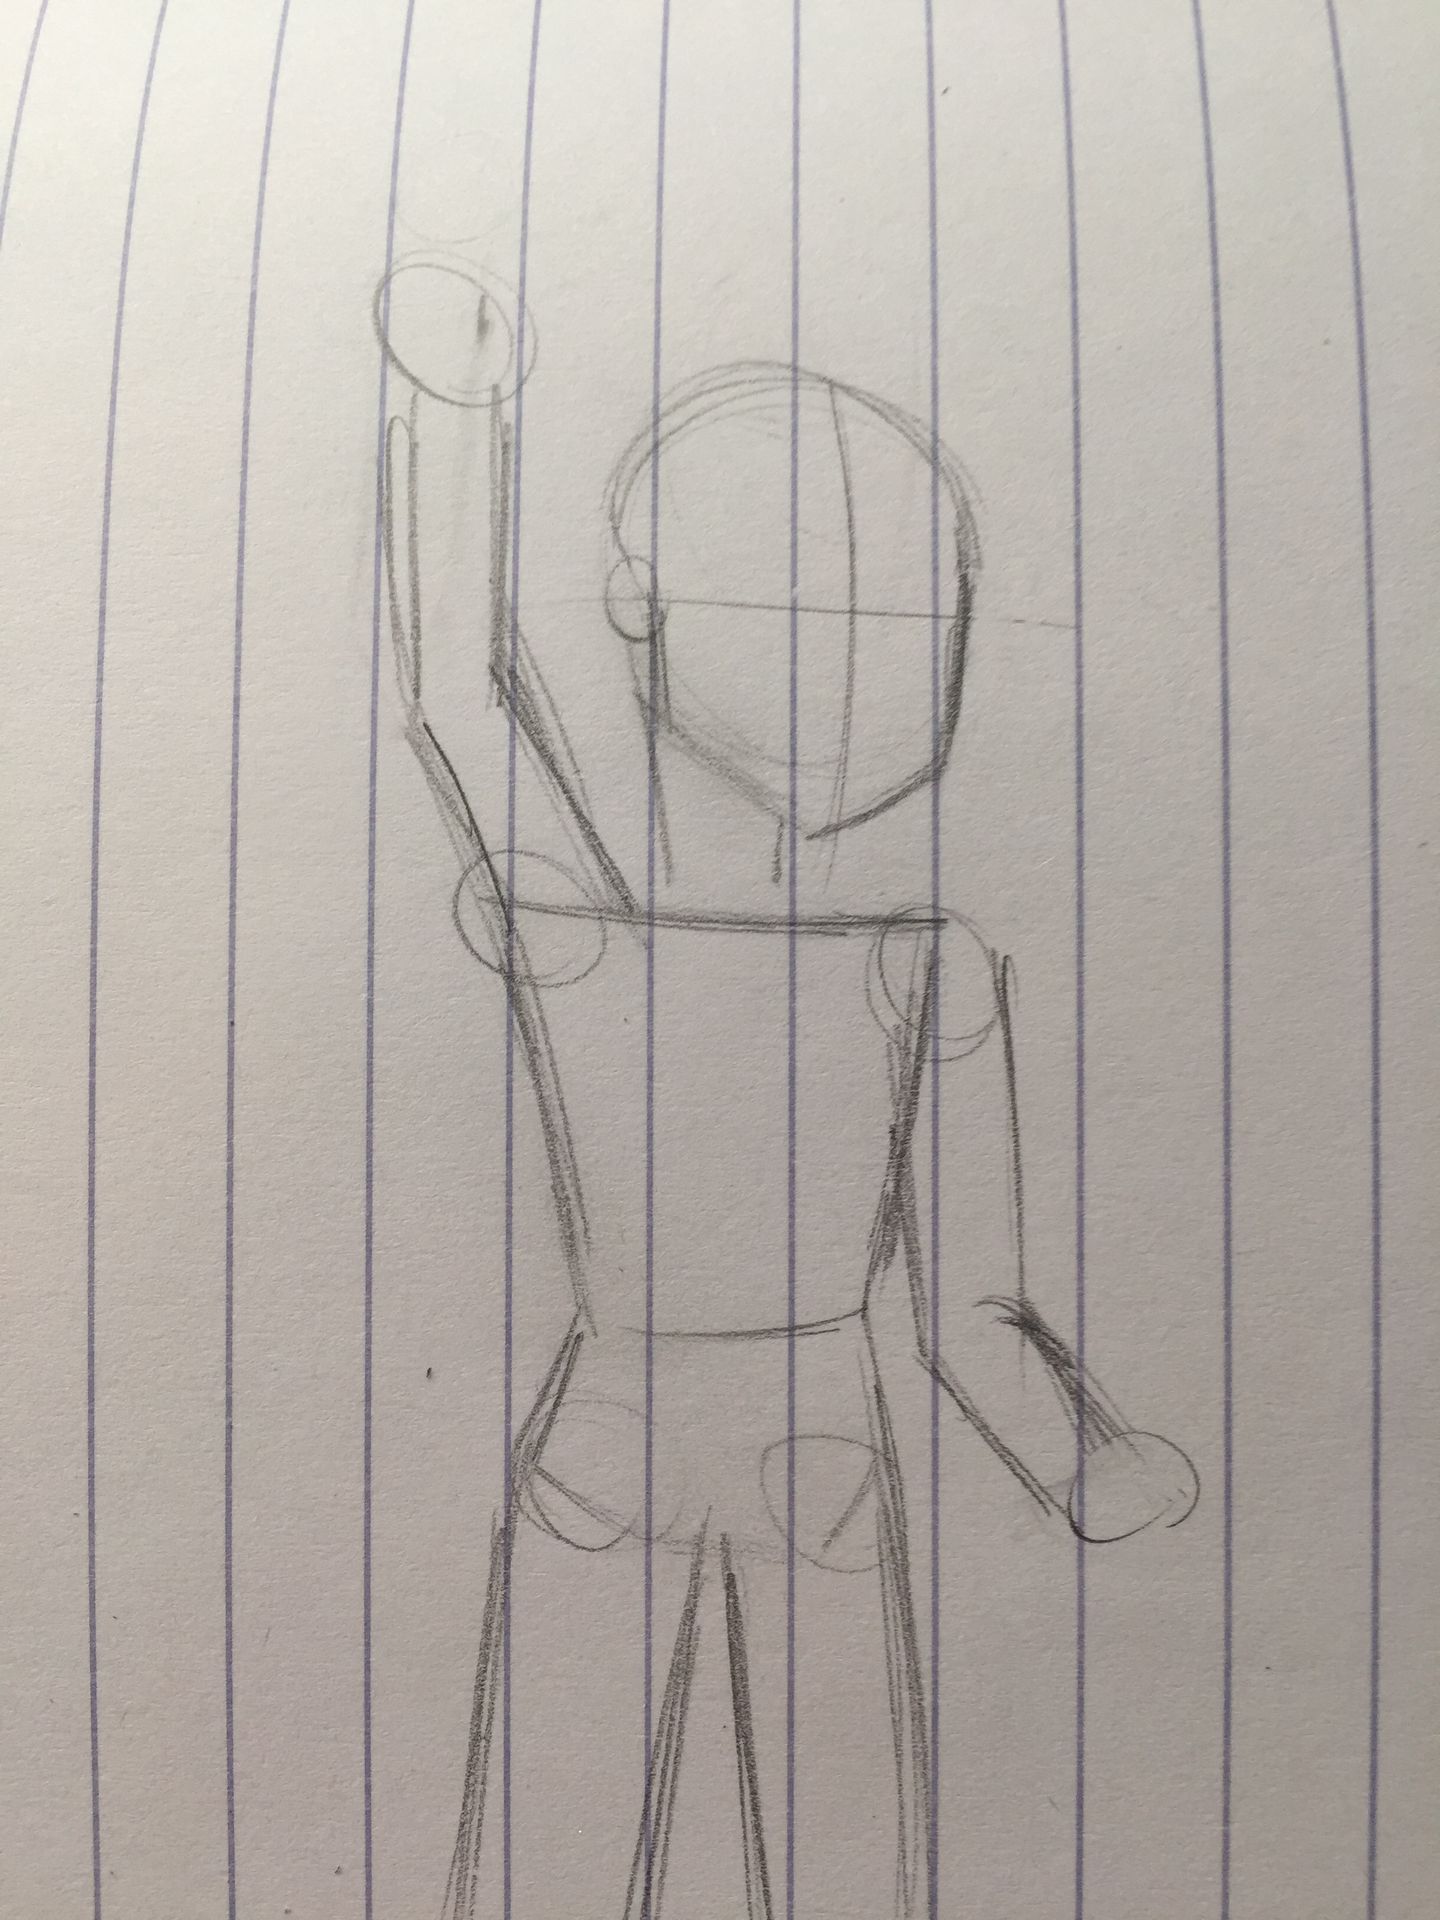
And now the arms! I don't pay much attention attention to joints or other arm stuff, but that's just me. For both arms and legs I start with a circle and work my way off that. It sorta measures how big they'll be.
Note: go crazy with arms and legs but not too much. Other wise they might not look like what you want. Feel free to use a eraser to adjust them whenever it's necessary!
Also like the feet I start with ovals and work off that. Sometimes I use distorted squares though. It's depends really.
Step three: detail.

Hands are hard. Sometimes I use my own hand to reference. It helps.
I also added clothes such as the sweater (can you guess who it is now?). Details like the hood, drawstrings are added, and etc. Makes sure it ain't flat. Stiff clothing doesn't sound comfortable.
Note: wrinkles are hard. Just remember which way they're going. If the clothing is right-side up gravity will pull them down. If it's bunched up make the wrinkles go inward to the source bunching them up (more about this on part one)
Step four: face and hair.
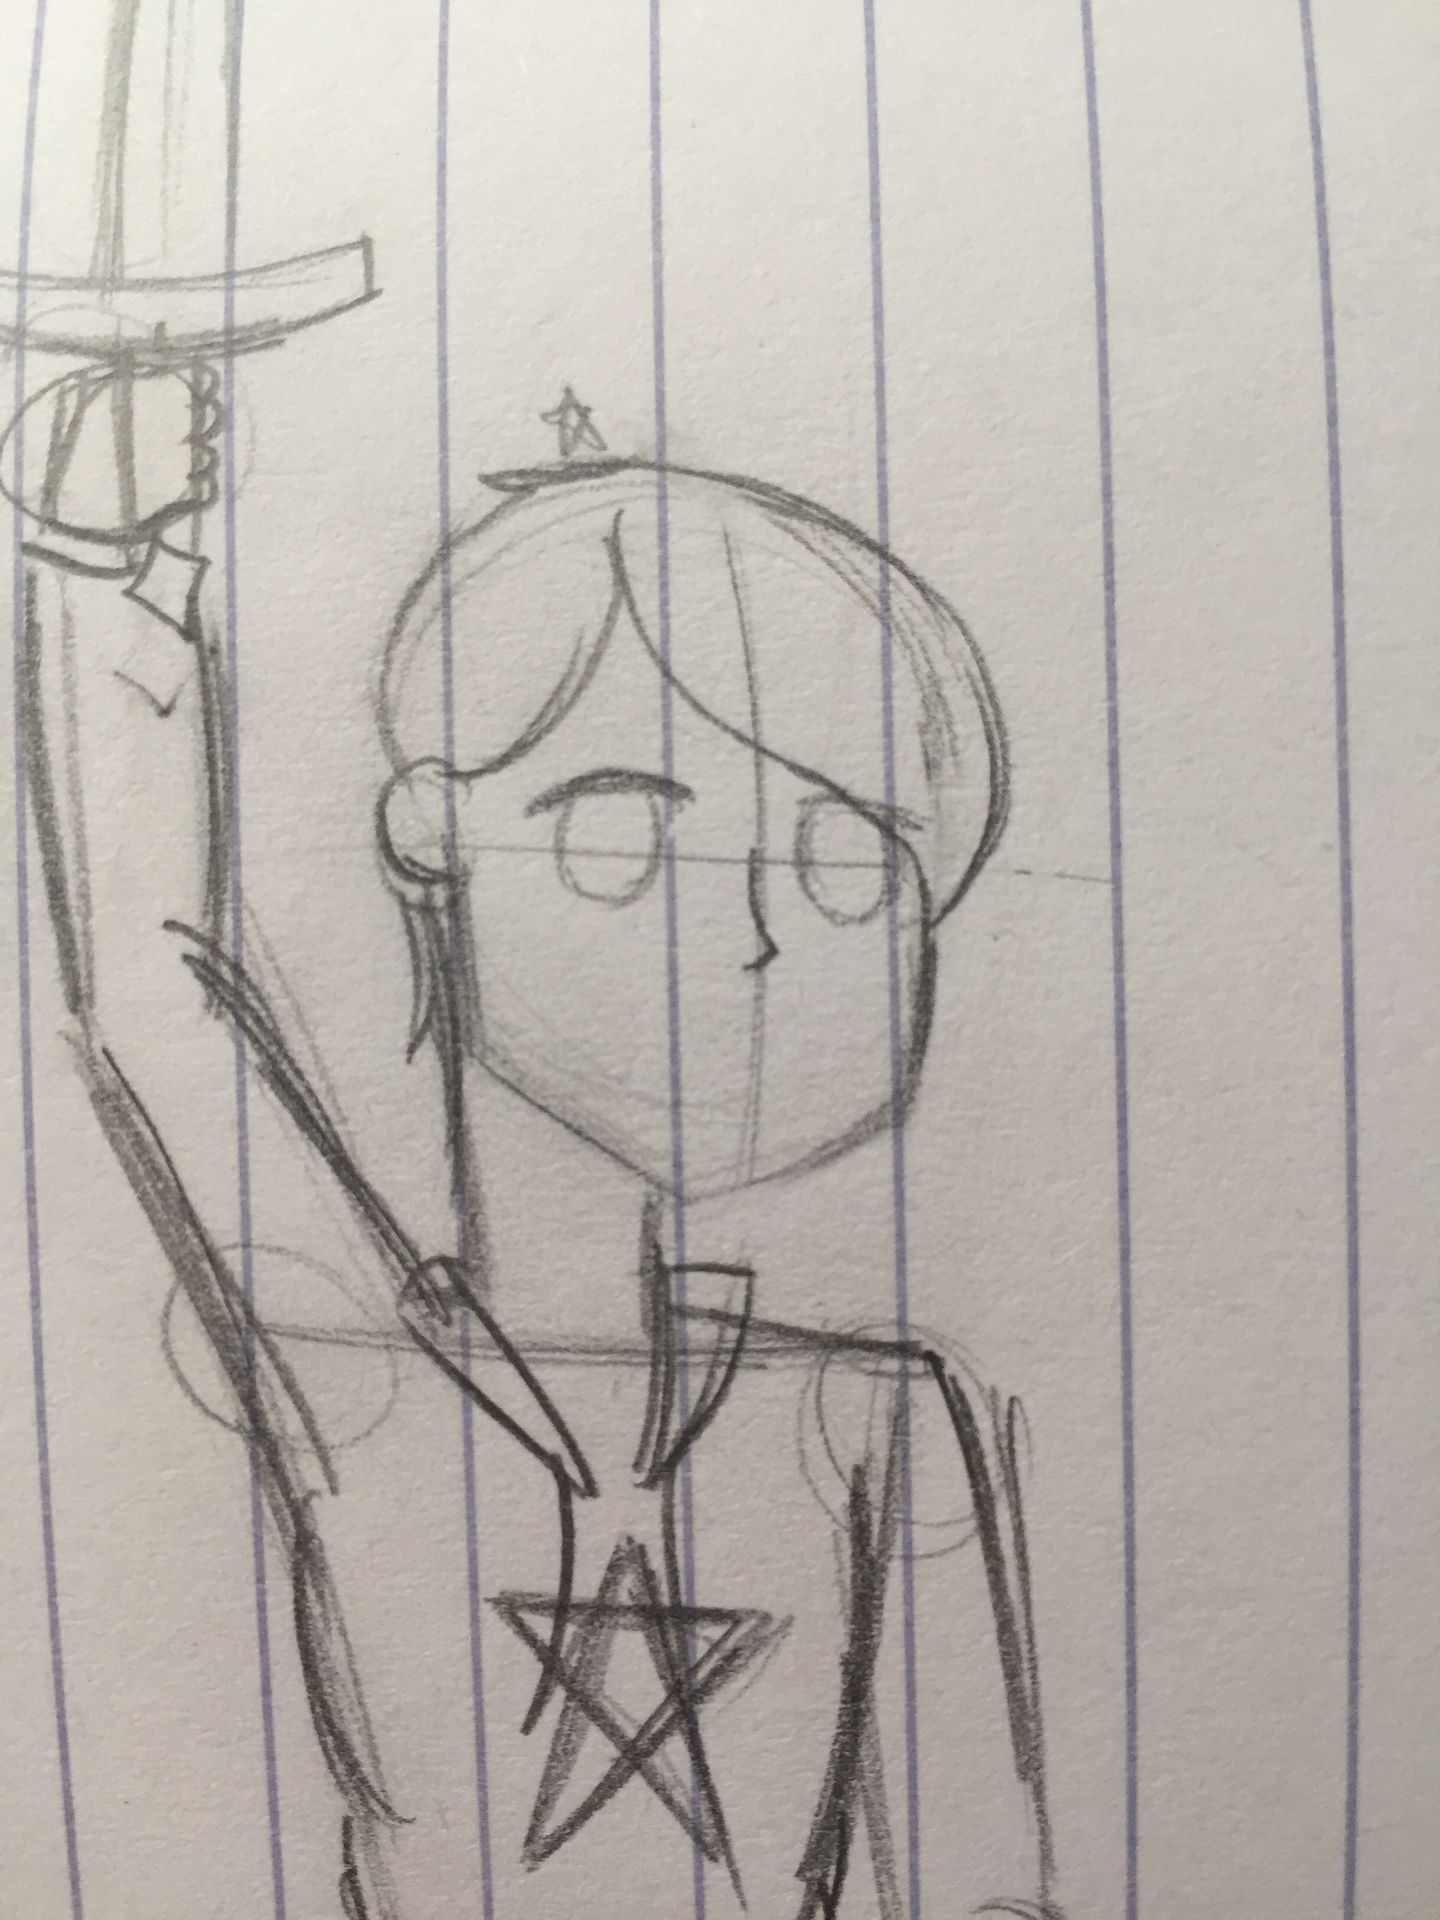
Now for the face. I start with the hair so I can know how much room the eyes will have. Sometime a person I draw will have a little separate Ahoge (I don't know I got that off of Gacha Life), like the hat on Timmy Turner from Fairly Odd Parents (this one has a star). Sometimes eyebrows will go under the hair, sometimes their visible, sometimes I don't use them at all! For eyes I start with the top and then draw the iris. Usually I don't draw the pupil. That's just me like I said before.
Note: for the nose make sure it lines up with the ears like how they most likely are IRL.
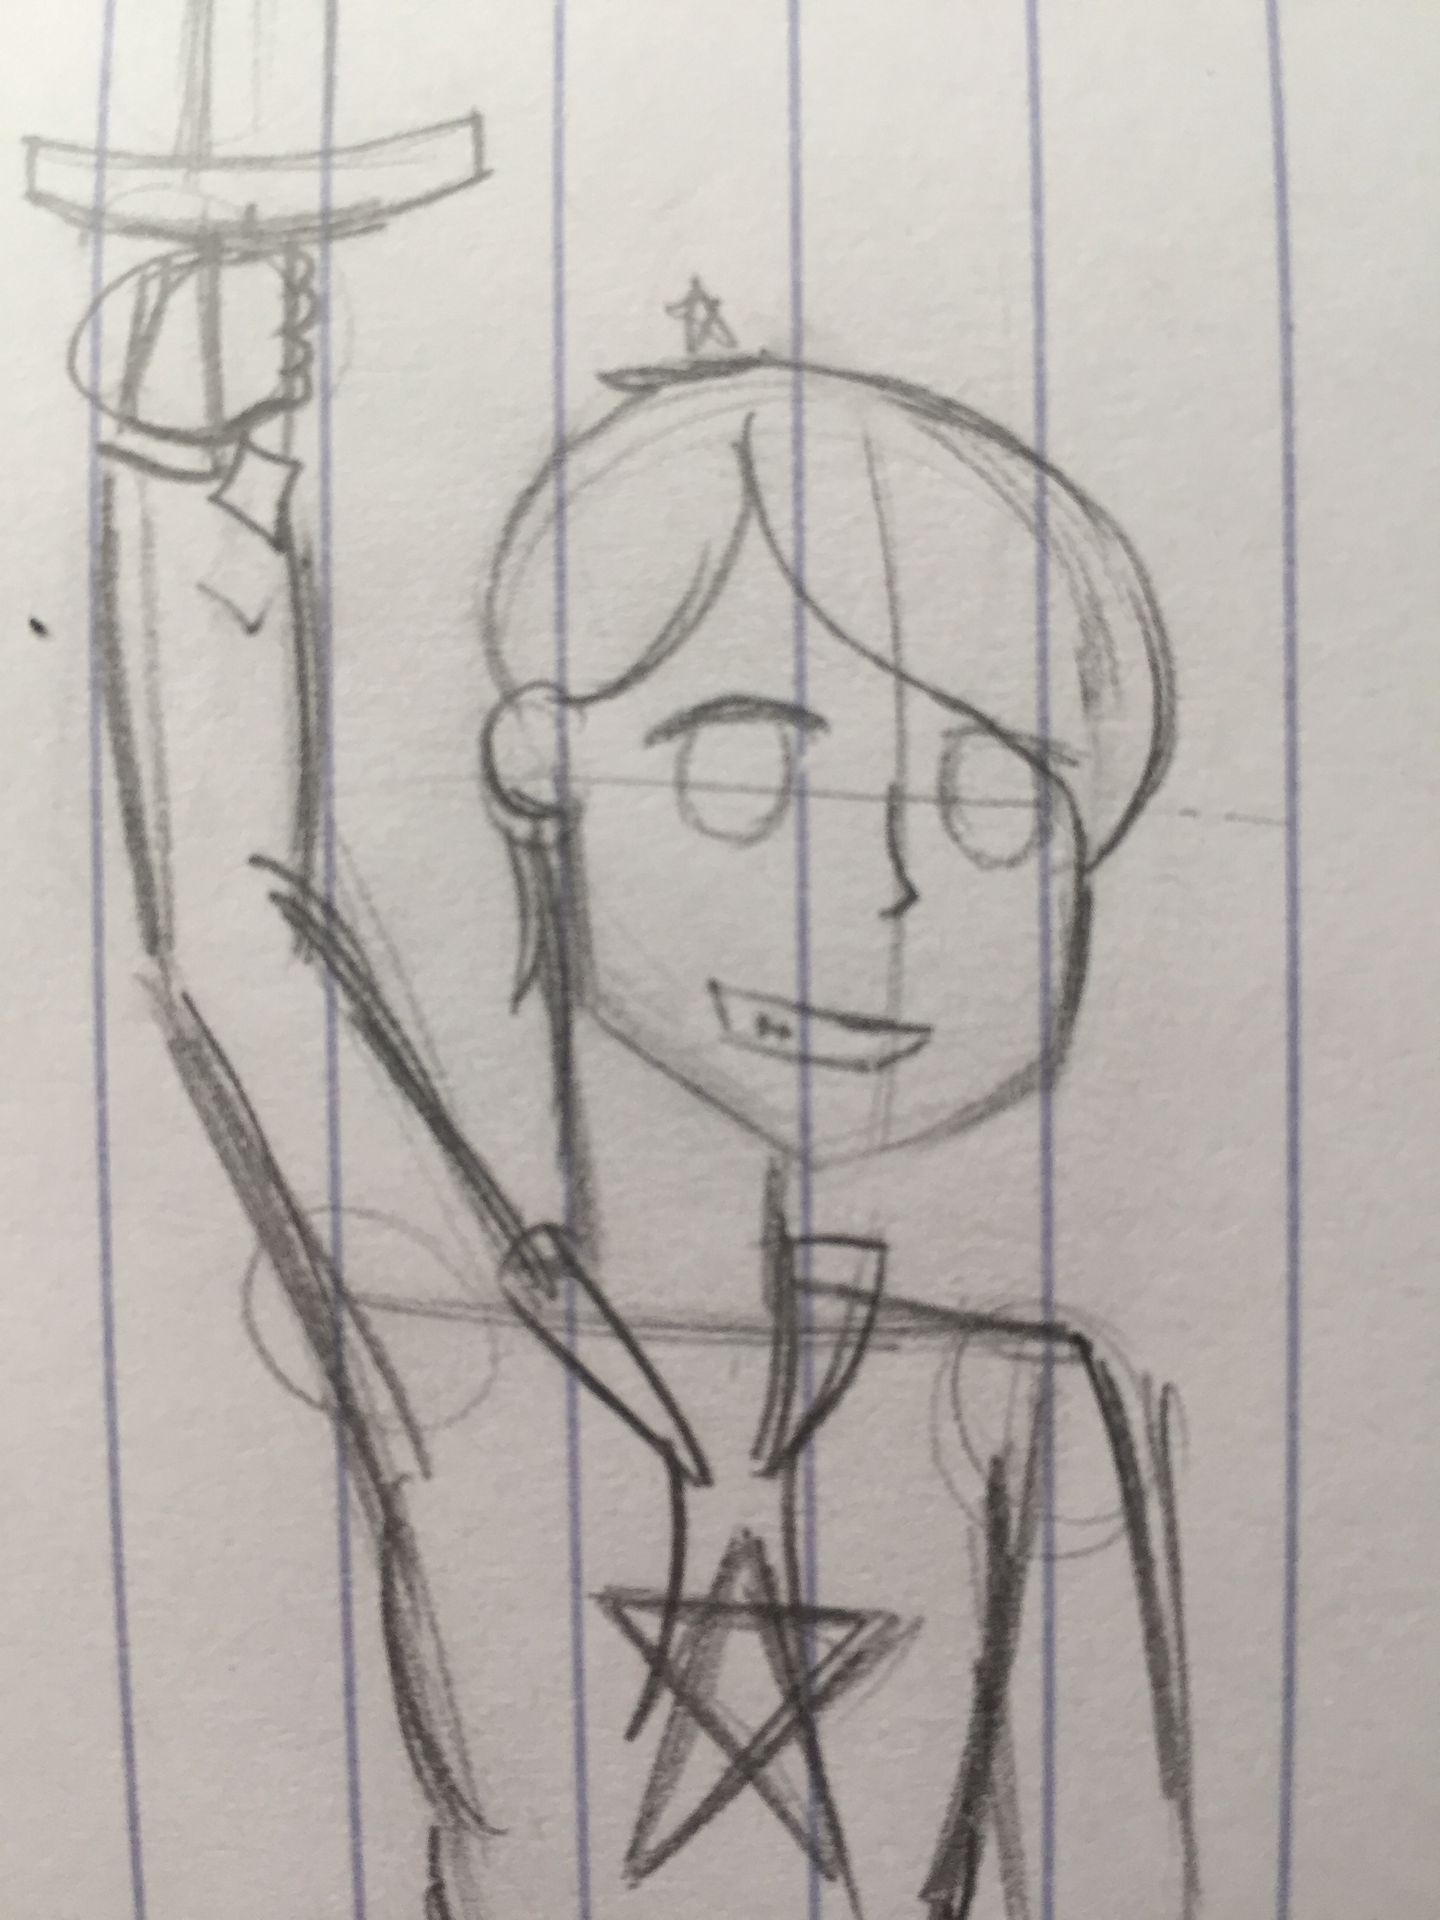
For the mouth I have some of the most trouble. The mouth for me makes the most emotion in my drawings. I'm still practicing on it.
I added freckles to him a while after but never took a picture. All I do is put random dots on his face. Just go crazy on that.
Note: not too much though. Some people have tones of freckles but make sure it doesn't look like the person has chicken pox.
Step five (final): clean up.
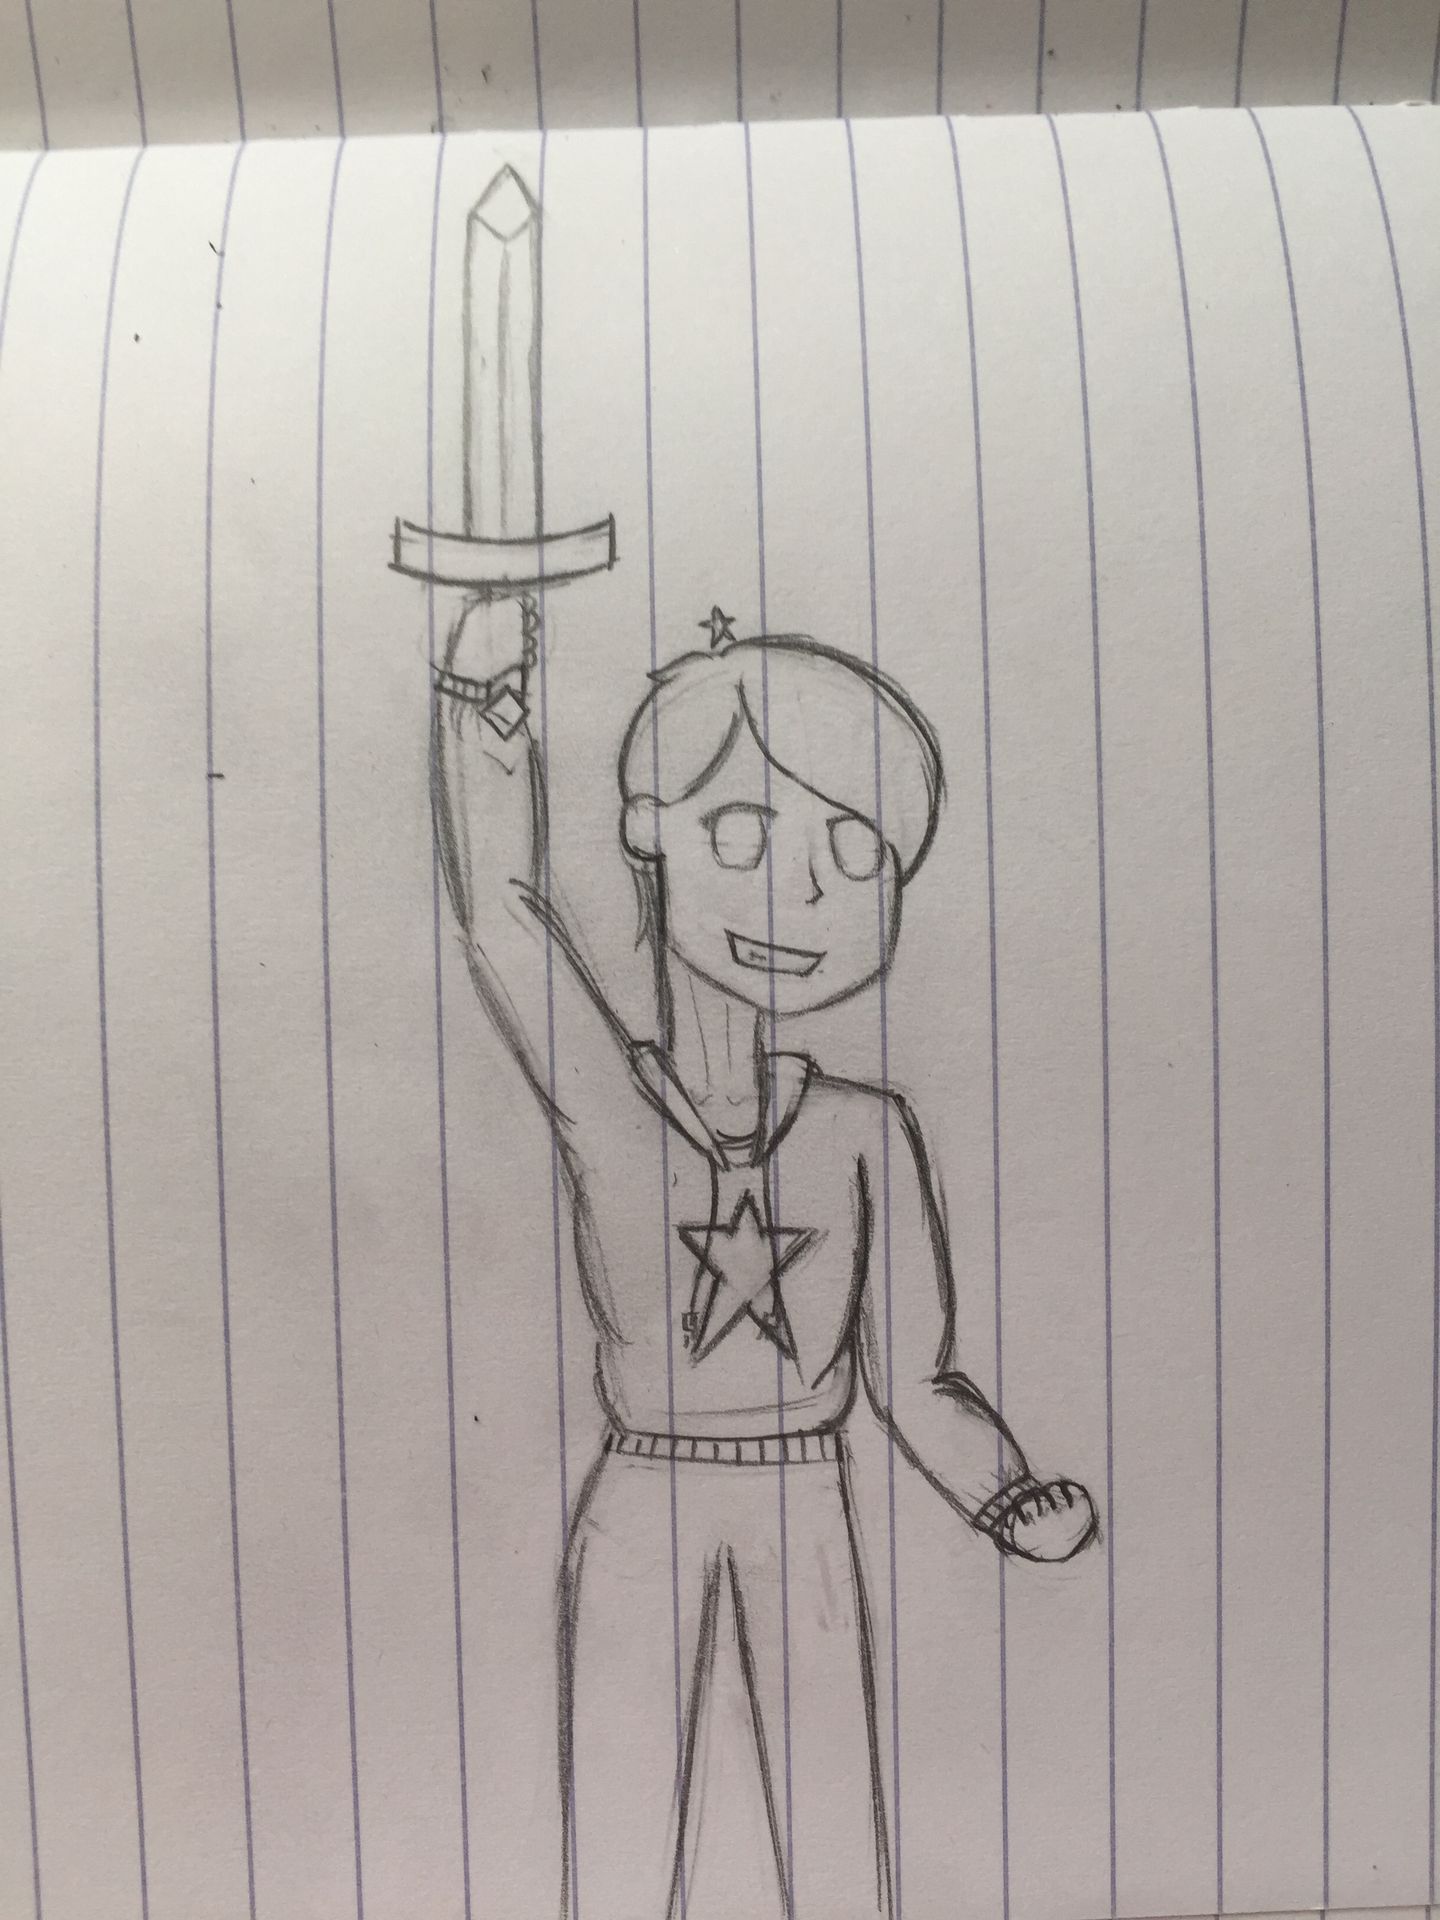
Once everything is done go ahead and remove line you don't need.
Note: try not to remove wrinkles or extra detail. I would suggest adding small detail after you've cleaned up the art. That way you won't worry about that. If you erase it that's okay. Just put it back with the pencil!
Now that the lines are gone go ahead and add more to it. Once you're satisfied ink it up with a fine tip pen and erase the last of the pencil!
Once that's done you can add colour to the art and anything else that'll pop it!
Note: don't be too rough with the pencil. If you leave marks on the paper for sketching the pencil crayons will show that, or anything else you use to colour.
And there you go! That's how I draw (specifically Galaxy Steve!) I hope I helped you with drawing, and maybe inspired you in a way.
Bye bye!!
Bạn đang đọc truyện trên: Truyen247.Pro