SilkWing
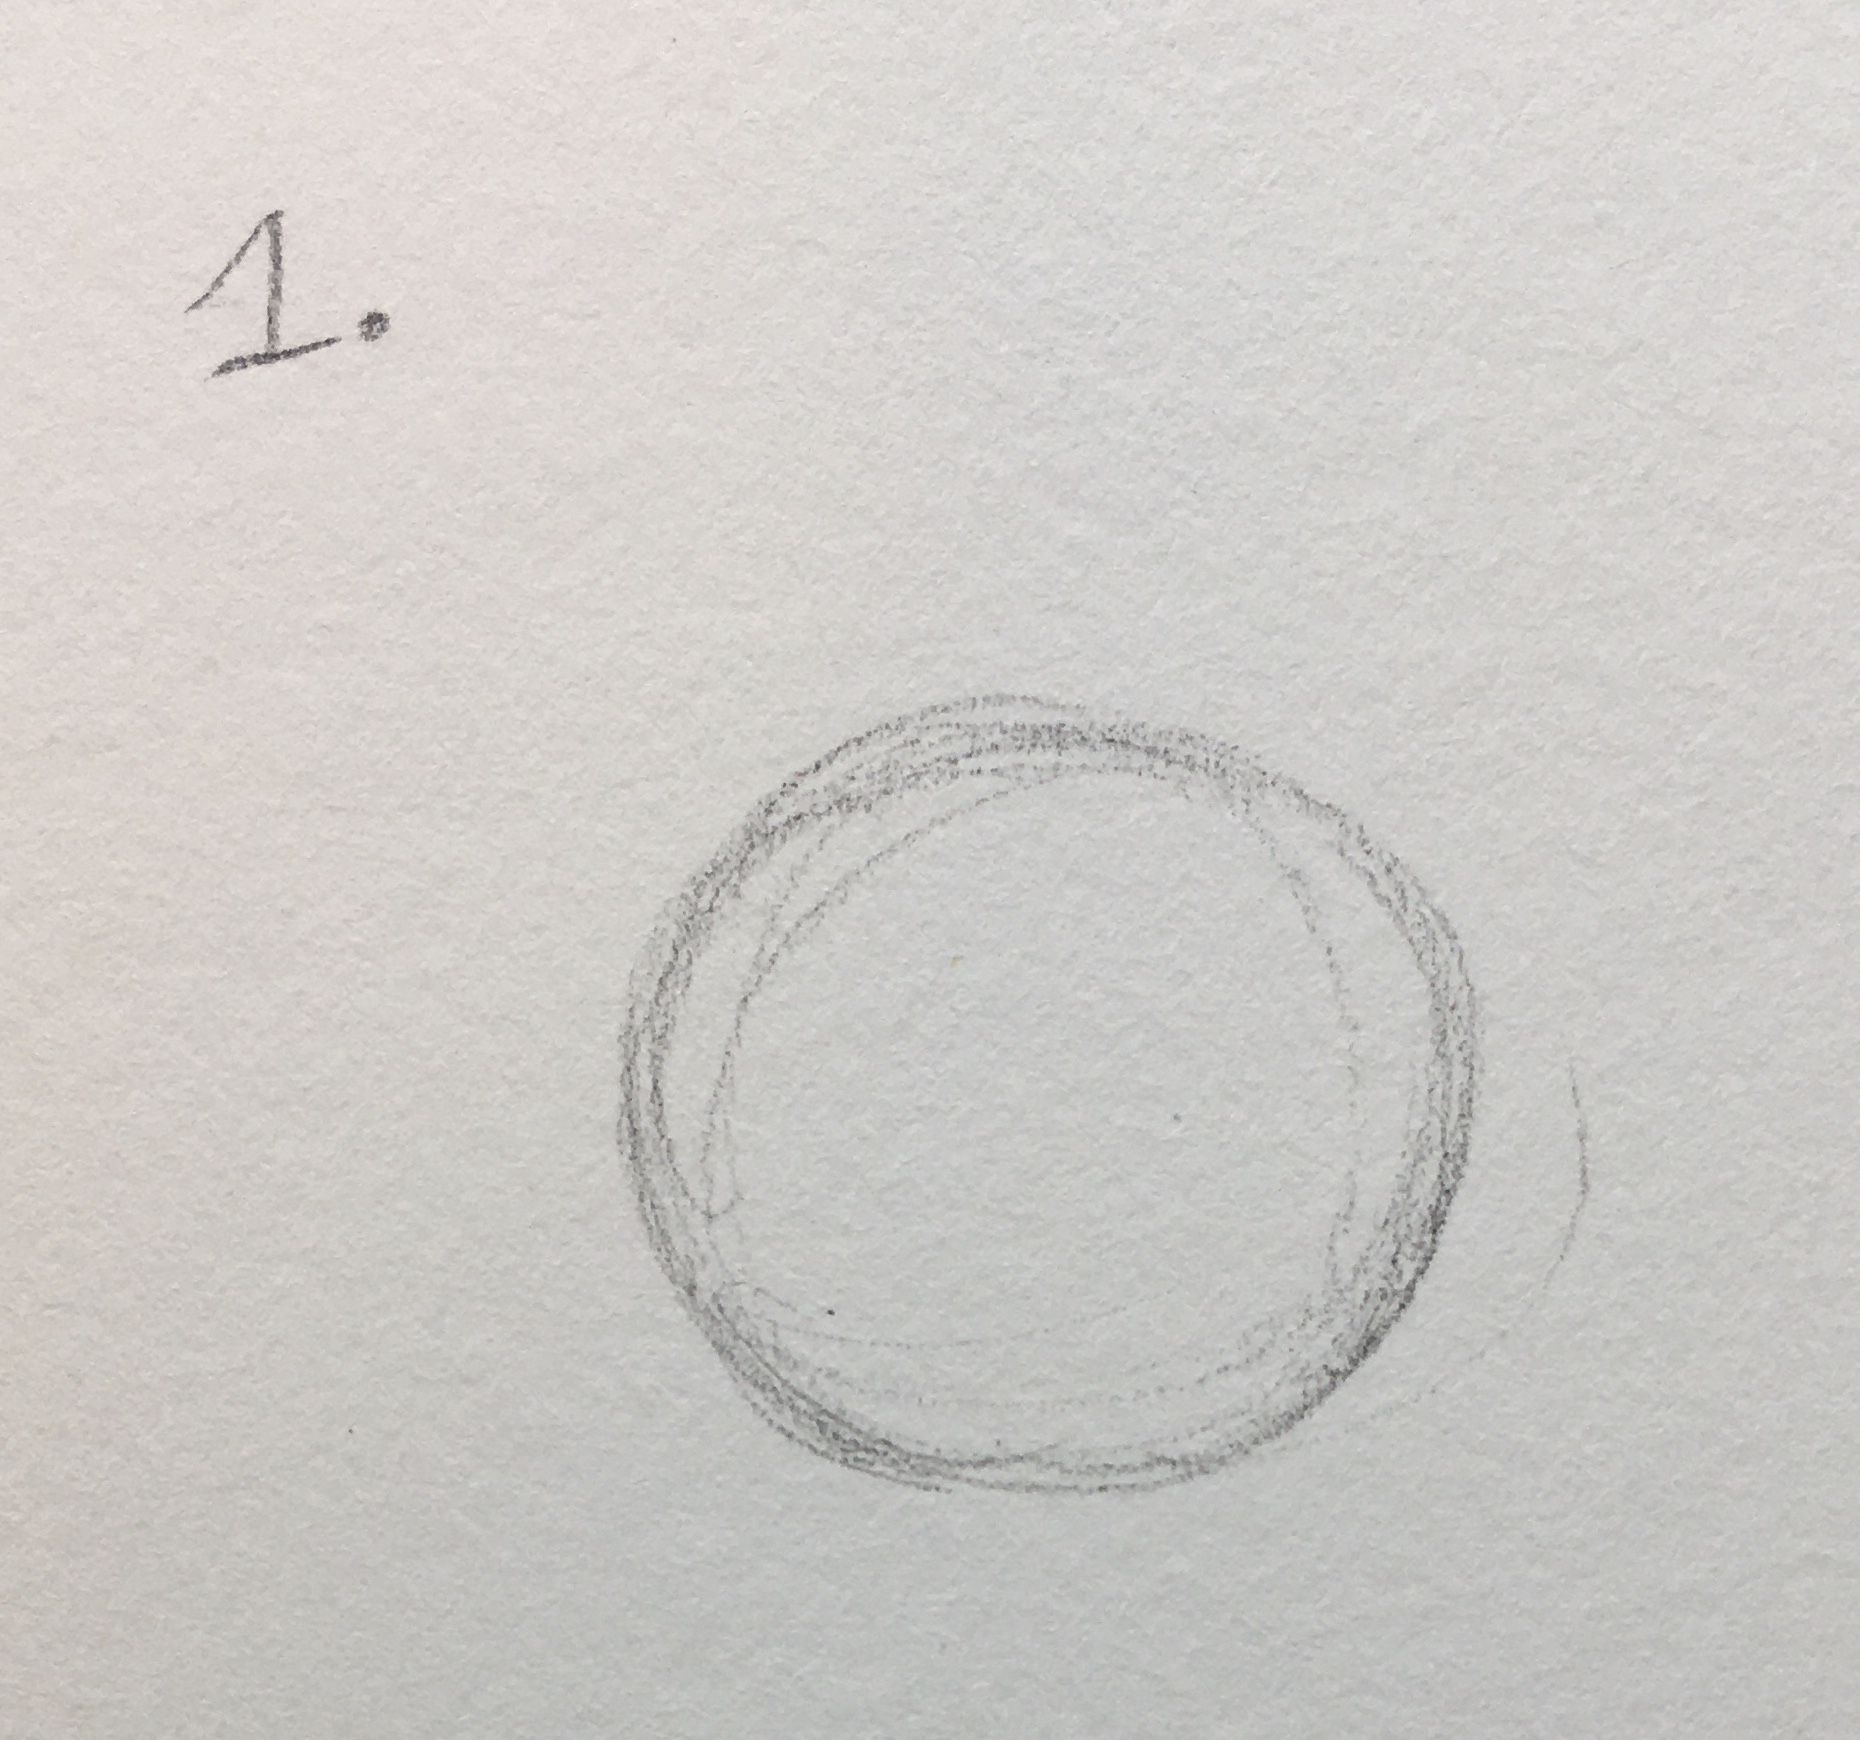
1. First step is to draw a circle. Sketch lightly with pencil, you will be erasing this later.
2. Now draw a second circle In front of the first (this will be the snout) and a little shape jutting out from the first circle.

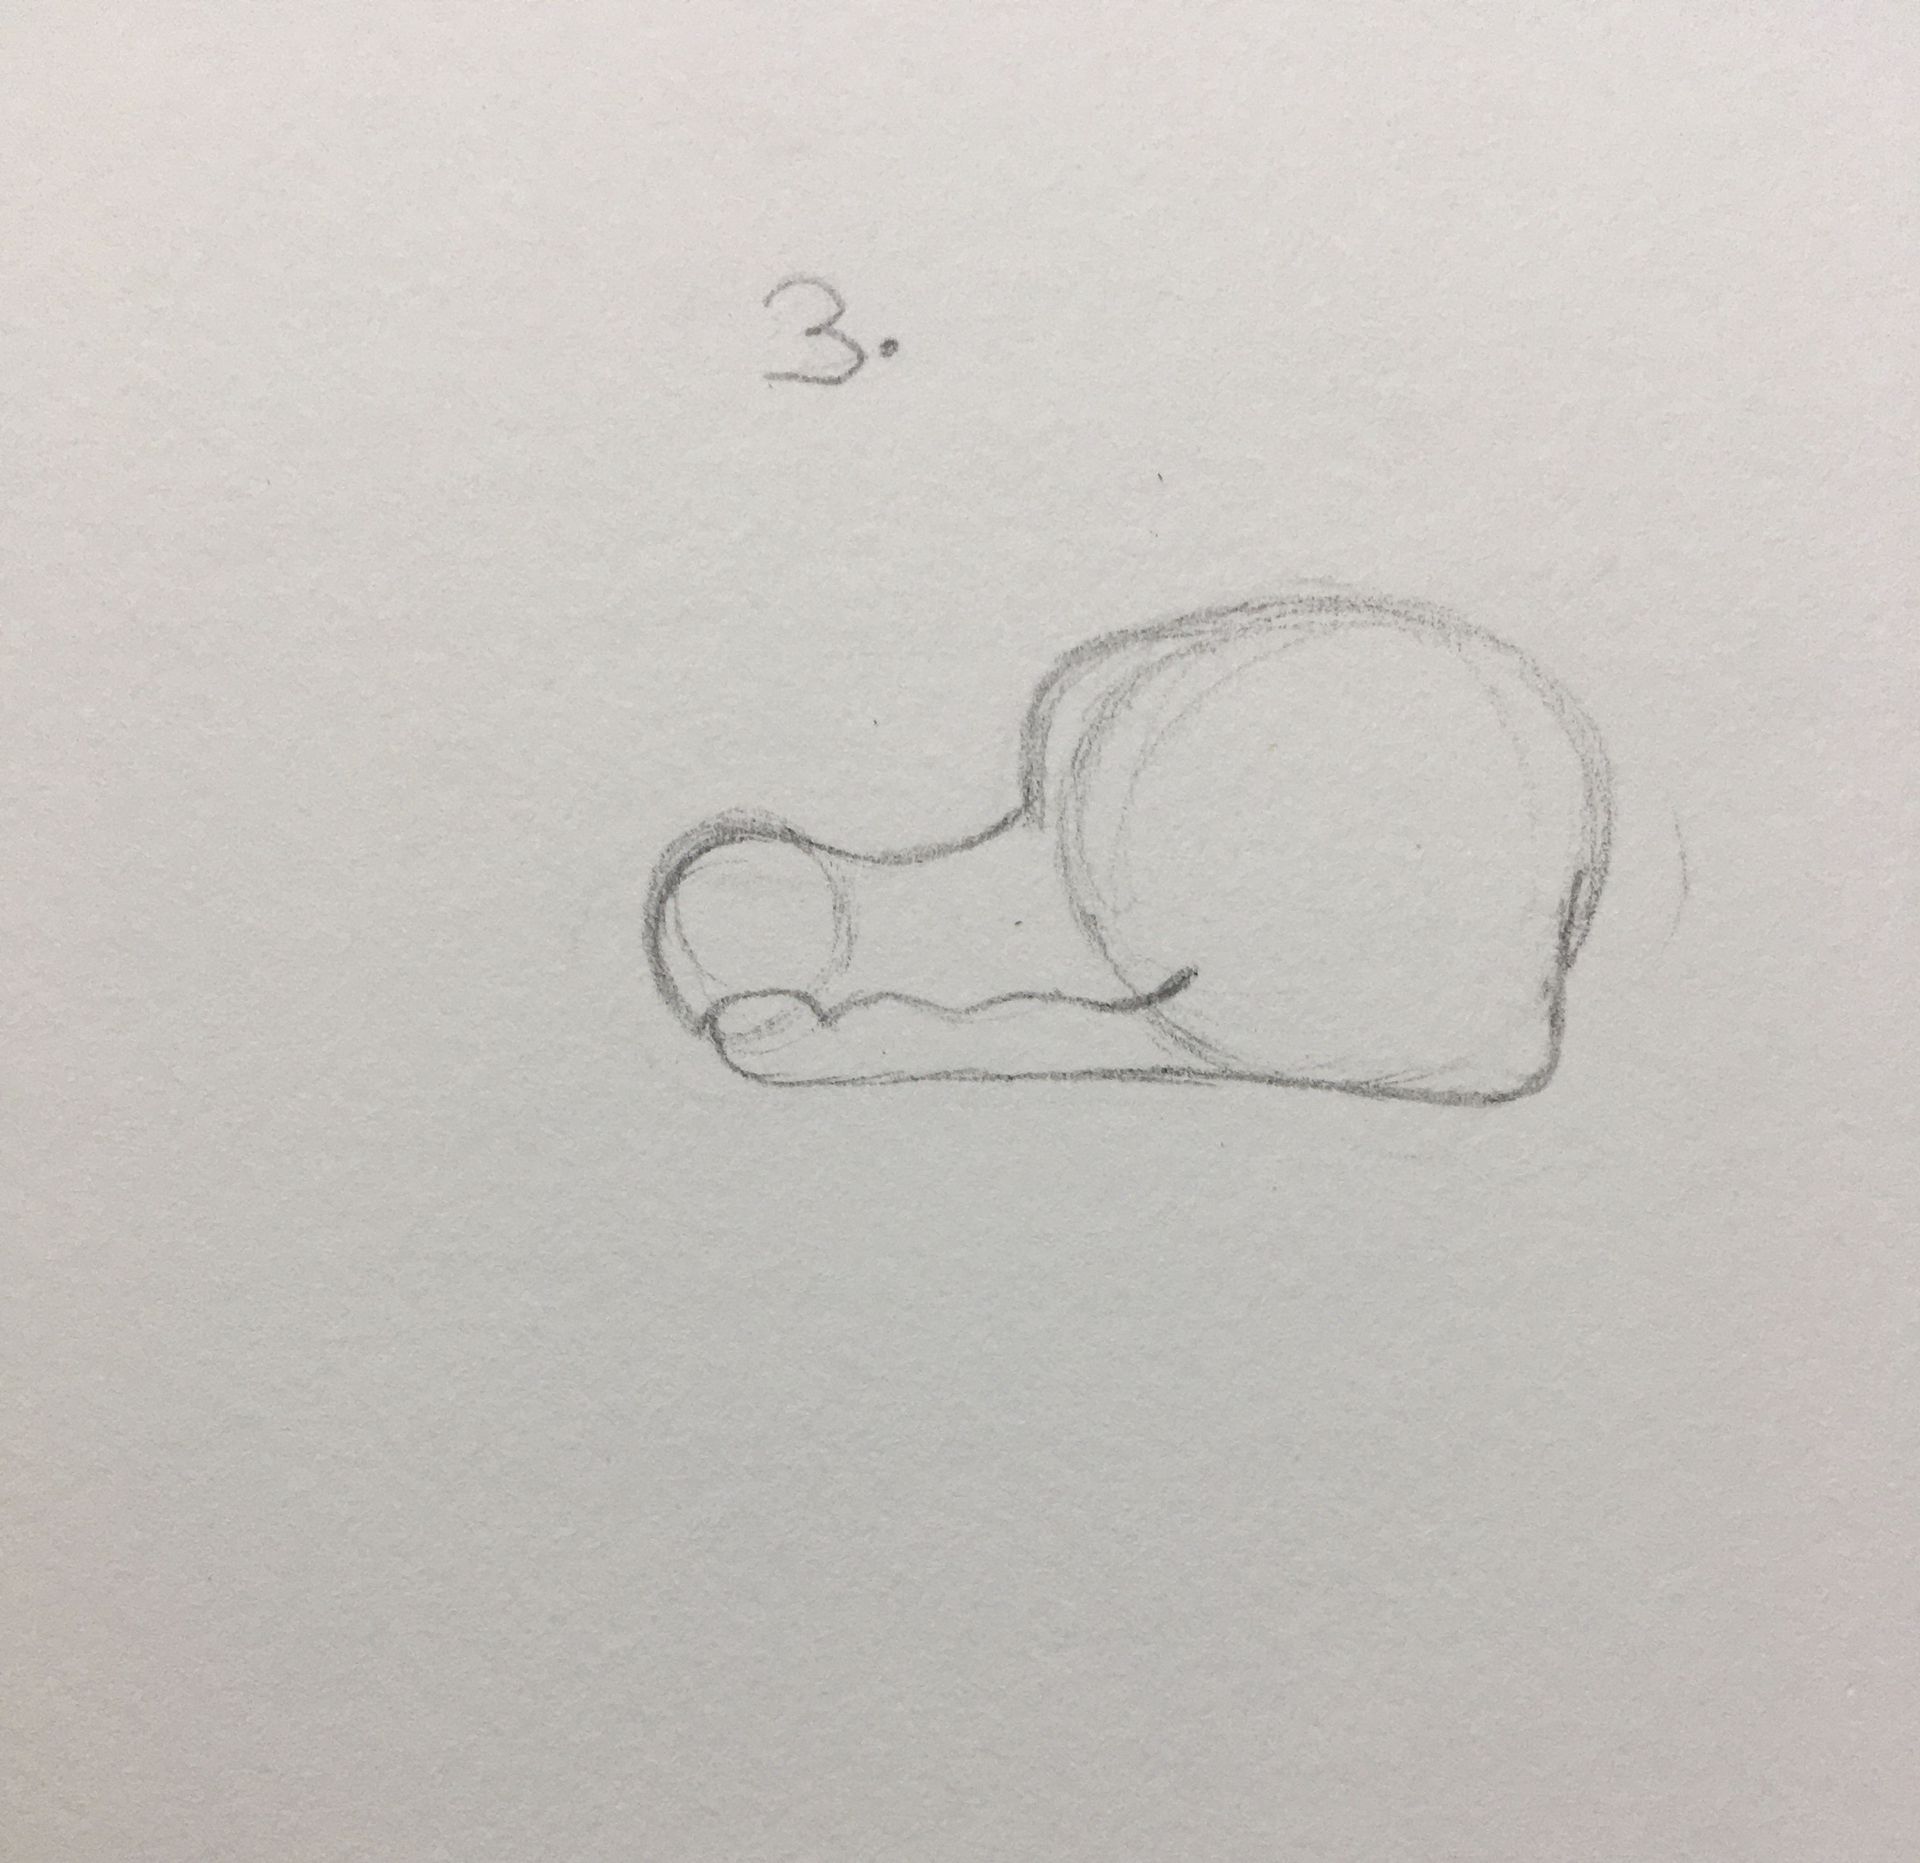
3. Connect the two circles with slightly curved lines to form the face. Make sure the top part juts out a bit so you can see both parts of the jaw. I made the mouth come up in a smile, you can change the expression if you'd like.
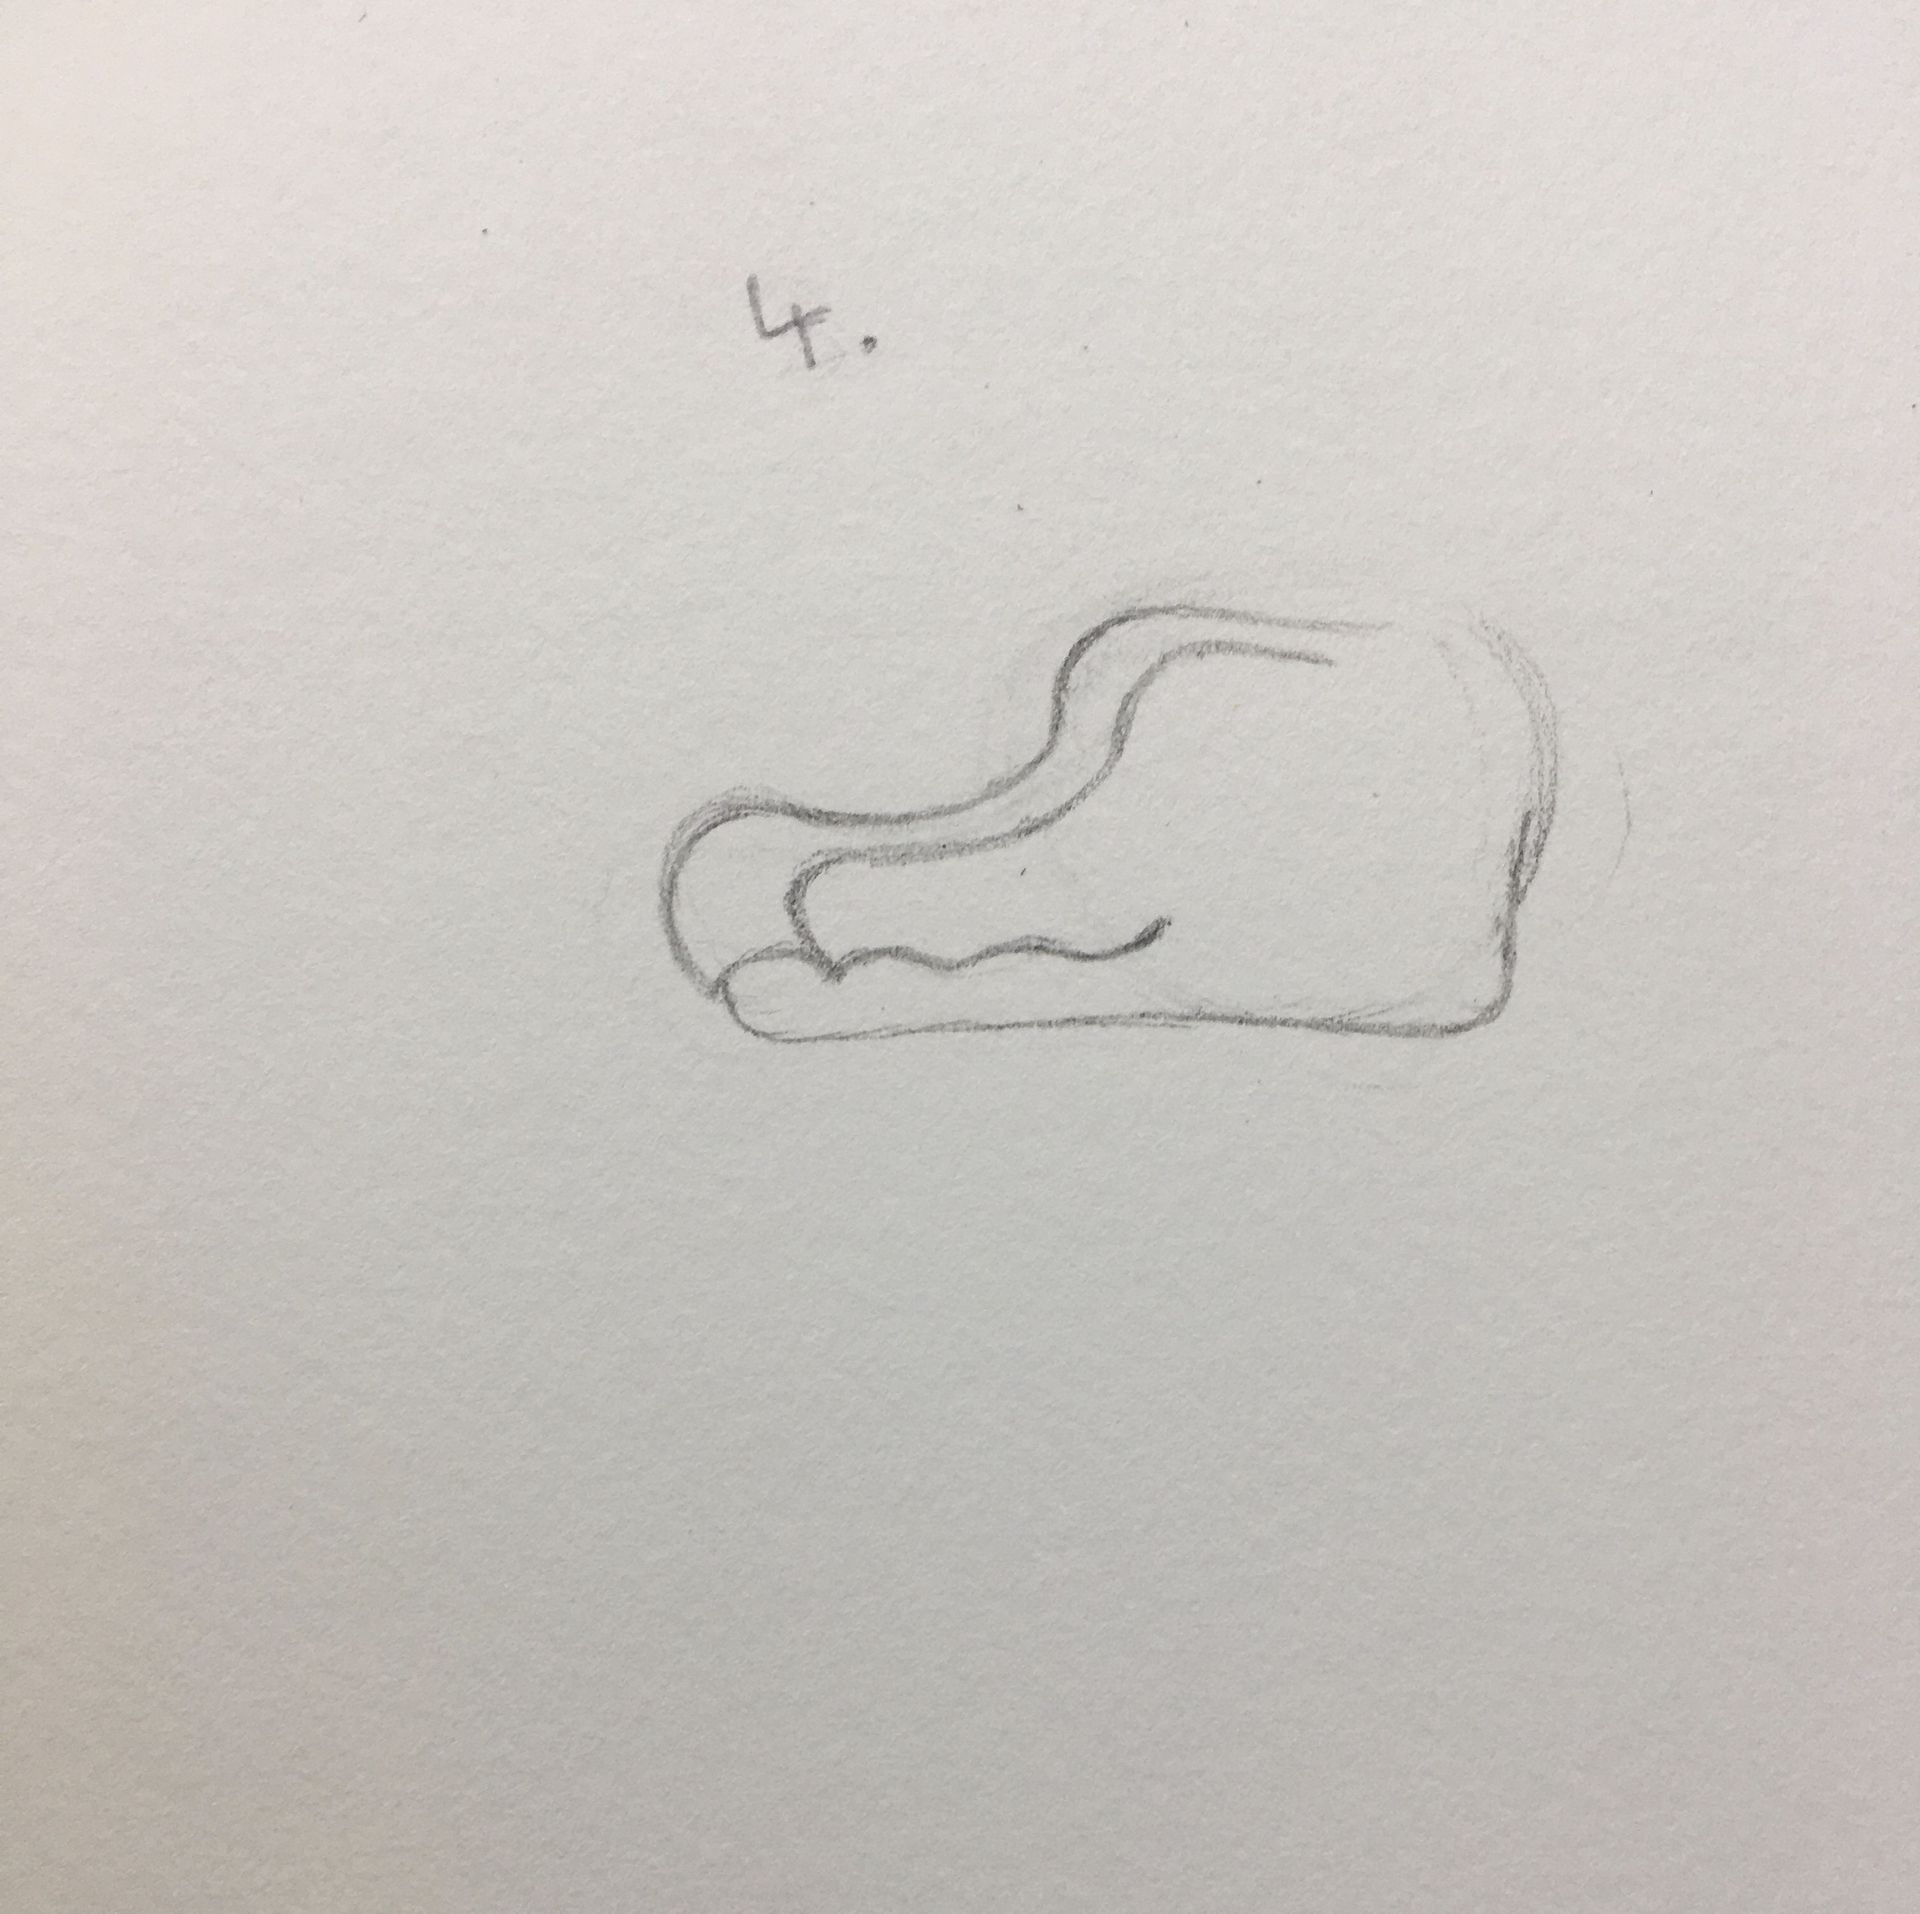
4. Add the detail line that forms the crest/brow thingy. You can also erase the starting circles, just be careful of the other lines.
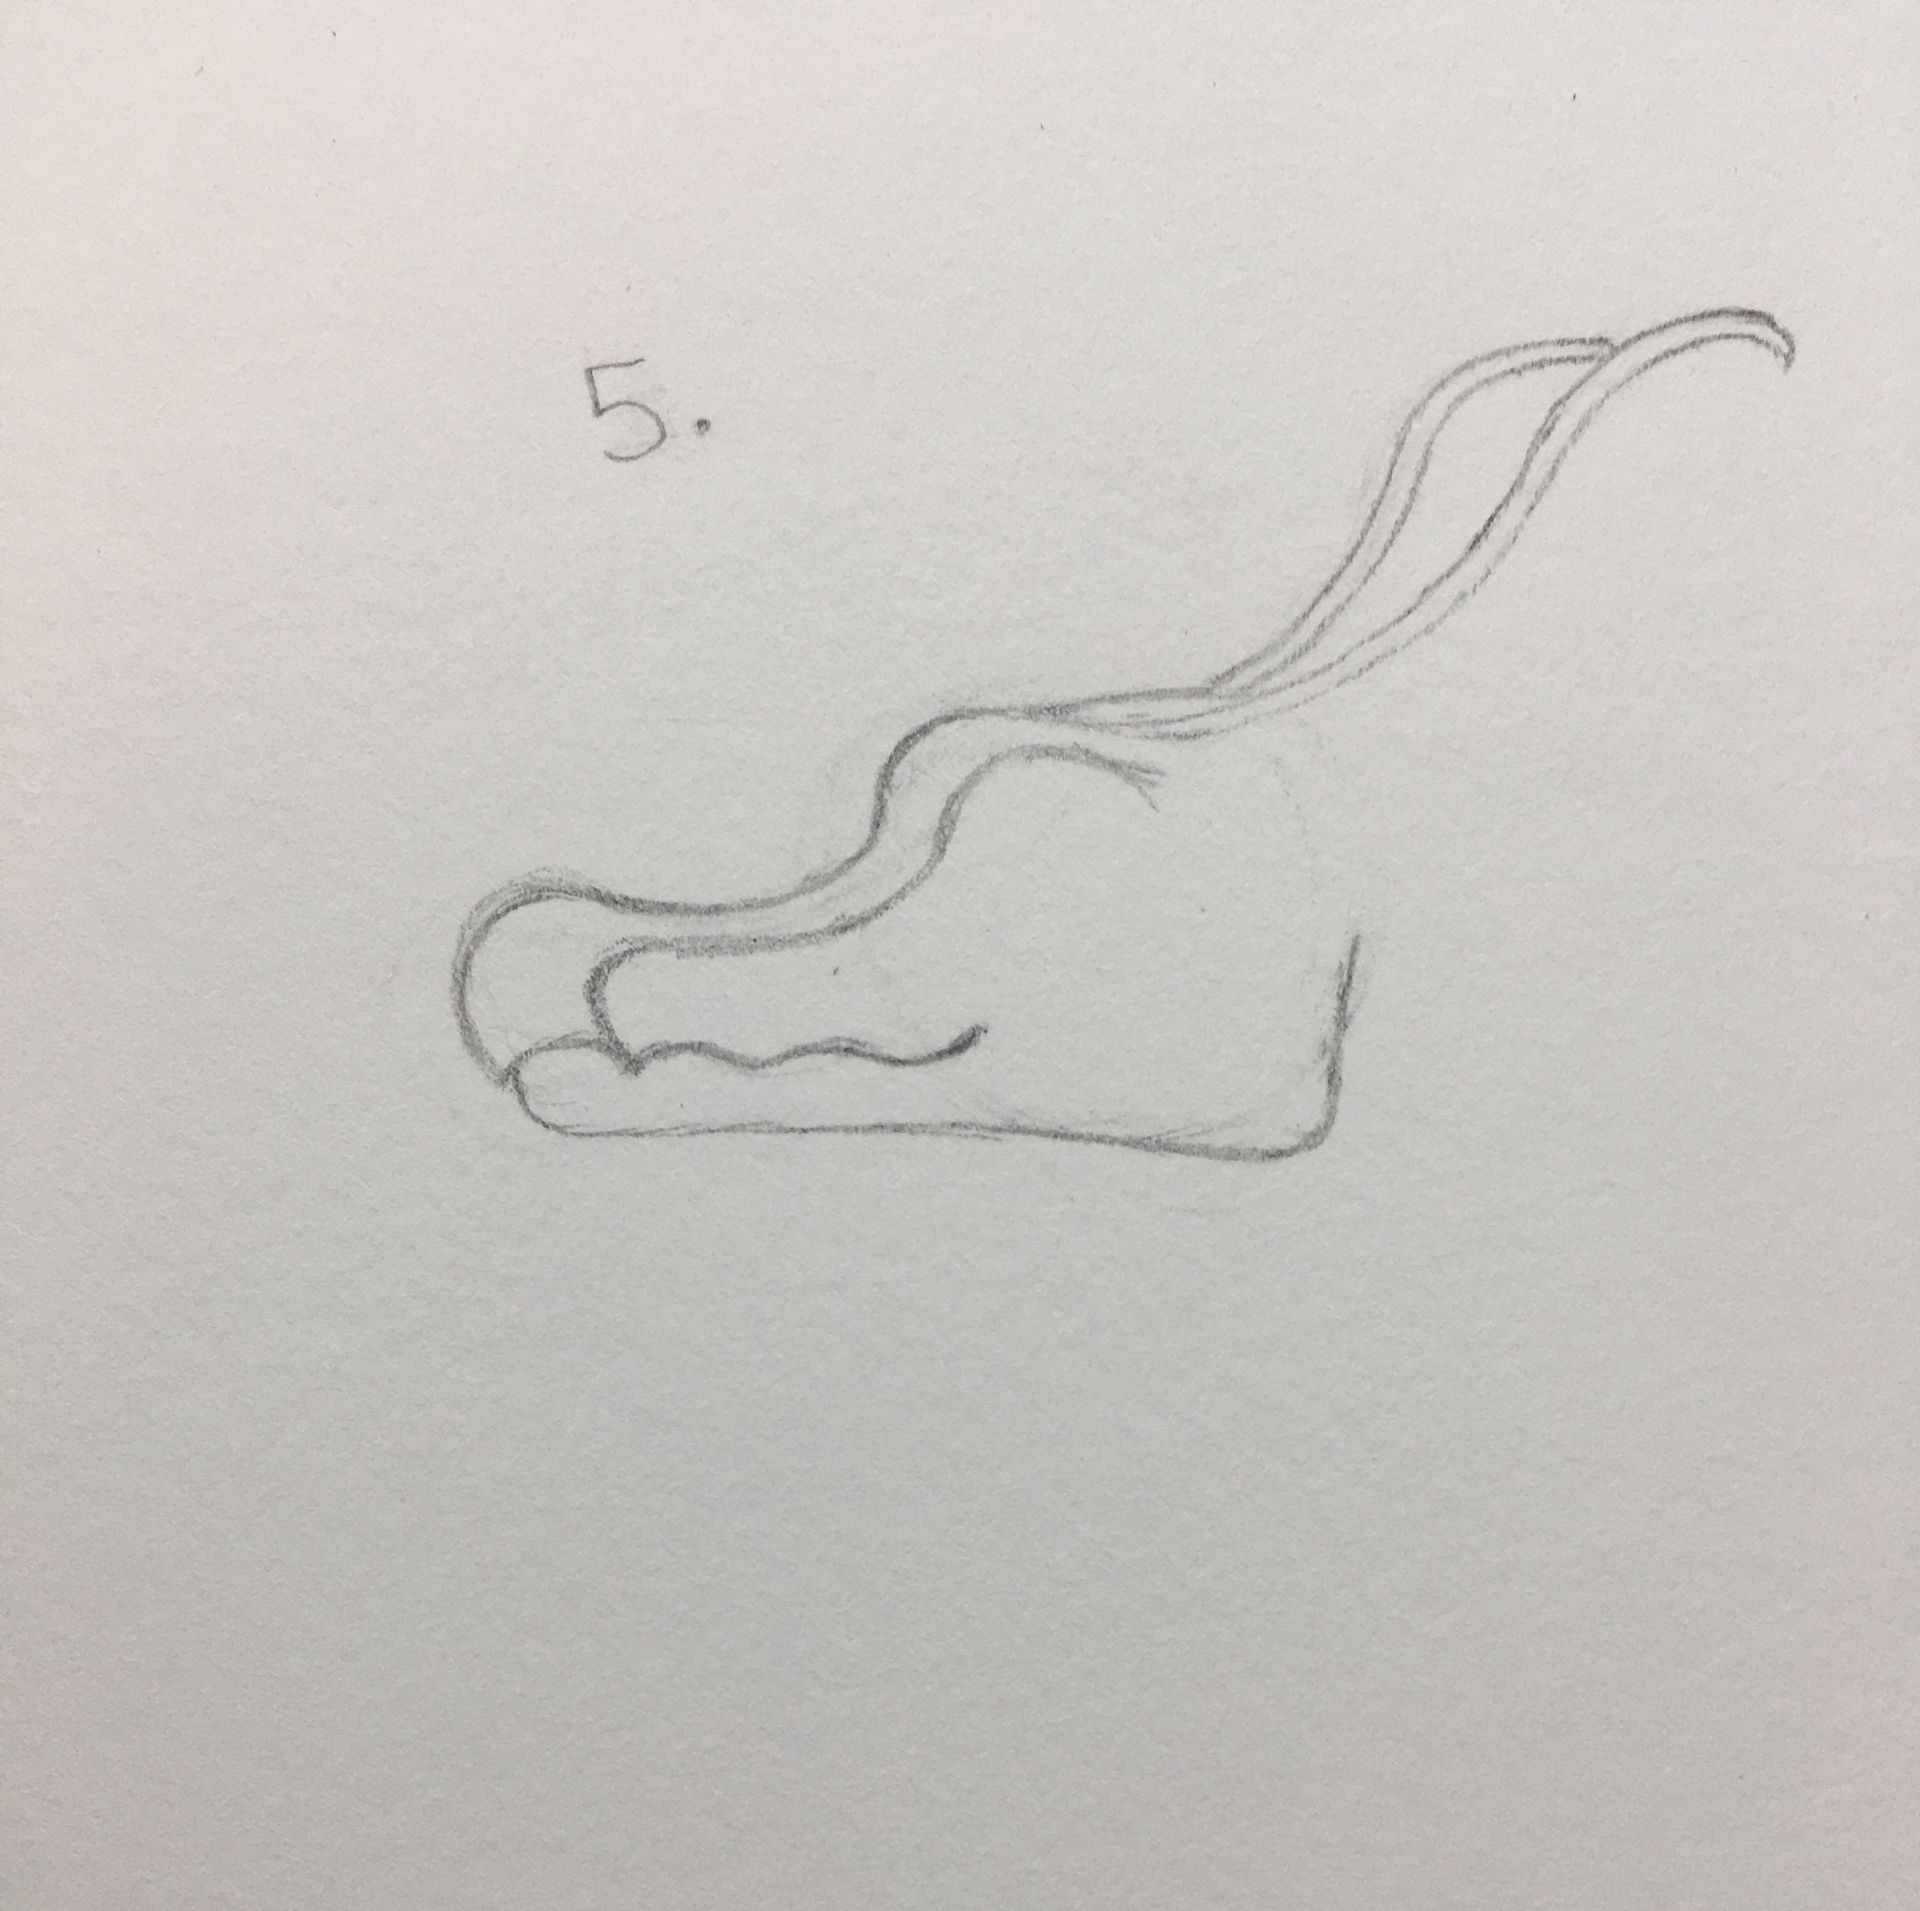
5. Add the antenna coming out of the forehead. Remember there are two, and they won't be slightly in line with each other. Take some time getting the shape and length right, things like this are tricky.
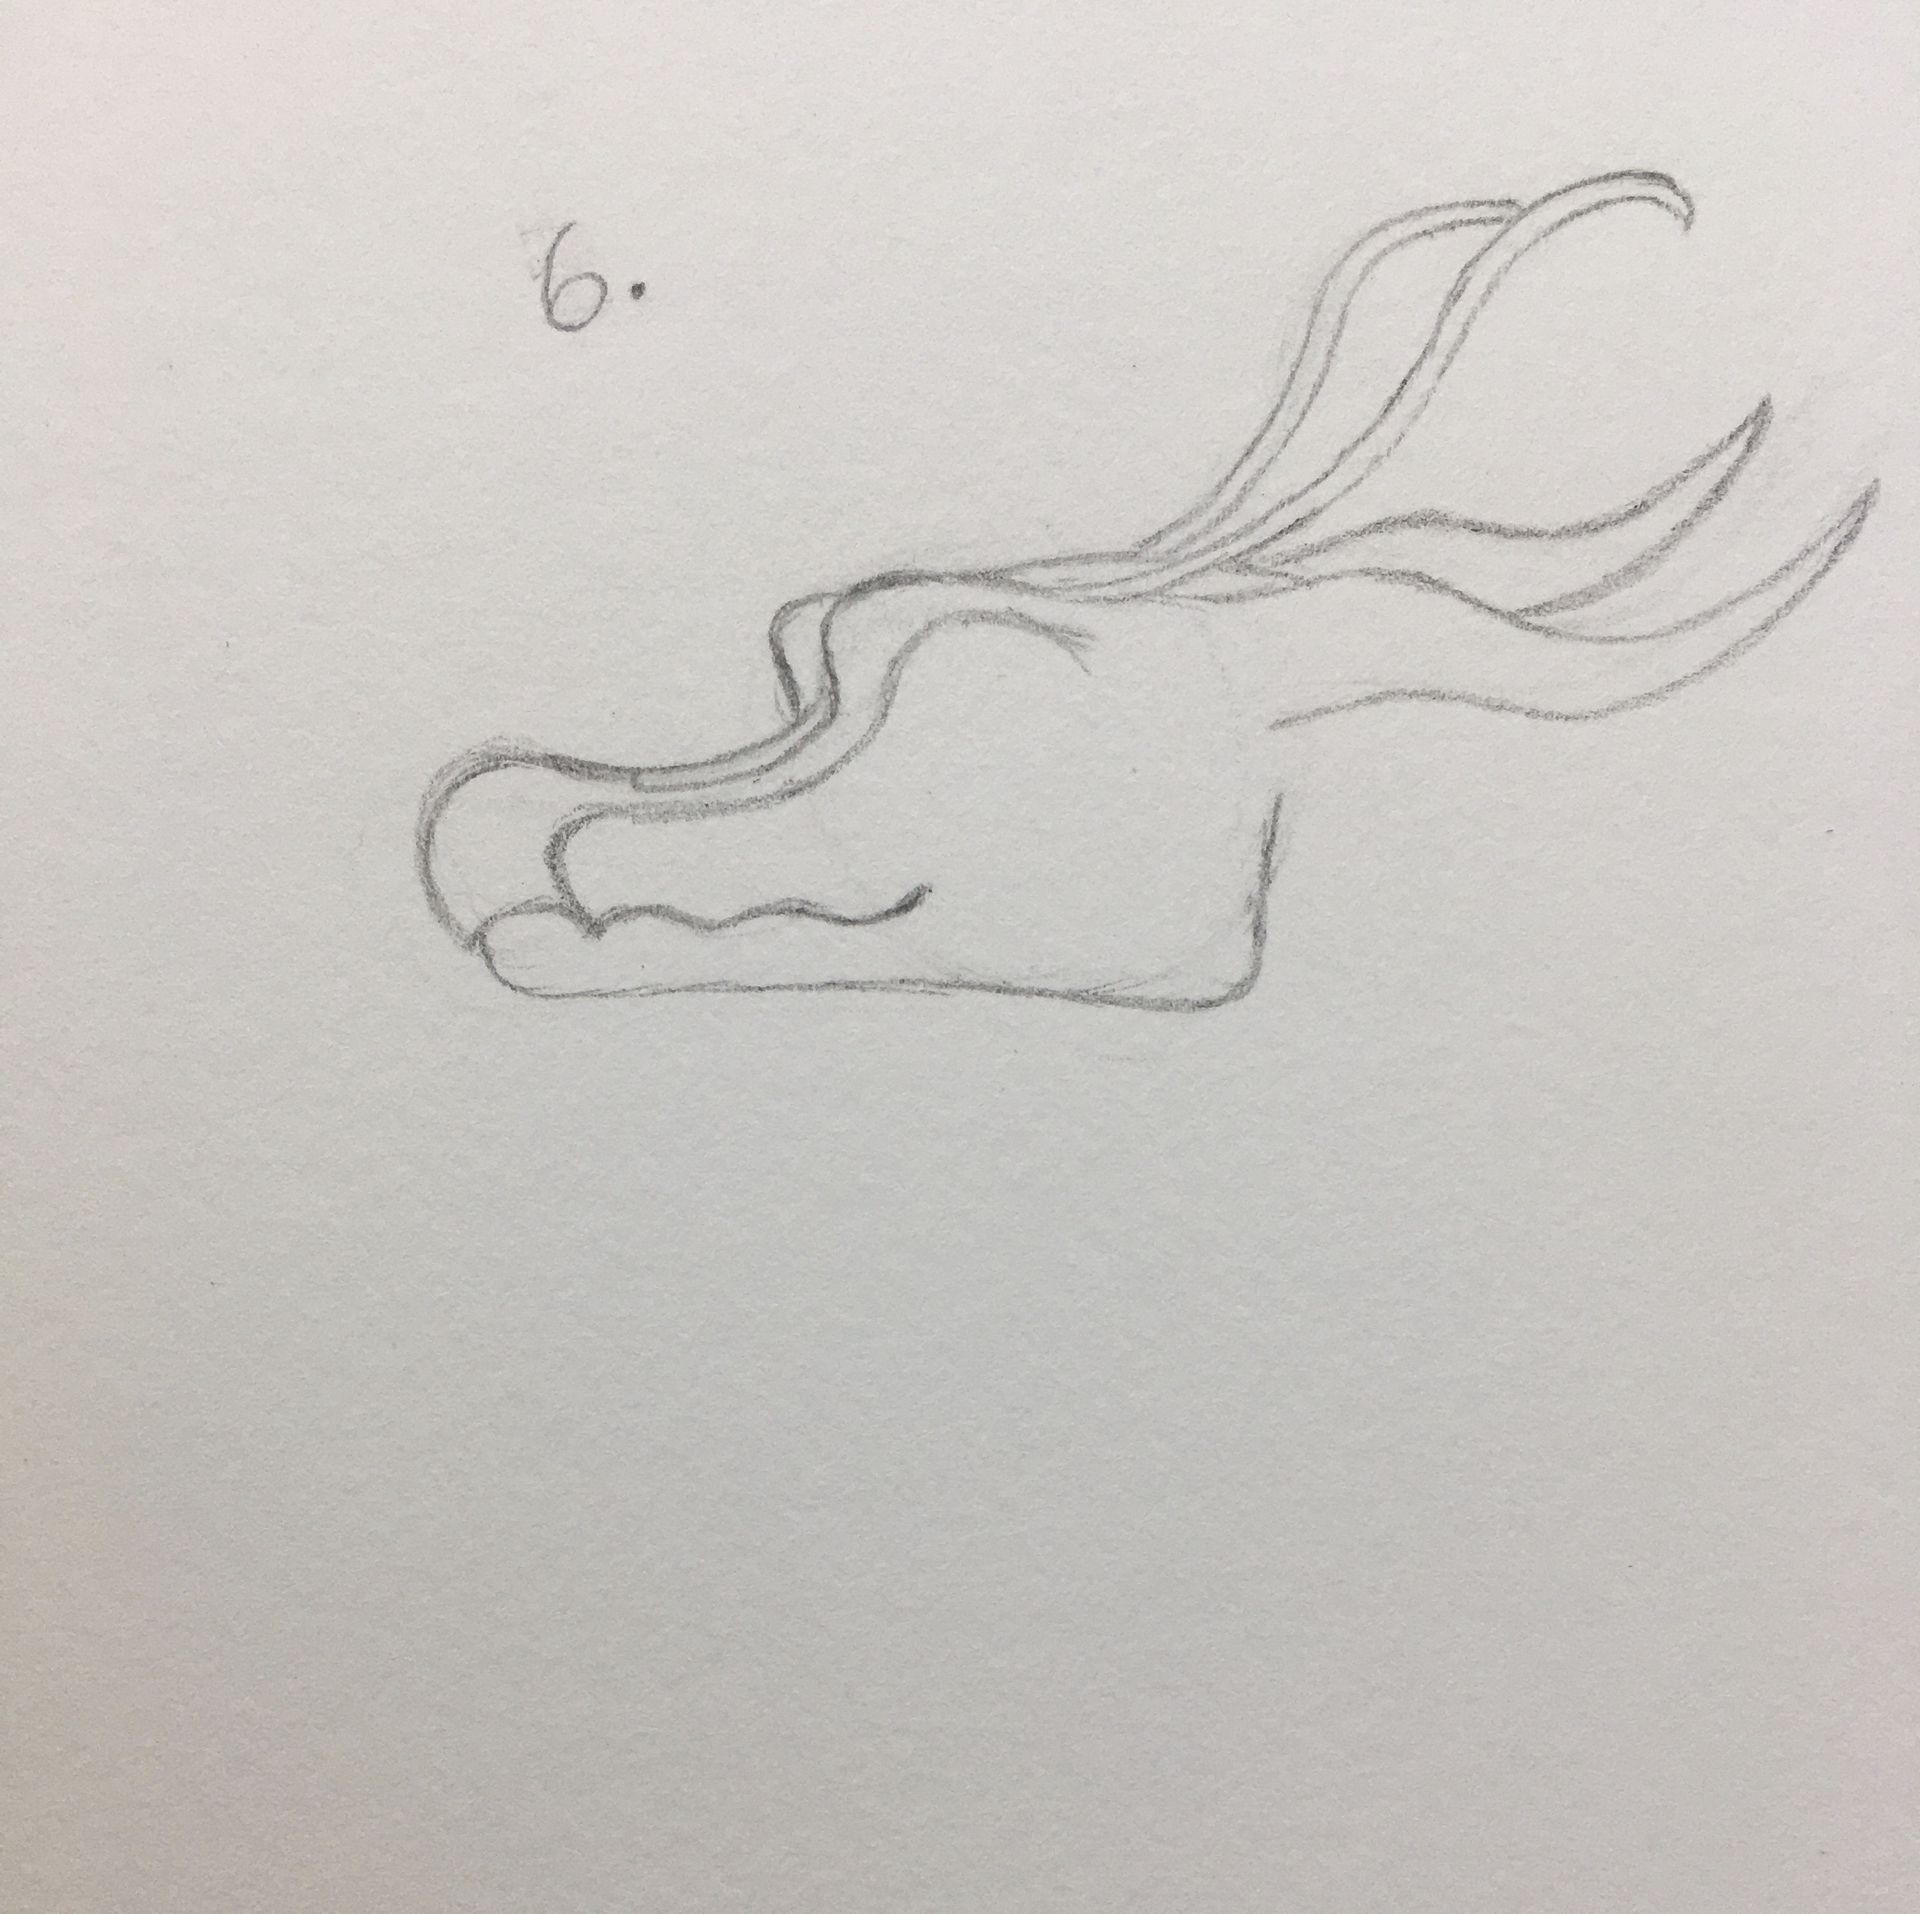
6. Add in the horns. SilkWing horns are long and elegant. Just like with the antenna, remember to add the second one slightly above the first. I also added in the second eyebrow/bump thingy, don't really know how to describe it but add it in to yours.
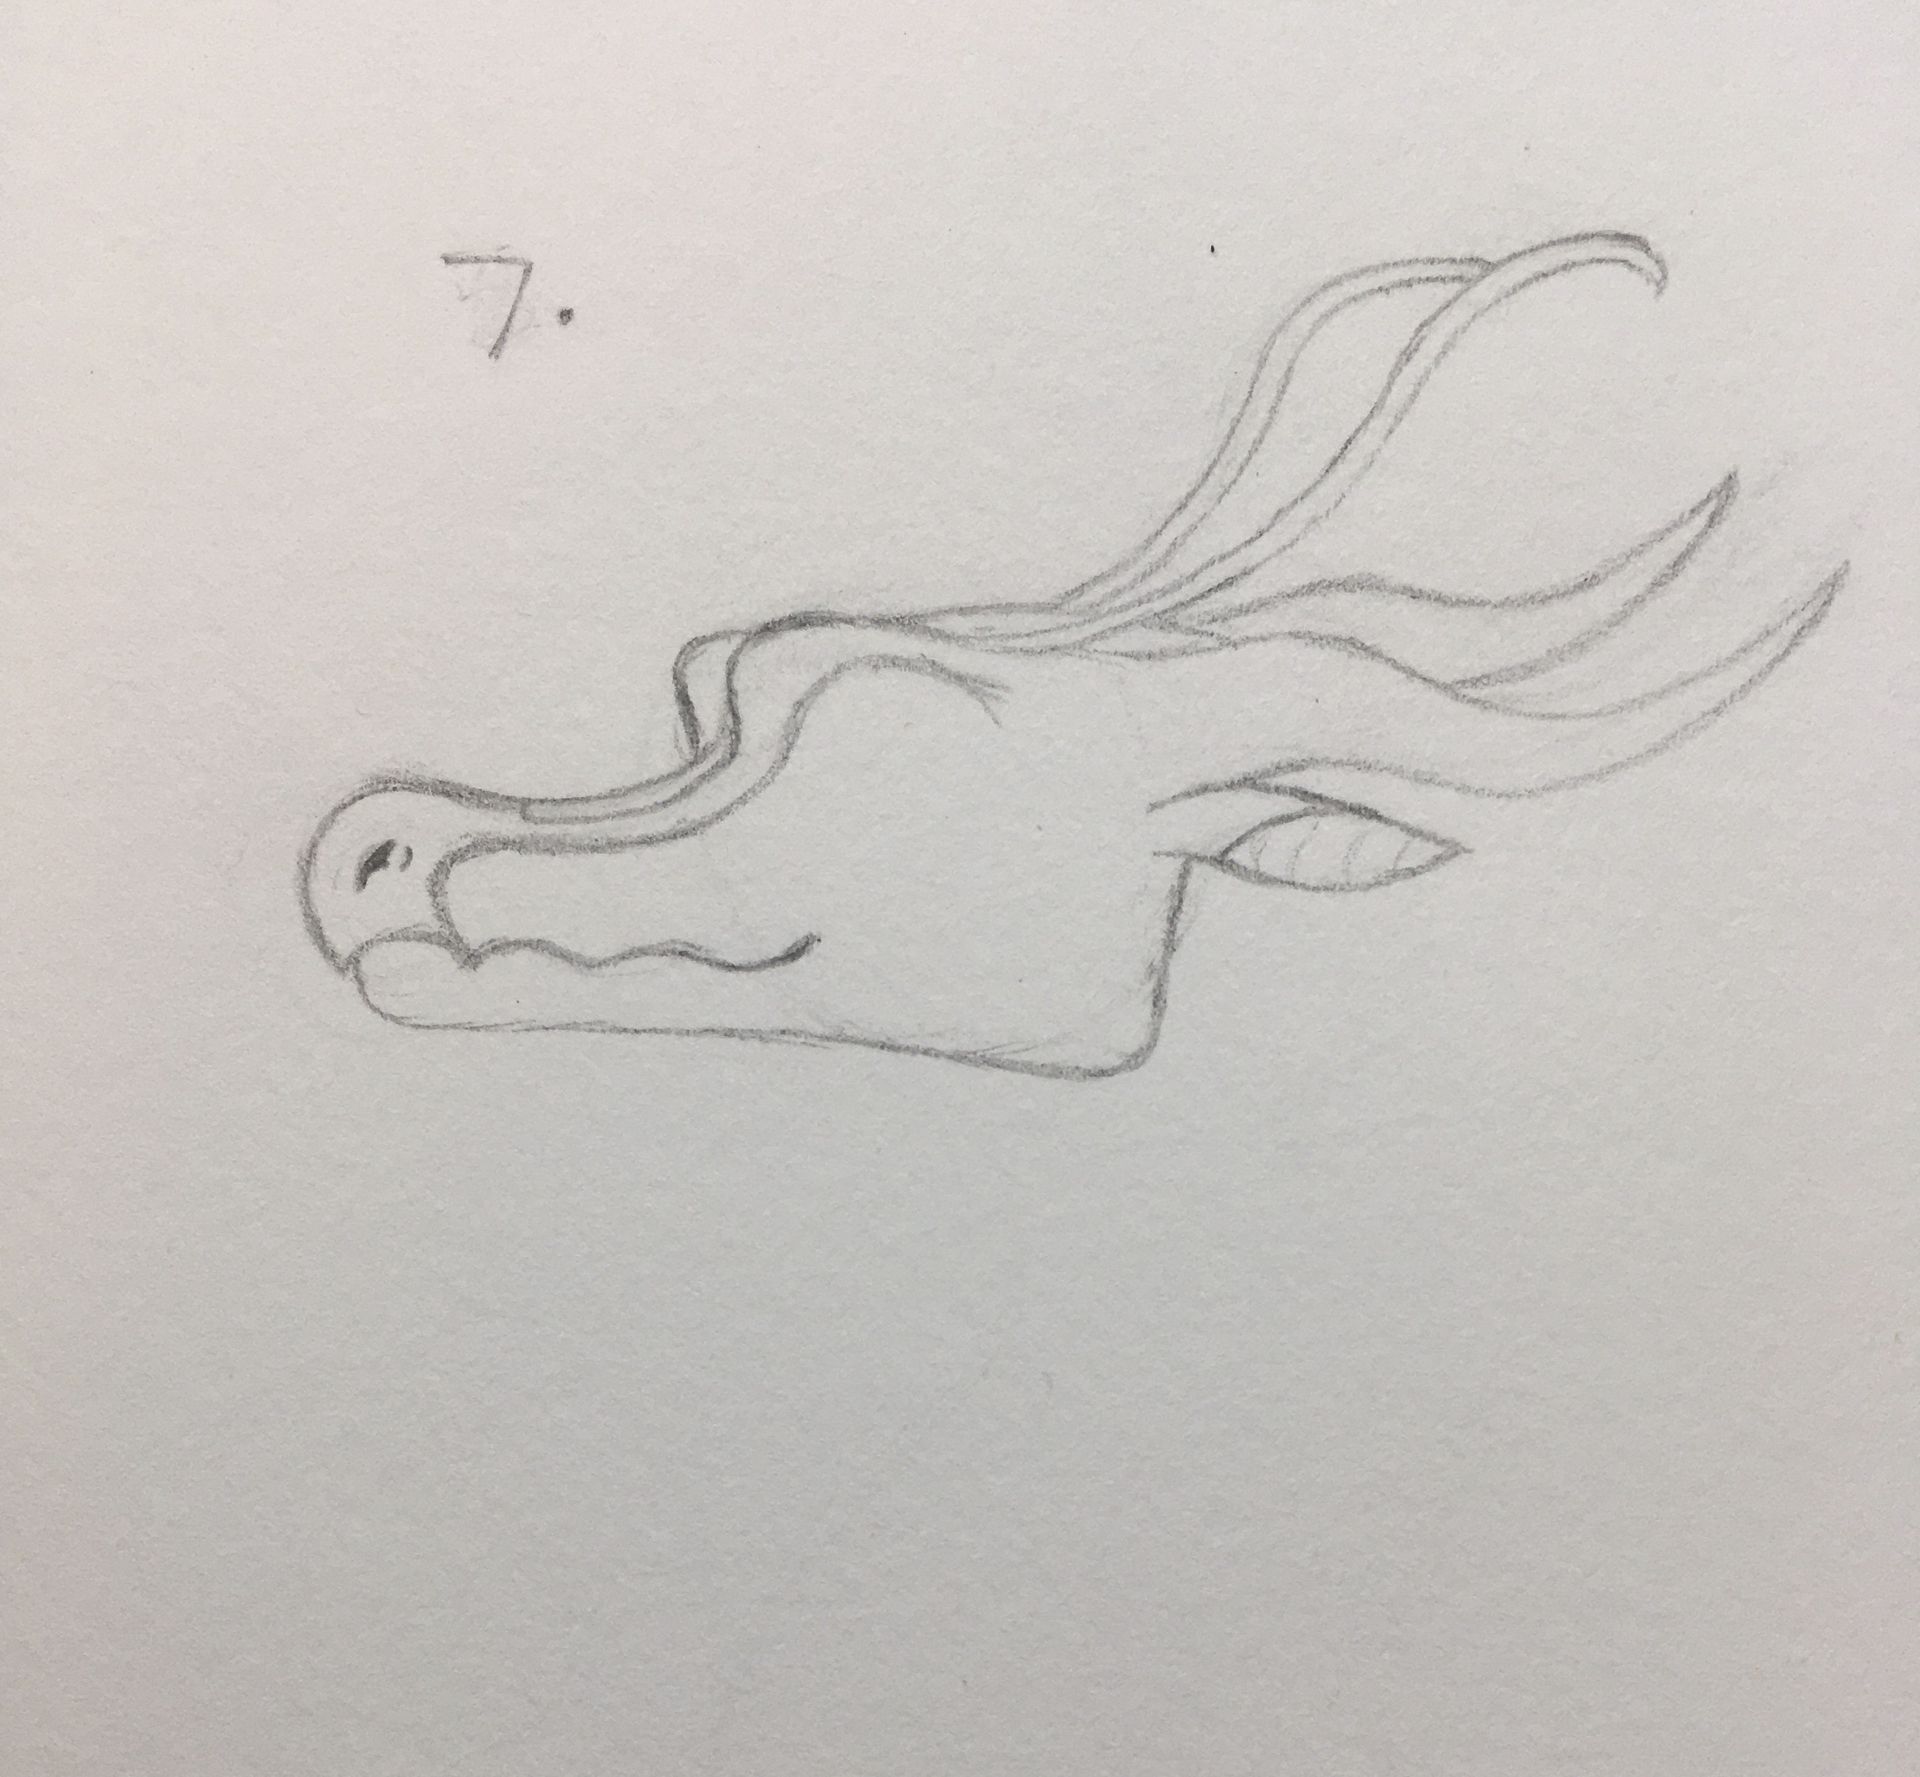
7. Put in the ear to finish off the head. This will be just below the horn, angled down. I also added in the nostril. At this point check to make sure your drawing has the same elements mine does, we're getting into details now.
8. Add in the details along the brows and horns, and the little scales at the bottom of the face. Remember to curve the lines to show depth, straight lines can make a drawing look flat.

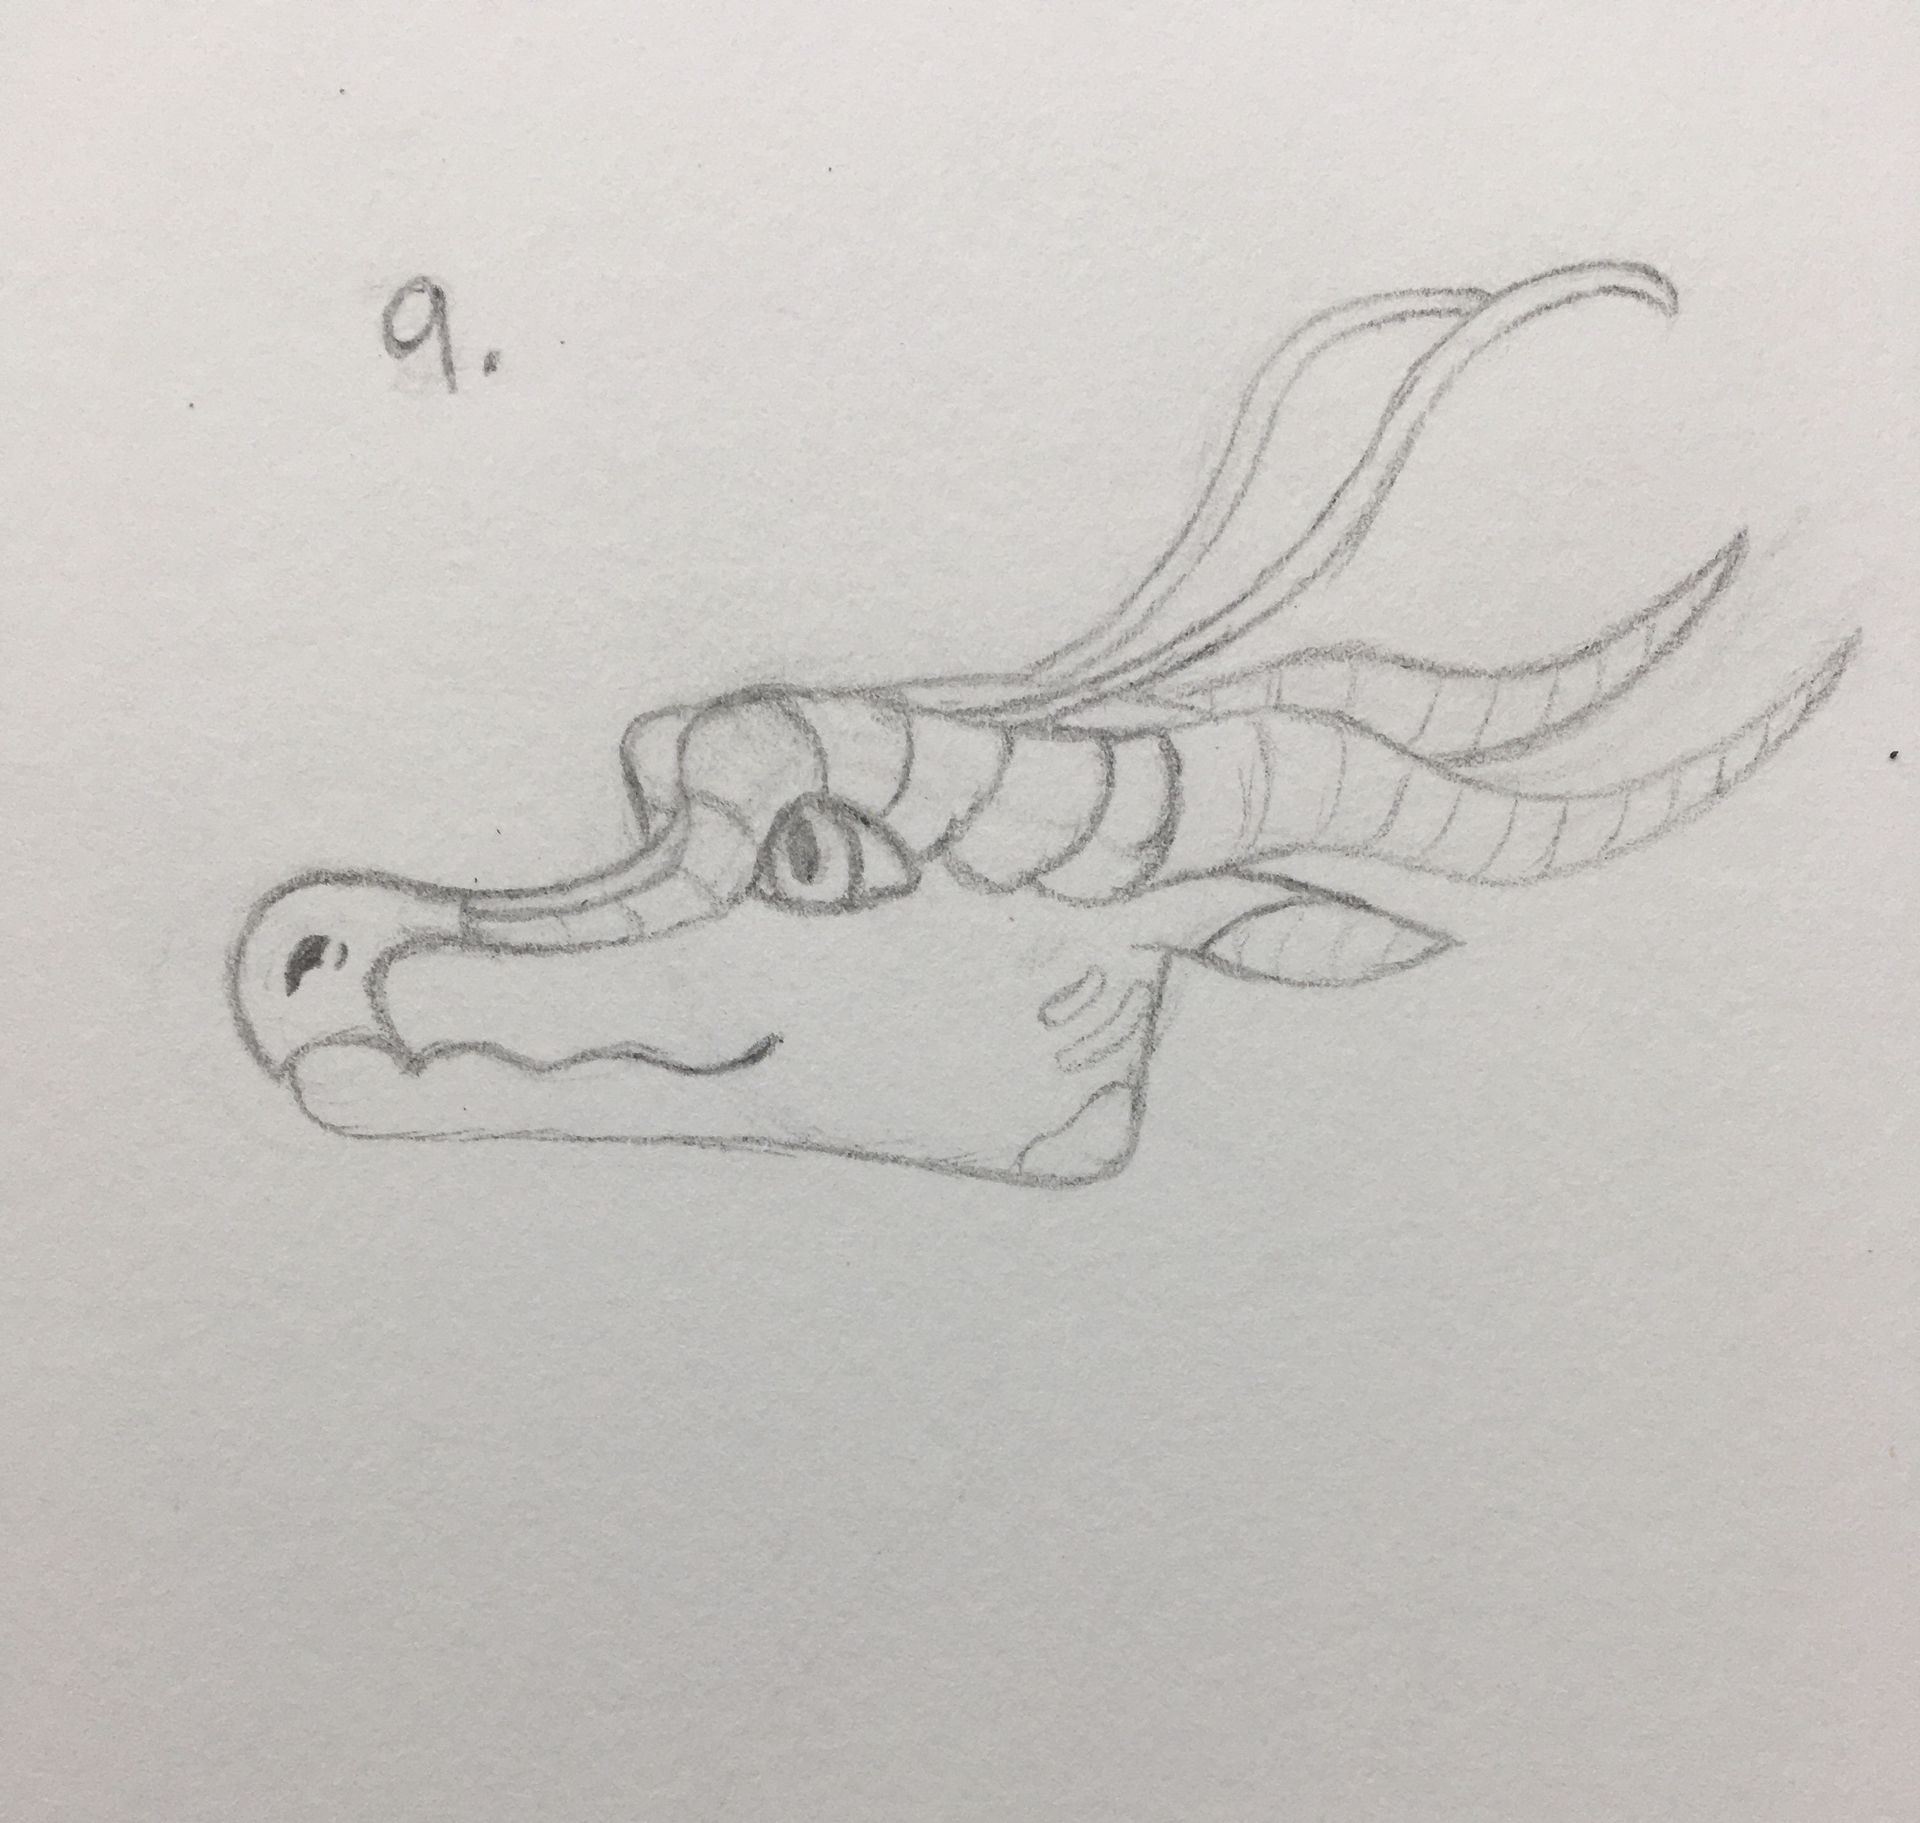
9. Add in the eye. Eyes are probably the most important part of the drawing, as they show most of the character's emotion. Take your time getting the shape right, it can be the difference between a murdury dragon and a fluff ball :3 I also adjusted my brows to have them fit the eye better.
10. Your head is done! Yay! Now add in the neck coming down. Dragon necks are tricky, sketch it out lightly until you have a shape you like. Remember both lines should curve the same way.

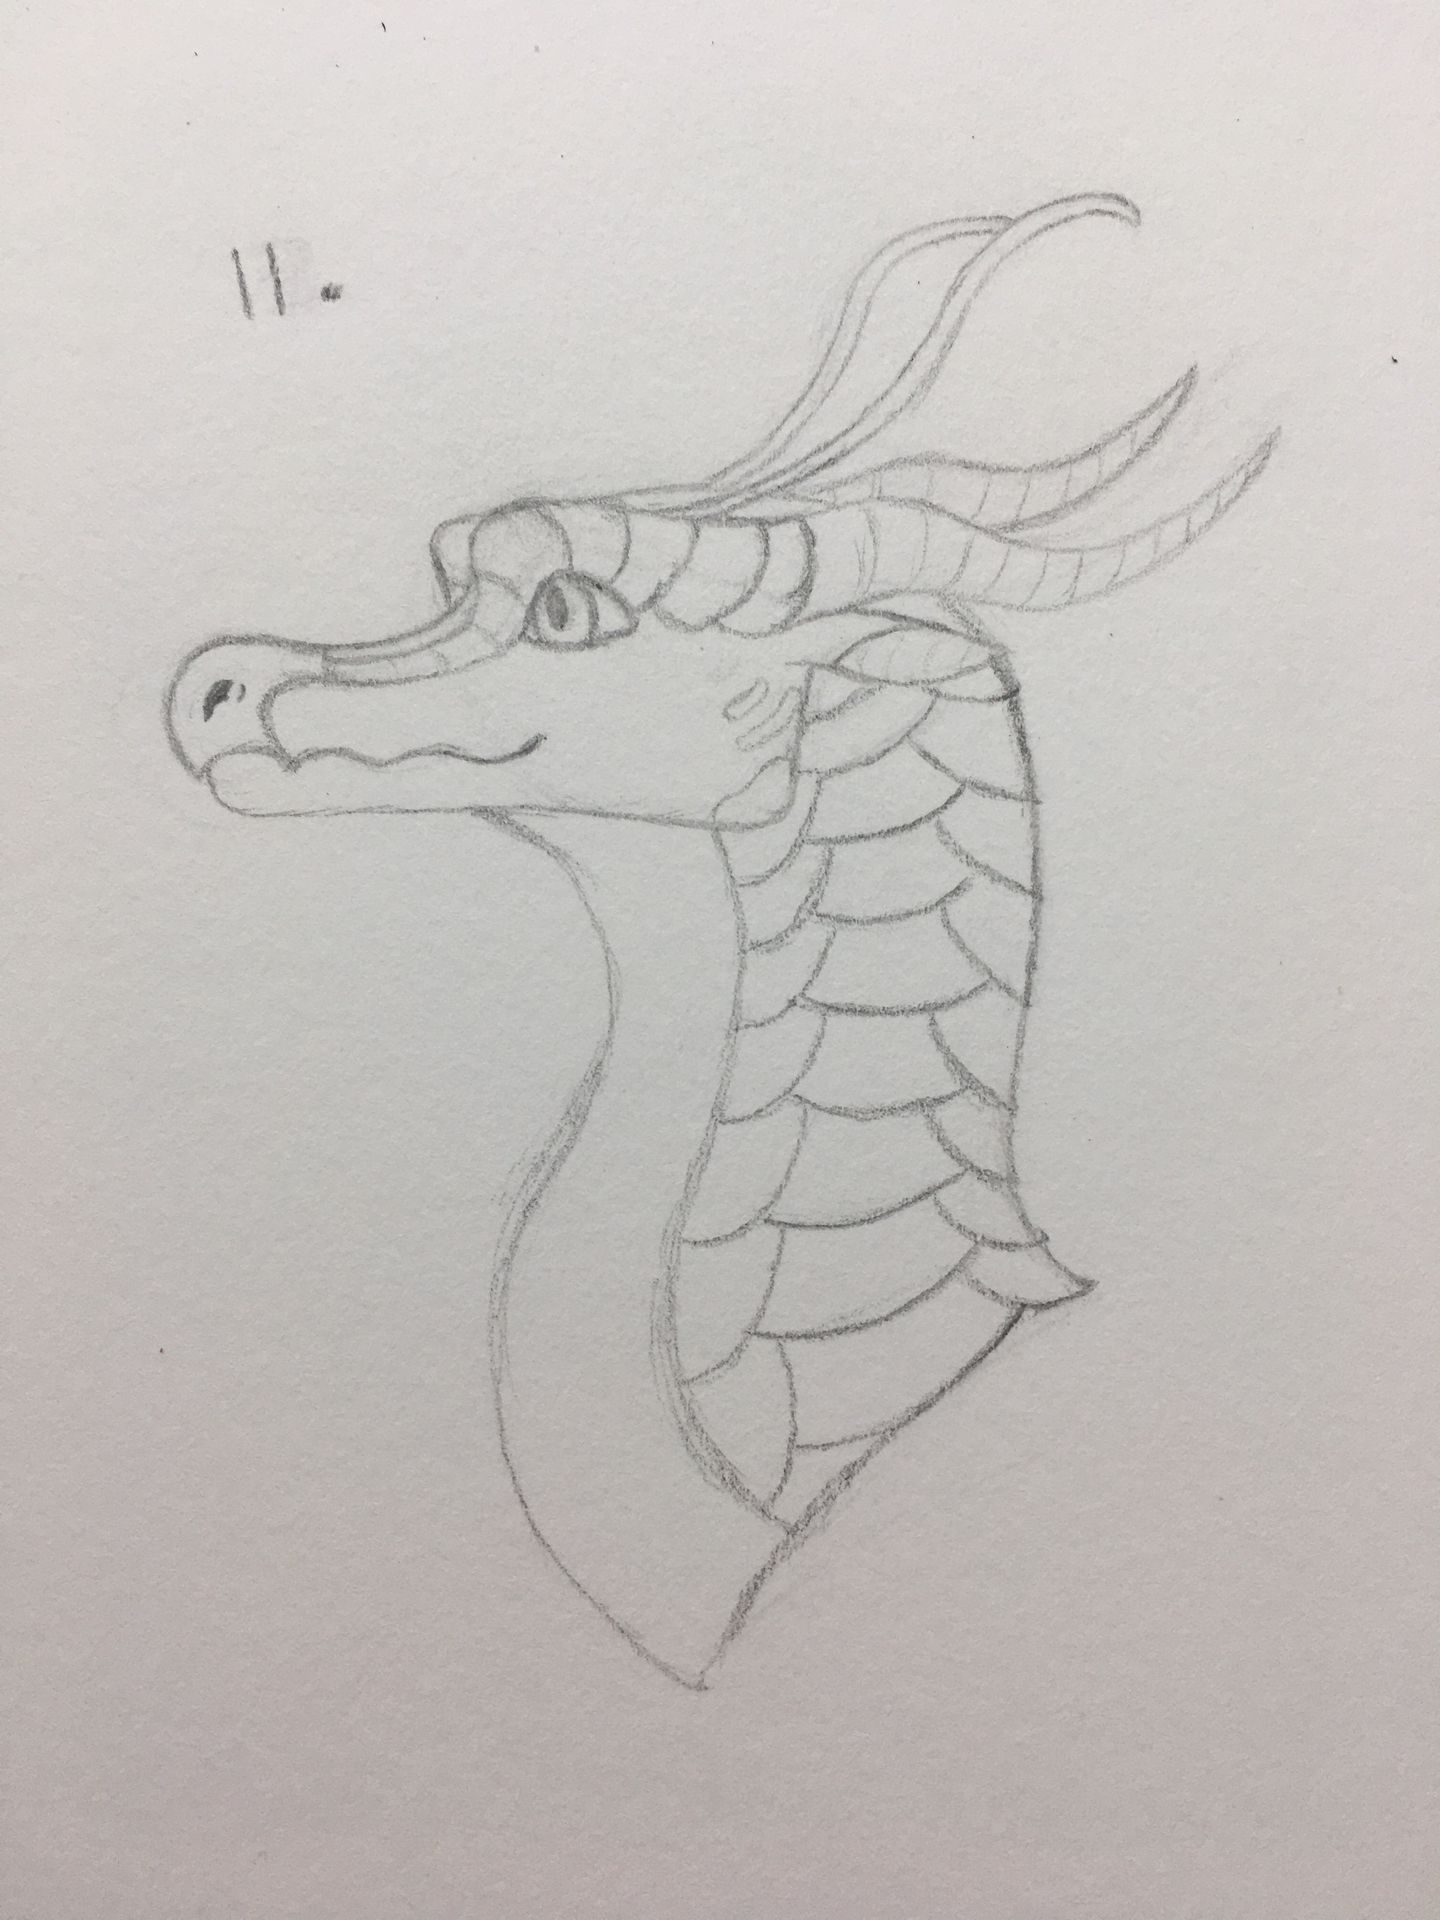
11. Add in the scales! SilkWing scales are rounded and overlapping. When I draw scales, I usually start with the middle line and then add in the two side lines afterwards. You can do it however you want though!
12. Details! These are all the final details on your dragon. Note that this is the last step where we will be adding things. If you want your dragon to have any jewelry or scars or something, add it in now. Don't forget the little circle markings on the scales, the spikes down the back, or the lines on the underbelly.

13. Outlining! This is pretty simple, just outline your drawing with a black pen. Take your time because there's no going back with pen. I chose to do thicker outlines for the outside of the dragon and for the larger shapes, you don't have to though. Remember to erase your pencil markings afterwards.

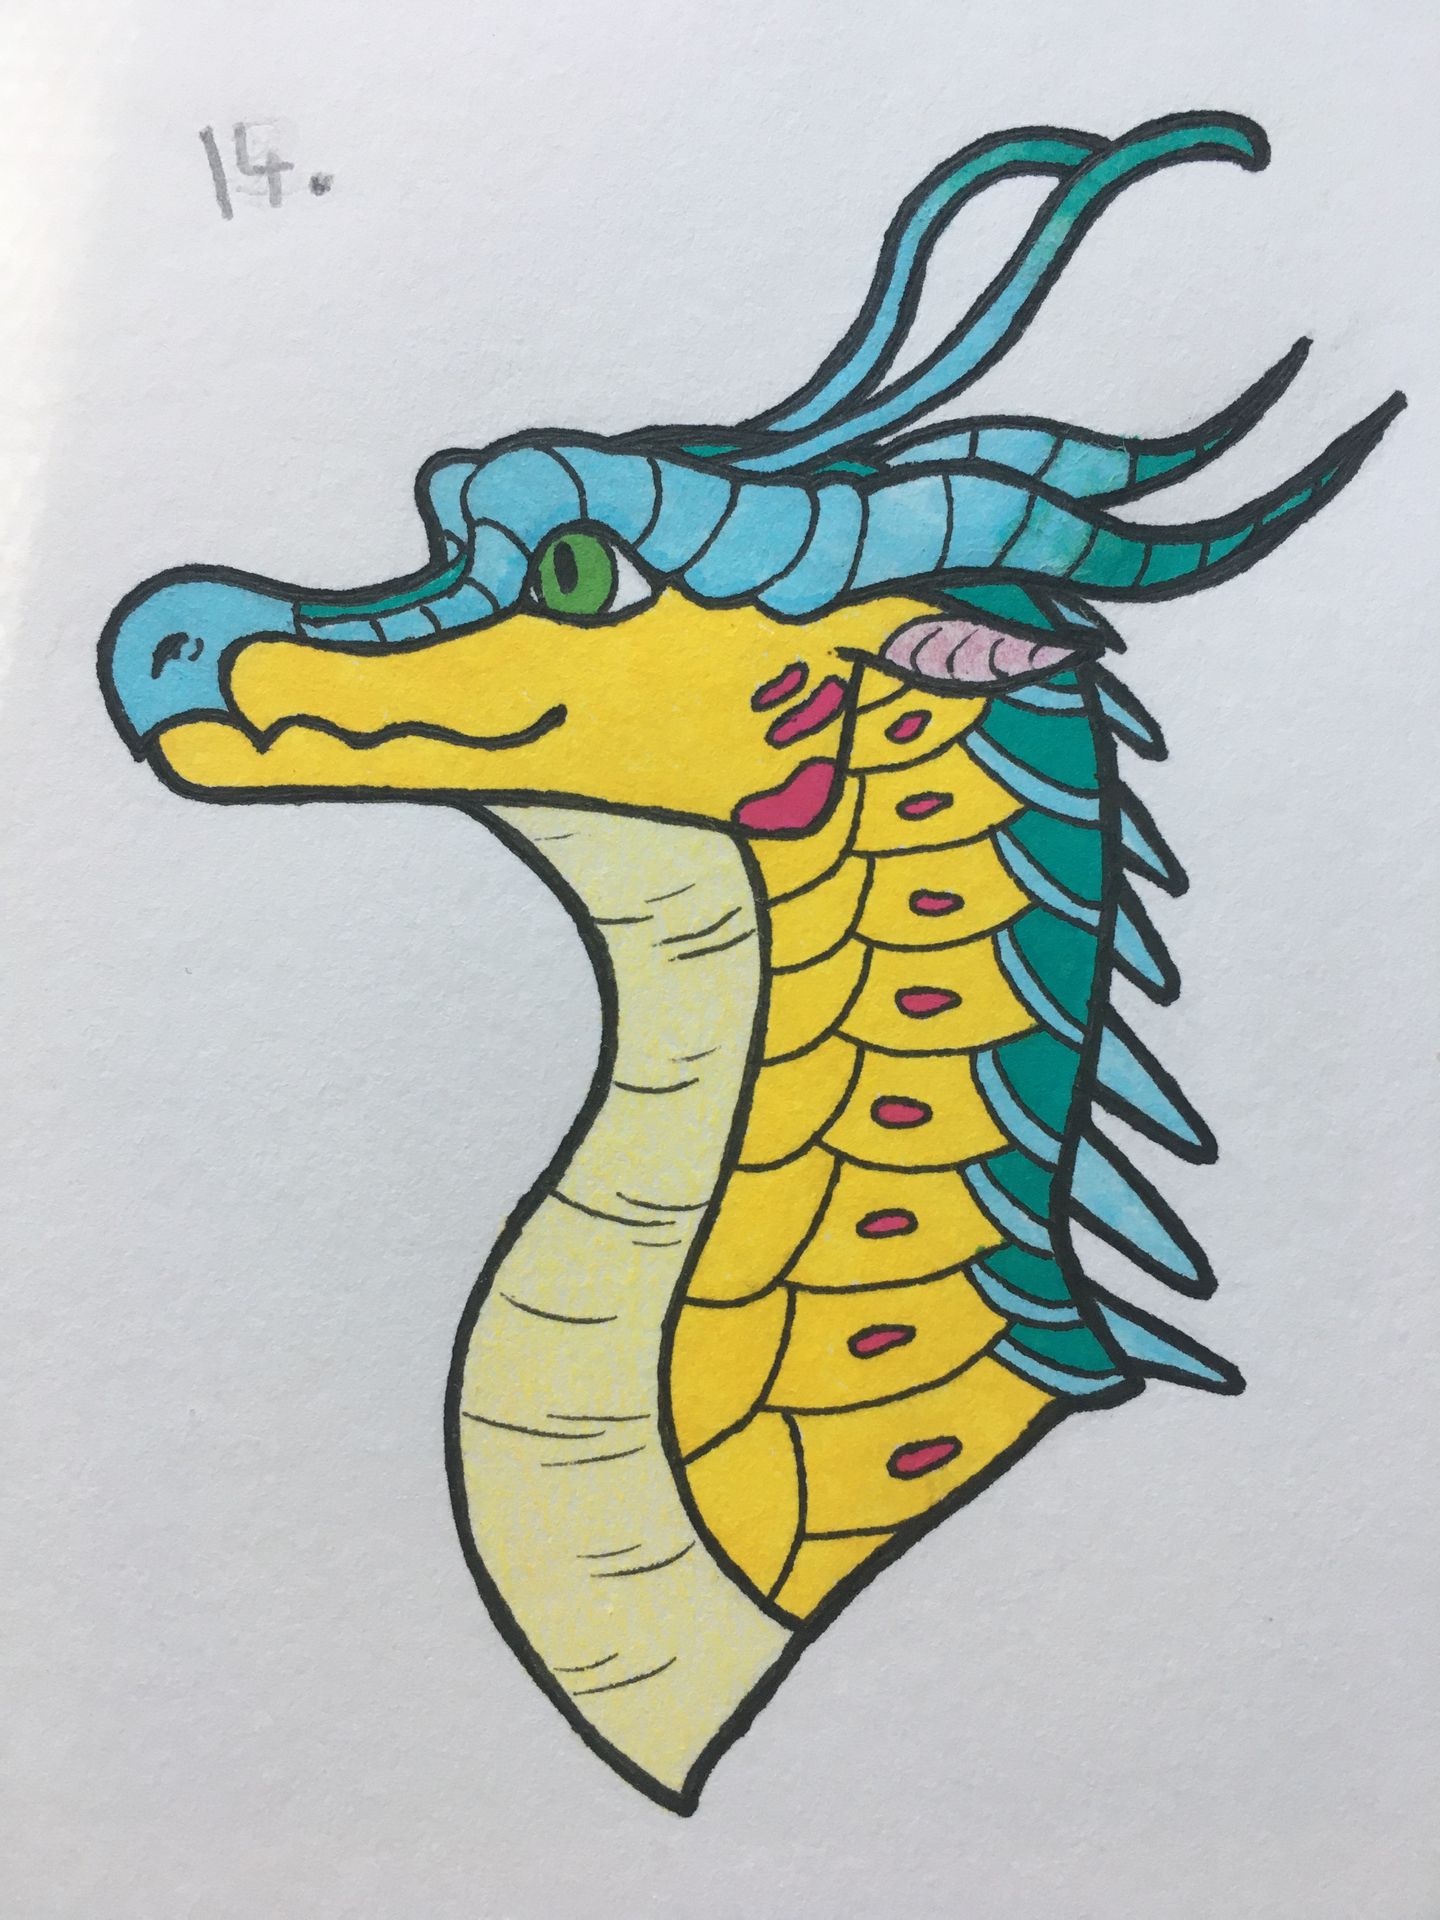
14. Colour! Fill in your drawing with whatever colours you'd like (SilkWings can be any colour accept black) Colour palates can be tricky to decide on, I like to take inspiration from things like birds or flowers, or just by testing out my colours on a separate piece of paper to see which ones would look nice together. I try to avoid using more than four or five colours, it can start to look cluttered.
15. Now it's time to add shadows to your dragon. You can do this by going over it in marker, or by shading over in pencil. Add shadows under the overlapping scales, where the head would shadow the neck, under the jaw, on the underside of horns and spikes, on the eye, and any where else you think would be shadowed.

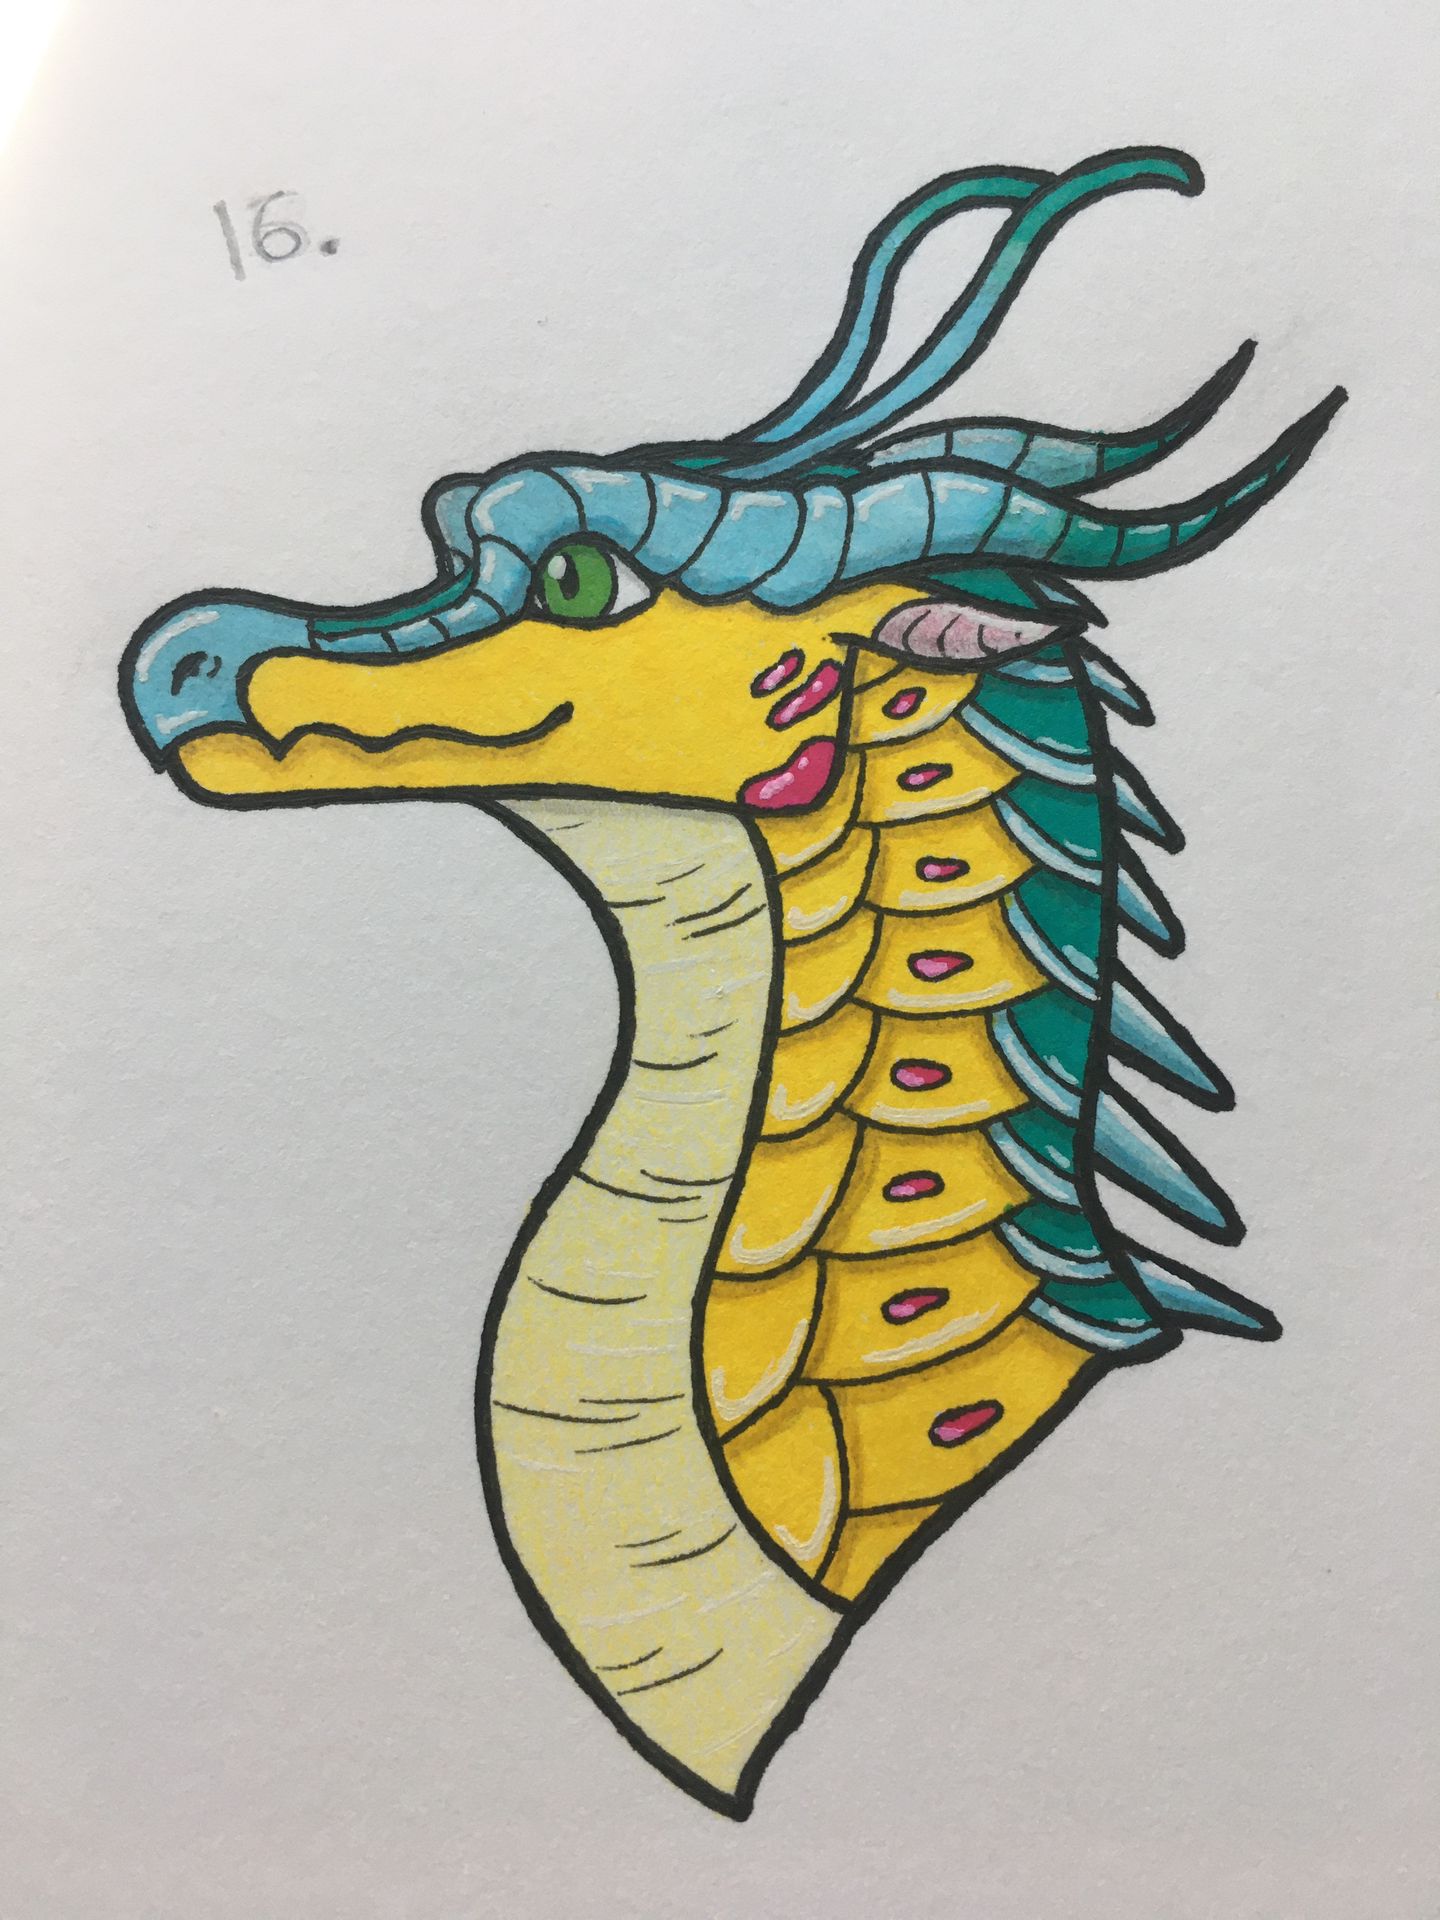
16. Add highlights with a white gel pen. This makes the dragon pop and its scales look glossy. Add highlights where the light would hit the scales. Don't forget the little eye! Remember not to overdo it. If you don't have a white pen, no worries, this step is largely optional.
Now name it, sign it, and you're done!
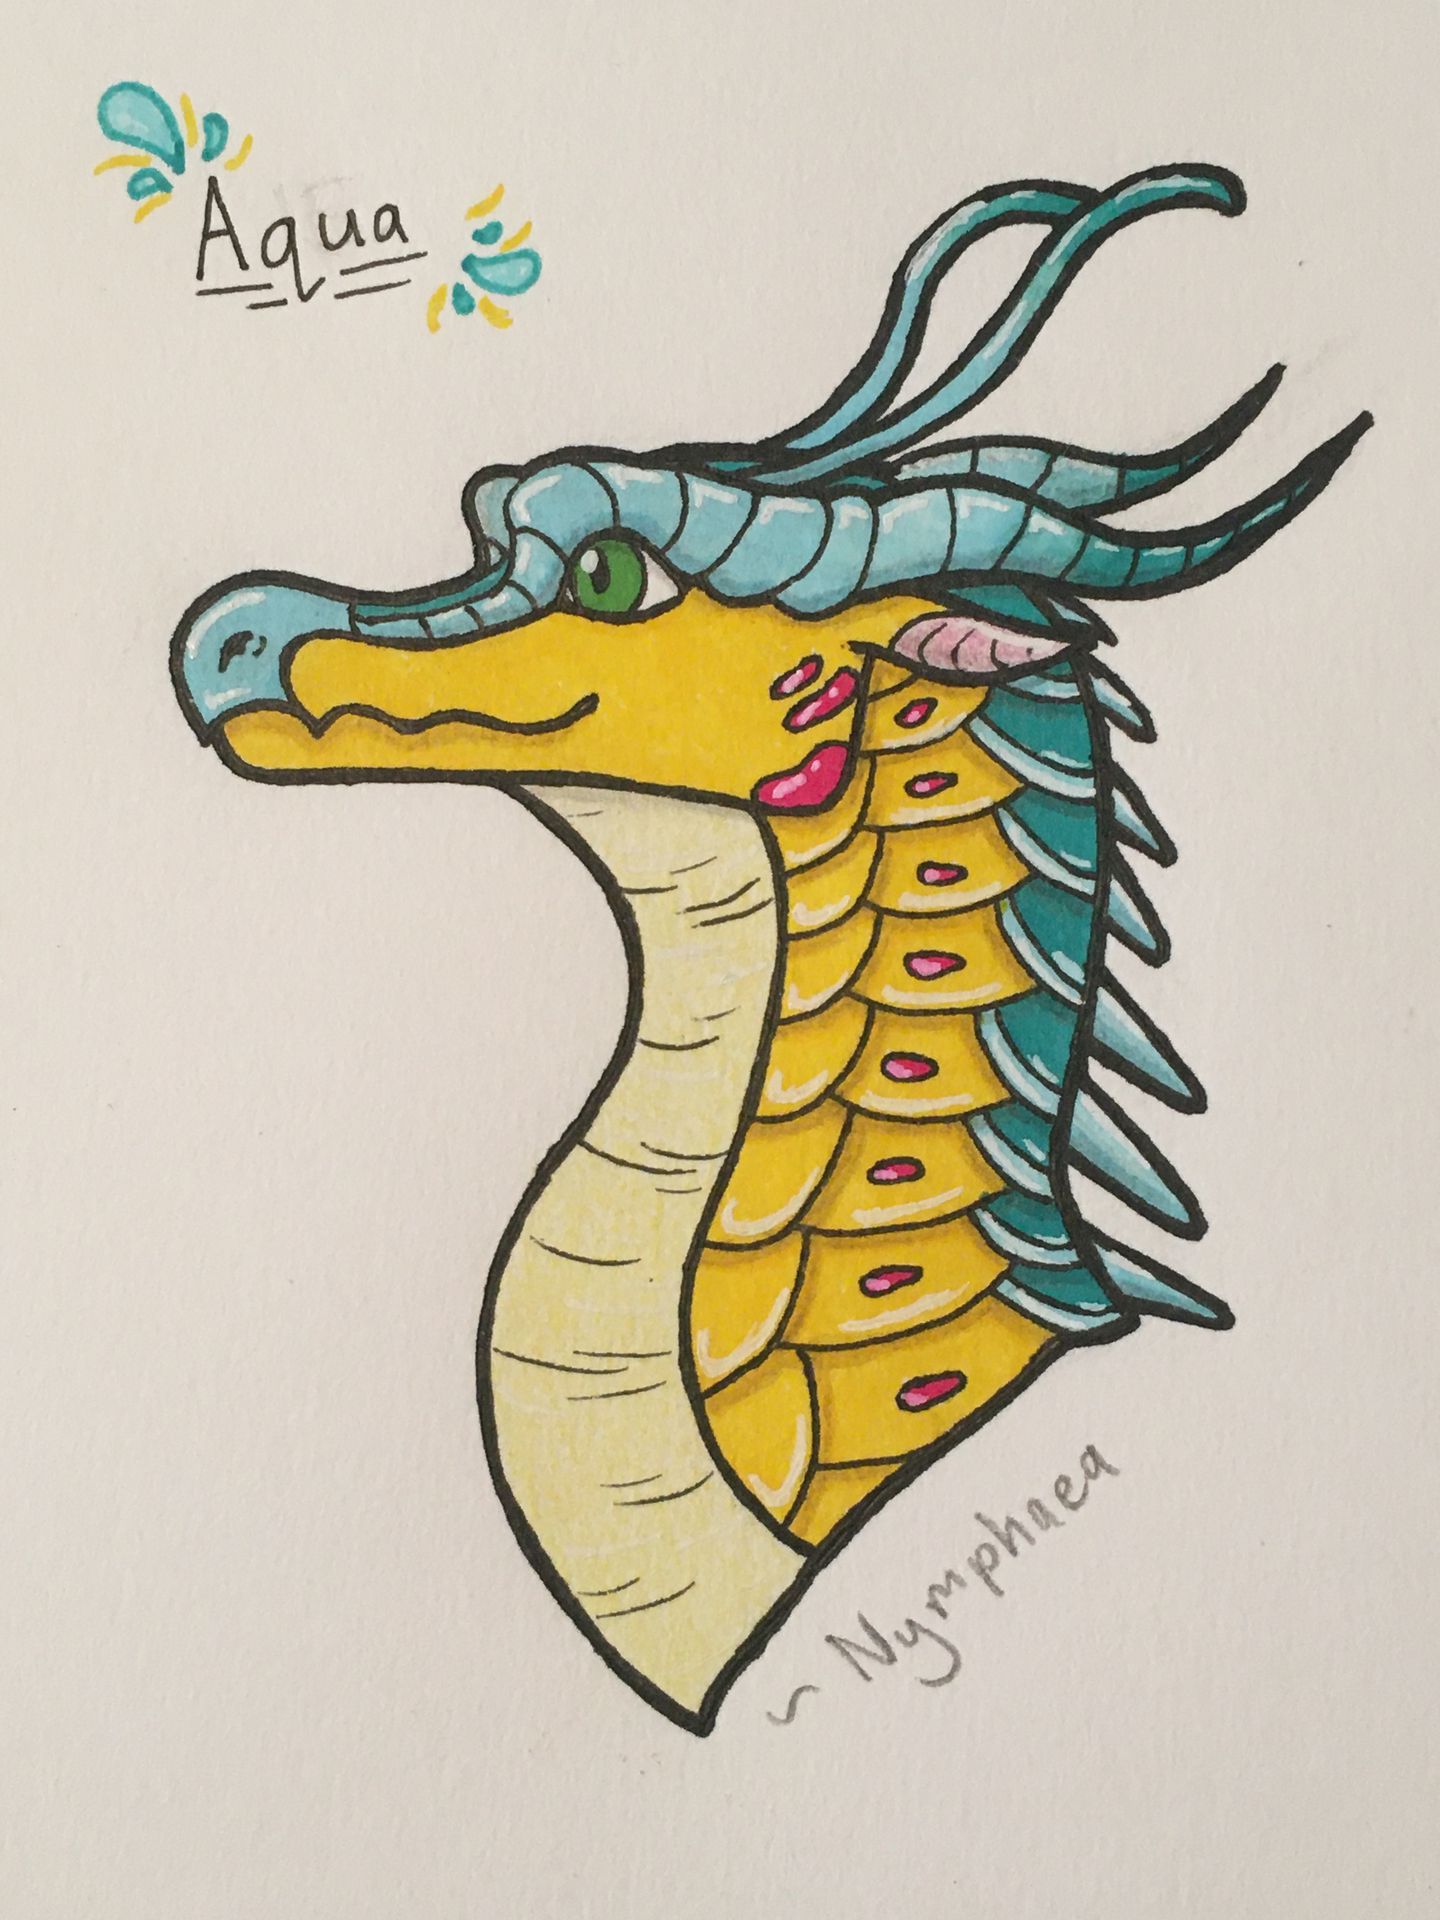
So yeah, that's how I draw a Wings of Fire SilkWing. Hope this was helpful, it was really fun to make. Bye and see you in the next chapter.
~ Nymphaea
Bạn đang đọc truyện trên: Truyen247.Pro