[Walkthrough/Tutorial] Cover Shop
Hey guys! A little treat for you today! I've decided to upload my first tutorial!
While I was making the cover for this book, a friend of mine asked me to guide her through it step-by-step, so at each point I took screenshots for her to understand the process better, and today I'm putting them up for you along with an explanation!
In this tutorial, I'll be showing you the process that was used in making the cover for this cover shop. It's a cover that's along the lines of a horse manipulation found on DeviantArt.
I use GIMP Image Manipulation Program for all my covers. It's a free open source program that was brought in to compete with Photoshop (although PS will always be the best photo editor on earth), and it's still a very powerful tool.
This is NOT a PicsArt tutorial. I'm unsure, but perhaps PicsArt experts could adapt this tutorial to their mobile devices, but I use a computer (laptop specifically since my computer is out of commission), and if you want to follow along, you're going to need one as well.
This is also not a beginner's tutorial. I'm going to talk a lot about layers and their functions, so you're going to need to have at least a basic knowledge of photo editing softwares (even PicsArt uses layers) in order to completely follow along with this tutorial.
So, without further ado, let us begin!
You will need:
GIMP
A computer/laptop
Music (if you like listening to music while you edit)
A pet (dog or cat is preferred)
Before you begin: Collect your stock
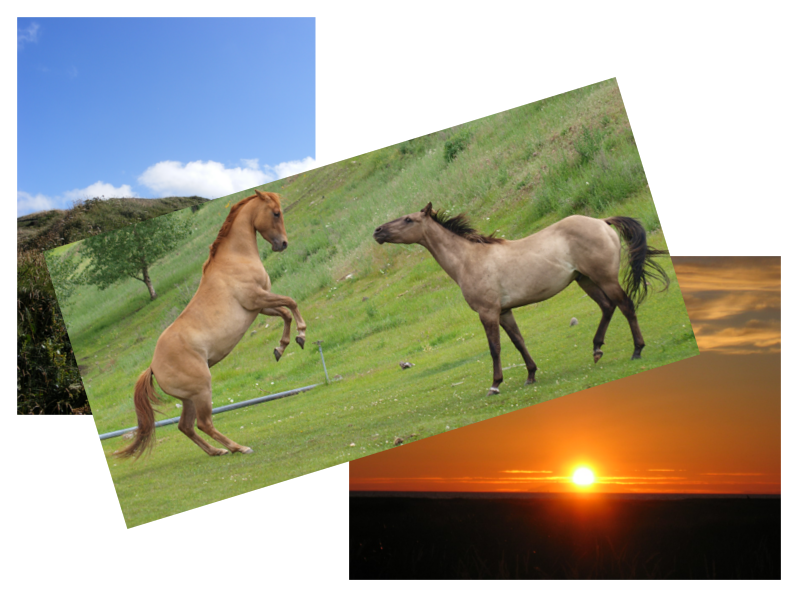
I mostly get my stock from DeviantArt, even for my regular covers that I make for people. In this tutorial, we'll be using three stock images, i.e., a cliff, a horse rearing and a sunset. I got the cliff from The-strawberry-tree, the sunset from BreezeStock and the horse from Eltear-Stock, all of whom are DA users.
Keep in mind that your stock images should always be big. Honestly, the bigger the better, because you can always size them down later. It's a better and more effective alternative to having a small picture and then having to scale it up, hence losing definition and having it become pixelated.
Now, let's put it all together!
Step 1: Open GIMP and create a new canvas
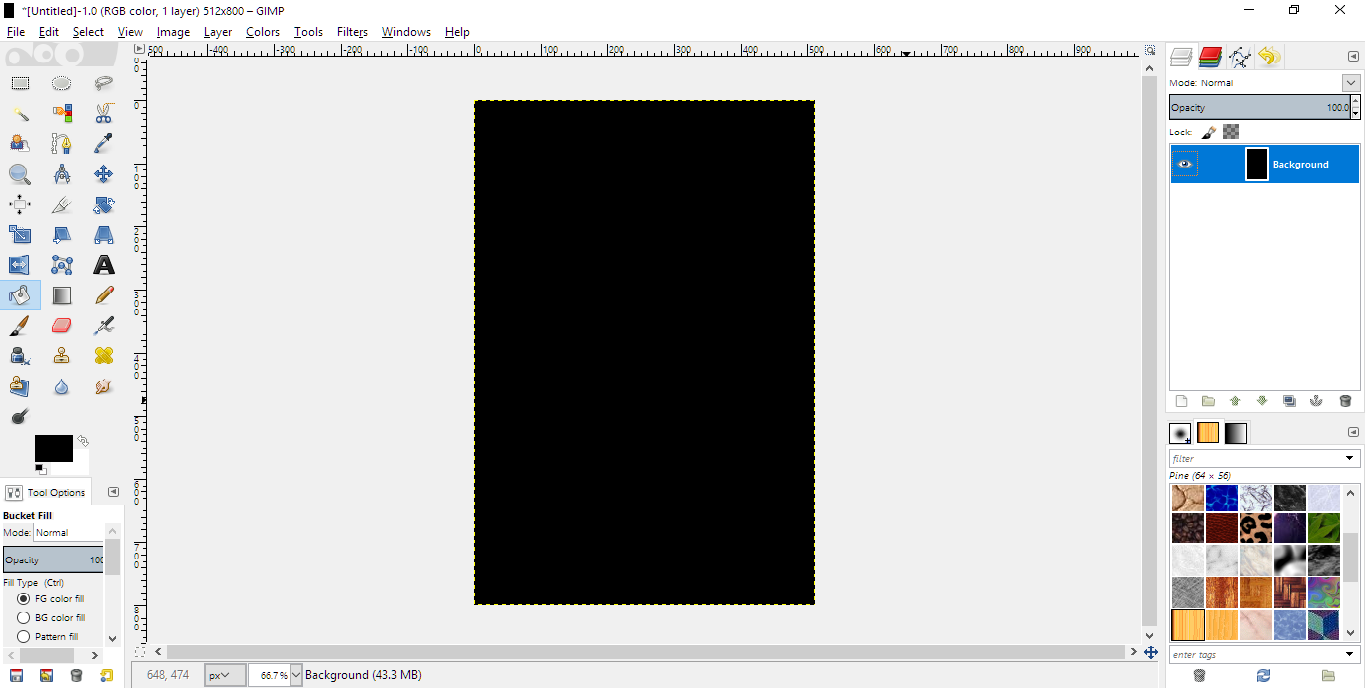
This is your base. I usually like my base to be either white or black depending on the theme of the cover. For this, I have used black since it has strong shadows, and the concept is to fade it into black.
The canvas size is 512x800, the recommended size for a Wattpad cover.
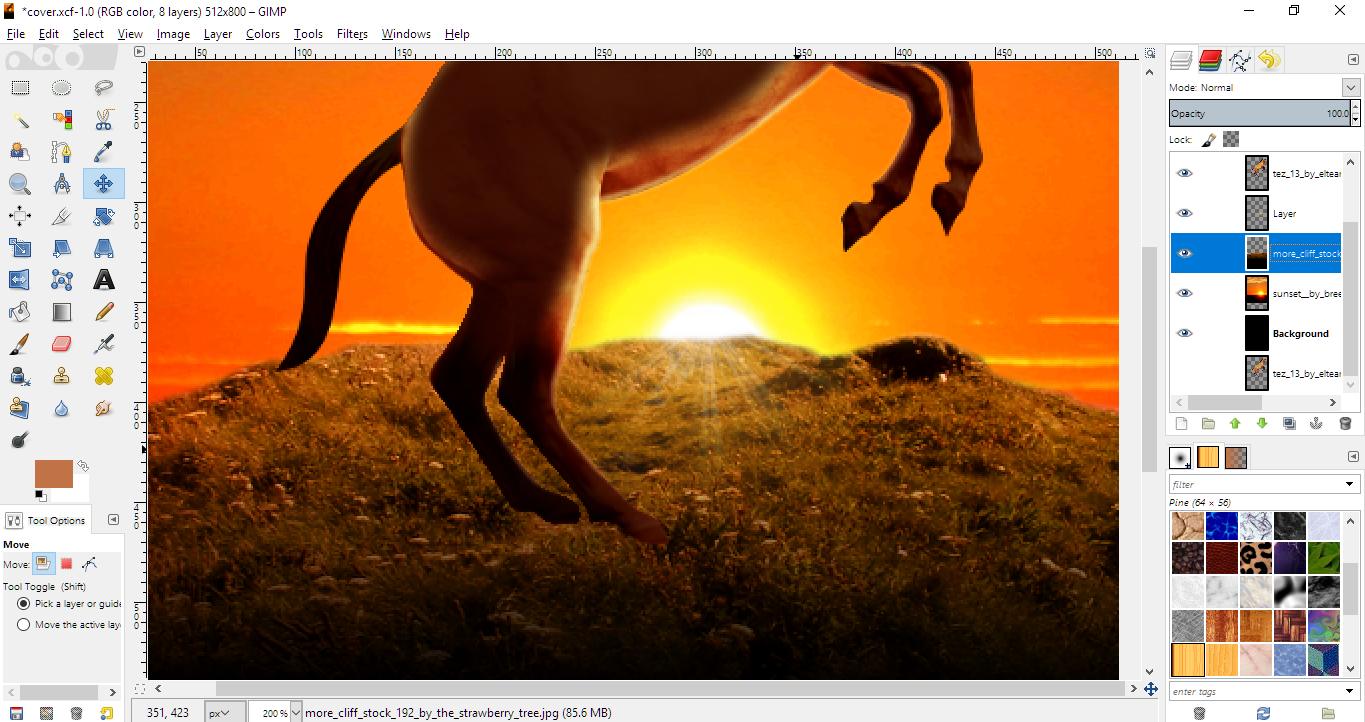
Step 2: Bring your stock onto the canvas

There are several different ways to do this, the most common being going to File->Open as Layers. I just dragged and dropped them into GIMP.
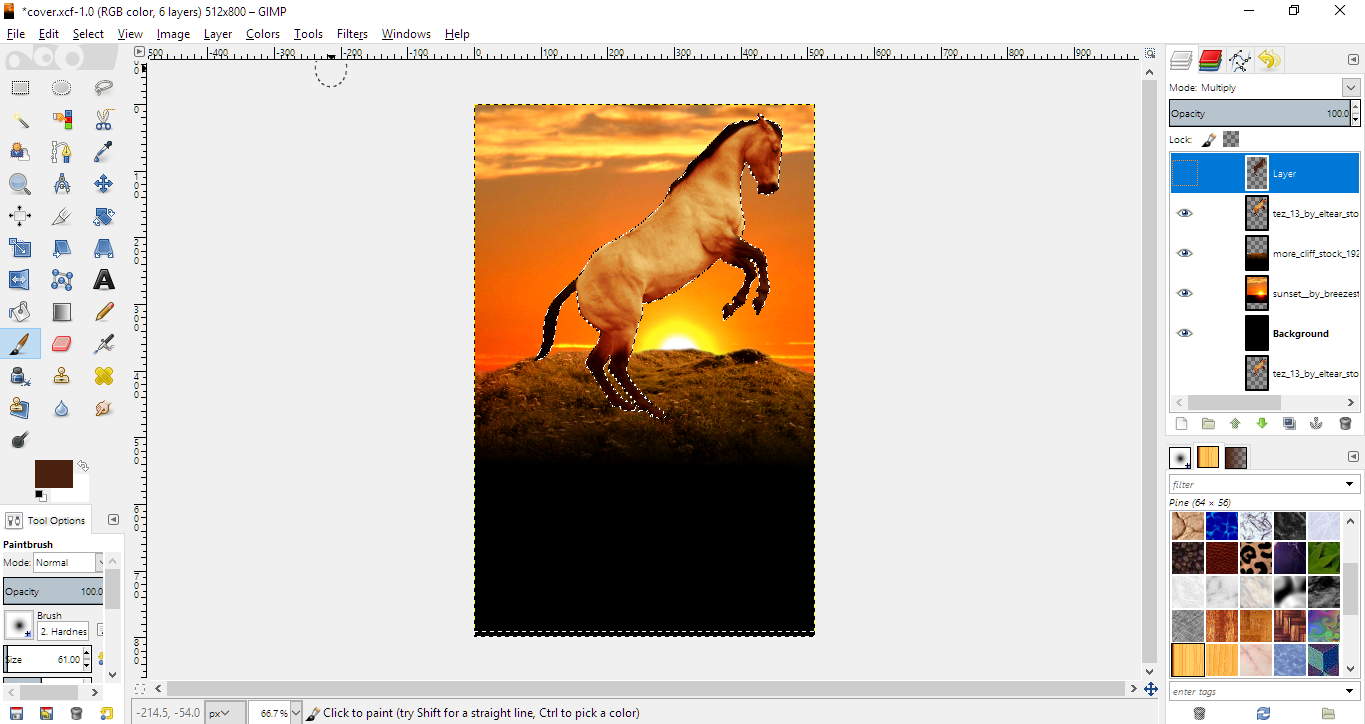
Step 3: Cutting

Now your objective is to get the elements of the stock that you want separately. There are again several ways to do this. I used the Pen Tool (since it gives precise lines) on the horse and just used an eraser on the cliff.
Step 4: Resizing and adjusting
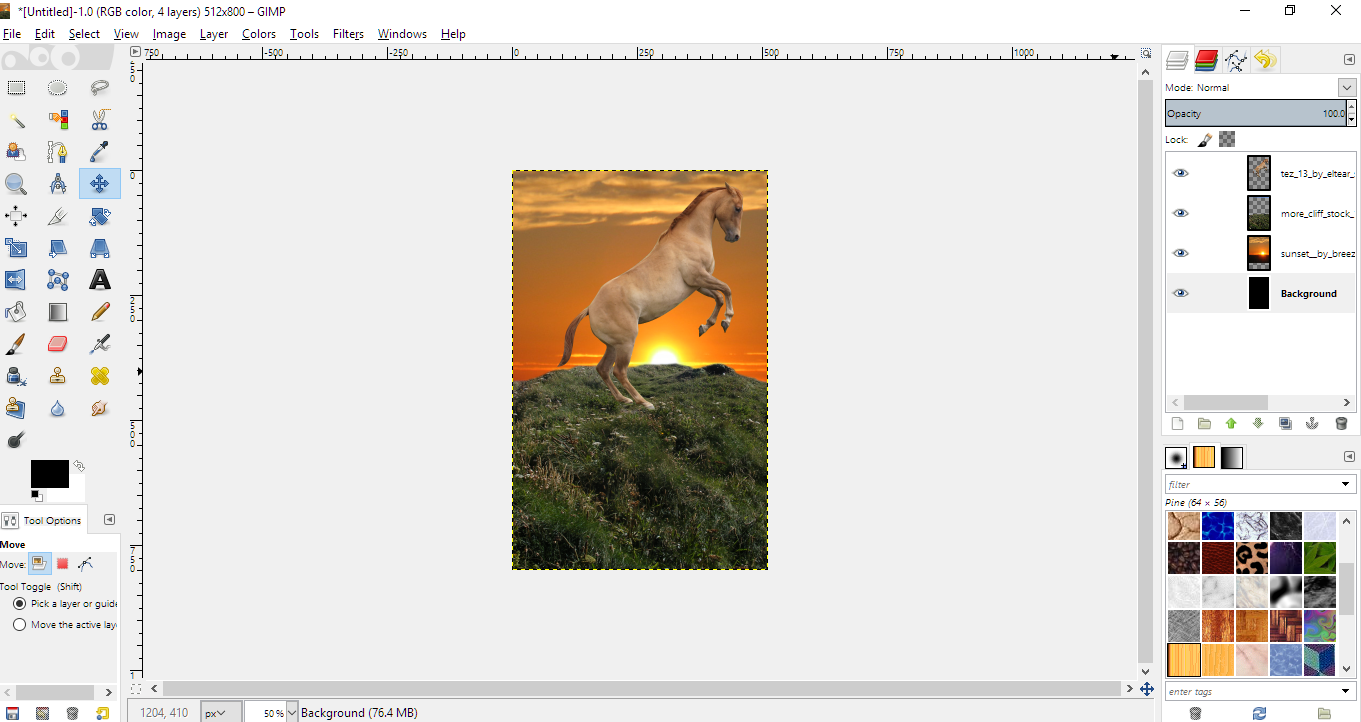
You've got your cut stock? Great! Now just put it together, each on a separate layer. You can use this time to play around with the positioning until you're satisfied, although you can do that later as well.
Step 5: Recoloring
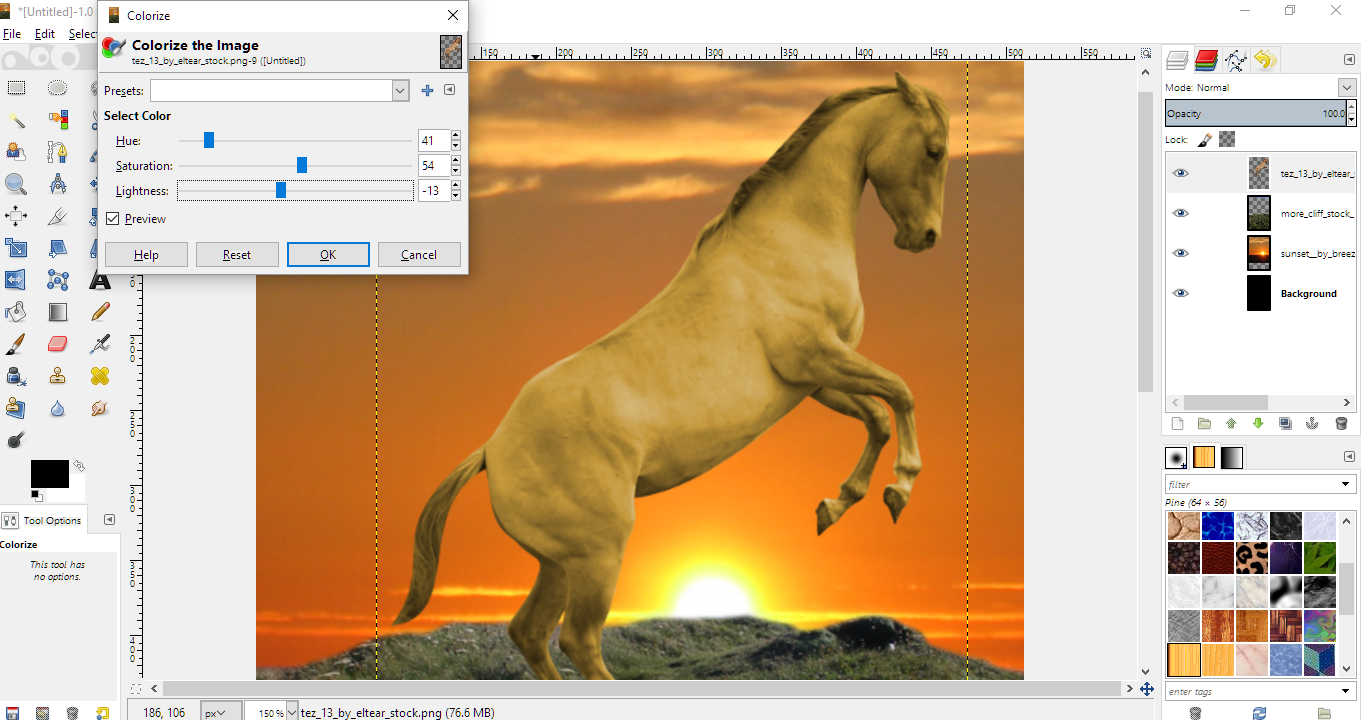
People usually skip the next couple of steps if they're going to use the original horse.
However, the horse I want is a dun colored one, meaning a horse with a golden-yellow coat, brown points and black mane and tail. The horse that we have right now is a chestnut (a reddish-brown horse), and that won't do.
Hence I hop over to the Colorize tool (Colors->Colorize) and play around with it until I'm satisfied.
Step 6: Markings and Dark points

I now put some brown on the muzzle and legs, and some black on the mane and tail. All this is done on a new layer, and then the opacity is brought down.
Step 7: Color adjustments
In this step, you will adjust the colors on all layers, making them match and be part of each other more. To do this, head on over to Colors->Hue-Saturation, Colors->Brightness-Contrast and Colors->Color Balance and mess around with different settings on different layers until you're satisfied.
I also went on the cliff layer and added a black gradient. For this, I used the Blend tool, choosing the FG to Transparent, with my FG color as black. This is now your main concept, and you should get an idea what your cover would look like by now.
This is also the time your cat will decide to sit on your computer and demand your attention, so to avoid losing your work, you should save it as GIMP doesn't have an Autosave feature.
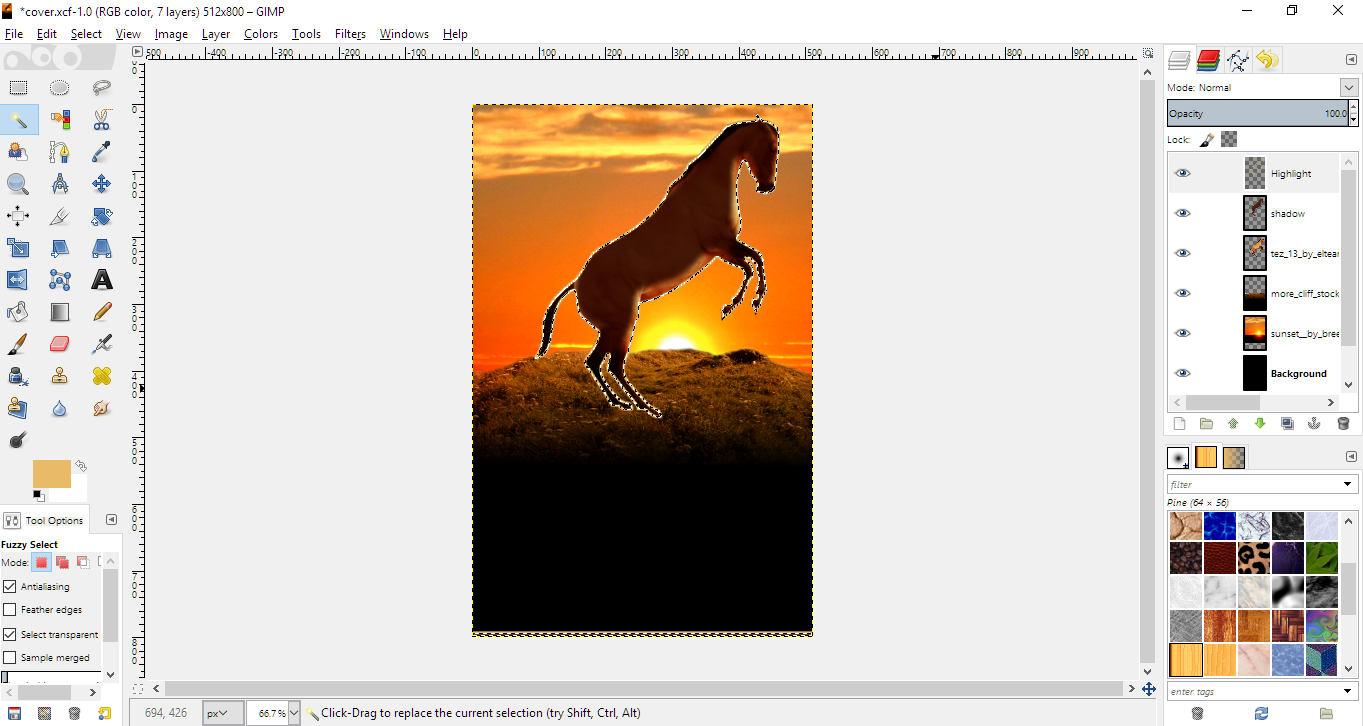
Step 8: Shadow

Take your color picker tool and choose a dark brownish color from your horse. I would not recommend using black here since there is a pretty strong light source, even if it's in the back. Details will be shown, and if you use black, it can wash out your horse, so for shadows, it's always best to pick a color from the horse itself.
Once you've chosen your color, create a new layer above your horse layer and paint over the horse. Set it to Multiply mode and adjust opacity as needed. Keep in mind your light source and how it would affect your model. Use your eraser to adjust if you're not satisfied with the shadow.
A good way to make sure you don't cross the lines is to go to your horse layer, pick the fuzzy select tool and select the outside, the transparent part. Then go to Select->Invert. This will allow you to paint inside the selection.
Step 9: Highlight
This is where it gets fun.
If you ever look up horse manipulation tutorials on DA, they'd always say to paint the highlights on your horse via a paintbrush. But I'm way too lazy for all that jazz, so I take the easy way out.
Take your color picker tool and choose a light highlight shade from your horse layer. Assuming your horse is selected, shrink the selection a couple of times (Select-> Shrink) so that it goes inside the horse a little. Create a new layer above your shadow layer. Right-click and go to Edit-> Stroke Selection and set the line to 4px.
Once you click OK, you should have a light line outlining your horse and on a new layer, perfect for fine tuning.
Step 10: Highlight part 2
Set your Highlight layer to Screen and adjust the opacity as needed. Then grab your Eraser tool and begin erasing the parts of the highlight you don't need. Again, keep the light source in mind here.
You can also use this time to adjust the size of your line, making it thinner when needed.
Step 11: Highlight part 3
If your horse is one color throughout, like the horse was originally, this step is unneeded. But our horse here has dark points, hence not all of your horse will reflect the same color. So take a light color from the horse (adjust the color as needed) that will be your highlight for the darker points.
Making sure your Highlight layer is selected, Click the little checked square next to the small brush icon, both are next to the word Lock. This locks the transparency of the layer, and you can now happily paint over the highlight.
Step 12: Lighting effects
Now you begin to add lighting effects. I used just a Gradient flare here, and I'll get to the others later.
Deselect your horse by going to Select-> Deselect or Shift-Control-A. Then create a new layer and go to Filters-> Lighting Effects-> Gradient Flare. Select Distant Sun and set the layer to Screen, adjust opacity as needed.
You can move it around using the Move tool. Bring it down to the sun from your sunset so that it's casting light rays on the cliff. Use the Eraser to erase the unneeded parts.
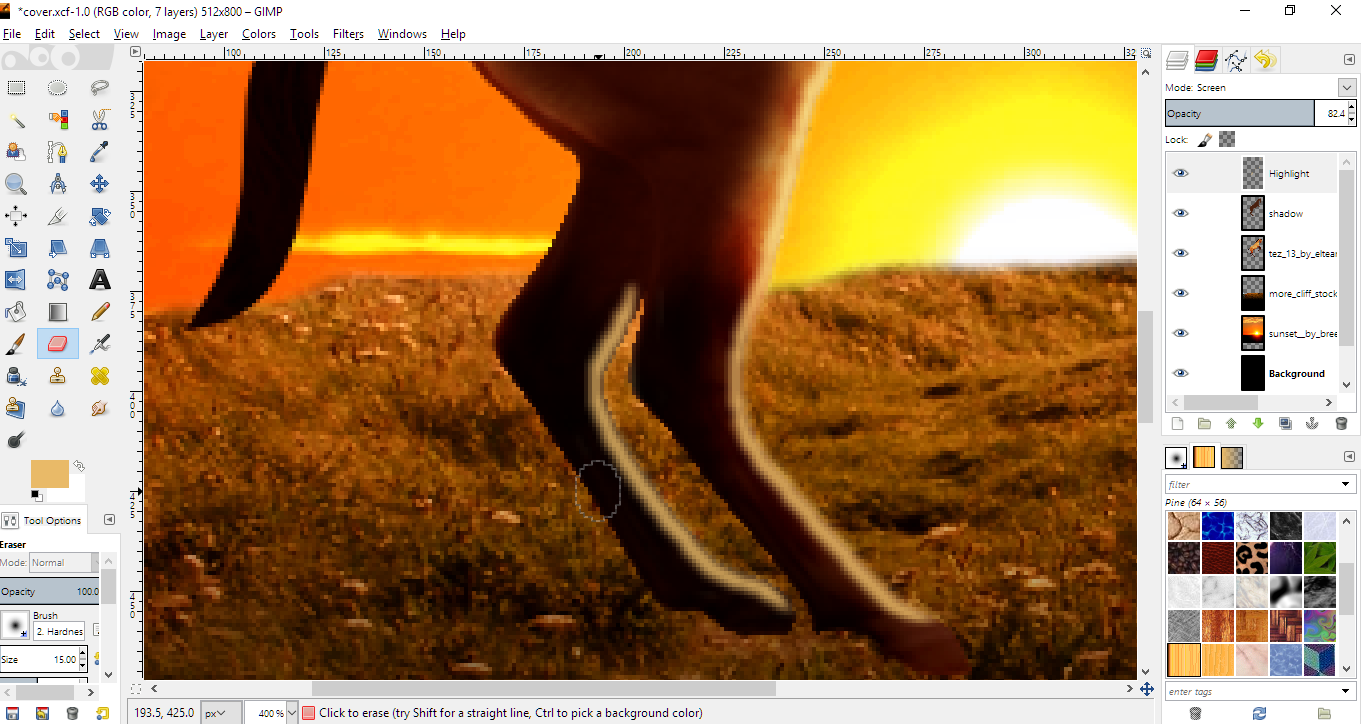
Step 13: Grounding
All's well and good, but our horse seems to be floating in space right now. We can't have that, can we? So let's ground it.
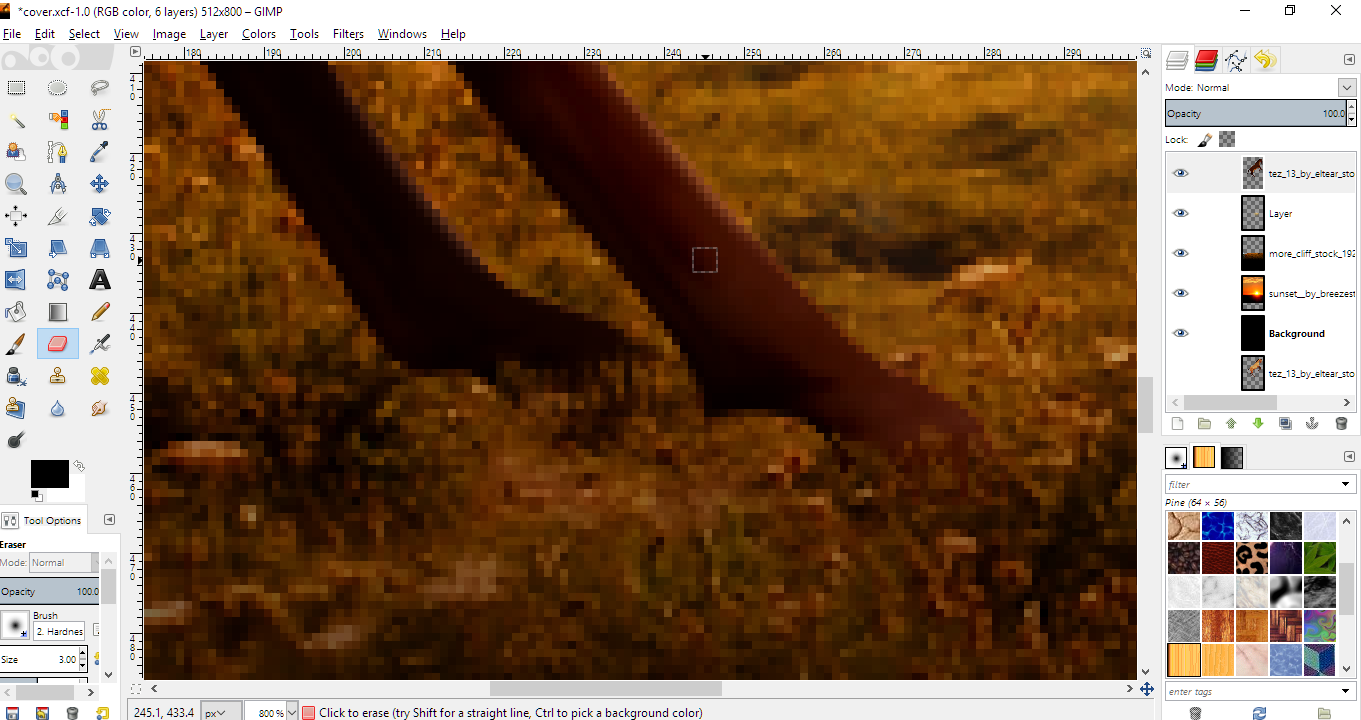
Merge the shadow and highlight layers into the horse layer and then grab your Eraser tool and begin erasing the ground where the horse is standing on the grass. Keep the size small, and go upwards as if you're simulating the grass.
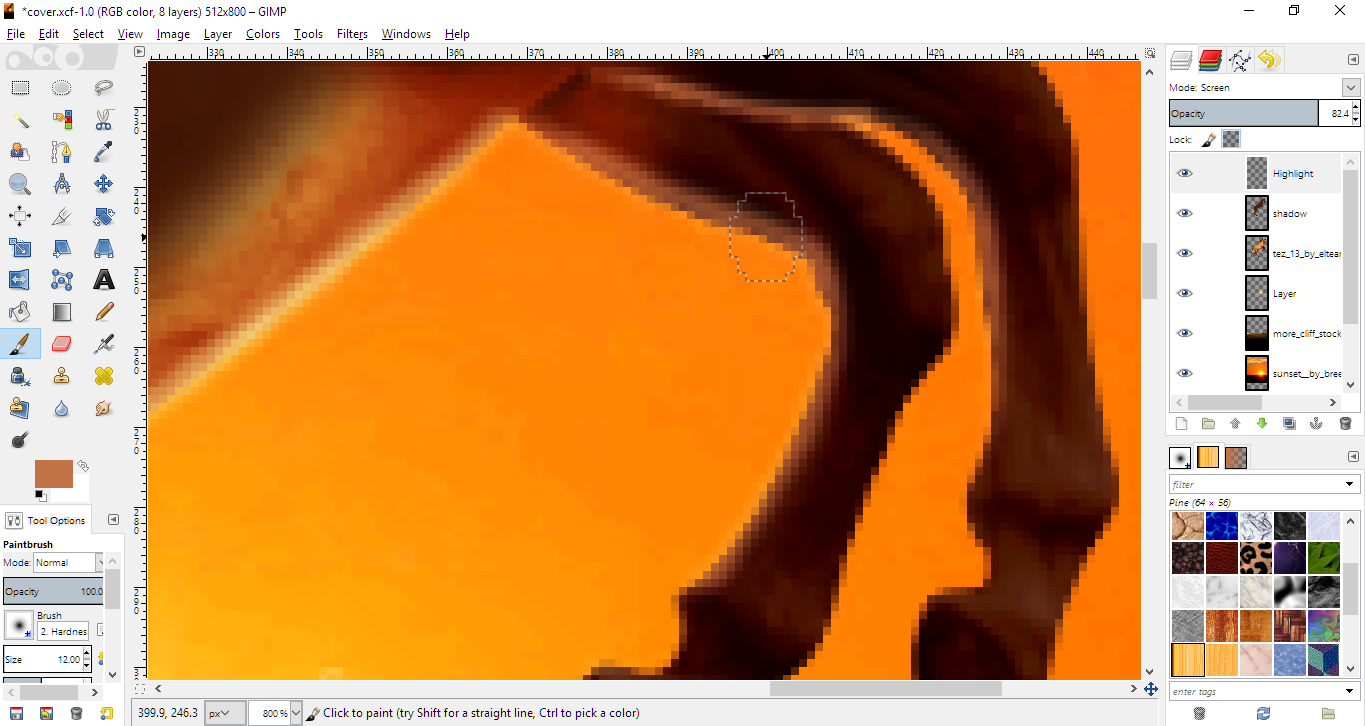
Step 14: Cliff Shadow
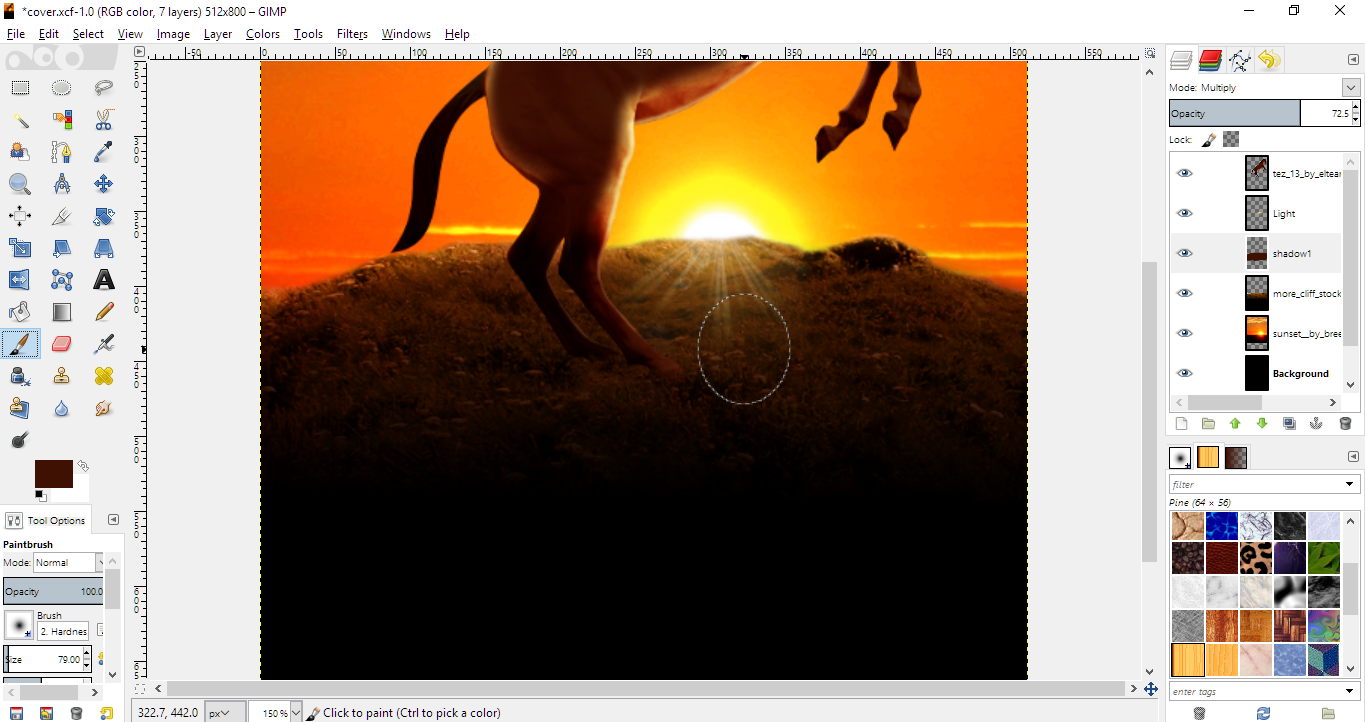
Create a new layer above your cliff layer and choose a dark brown color from any of the layers. Then paint on the new layer and set it to Multiply. This will serve as the cliff's shadow, since remember, even the cliff is backlit.
Use the Eraser to erase any mistakes or unneeded parts, and adjust opacity as needed.
Step 15: Horse Shadow
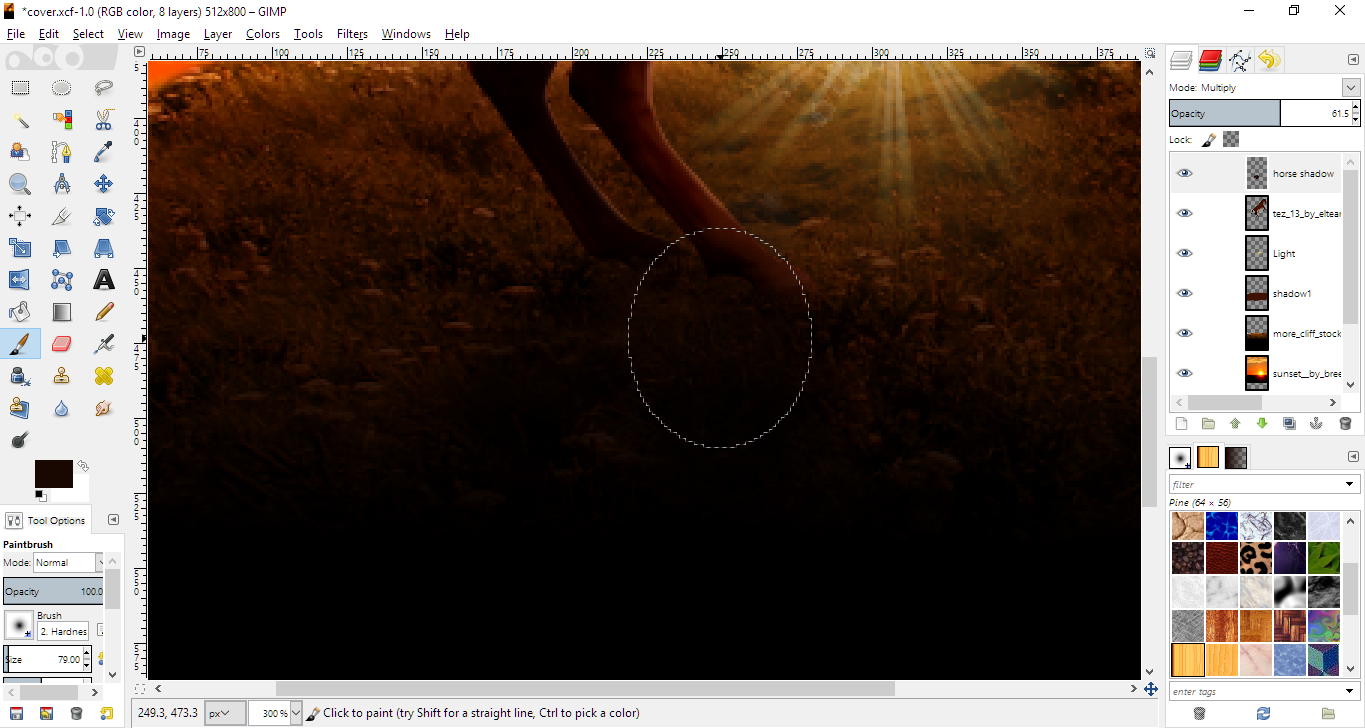
Create a new layer above your horse layer, set it to Multiply and use the same color you chose for the ground to paint the horse's shadow on the ground. Keep it darker than the cliff's shadow though, and don't forget to paint a little on the hooves as well. This grounds it firmly on the ground.
Step 16: Mane and Tail
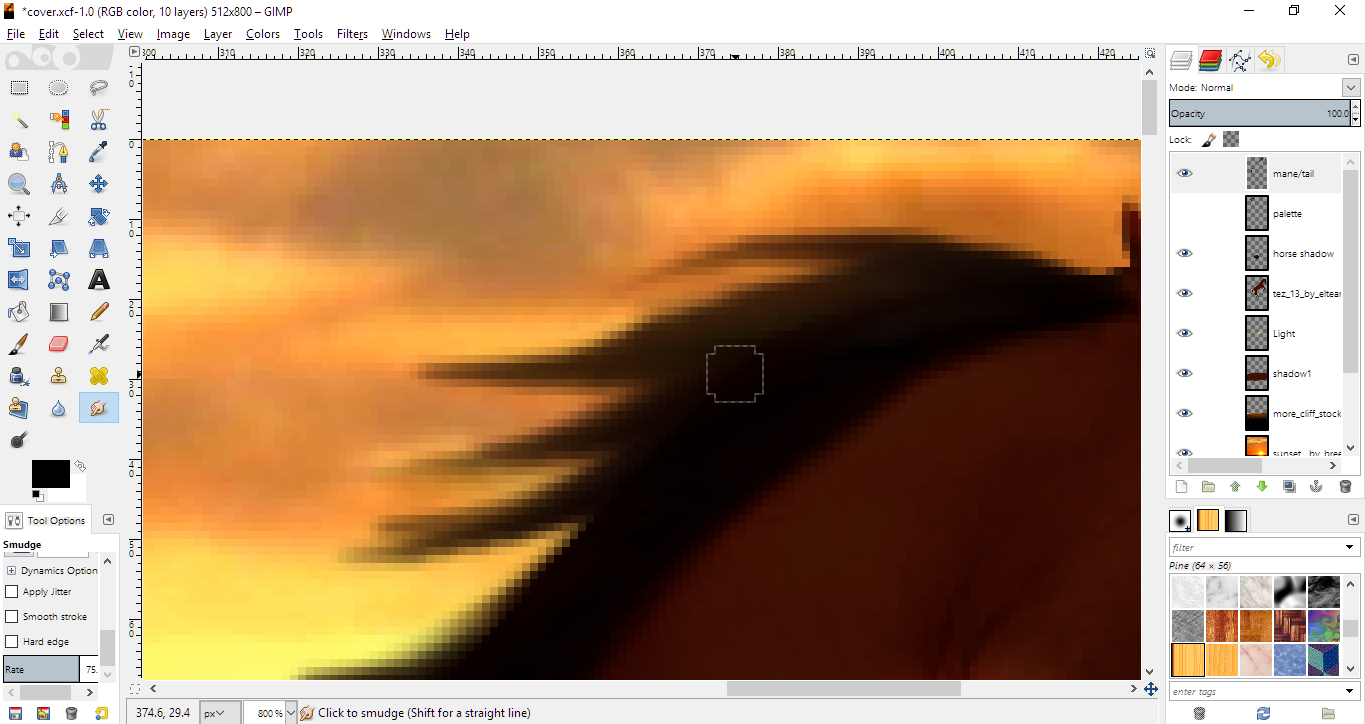
We have finally come to the mane and tail!
For this, select the mane and tail separately and copy them onto a new layer so they're separate from the horse layer. You'll see why this is important in a little.
Grab your Smudge tool (the thing that looks like a finger in the toolbox to your left) and on a high rate, begin smudging the mane and tail into a flowy shape. Use the already there mane as a guide, and you can use the Undo tool or an eraser if you want to correct any mistakes.
This is honestly the most fun part of the entire thing, because I love horses with flowy manes, and it gets me pumped!
Step 17: Tail effects
This step can be skipped since I didn't do much here. All I did was select the tail specifically and use the Scale tool to make it a bit bigger. I then smudged it into the long flowy tail I like.
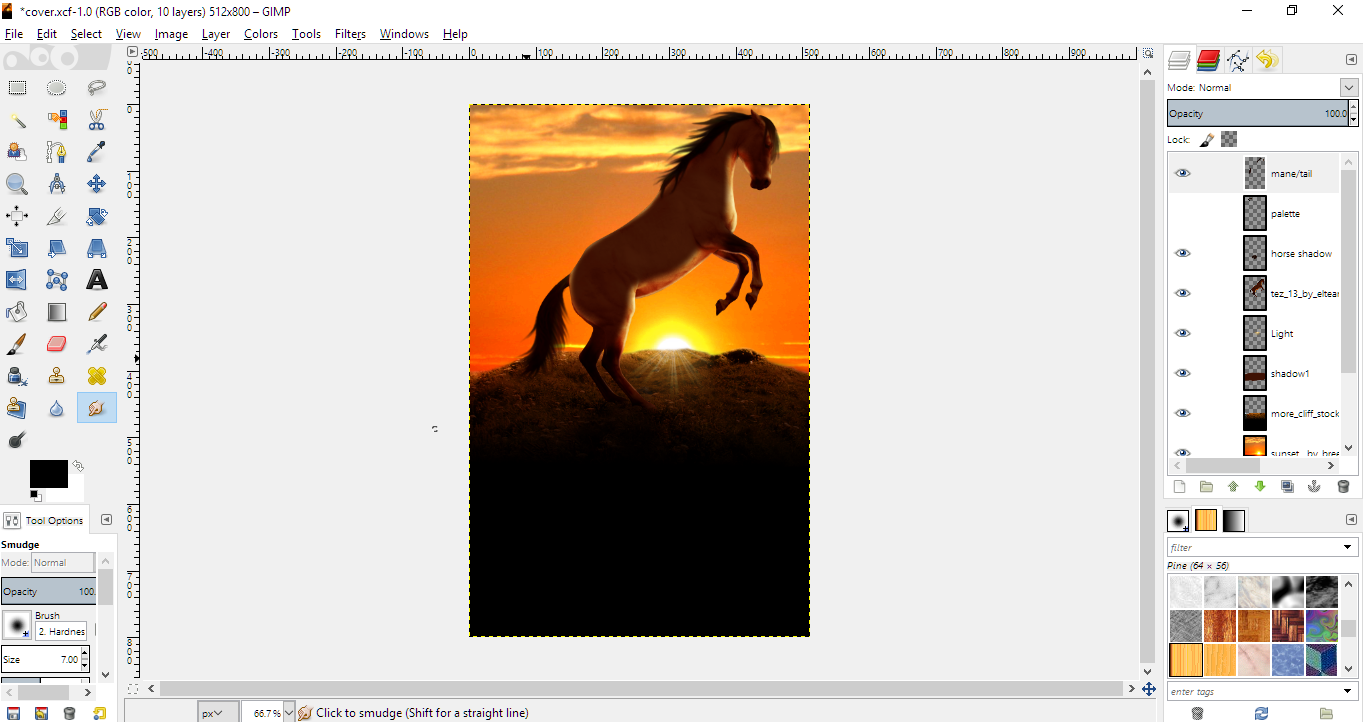
Step 18: Final Lighting Effects
We're mostly done now. This is how our picture is going to look. You can now adjust the colors a bit more (like I did), make it more vibrant and move it around a little more.
You can now stop here, but I went a little ahead and used more lighting effects and even added a lens flare.
Step 18: Text
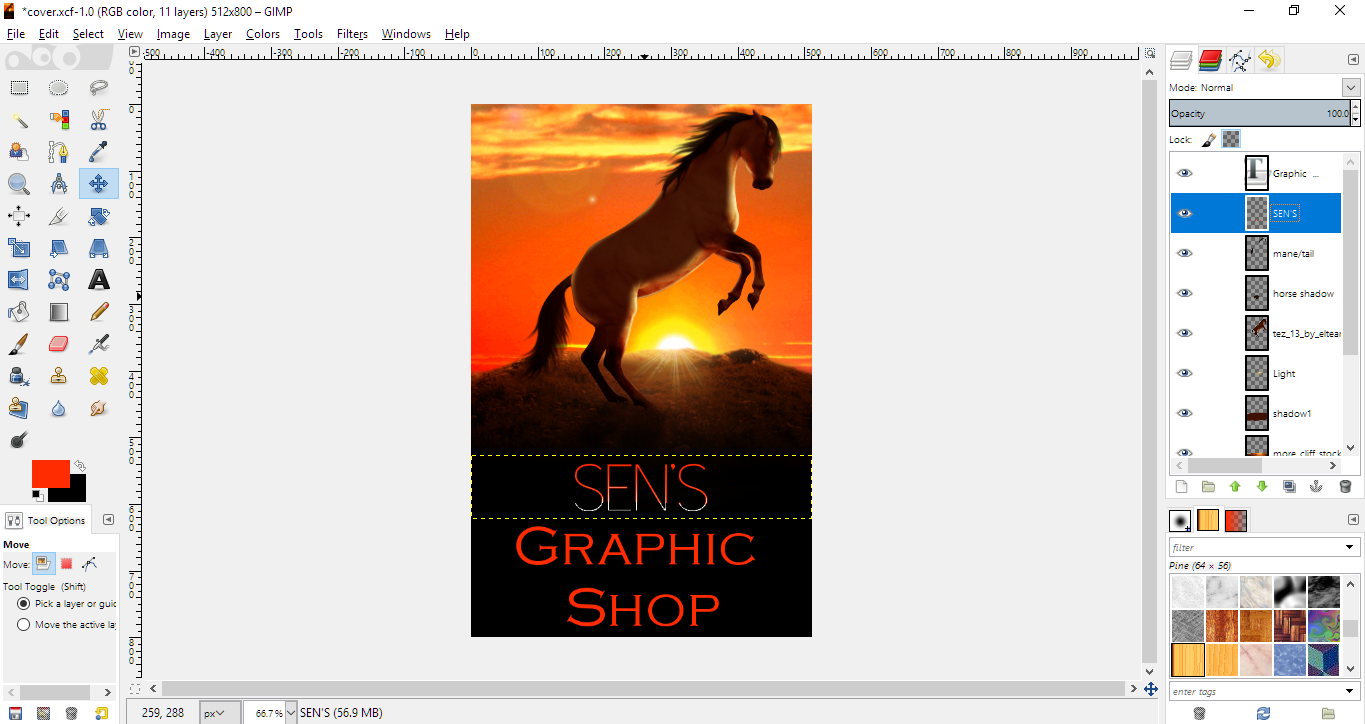
And for your final step, Add some text with some effects, and you're finally done!
So I hoped you like this little tutorial. I know it's not an easy or simple one, since it is more Intermediate, but its also a way of sharing with you guys my process.
A quick disclaimer: I do not recommend this tutorial for anyone who's just started using GIMP. I tried to make it as simple as possible, but a lot of the tools and techniques I used in this tutorial are at least 6-month plus experience at minimum. You're welcome to try this tutorial, who knows, you may come up with something better than I!
If you'd like me to do more tutorials like this in the future, please let me know!
Bạn đang đọc truyện trên: Truyen247.Pro