SBS Art!!! {Part 3: Asami Aoki ~ The Ultimate Comedian + TUTORIAL!}
Dear readers! :D
I remember when I first started drawing these OC's, I told myself, "Alright. Listen Bori. . ."
" . . . These are supposed to be small, easy to make, easy to manage. That means, LOW DETAIL!" I screeched in my brain, slamming my fist on a nearby coffee table. "So, don't fuck it up. Don't do anything cool. No new fangled shit, ALRIGHT?"
Then the other part of me said, "Cool, yeah! You have my word, this won't be anything crazy!"
. . .
. . . But it got crazy.
If you look, after the first one I slowly started adding more and more detail to these. T.T
I simply couldn't help myself, but to add more and more to them. Because there is nothing I love more than character design, and making versions of other people's characters is really really fun, and—I'LL NEVER STOP.
I mean, I will, but you know. . . Not yet.
So anyway, you're all probably wondering why I'm rambling so much. I'll get to the point. The character I've drawn this time is from the delightful iputthepaninpanta . They made Asami Aoki, the Ultimate Comedian!
However, I specifically worked with them on the redesign, and we talked about how I should draw Asami. It said that they wanted to use my drawing as a reference for whenever it draws Asami next, and because of that, I figured it'd be a cool idea to give a full tutorial on how I draw/have been drawing these DR OCs.
I'm gonna go into full detail and talk about my thought process, including screenshots that I took while I was actually drawing! Buuuuuuut, that's only for people who are interested. If you wanna skip to the next part and the bottom, you can! Just scroll all the way to the bottom of the chapter.
It's in two parts since I hit the image limit. I hope that isn't too confusing. . .
With all that said and done, let's get going!
Info:
So, the program I use to draw is called Autodesk Sketchbook! It's a drawing app for mobile devices. (I.e. phone, iPad, tablets, etc.) I used to use it on my laptop, (which is a Chromebook, and is more like a large tablet that happens to have a keyboard,) but then my laptop stylus kinda broke on me.
And now, I do all art on my phone! I used to have a cellphone stylus, but uh- . . . That broke too . . . So now I do absolutely all digital drawings on my phone, with my fingers. And it works well! Surprisingly. I have a lot more motive to draw now, since all I have to do is open the app on my phone. Meanwhile on my laptop, I have to wait a while to boot it up, and sit up straight and everything. But with my phone, I can do it whenever inspiration strikes, and stop whenever I need to.
Autodesk is fairly easy to use, completely free, and has a ton of fun brushes! I strongly recommend it to anyone interested. Like I said, I use my fingers to draw, but there are also those cheap plastic phone styluses that you can get from a gas station or something if you really need one.
And lastly, DISCLAIMER!!!
These are MY thoughts. And this is MY experience with art, therefore, it may not work for you. Everybody is different, my words aren't law. Like, AT ALL. I had an art job where I worked with others to design art installations for our community and local area, and learned a some really cool things! However, I'm still no master. I've just grown really comfortable in my own art style. (Finally, tehe . . .)
If this helped, awesome! Great!! So happy!!! But if it didn't, don't worry. That just means our experiences didn't line up, and that you just gotta keep searching. I believe in you!!!
———
Step #1: Prep (I dunno what else to call it-)
{Currently, there are 4 Layers}

(Everything will be circled so you can see everything. Any newly added layers are circled in purple, and the drawing on the canvas will be circled in red. . . Well, it's kinda maroon if anything, but whatever. You get it.)
First off, put something on while you draw! (If you want. It usually helps me keep up motivation.) Like music, or a podcast or something. My drawings usually take a while, so I listen to a lot of lo-fi, and DR character inspired playlists, tehehe . . . I actually made a playlist! Here: (check comments)
https://youtube.com/playlist?list=PLemGrK6GSMZNbQIRxhAbmFIRVZCa-k_9g
In the middle of the screen is obviously the canvas, where I actually draw everything. At the top is a bar filled with different tools that can help me draw. (I.e. menu button, creative tool button, brush button, color picker, layer button, and then there's a button at the end that gets rid of the overlay completely so you can draw without it showing.) and to the right has all the Layers displayed. I can close it whenever I want, (since it takes up so much space,) but for these screenshots, I kept it open, so y'all can see the changes that happen to it.
Once I'm ready, the next thing I do is compile all the references that I need. When I draw one of the DR OCs, I always read over the backstory and all the other stuff, that way I can get a good feel for what pose the character should be in(+ what I should add to the characters design.) But I'm a forgetful person, so I also take screenshots and have them off to the side, as you usually see. If there's already a drawing of the character, I put that up too. (You can scroll back up and see all the references that are there.)
But before I draw ANYONE or ANYTHING, I always PM or tag the original creator and ask if it's okay. I have some irl friends who don't like it when people draw their characters without permission, so I always ask before hand. Especially since I know I tend to get a little ahead of myself when drawing. But of course, whenever I do want to add something to the character, I ask if it's okay. (For example, I asked if I could give Asami a bow tie, and that's what started this, tehehe!)
———
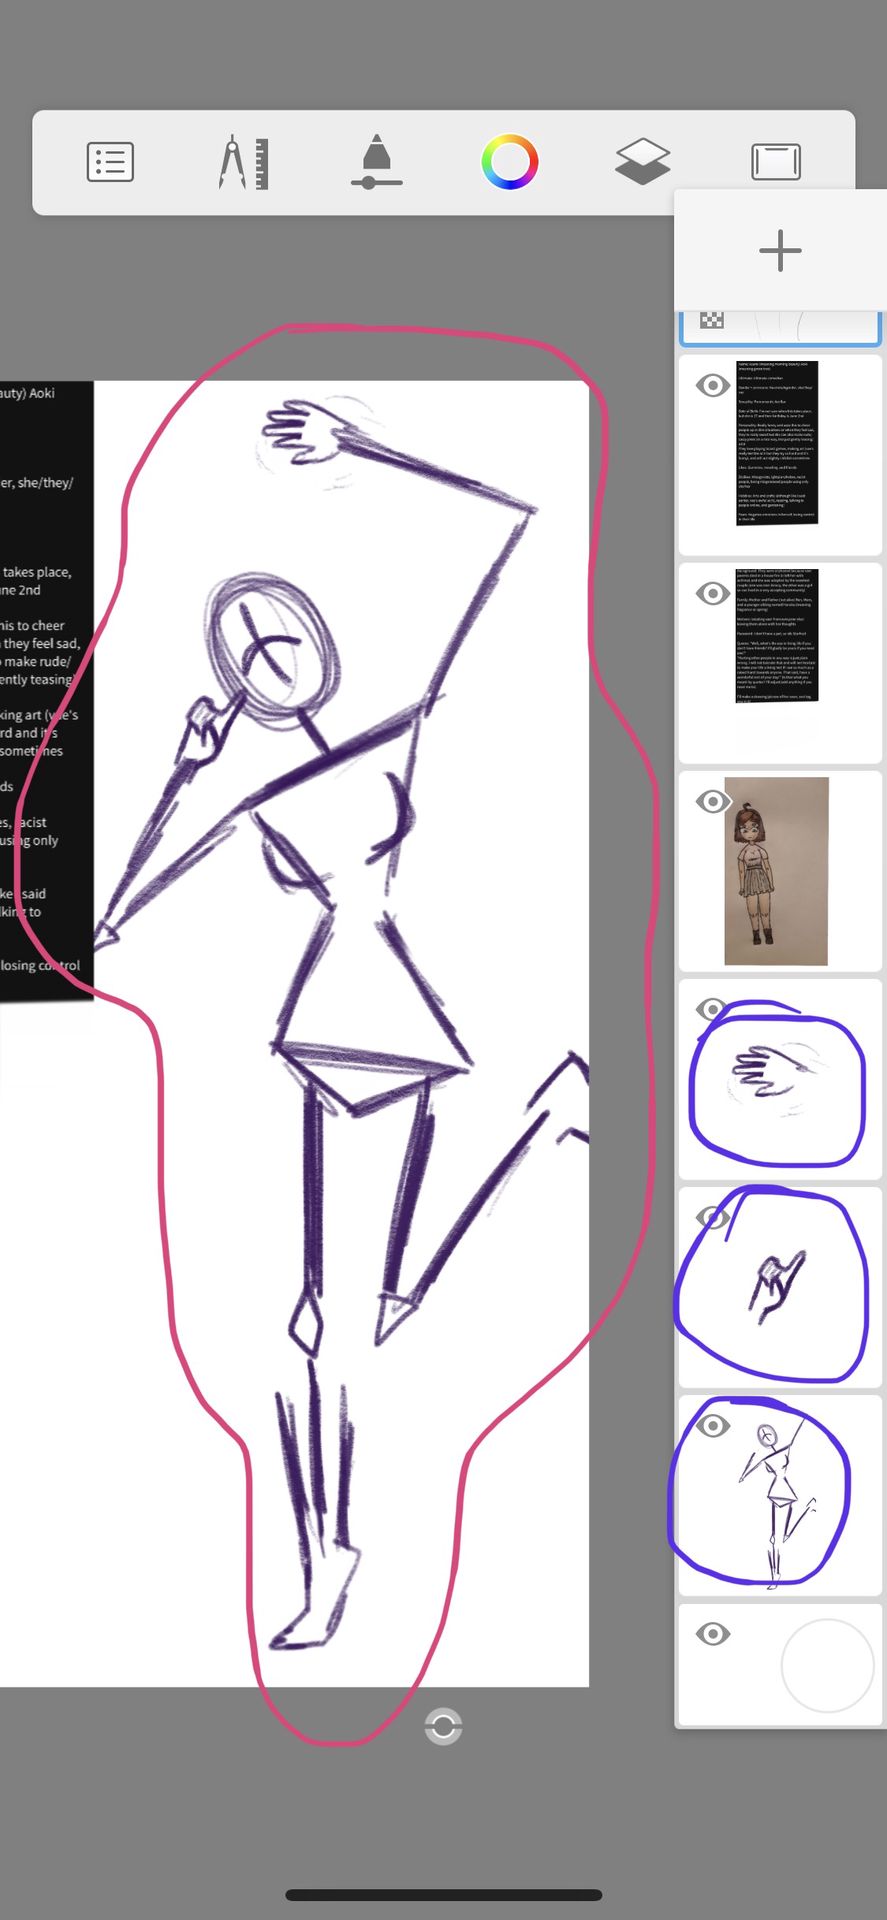
Step #2: Skeleton
{Currently 7 Layers}
(I use the basic pencil brush for drawing, and then the "Course Watercolor," brush for coloring.)
So, the skeleton is a basic model, used to figure out the anatomy of character pose. There are plenty ways to draw a skeleton, aaand, this is how I do it.
I draw the head, but don't really think about anything besides the size of it. Right now, it's shape doesn't matter, because I'm gonna draw over it anyway. In the middle of the head, I put a cross. These are to define the position or direction of the head.
Ex:


OOF, those were very rushed examples. But anyway, the vertical part of the cross signify where the head itself is facing. Meanwhile, the horizontal cross does the same thing, but also shows off where the eyes may be looking. (See the second head drawing.)
Then I do a line for the neck, and draw another horizontal line for the shoulders. From the shoulders, I draw the torso. The way I do the torso depends on how the character is. Chubby? Ripped? Thick? Thin? Sickly? Average build? It's all dependent on something. I just went with whatever on this one, and gave vae a some what pear shape with the torso. (For reference Asami's pronouns are she/they/vae.)
Anyway, fun fact! The width of your shoulders and hips are equal! So if you look at my skeleton,(the drawing I mean, not my aCTUAL SKELETON, WAIt!-) the shoulder line, and the hip line are around equal. Just a fun fact though. You don't actually have to use that in your art, depending on the style.
If the character has tits, I draw the basic shape of where they'd rest. That way later, I'll know what to do. For the crotch, I just do a triangle. Nothin else to do for it.
Then, arms and legs are next. So, another real anatomy fun fact! From the top of your head to your hips, and from your hips to the bottoms of your feet, are the same height. So, if you were to. . . Perfectly snap your body in half, you'd be half of your OG height.
(Ex:
Head to hips: 2'5
Hips to feet: 2'5
Persons over all height: 5'0)
So, the bottoms half should be the same height as the top! Another thing is from your shoulder to your elbow is the same length as your elbow to your wrists. (Upper arm and lower arm are the same length) And it's the same thing for the thigh and calf. (Start of thigh to knee length = knee to ankle length.)
You also may have noticed that I fully drew the hands and feet even though it's just a skeleton. I did this because . . . Honestly, the quicker you figure those things out, the easier it will be later. I just wanna get them out of the way immediately. However, I usually have the hands (or anything else that's being a pain to draw,) on a different layer since I don't wanna mess up the skeleton. . . Then I merge the layers later
But hands are tricky . . . . SO:


This is my general approach at hands. I wouldn't mind going into depth on this later, but this is all I have on it for now. But again, this is what works with my art style.
Besides that, there's not much to the skeleton. Sometimes I try out multiple different poses, to see what I like. Here's a beta design:

I didn't go with it because I just didn't think it'd show off the characters outfit enough.
In total, I usually take about 20 minutes with a skeleton? Depends on how much trouble it's givin me, ya know?
———
Step #3: General Anatomy
{Currently 5 Layers}


So, for the next part, I have to stitch together the actual anatomy. We have the base, but we need the actual form now.
So I lower the opacity of the layer the skeleton is on, and then I start to draw over it on a separate layer and start making the actual shape of the character. To lower the opacity of the skelly layer, I just open a menu and then slide the slider down a bit. (Usually 30%-50%.)
Then, I just make it all connect! (This is where you can REALLY see the pear shape.):

Ta daaaaaa! We got a basic anatomy and shape! When the anatomy template is done, I hide the skeleton layer, but don't delete it. (Sometimes it's good to look back at what you've made, ya know? So I usually just hid it so that it doesn't show up on canvas.)
But that's it. Nothing else too complicated about it. Takes me around 30 minutes at most, I think.
———
Step #4: Detail and All the Goooood Shit!
{Currently 8 Layers}
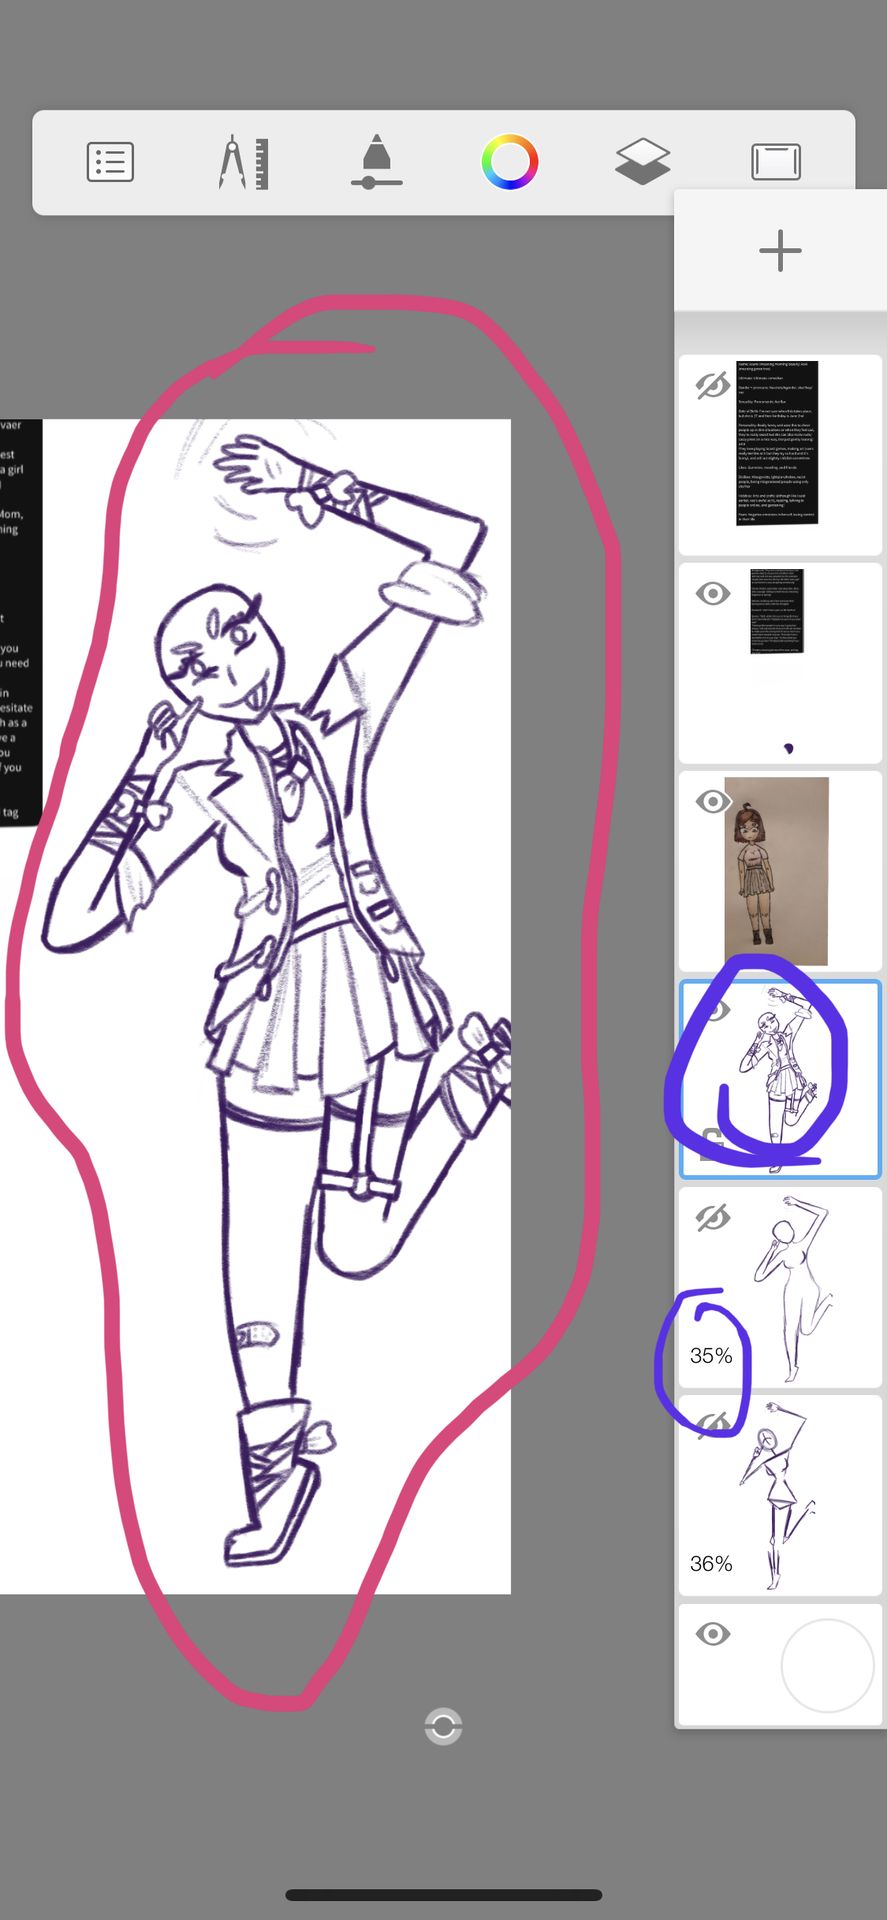
Alright! So, for this, I essentially just do the same as I did with the skeleton layer. I lower the opacity of the anatomy template, and then draw the details of the character from there. This is what takes the most time, from around an hour to wayyyy more.
But okay, let me unpack this:
- fairly normal tee shirt tucked into a skort
- plated skort! (Skirt and shorts combined)
- garter belt that stretches from around the thigh to the waist of the shorts (under skirt cover)
- boots on feet!
- cute ribbons on the wrists and boots! Also a lose bow tie dangling from neck.
- and final major piece is the blazer that they're wearing. That's all!
I made sure to drag inspo from both what iputthepaninpanta wanted and what was there to begin with. The boots, plated skirt, and tee shirt were all from the OG.
Of course, sometimes I'd add new references to help me, since I'm a dumb dumb:
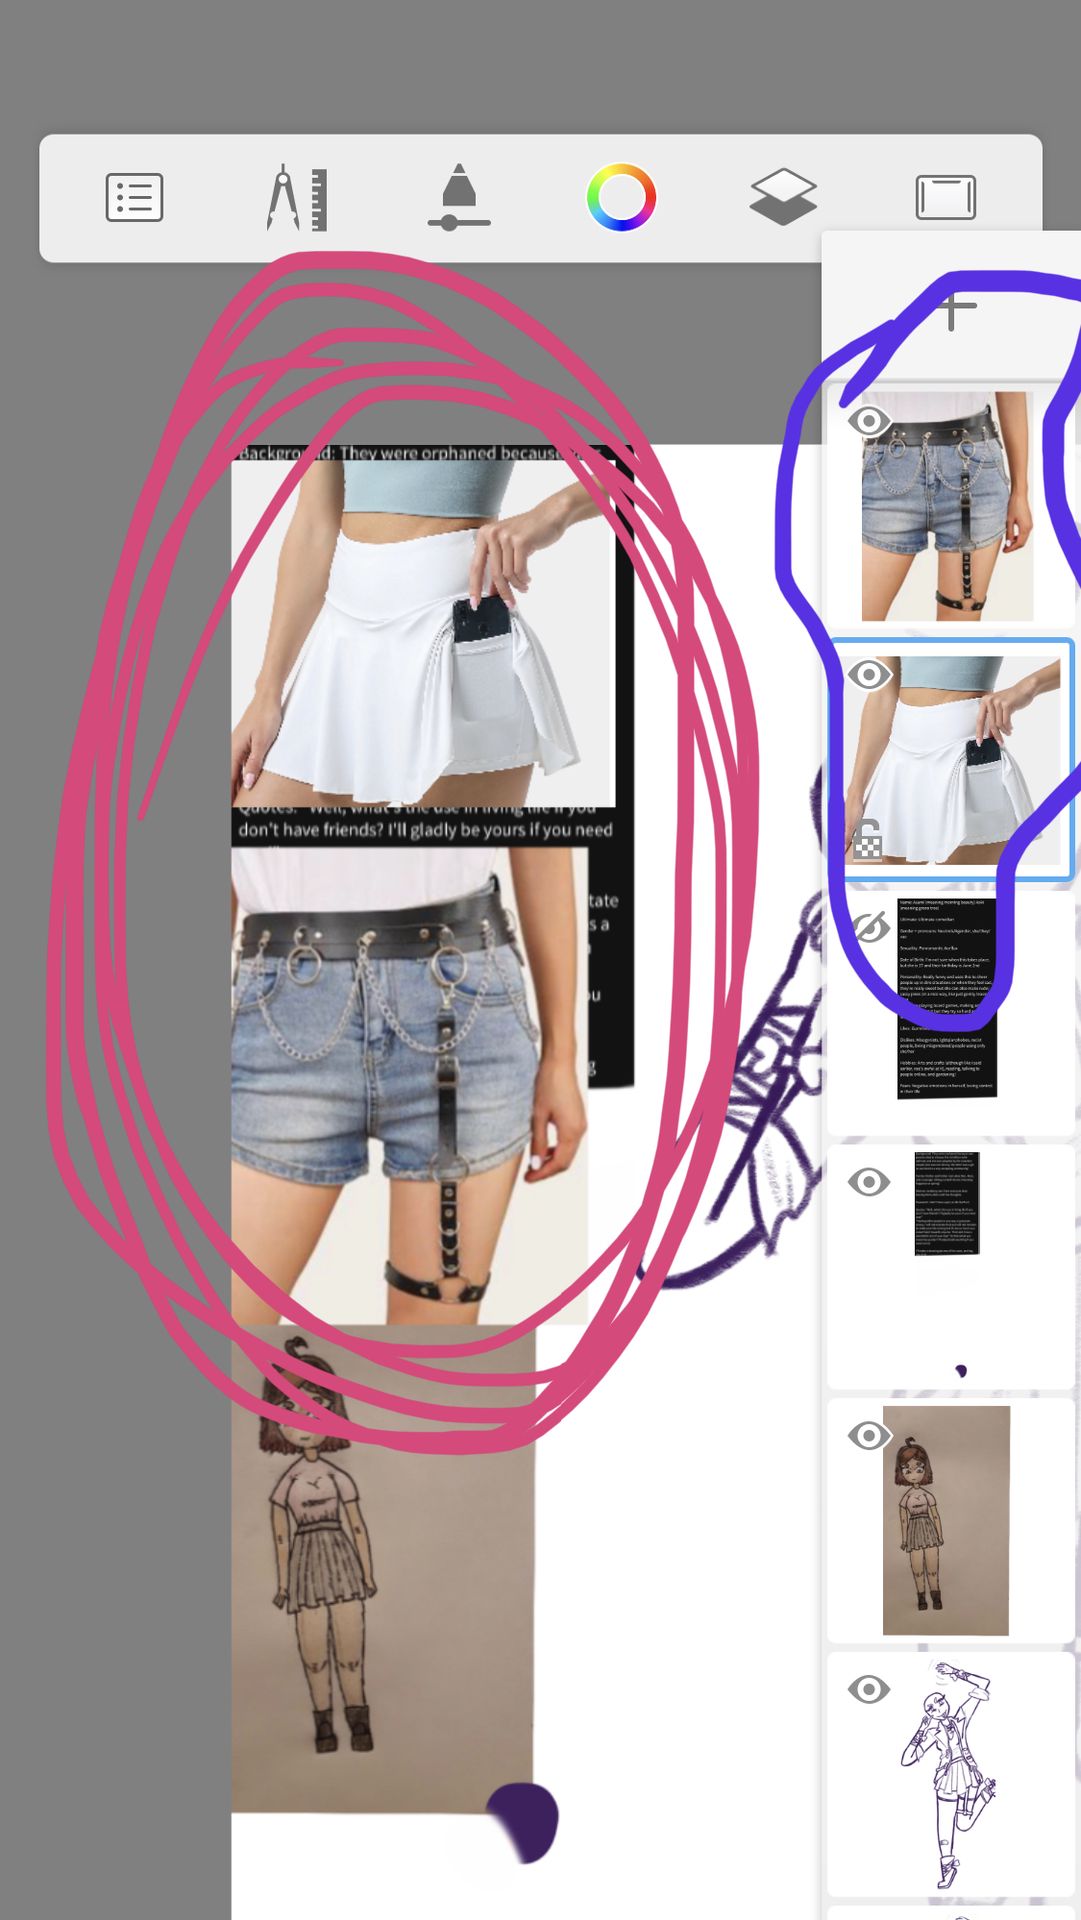
Those are just stuff from Google I found. Google and Pinterest are your best frieeeeeends!
You may have noticed though, that vaer um . . . bald, right now. I usually save the hair for the very very end!:

I bring the opacity down again, and then draw it:

But again, hair doesn't take me long. Maybe 10-20 mins. I did try another variation though:

But I like the OG! It's very beautiful.
———
Part #5: The Even BETTER Shit :D
{Currently. . . . Idfk how many Layers, I refuse to go count. TOO MANY.}

So. Color. FUCK.
I love coloring, SO much. But oof, it takes a while. I remember saying that drawings detail takes most time, but nah, coloring does. T~T
For every part of the character I draw, (sometimes every color) there's a new layer. The skirt has its own layer, the shorts under it, the garter belt, the boots, the ribbons on the extremities, everything.
I do that, because then if I REALLY need to change the color of something, I can just edit the layer settings. But yeah.
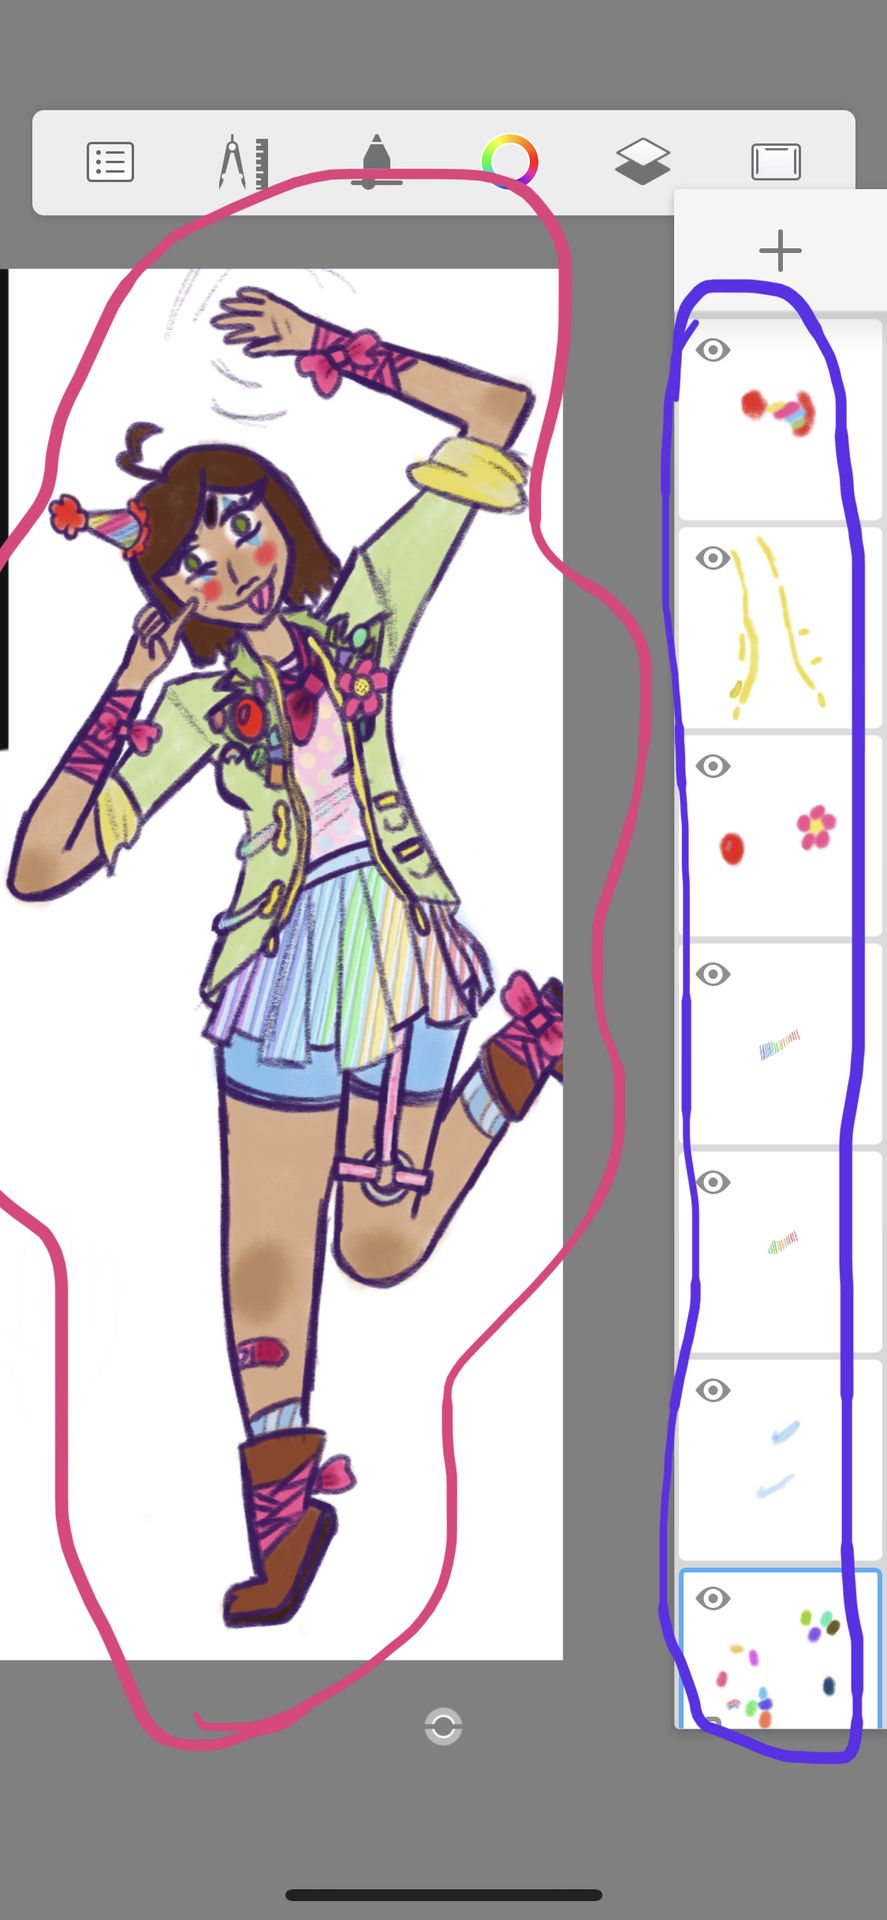
I did however, add a few things after coloring.
After a bit of coloring, I realize that I wanted to add a few more things, so I went back to the drawing/"lineart" layer and edited things:
- added a party hat to give it some clown vibes (iputthepaninpanta offered that I should put a clown nose, lmaoooo.)
- (in memory of the clown nose,) I added a clown nose pin! Along with a menagerie of other pins. In the "Likes," section of her Form, it mentions that vae like traveling. So, I added a bunch of pins, imagining that they buy a new pin everywhere vae go! There's also a flower pin. (Like the kind that squirts water at you if you go to smell it.)
- blue socks, because I realized I forgot those—
- and clown make-up. For extra Clownery.~
The stripes on the skirt and polka dots on the shirt are rainbow, as requested from the lovely iputthepaninpanta , and are actually on a completely different layer than the other coloring layers. It's up directly under the "lineart" layer.
I was told that I could pick whatever skin color I wanted, so I just had fun with that.
And nooooow, I shall share with you another bit of info that I learned working at my art job. That info is, "You should (almost) never use a color only once."
There's a thing my boss taught my called, "Pulling the color throughout." It's were you use a color in multiple different places, therefore bringing it together much more nicely. That's why sometimes, you'll see characters with a black shirt and pants, but then they'll wear a blue hat and blue shoes. Although the color isn't all over it, there's still enough for it to look nicely. (Think of how Ibuki has pink and blue in her hair and on her stockings. She pulls the color throughout her outfit. She also has a white shirt on, and white shoes. If you look close at her, you can see how much her colors are stretched and pulled.)
Because of this rule, I made the blazer she's wearing green like their eyes. And I based the color of her boots off of the hair color I used. The blue makeup under and over vaer eyes is the same blue as the skort, and that same blue is in the socks. The pink of the ribbons on their extremities all match, and also come together in the center, because that's also where pink is. The lighter, more baby pink is both in the shirt, and on the garter belt. It all comes somewhat together. (Although, I shoulda put green on the shoes or something.)
If you look back at my other drawings , you'll see the "Color stretching," there too.
But yeah, coloring took a while due to my indecisiveness.
———
Step #7: Chibi Head!!
{Idk about the Layers, I'm sorry. T-T}

Okay. This is the easiest part. Very little effort goes into these. It takes about 10 minutes if anything.

Please go to next part!!!
To be continued. . . .
- Bori
____________________________
Bạn đang đọc truyện trên: Truyen247.Pro