(1) How to Make a GIF Banner
WARNING: I'm not an expert. But I have learned to make them from several tutorials on Wattpad and I figured I'd share my knowledge ^^
Apps/websites needed: Photopea (website), Phonto (mobile app), Picsart (mobile app/website), DaFont (website)
For this tutorial, I am making a manip GIF for my JATP fic Ghost Girl :)
I am doing this from a computer for this tutorial.
Before you start, find gifs you want to use for the banner and then continue on.
(Also please excuse my drawing skills, haha!)
STEP 1: Open Photopea

—If you go to photopea's website, you will select "New Project". It can be done on a phone or computer but I would recommend a computer since I think it easier and I don't know where the gifs go after you save them on a phone anyway. Plus it's way less clunky.
STEP 2: Make The Size "Twitter Header"
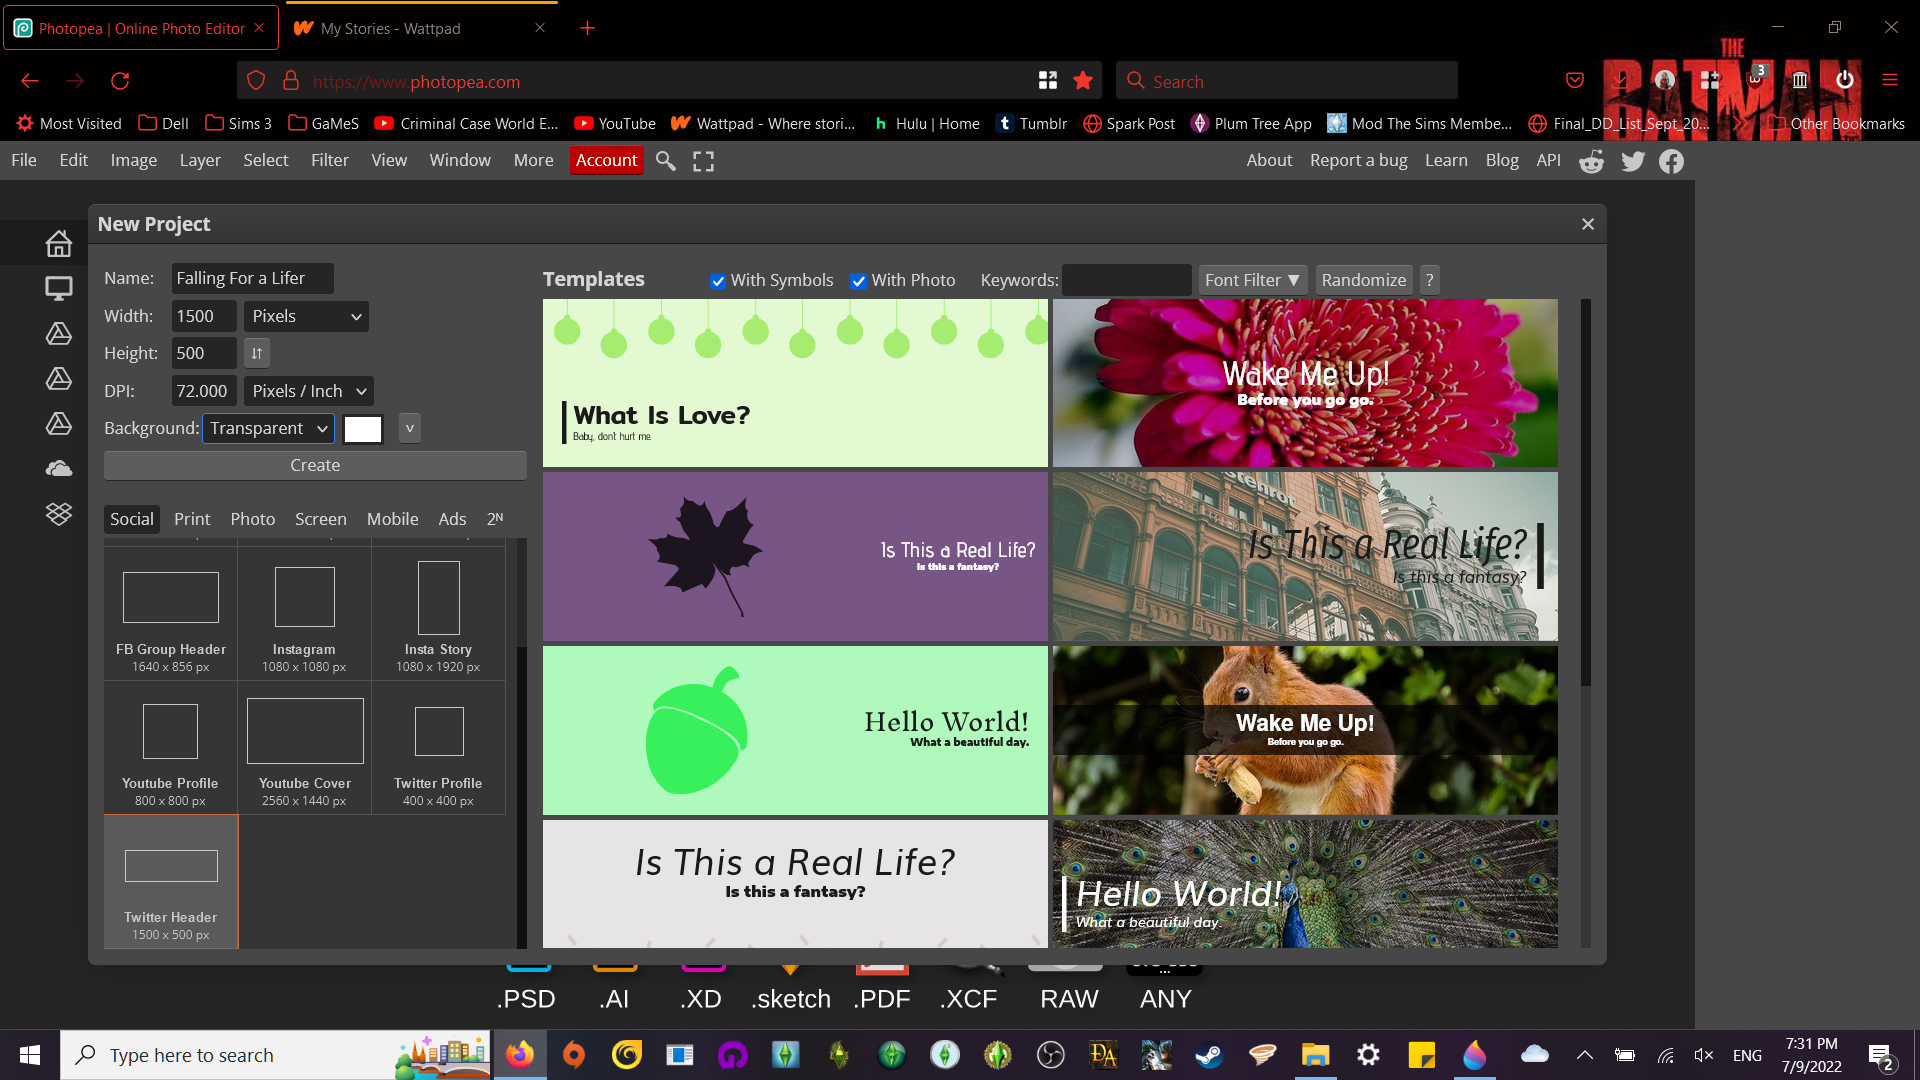
—You can name the project whatever you like. For me, I usually name it after the graphic I'm making.
For this project I have named it "Falling For A Lifer" since that's the text I'm using to indicate act 1 of Ghost Girl.
The size will be changed later so leave that alone.
For the color, I would recommend changing it to transparent (as I did above) but you can use white/black, I just find it easier to work with.
Then press the create button.
STEP 3: Select File, Then Open
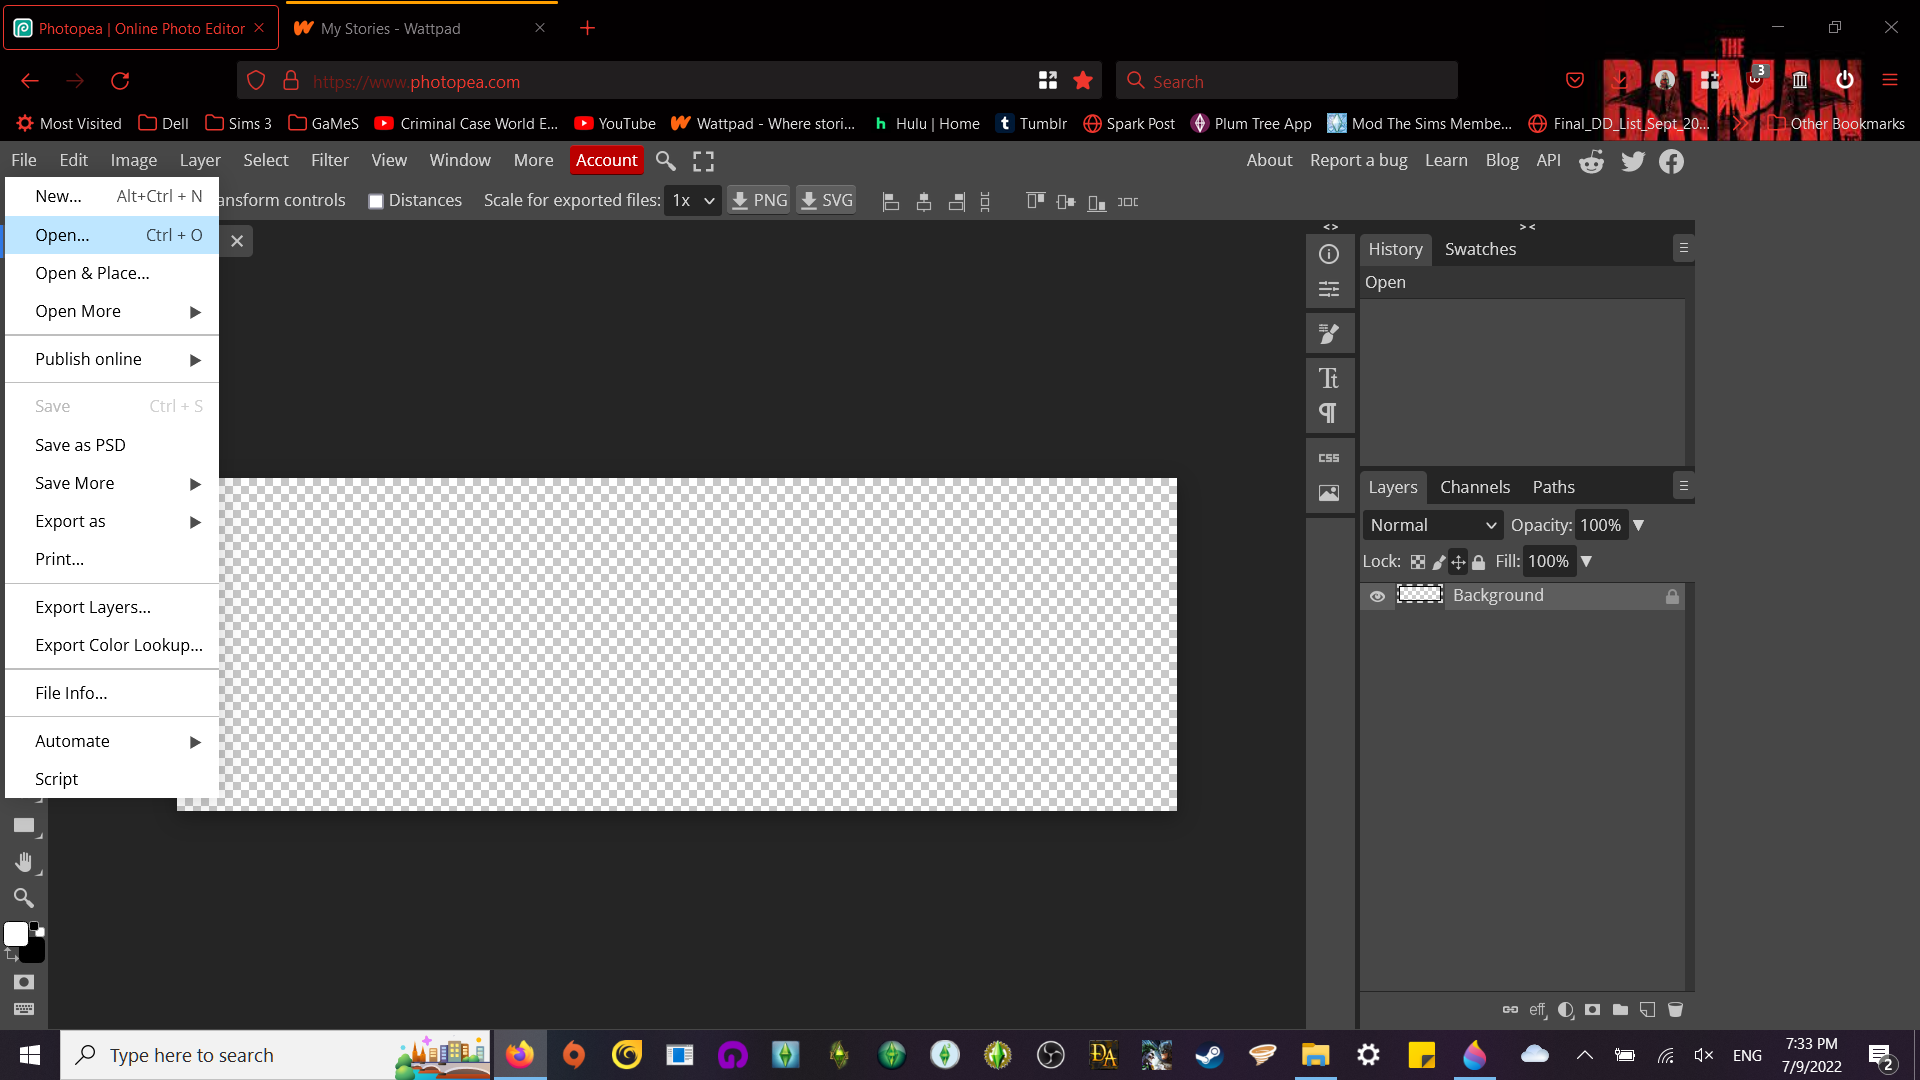
—On the computer, you will find the gifs you looked for earlier in your files. I like to place them in my pictures and give them a name, usually after the actor/character I am using. I also sometimes number them if I am making multiple headers with the same person.
For this banner, I am using "Flynn" and "Aurora" to name the GIFs.
On a mobile device, it should be in your photos :)
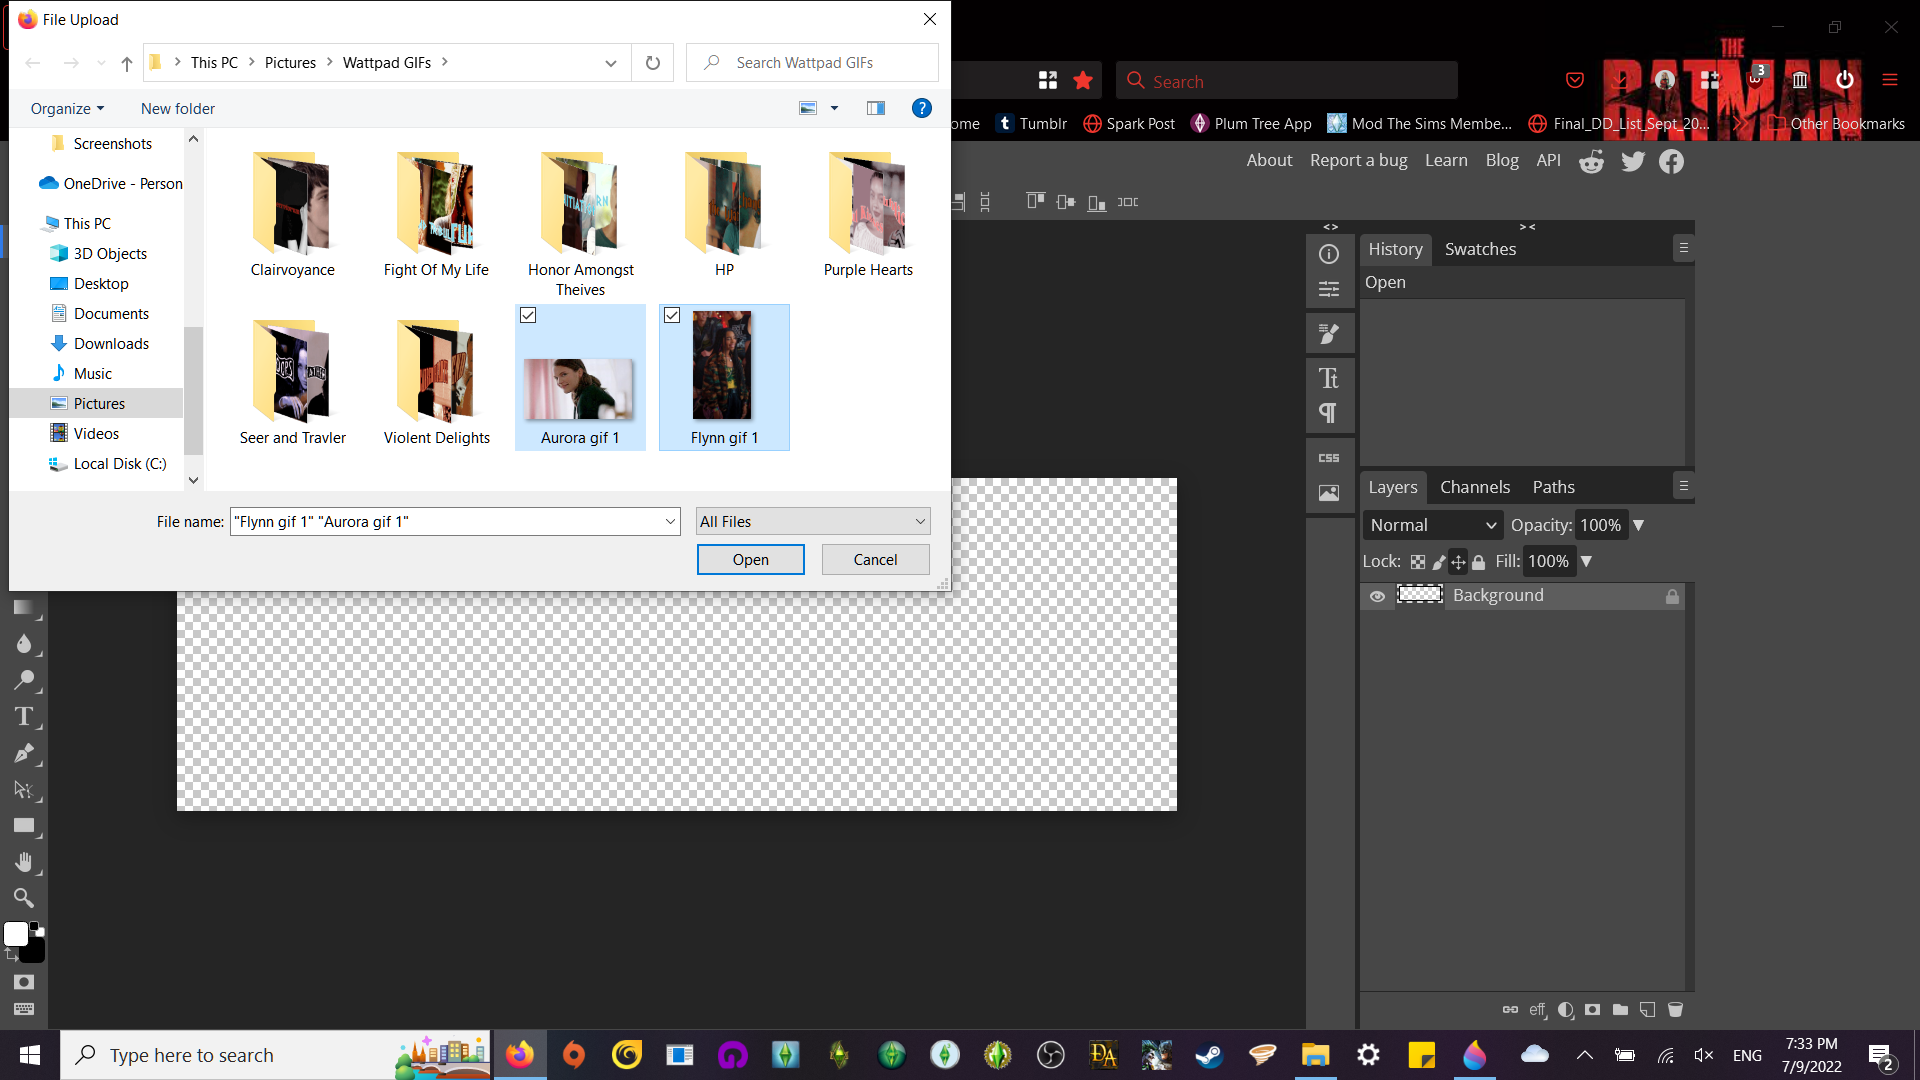
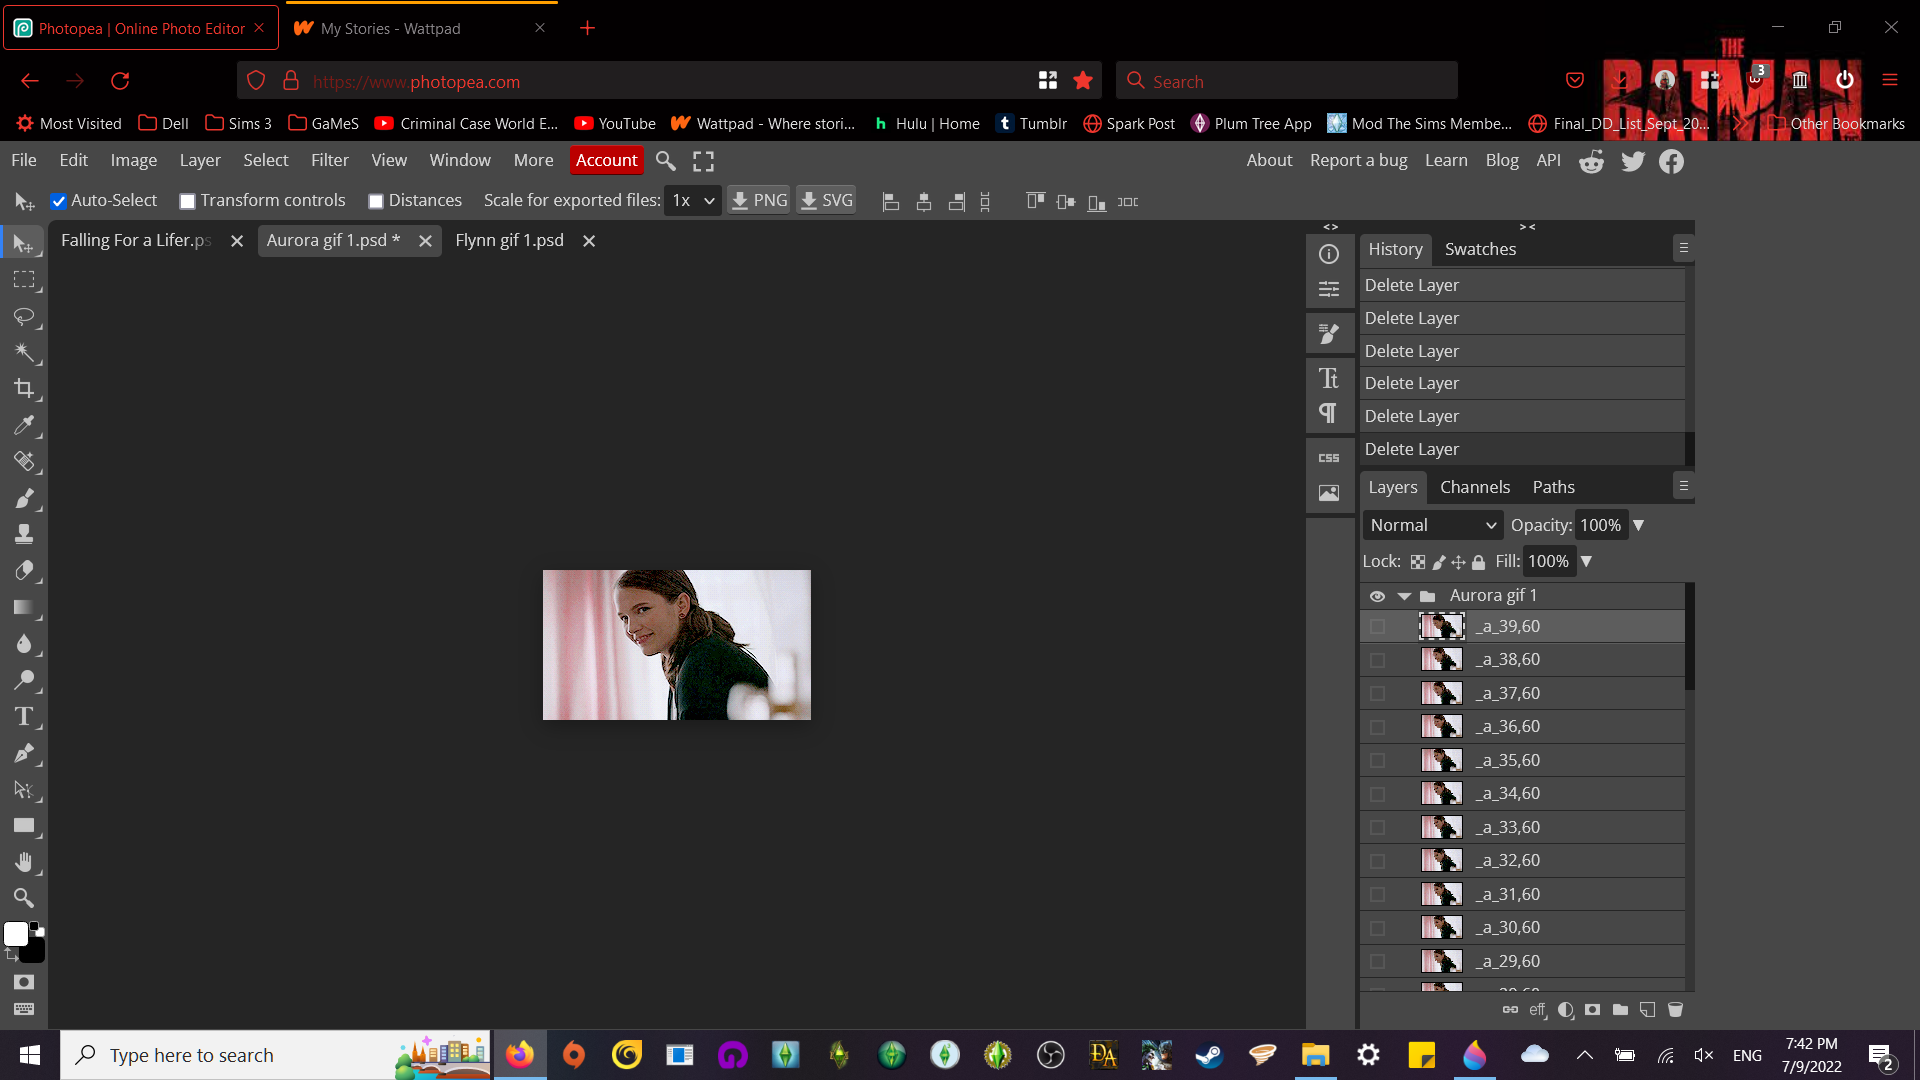
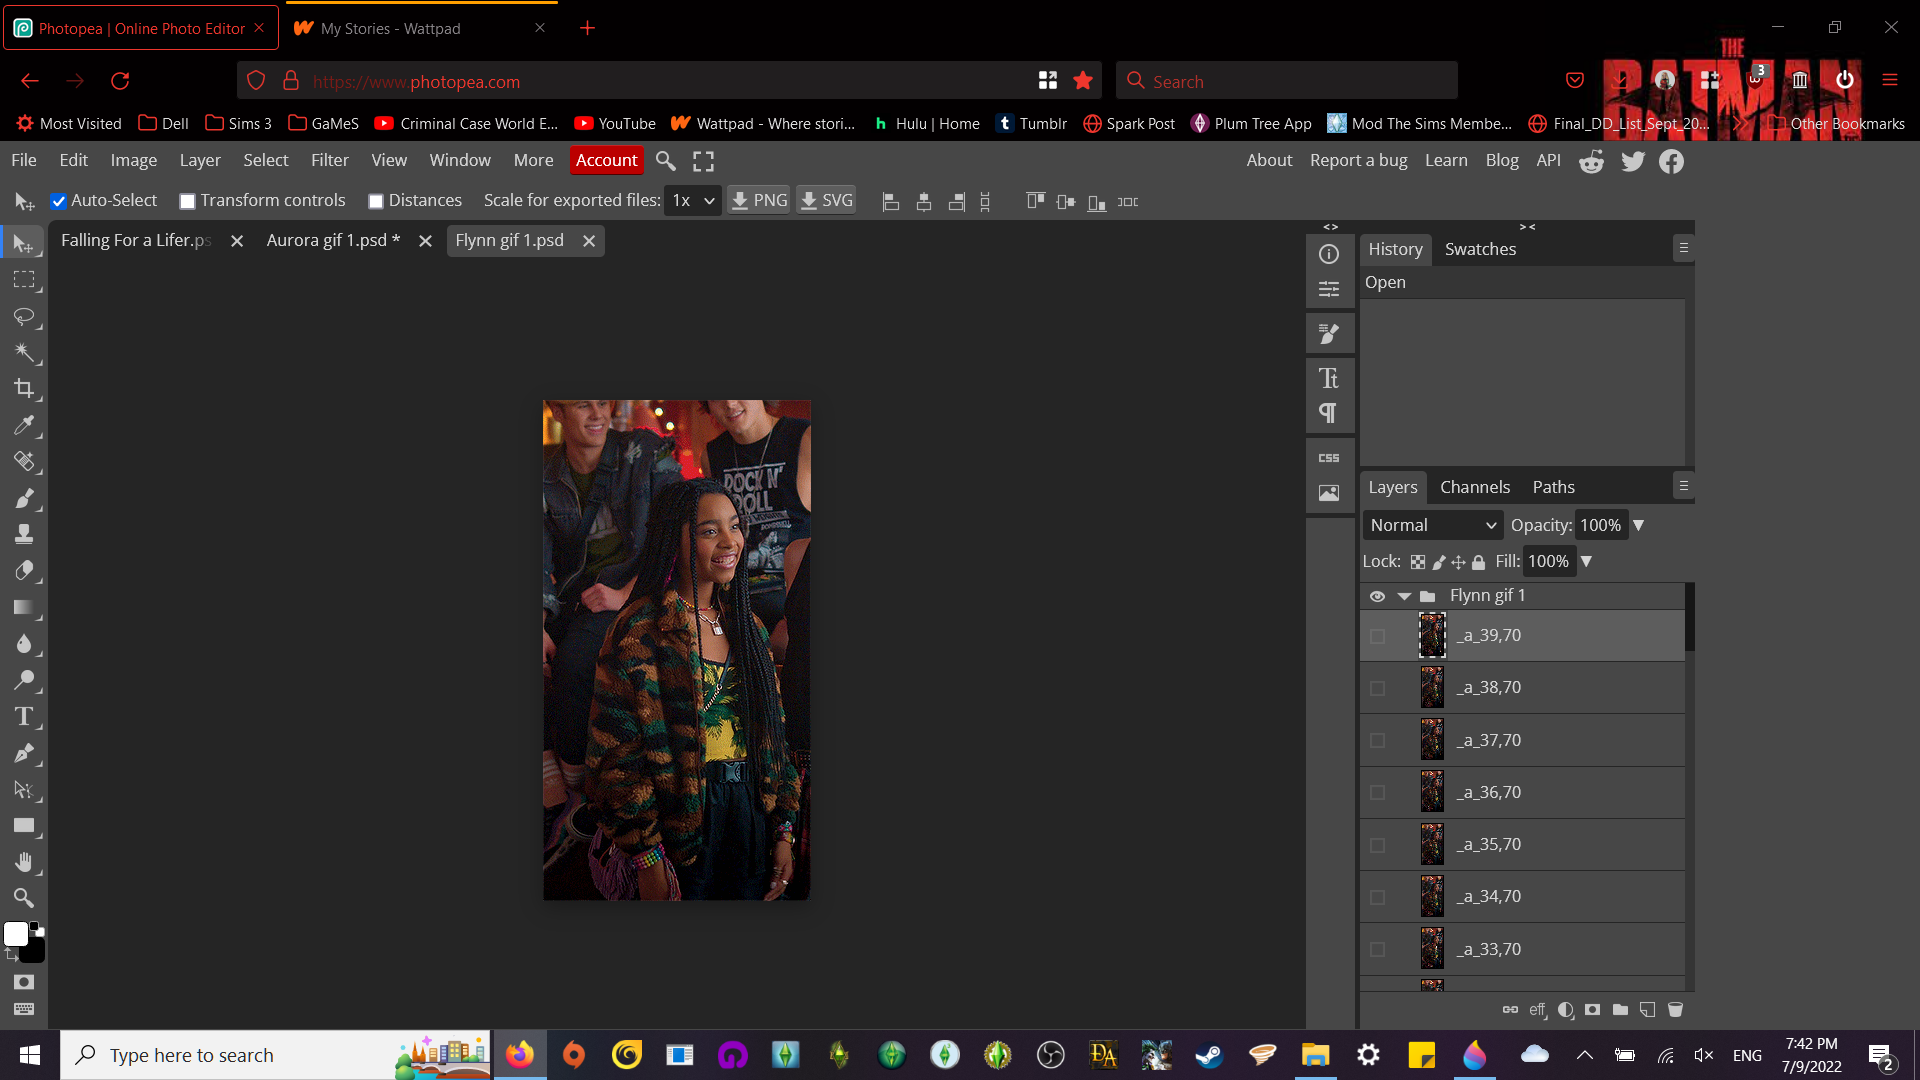
Once both GIFs are in, you will need to check both of them to see how big they are.
There are two numbers. For these gifs the numbers are:
AURORA--81, 60
FLYNN--39, 70
The first number is the one you need to focus on when you're deleting layers so both gifs are the proper size and can both be working at the same time.
Since the Flynn gif is smaller than Aurora gif, I would focus on that one.
Click underneath the folder and press the trashcan in the corner until both GIFs are the same size.
For the gifs I'm using, I will be deleting layers of the Aurora gif until it is 39.
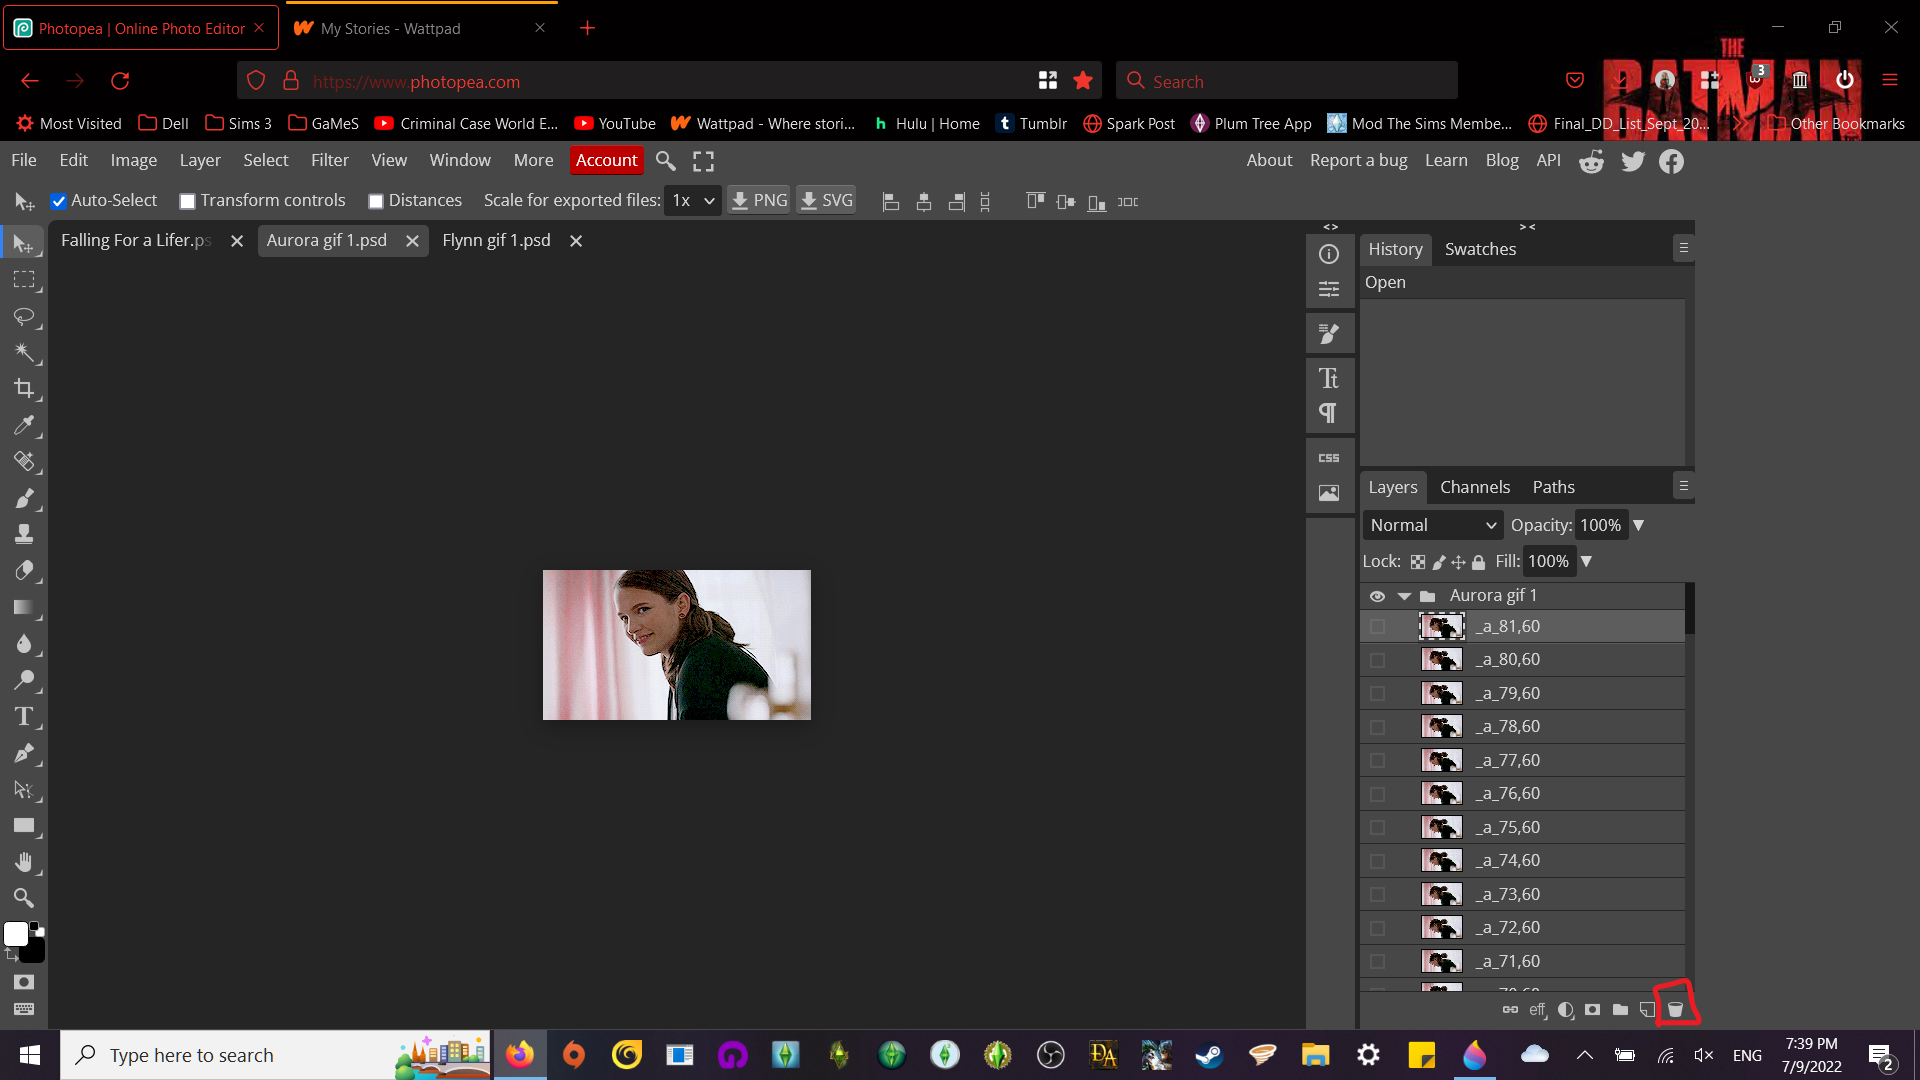
And we're done :D
STEP 4: Make Both GIFs Visible
—As you can see, there are tiny squares next to the numbers. Click on each one so each layer in the folder/gifs are visible.
After you're done with that, drag both gif folders to your project.
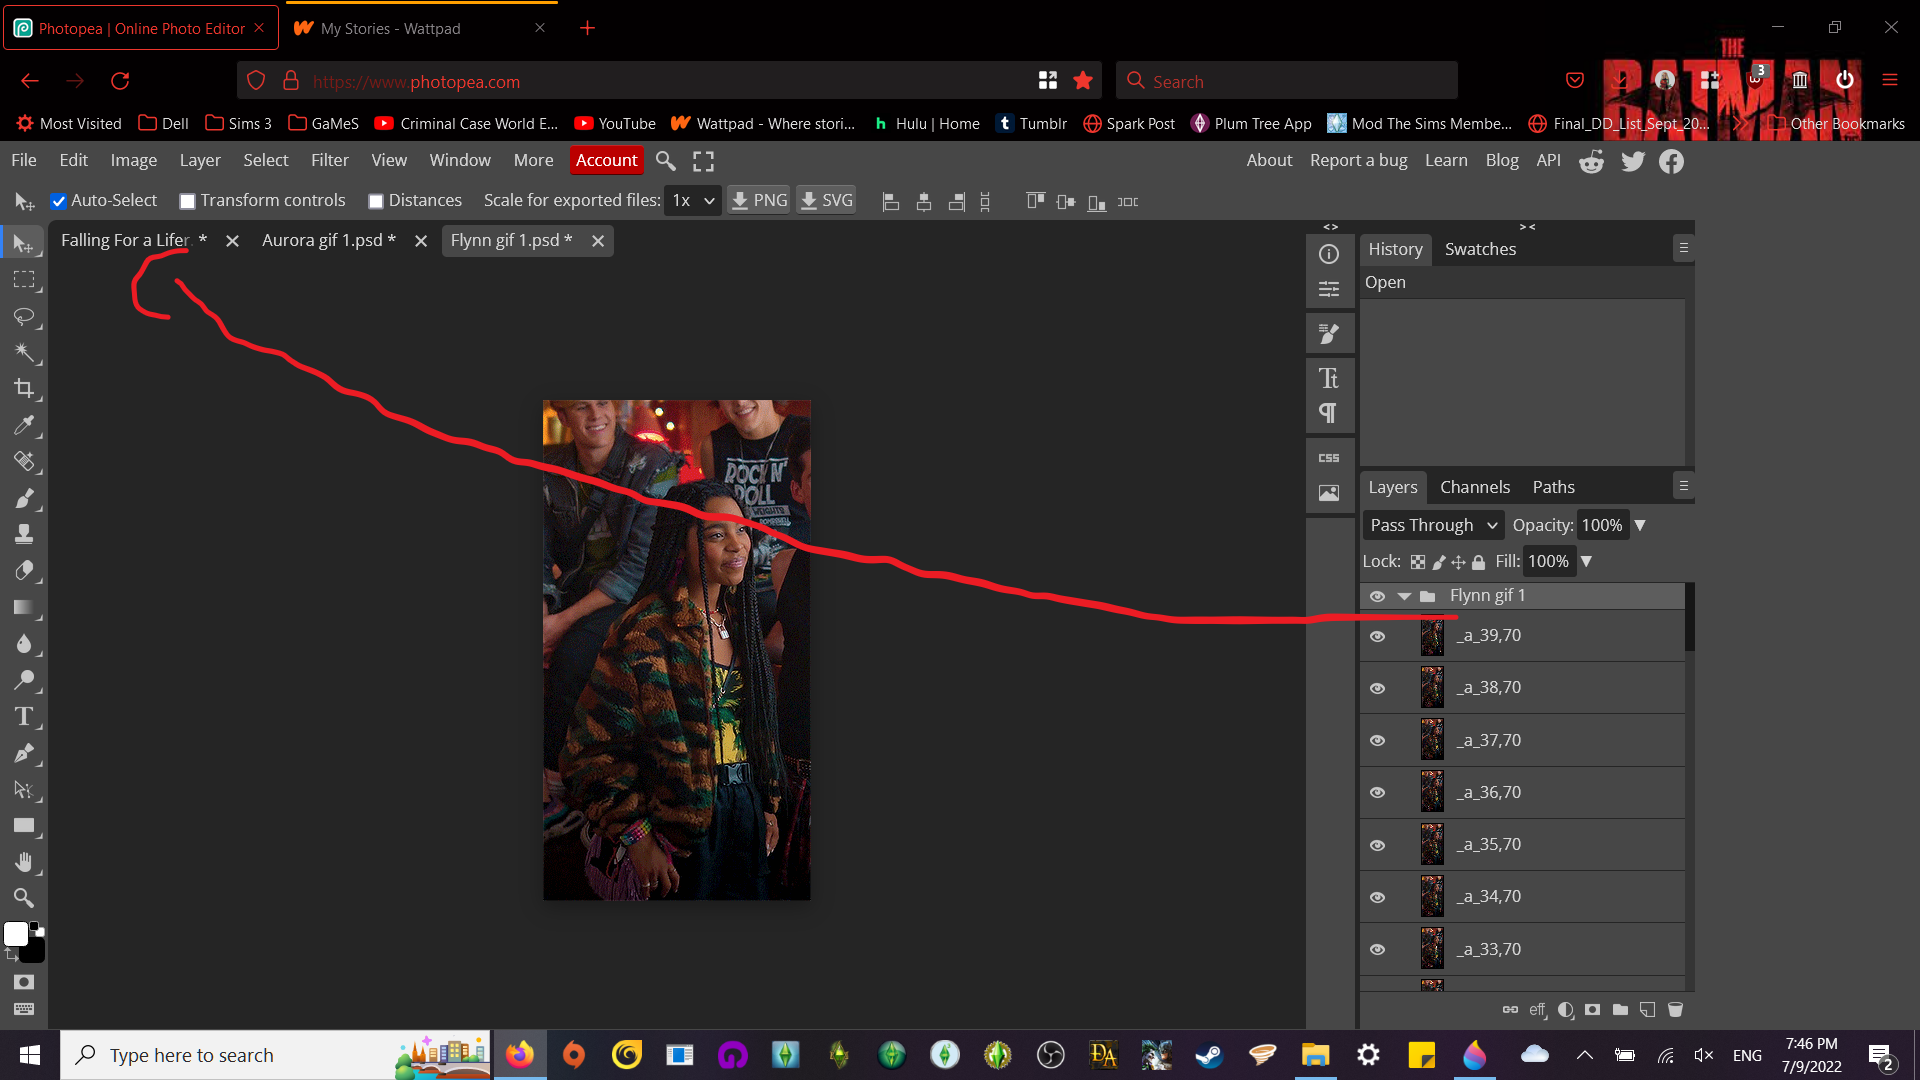
After you're done, you will see both gifs in your project. They are probably stacked on top of each other, so drag one over to the other side so you can see them both.
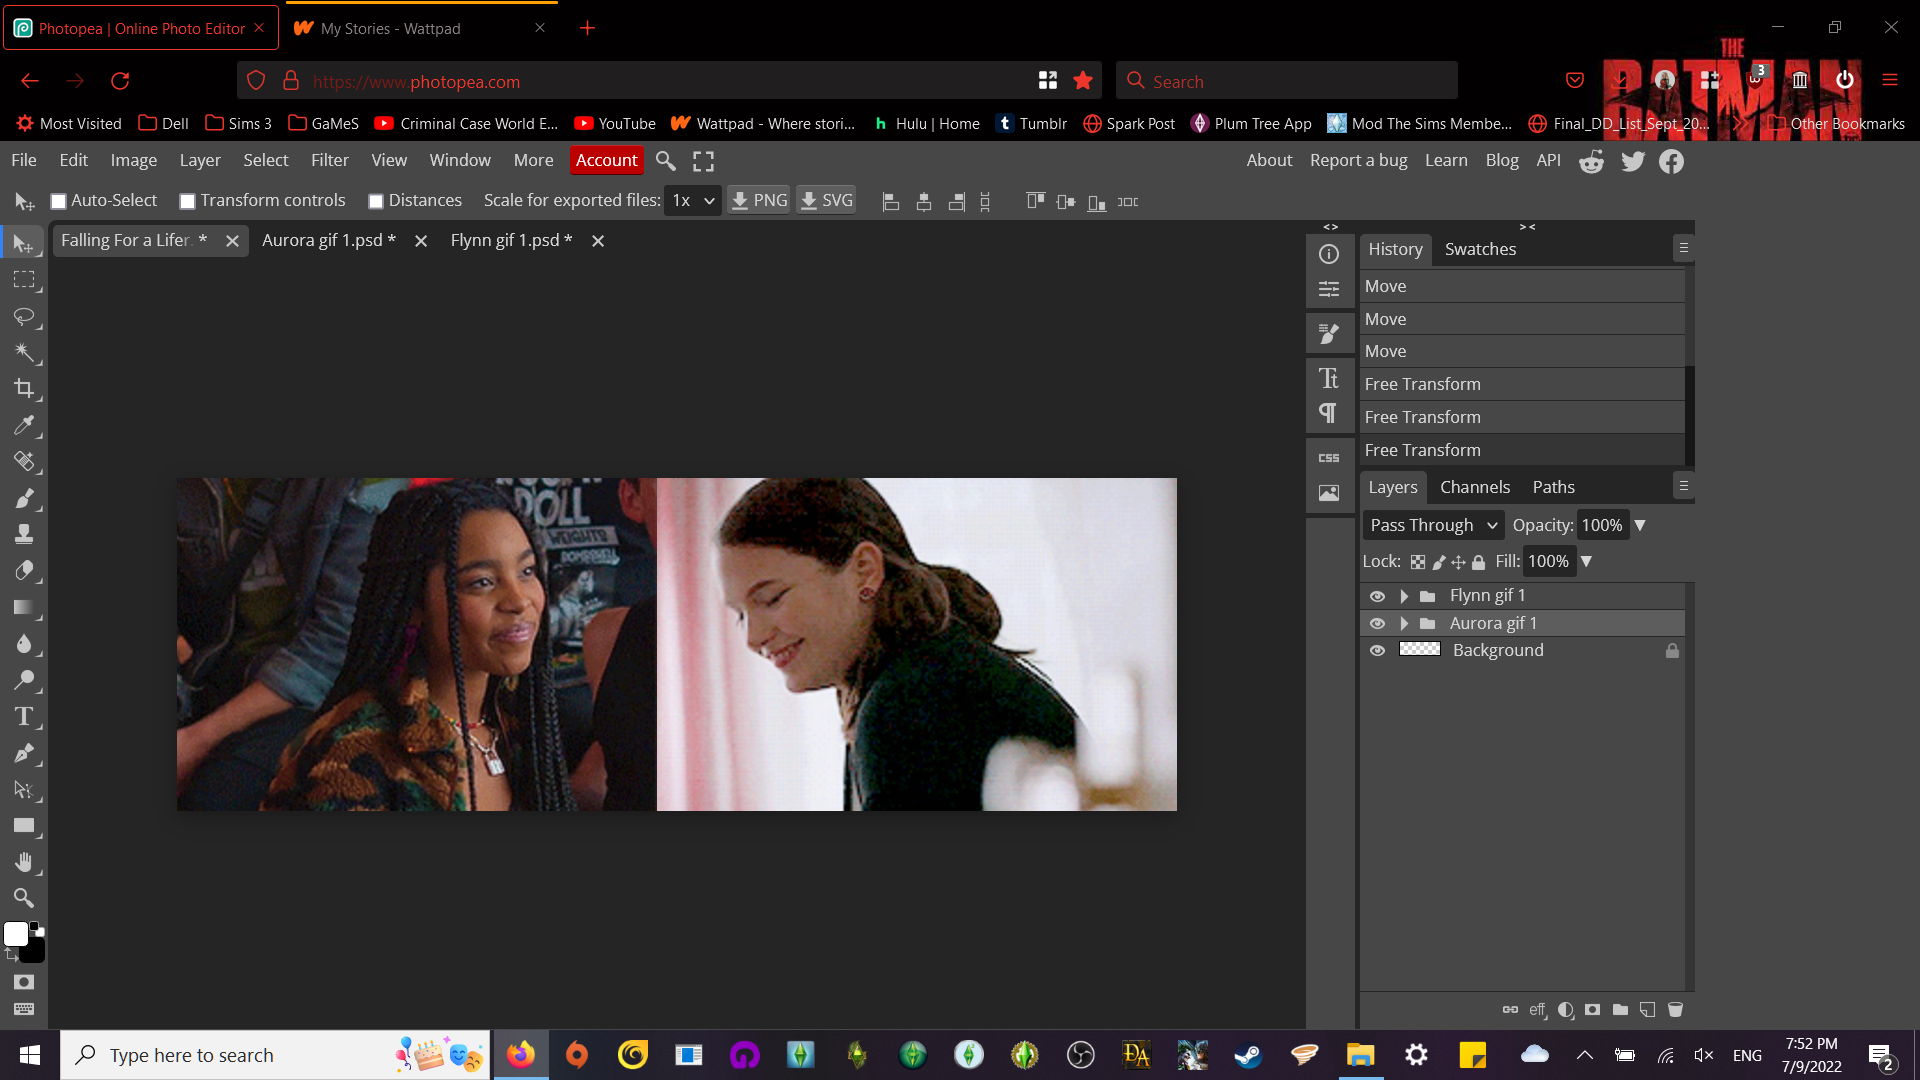
Next, click "transform controls" at the top and drag the gifs so they are the same size. Uncheck transform controls.
It should look like this:
STEP 5: Click The Eraser Tool
—On the sides, there are a lot of tools. The one we need is called...well eraser tool, which you can see in this screenshot.
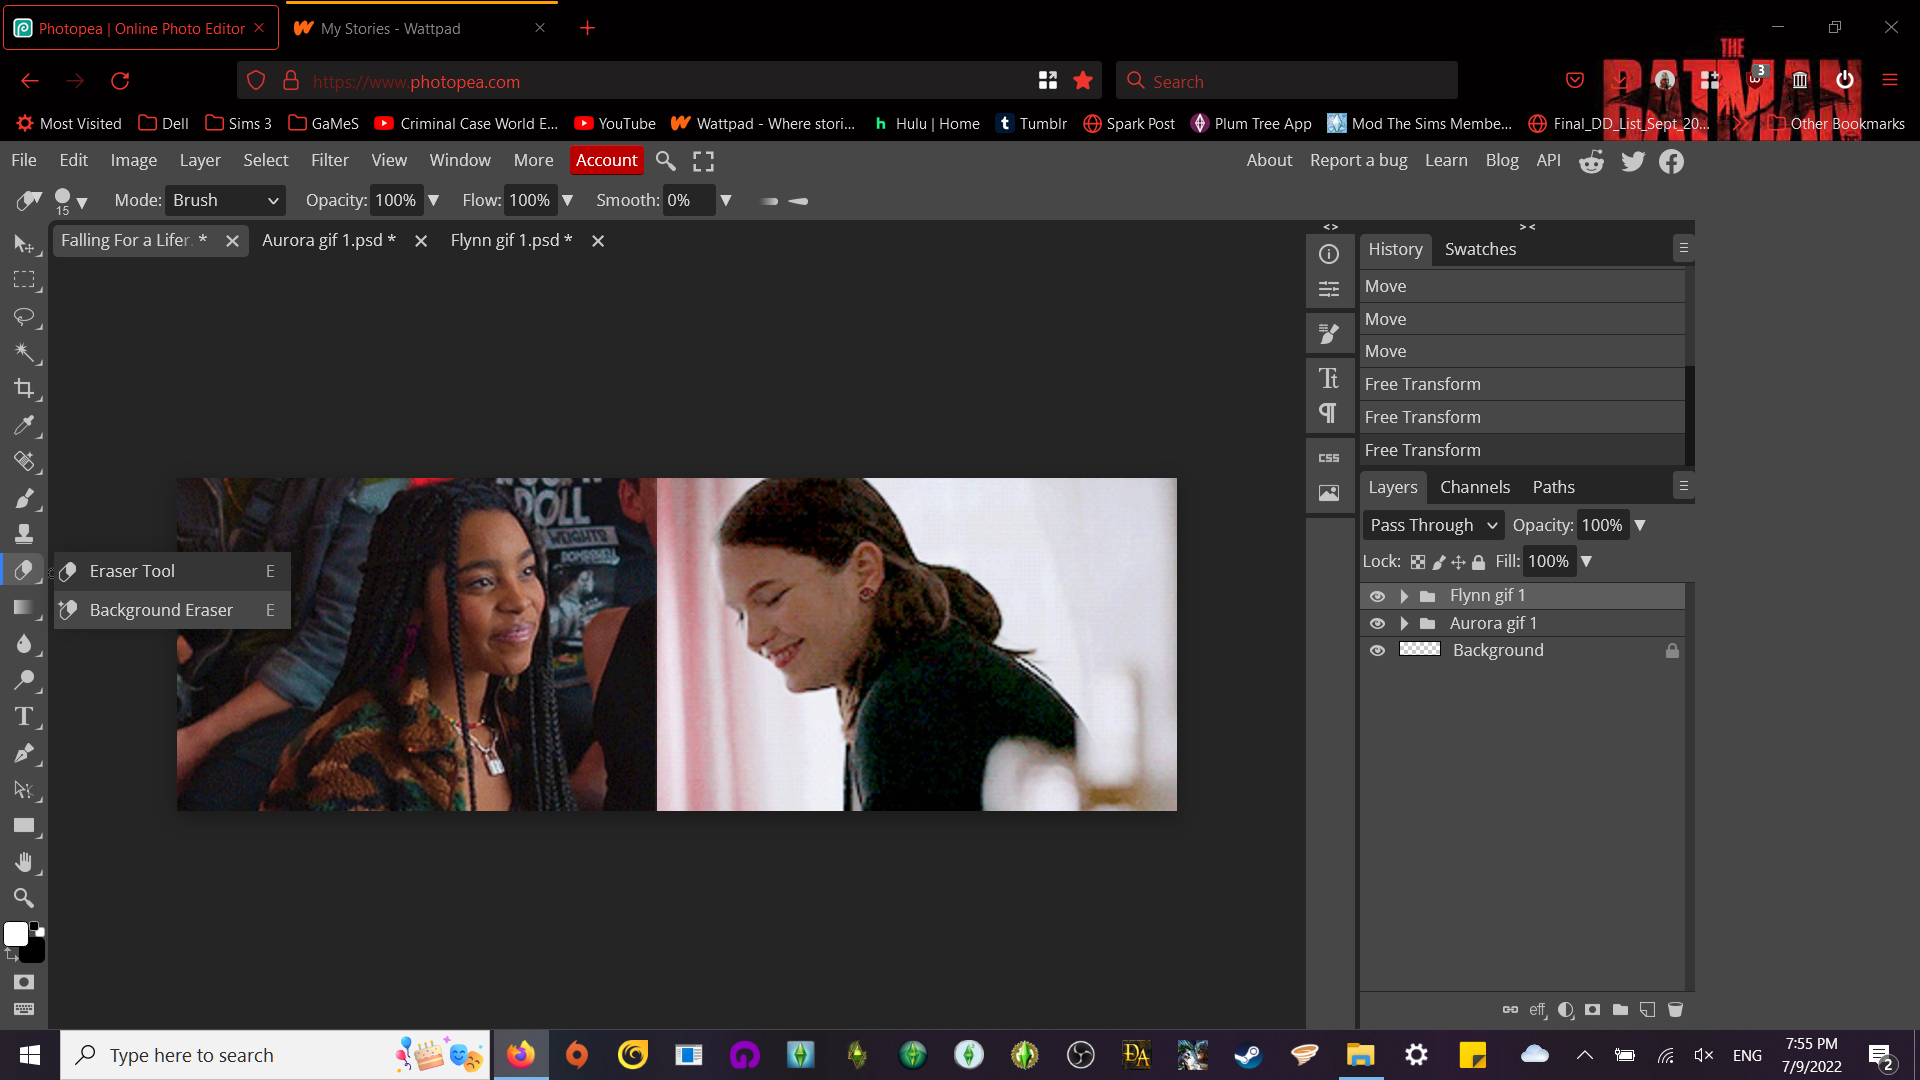
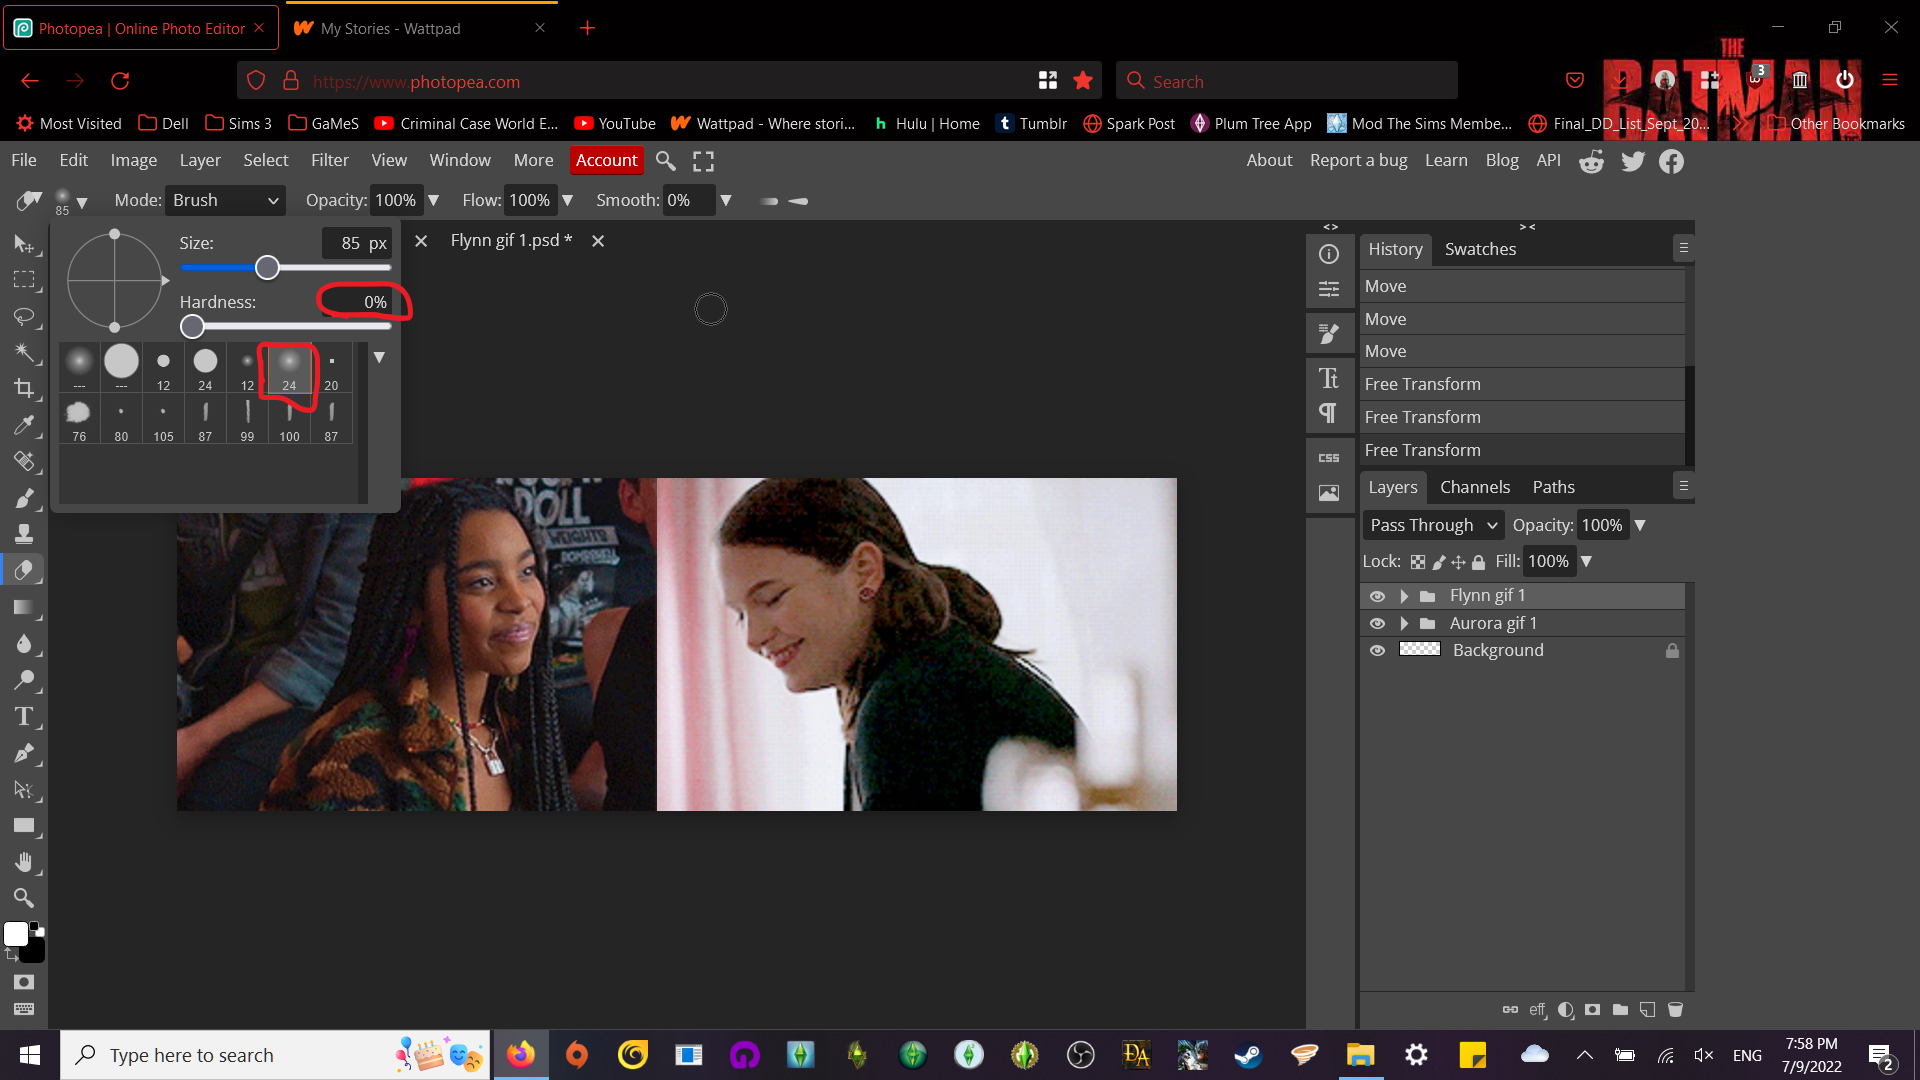
After that, select the eraser size. I use size 24, set the hardness to 0 and make the size 100 and something so I have enough room to erase.
Next, click "add raster mask" in the corner of the screen. This allows you to erase a layer, otherwise it will not be editable :)

If you make a mistake, you can always click the trashcan and start again <3
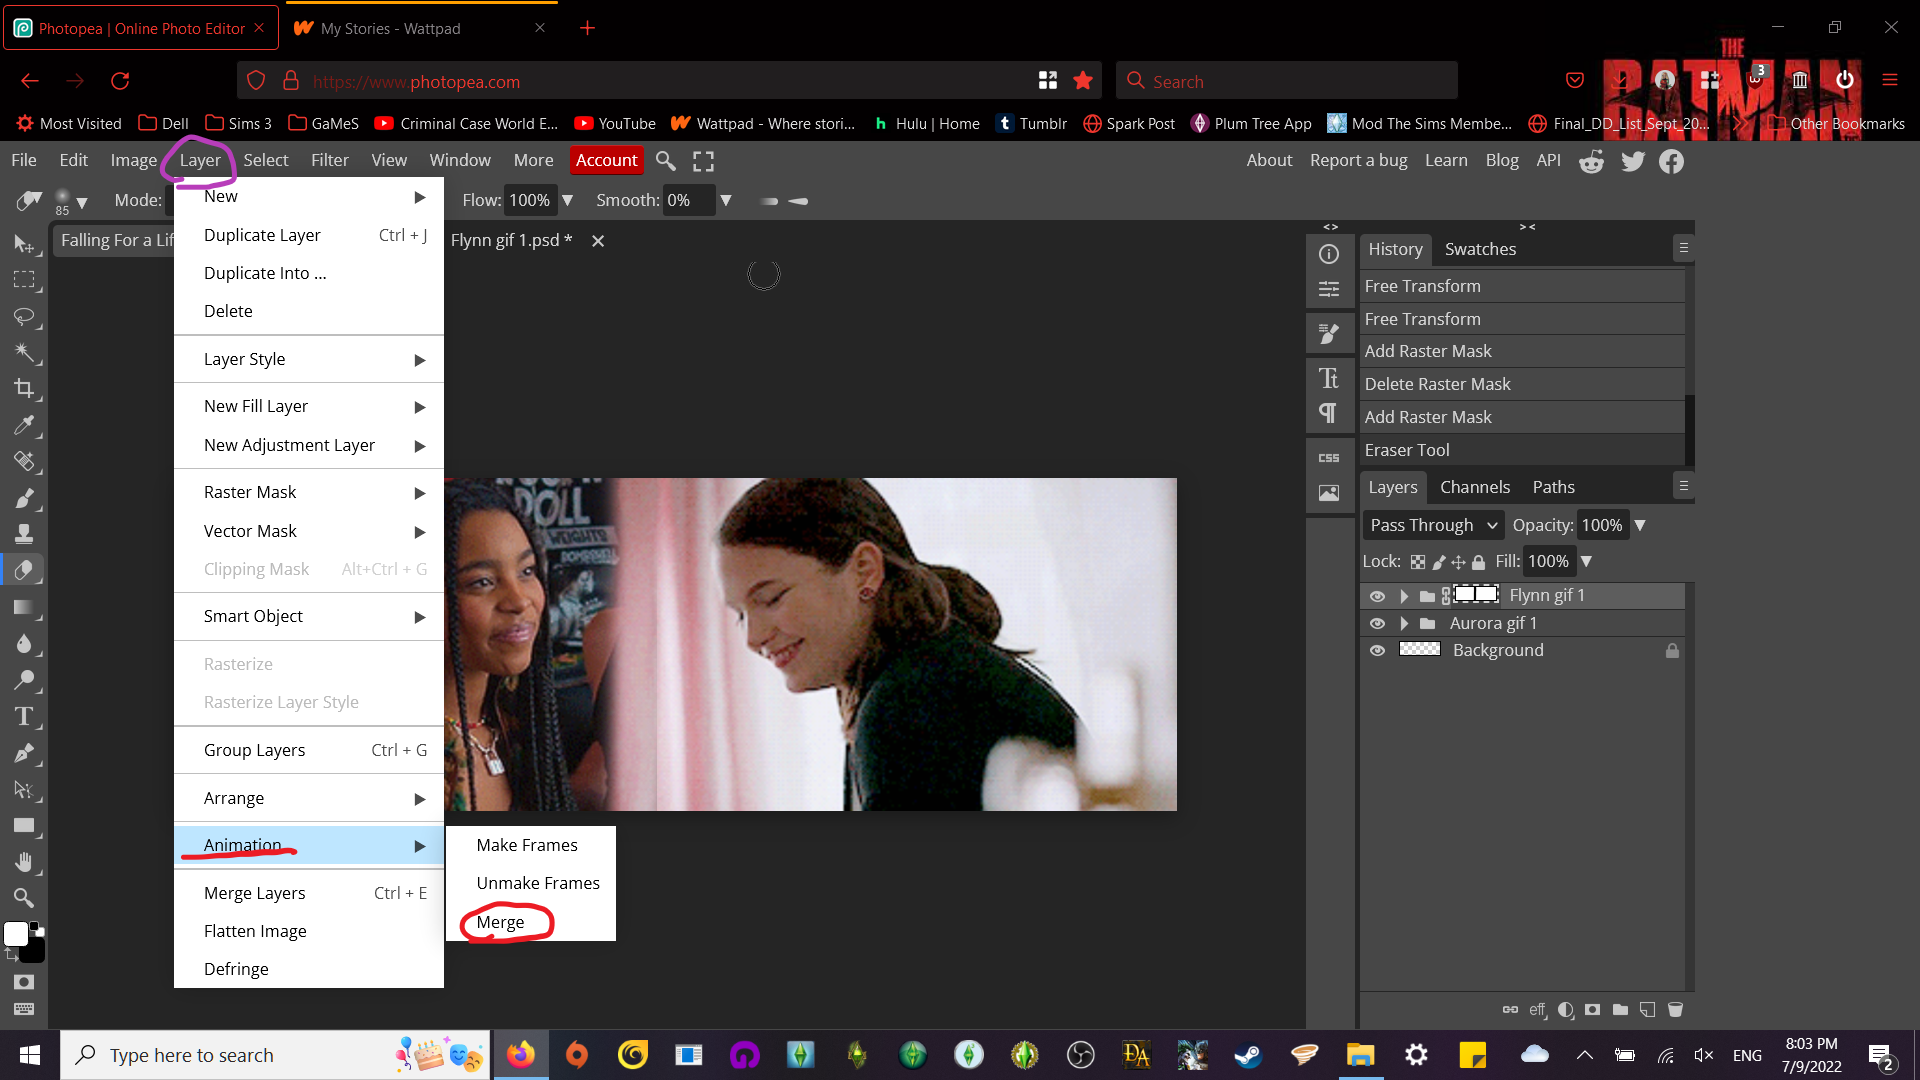
STEP 6: Merge Your GIFs
Click Layer, select animation and then "merge". This is so both gifs can be moving at the same time.
STEP 7: Look for a font
—For this next step, you will need a mobile device--as well as the apps Phonto and Picsart.
(Please note that I am using an iPhone as I do not have an android so the steps might be a bit different on that device)


Once both apps are downloaded, go to Picsart and click the plus button. Scroll all the way down until you reach color backgrounds and click the first image.
That's this one, right here:
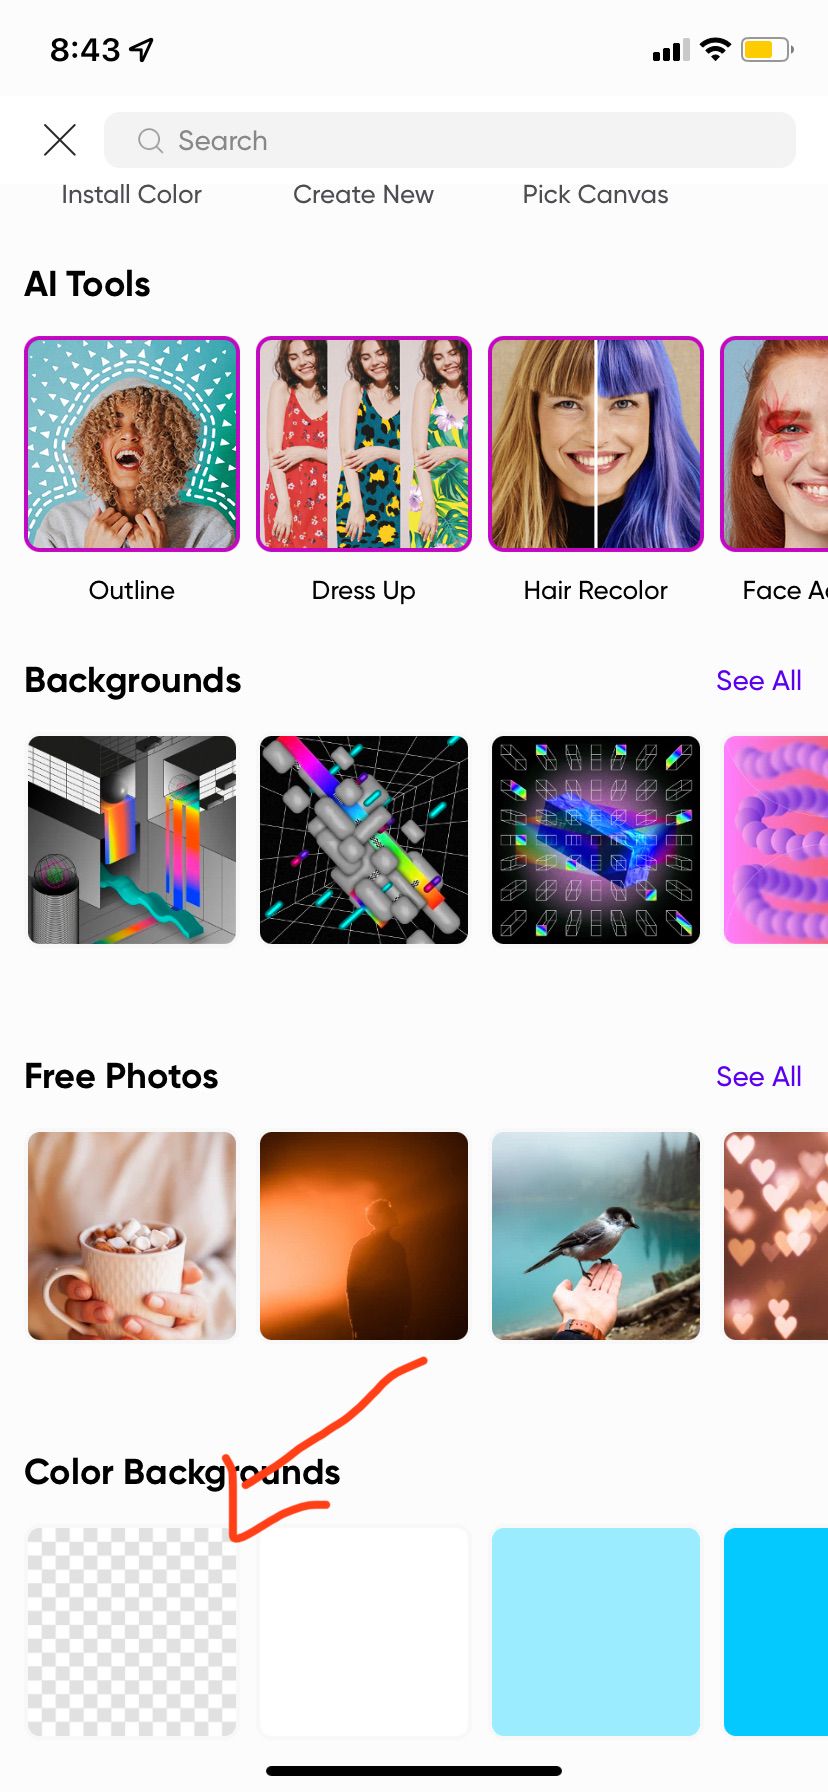
Click it and then go to next and save it to your device (don't select post--that will post it to your profile which isn't what you want!)
—If you already know how to find fonts/add them to DaFont skip ahead. Otherwise, read on!
For the uninformed, DaFont is a website where you can find fonts to use for whatever you need. There are some you can buy, but I stick to the free ones as they are for personal use and don't require anything.
Personally, I search up fonts by the fandom I'm using. In this case, I searched up Julie and The Phantoms fonts.
I couldn't find an exact match, but I did find this font called "Earwig Factory" which I think will look nice.
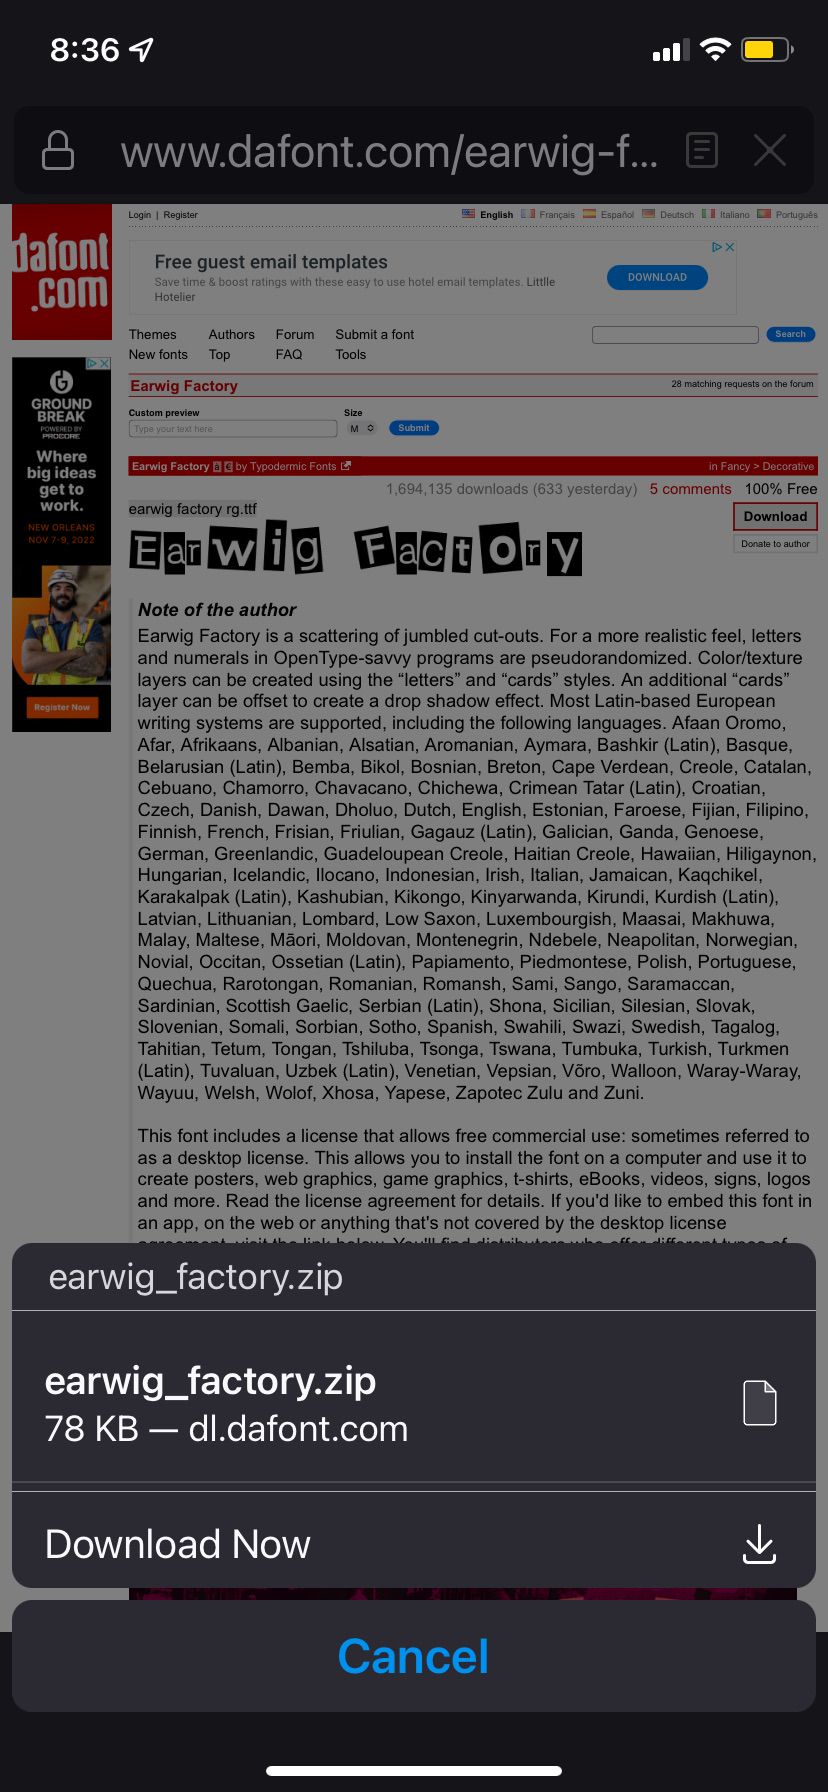
Click download, then download now.
Afterwards, go to wherever your downloads are kept and click on the zip file for your font.
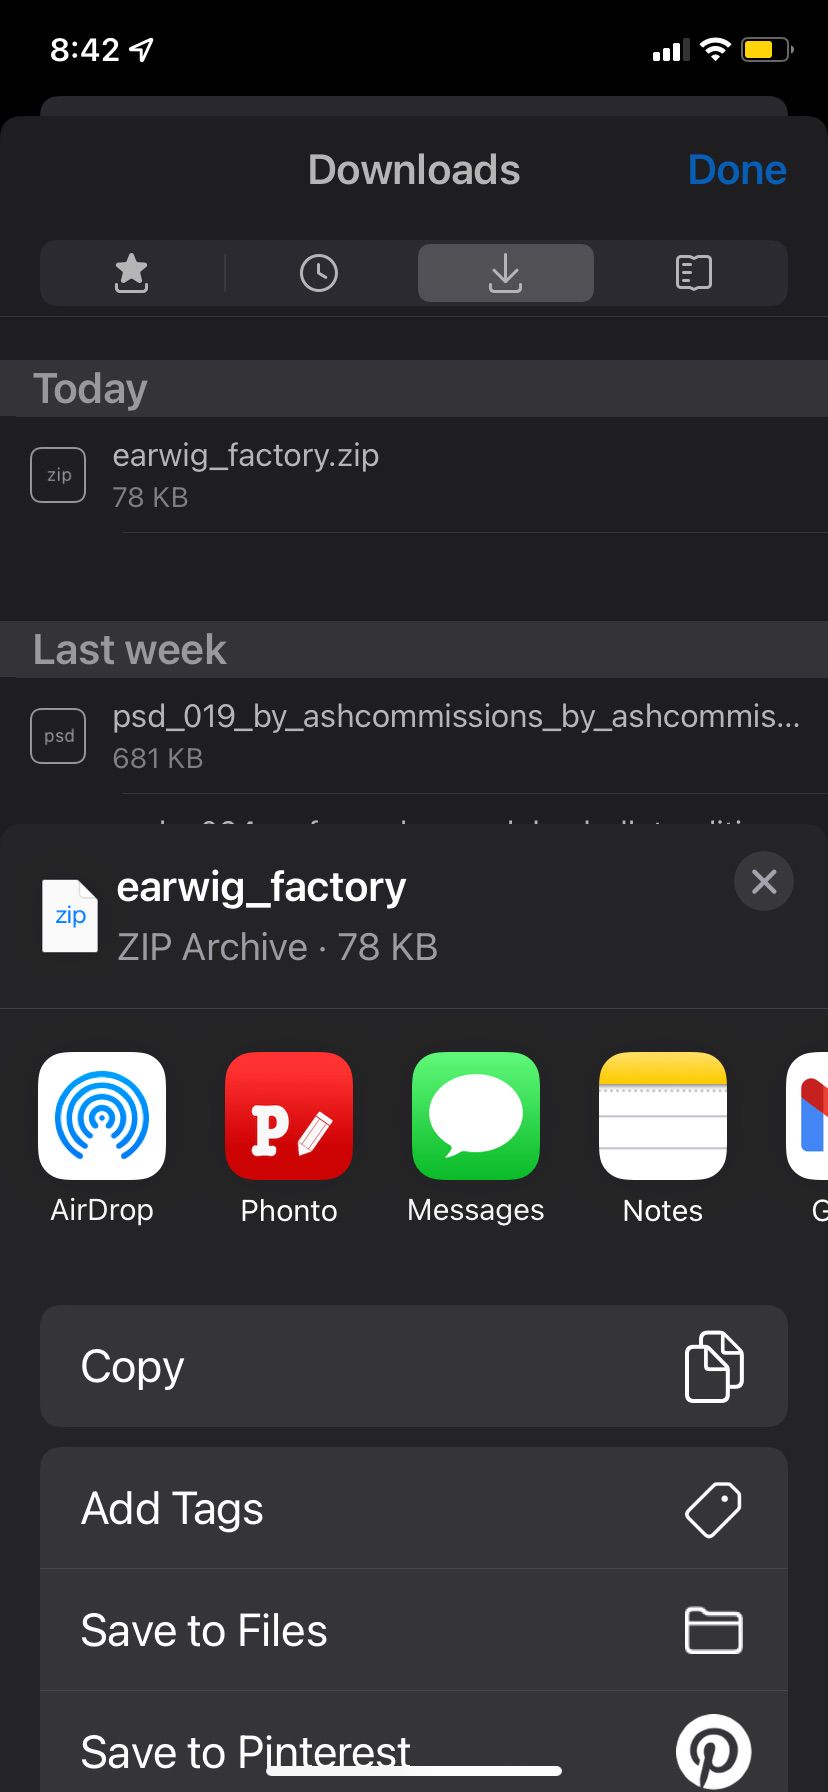
It will bring you straight to the app where you can install your font :)
Now, remember that background you saved? Here's where you use it!
Click on the camera, then photo album to bring up your transparent background. Click anywhere on the image to add text. Click font and select the font you had downloaded.
You can align it to be left, center or right. You can also add symbols but I don't mess with those since they are not important to what we are making today :)
Type in your text and click done.
Now, there are several options when you click on your text. Main ones I use are: style, size and (on occasion) curve (which is on the next page if you slide over).
Style is the color of your font and size is exactly what it sounds like.
Size can be tricky to figure out when placing them on the gifs. It's a lot of trial and error but I promise it's worth it :D
Once you get the text the way you want, click the share symbol in the right hand corner.
Click "save as png". It will appear in your photos :)
Tip I learned: if you, like me, only use phonto for text, you can click on the camera at the bottom when you open the app again and select "restore previous session" which will bring up your transparent background/last text you used. Saves a lot of time from going back and forth to Picsart
Now that we have saved the photo, go back to Picsart and select the text from your photos.
You can leave it as is or make the text curved, but to keep things simple I will save it as is.
Click "next" followed by "post" which will save it as a sticker on your profile.
Go back to your desktop and log into Picsart's website. Go onto your profile and find your text.
Right click your text and select "save image as". Name it whatever you want or leave it as is. I name it after the act name I am using in my fic followed by text so I know it is the text for that banner.
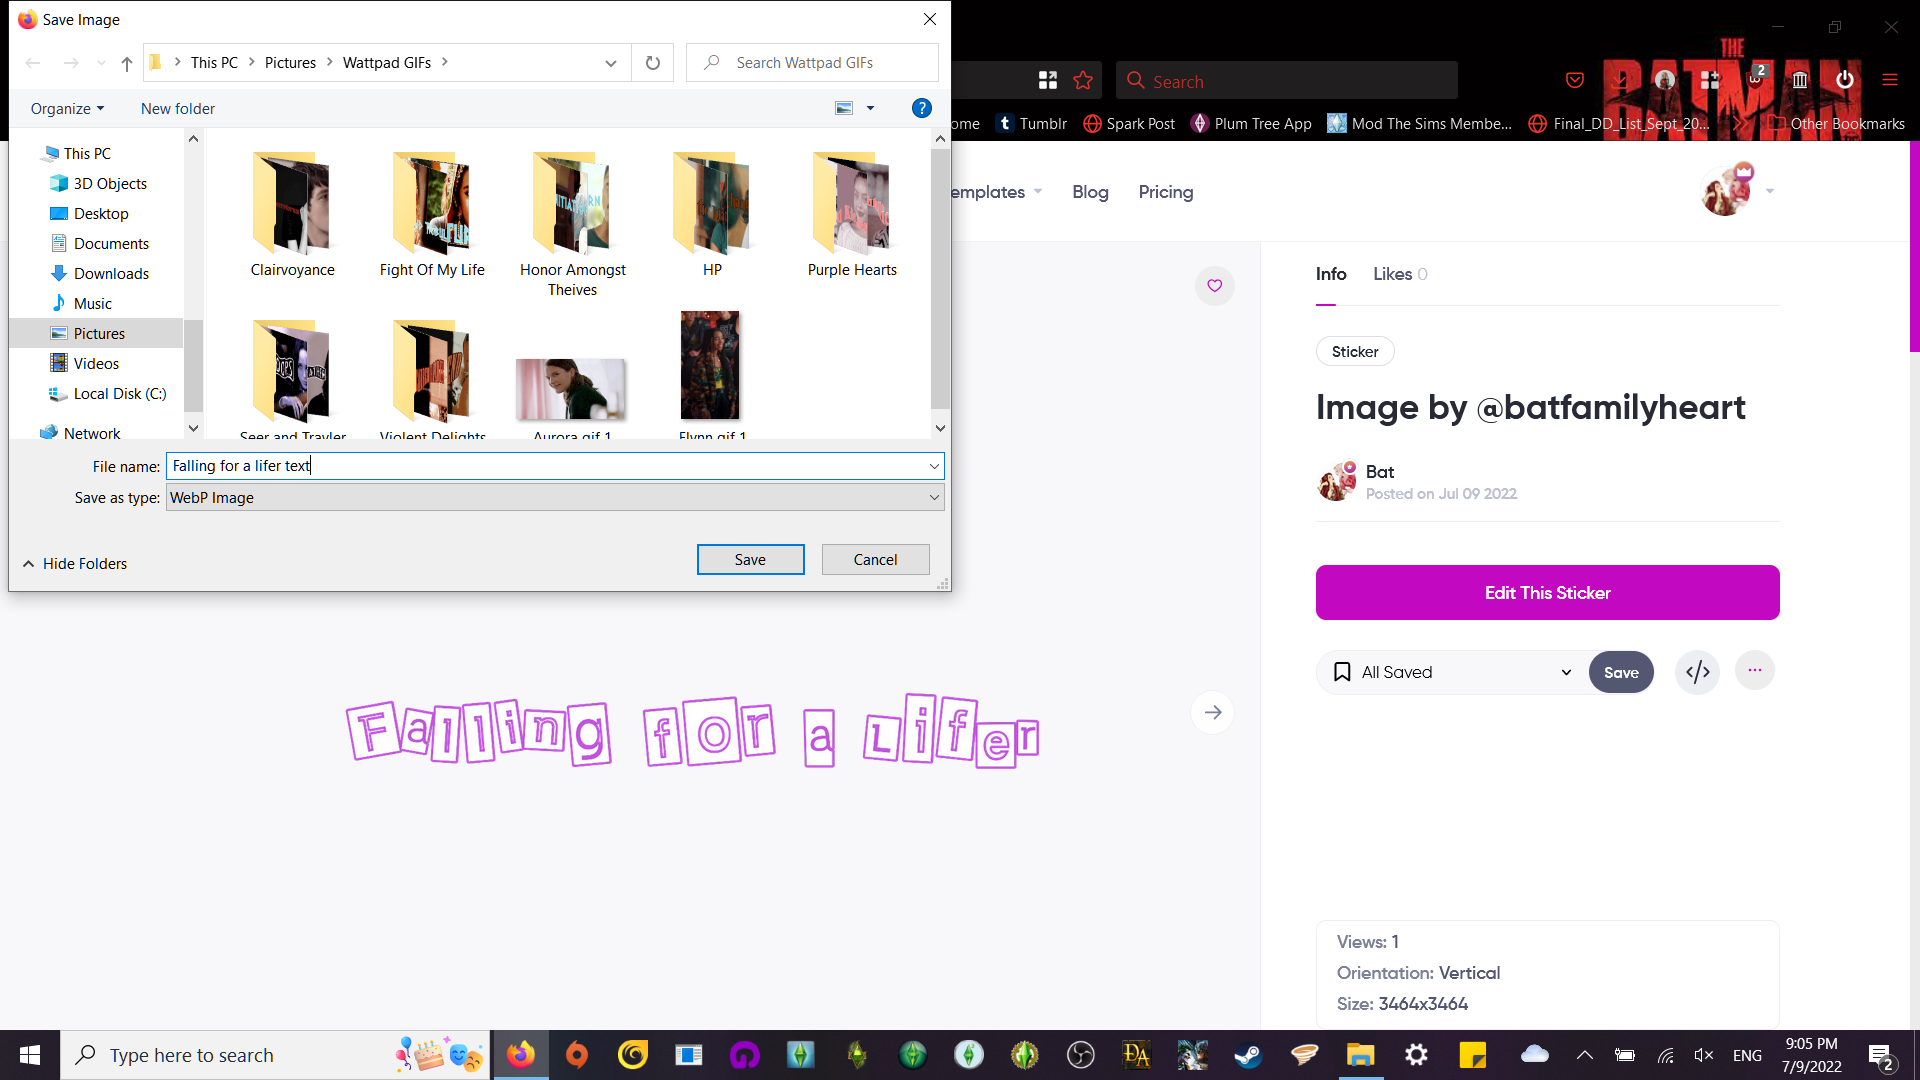
Once that is done, return to photopea and click file/open and select the text you created.
Grab the folder like you did for the gifs earlier and drag it to your project.
It may look blank at first but drag around a bit and the text should appear. For some reason, it always appears out of frame when I do this.
Now, we can export it!
Go to file/export as/GIF. You can now change the size. I usually make it 500 or a bit bigger as anything above 600 Wattpad doesn't seem to like.
And...viola!
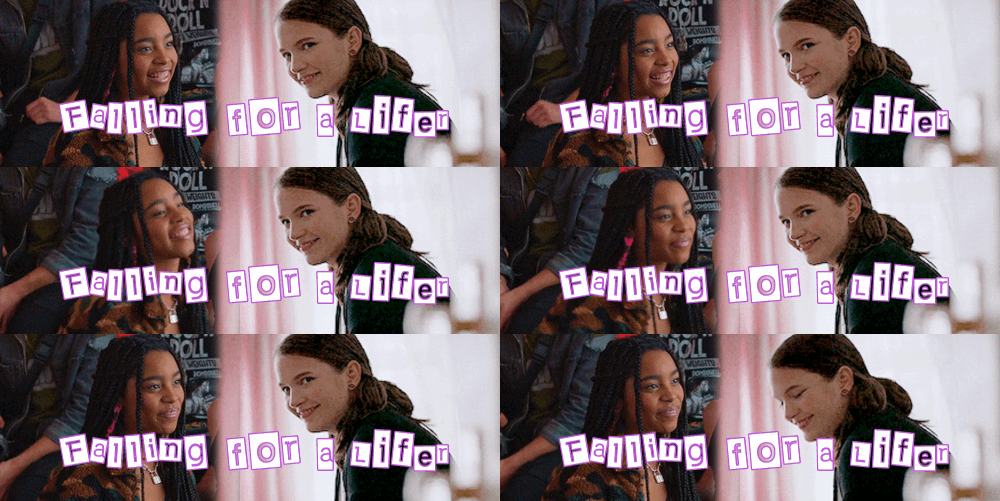
Now you have a gif banner! Hurray🥳🥳
Thank you for going through this whole tutorial. I am so sorry it was so long! Let me know what you'd like to see next <3 I will probably have a tutorial for PSDs and making curved text soon :)
BatgirlGeek❤️
Bạn đang đọc truyện trên: Truyen247.Pro