
˗ˏˋ 𝐂𝐎𝐑𝐍𝐄𝐑𝐄𝐃 𝐁𝐎𝐗 ˎˊ˗
𝙋𝙇𝙀𝘼𝙎𝙀 𝘾𝙍𝙀𝘿𝙄𝙏 𝙈𝙀 𝙄𝙁 𝙔𝙊𝙐 𝘿𝙊 𝙀𝙉𝘿 𝙐𝙋 𝙐𝙎𝙄𝙉𝙂 𝙊𝙉𝙀 𝙊𝙁 𝙈𝙔 𝙏𝙐𝙏𝙊𝙍𝙄𝘼𝙇𝙎! <3
┌────── ⋆⋅☆⋅⋆ ──────┐
TUTORIAL #2
└────── ⋆⋅☆⋅⋆ ──────┘
APPS USED: PicsArt and Phonto
FONTS USED:


⊱ ──────ஓ๑♡๑ஓ ────── ⊰
STEP 1: GATHER YOUR RESOURCES!!
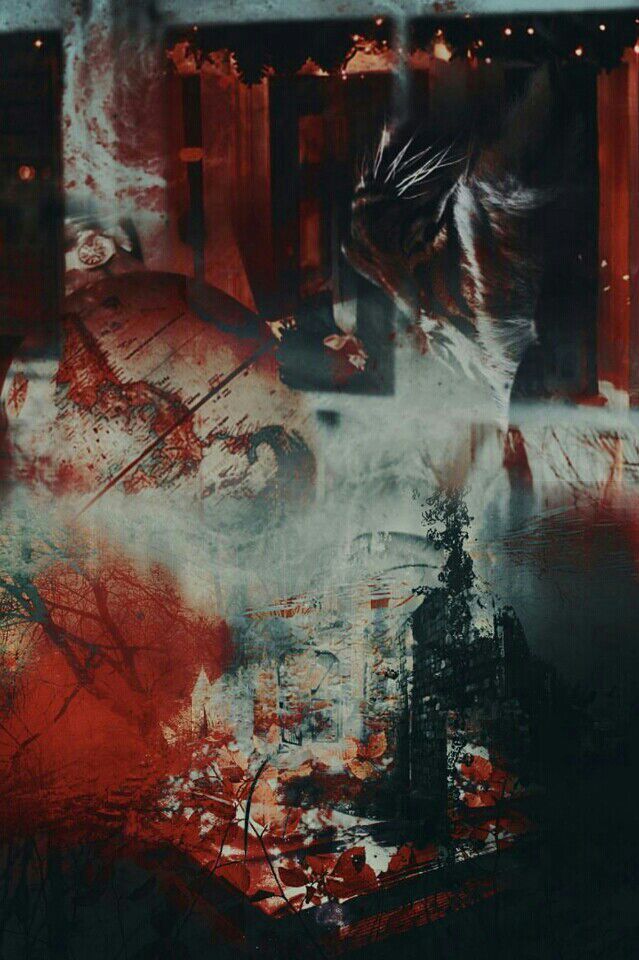
choose any background you'd like! i usually go to google and search 'wattpad cover backgrounds' and choose which i want to use!
ILL be using this one down below!
STEP 2: OPEN the PicsArt app and upload your background! CLICK on the sticker icon located at the bottom! this is where you can find and choose any png you'd like!
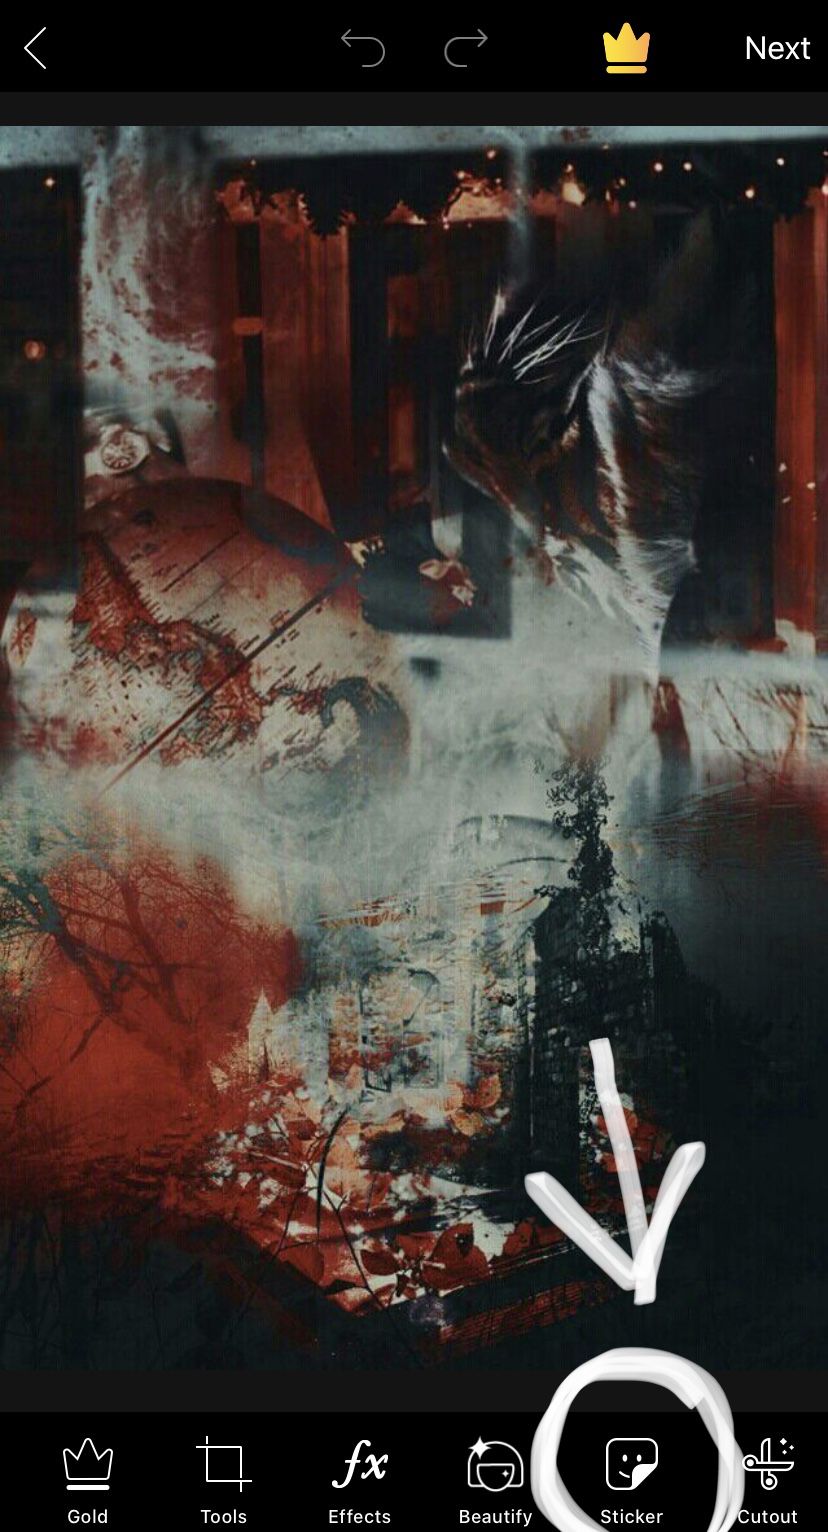
Simply type in the name of who ever you want the face claim to be!
⊱ ──────ஓ๑♡๑ஓ ────── ⊰
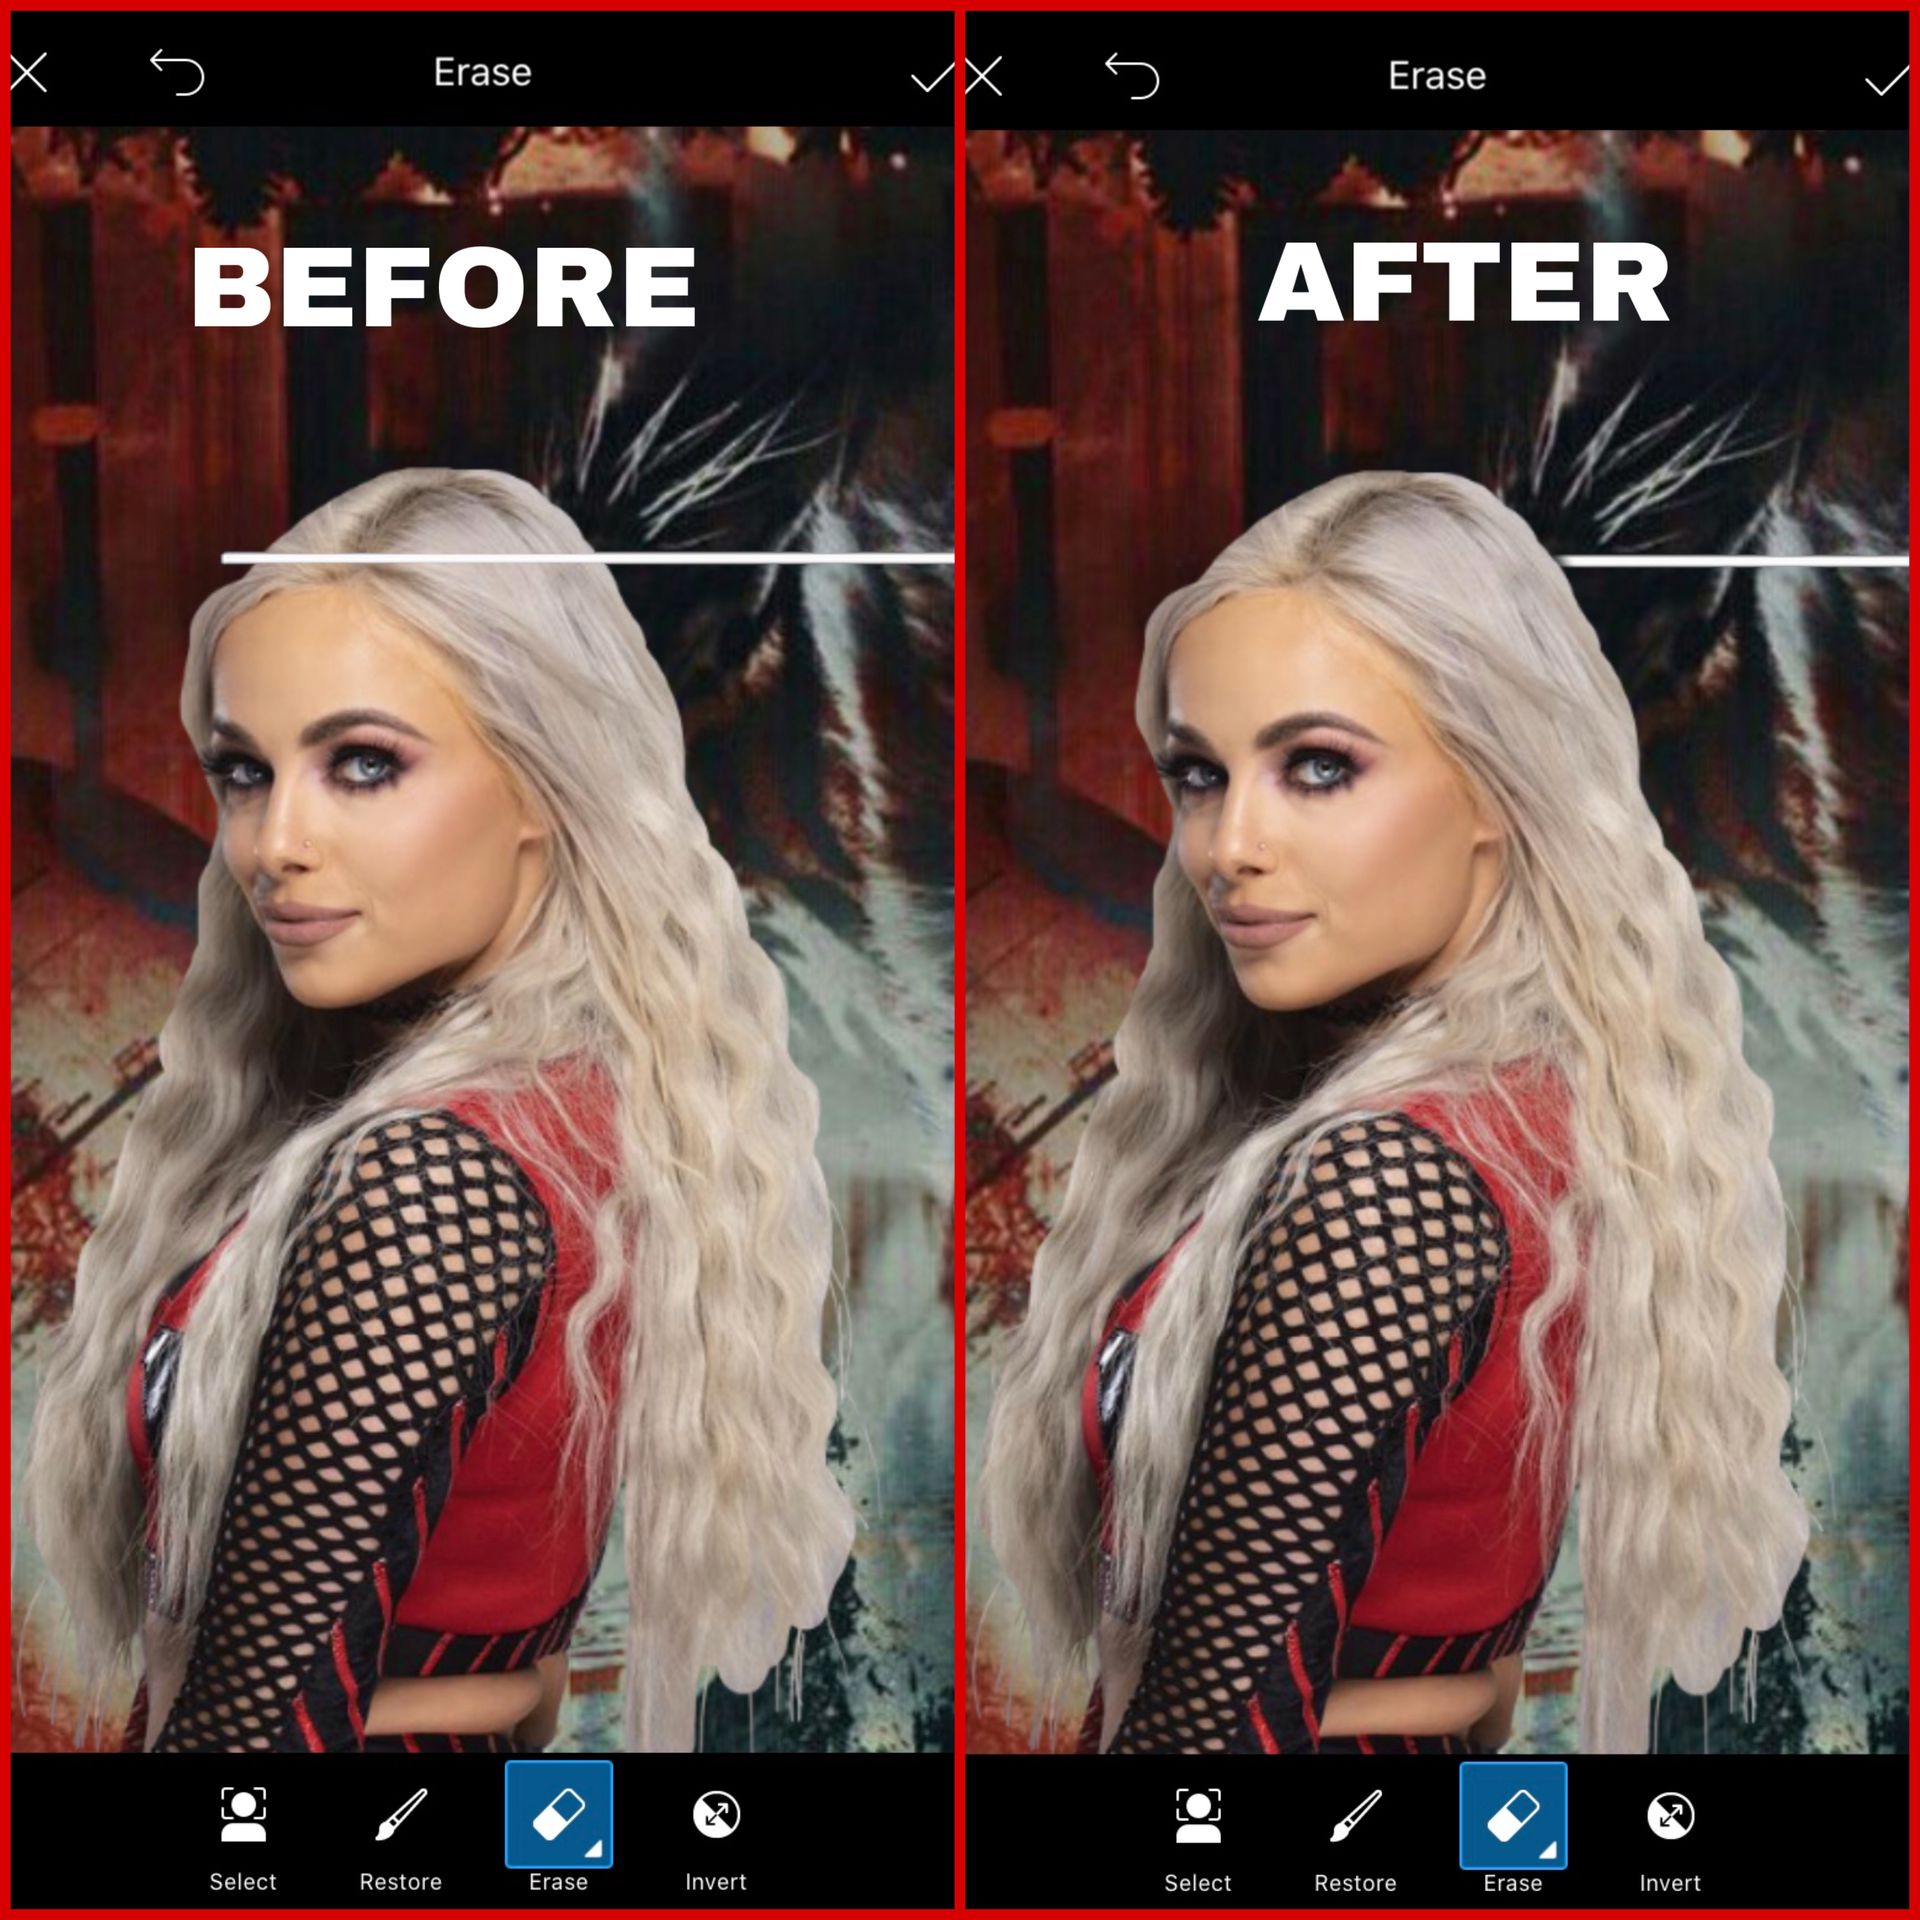
STEP 3: size up the png and place it in the middle! DO NOT HIT NEXT YET! tap on the png and click the eraser icon! adjust the settings and gently erase the bottom! this gives it a more clean blended effect!

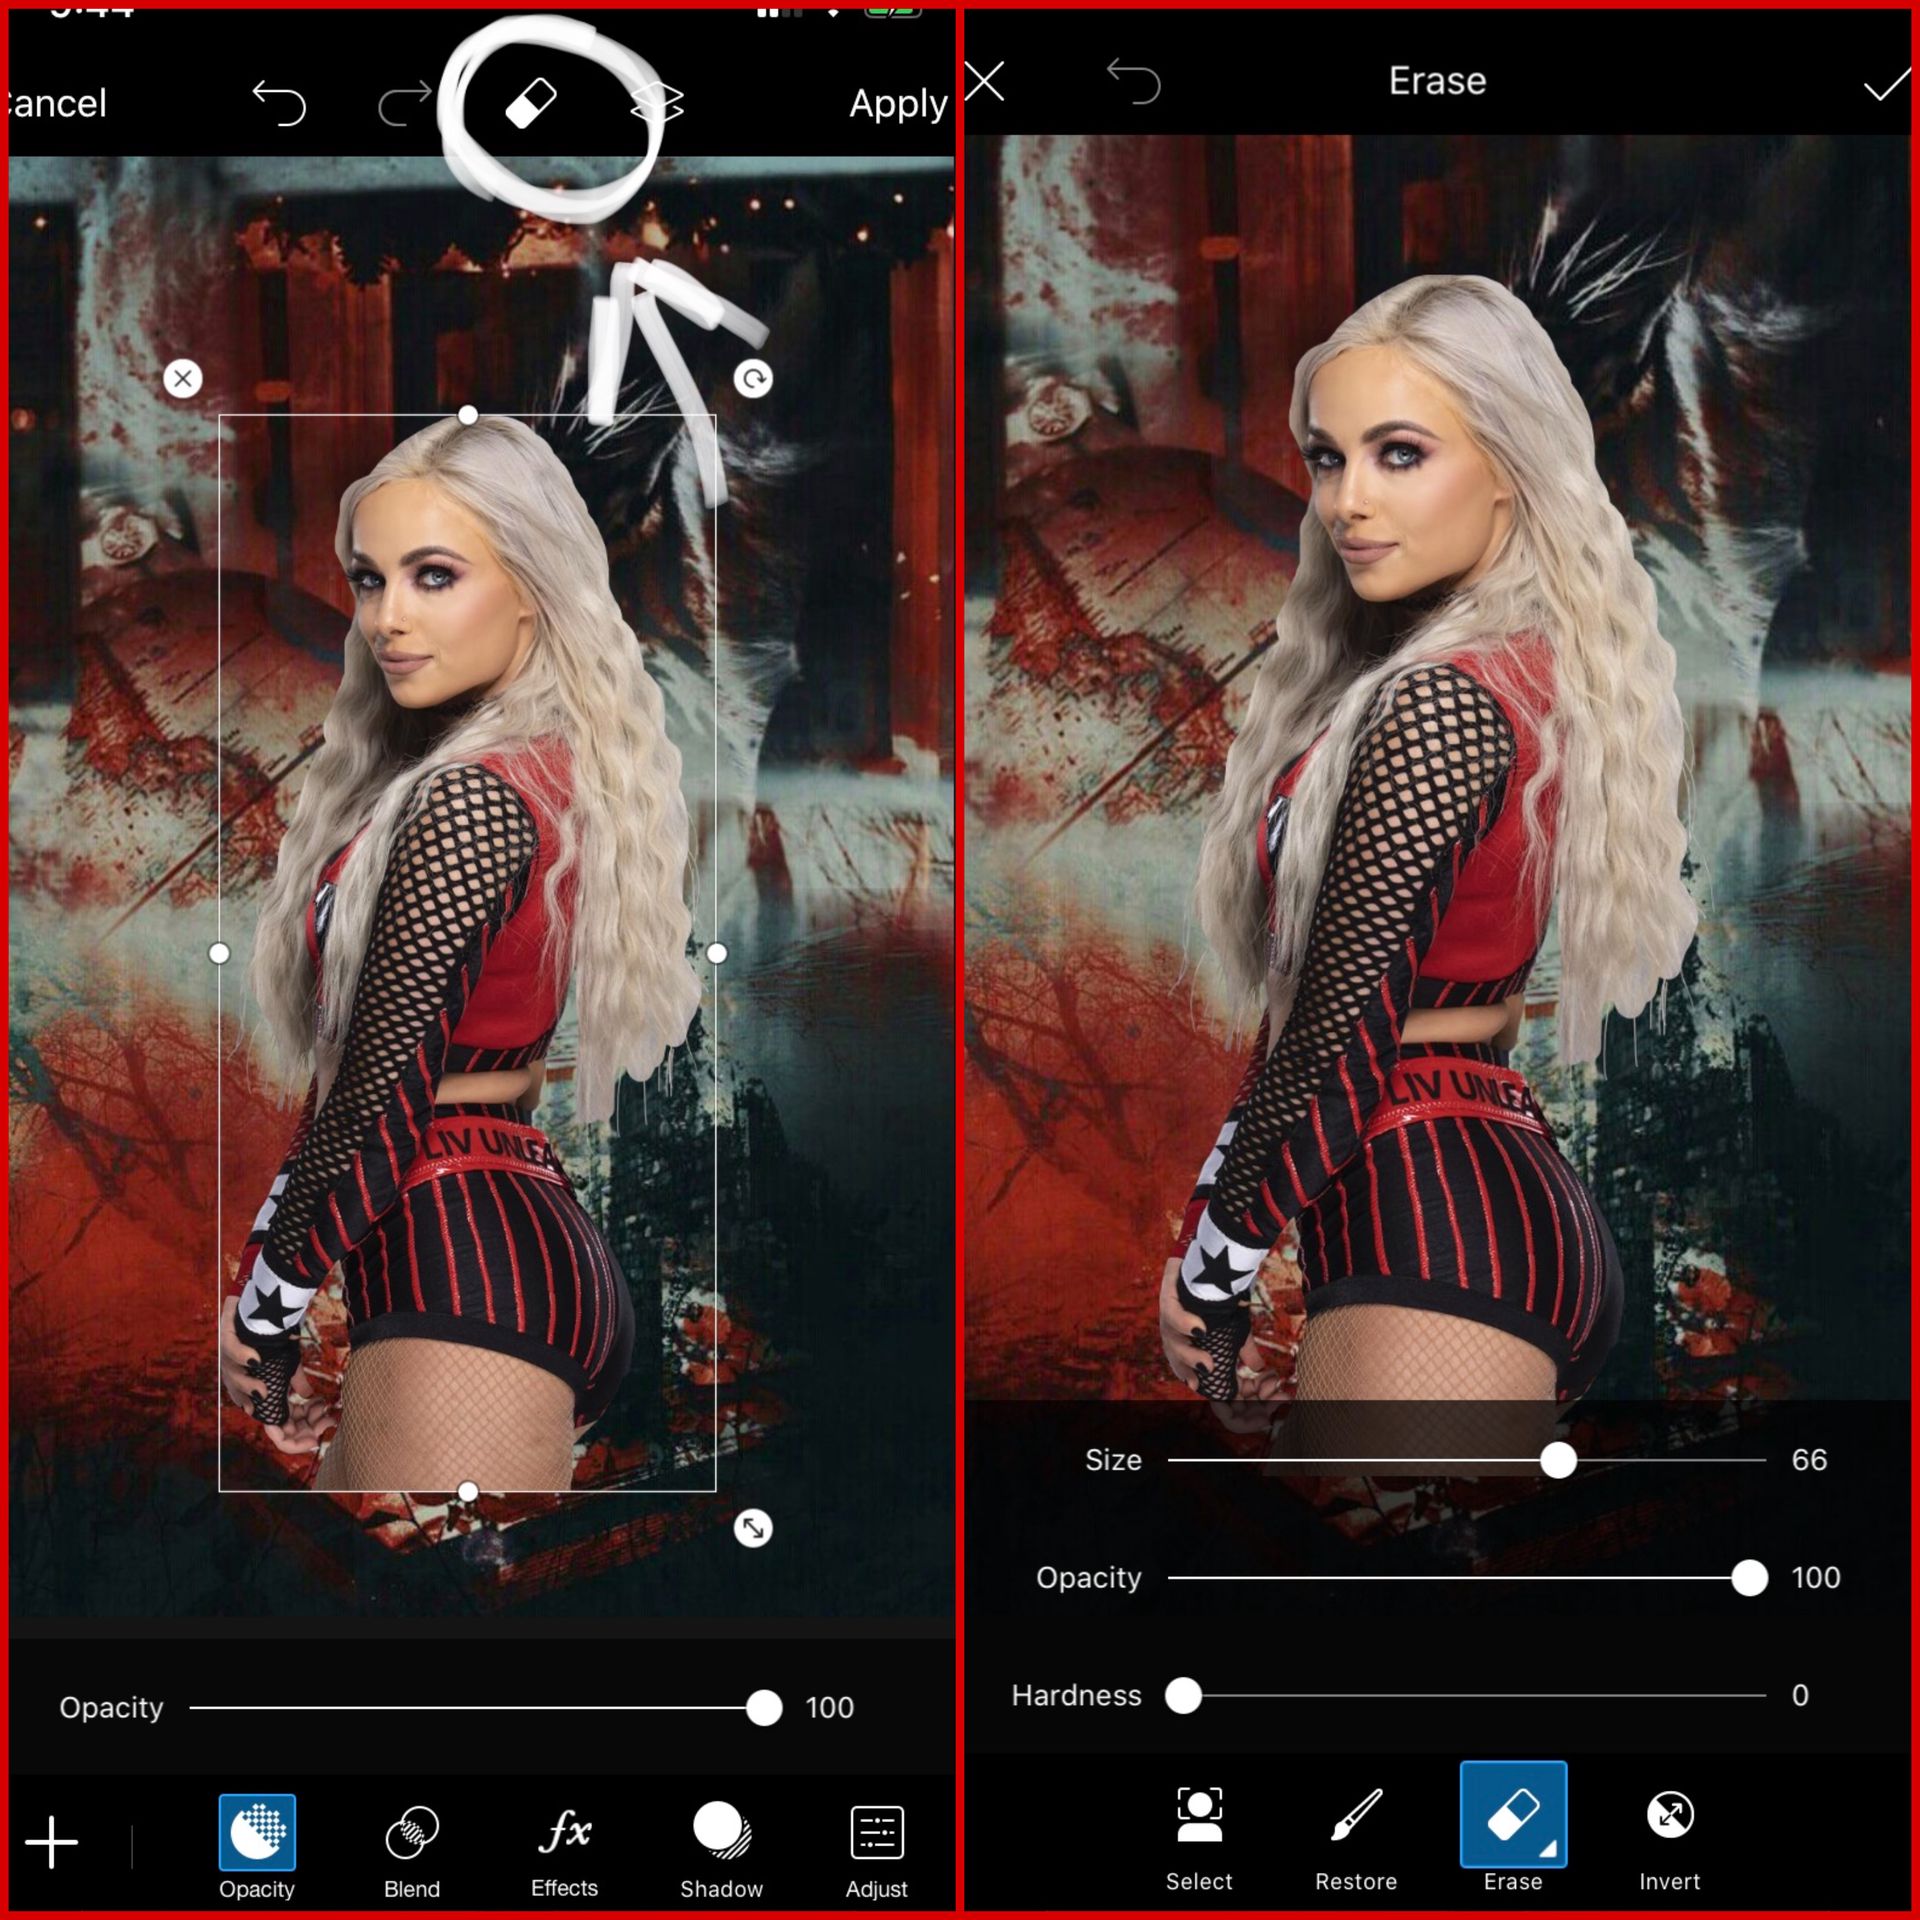
AIM TO ACHIEVE A BLENDED EFFECT LIKE THIS! ⬇️
STEP 4: ADDING THE OVERLAY!
add the overlay provided:

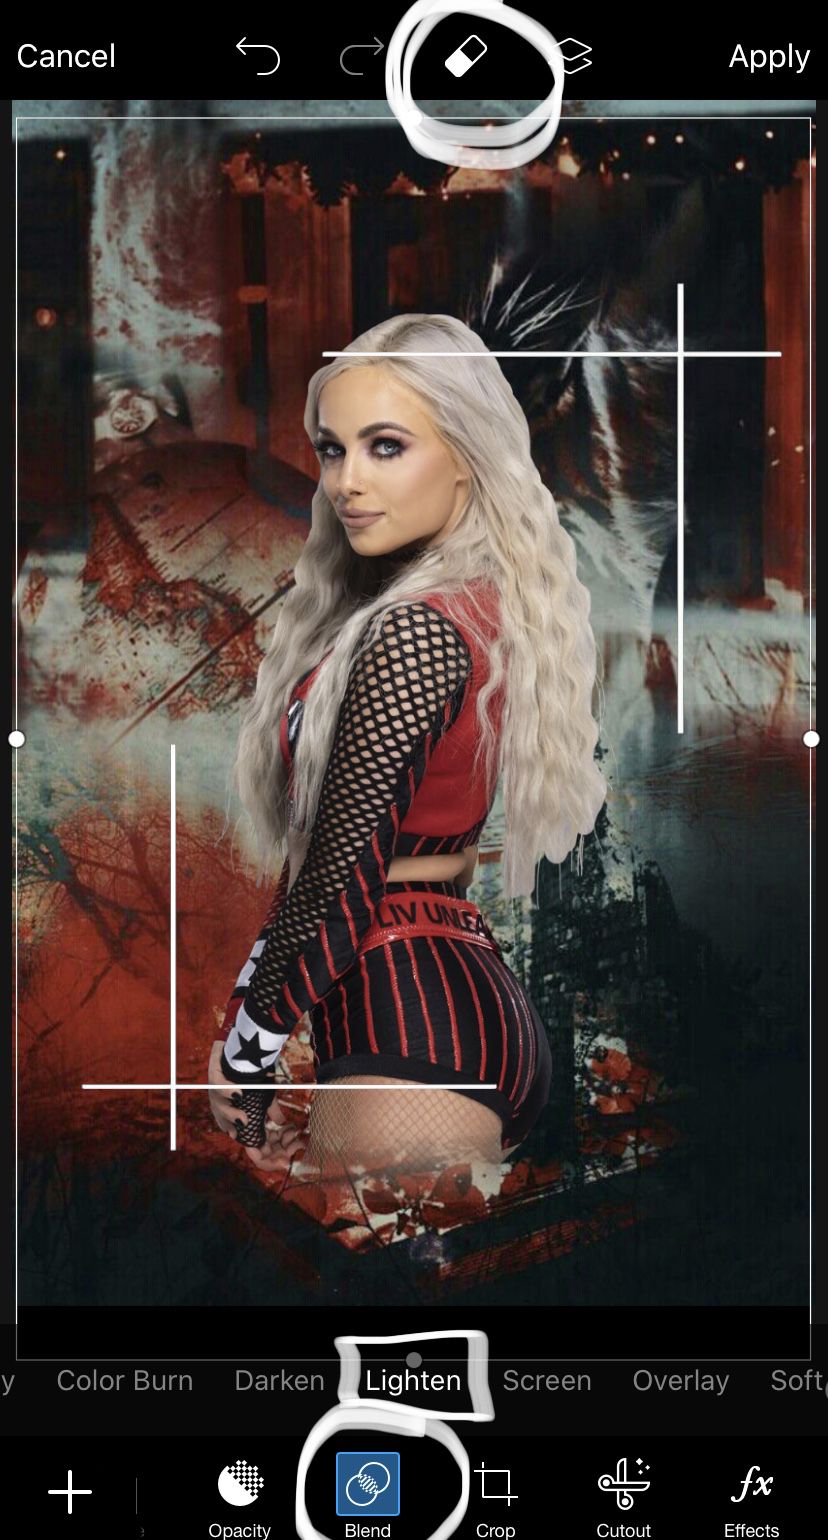
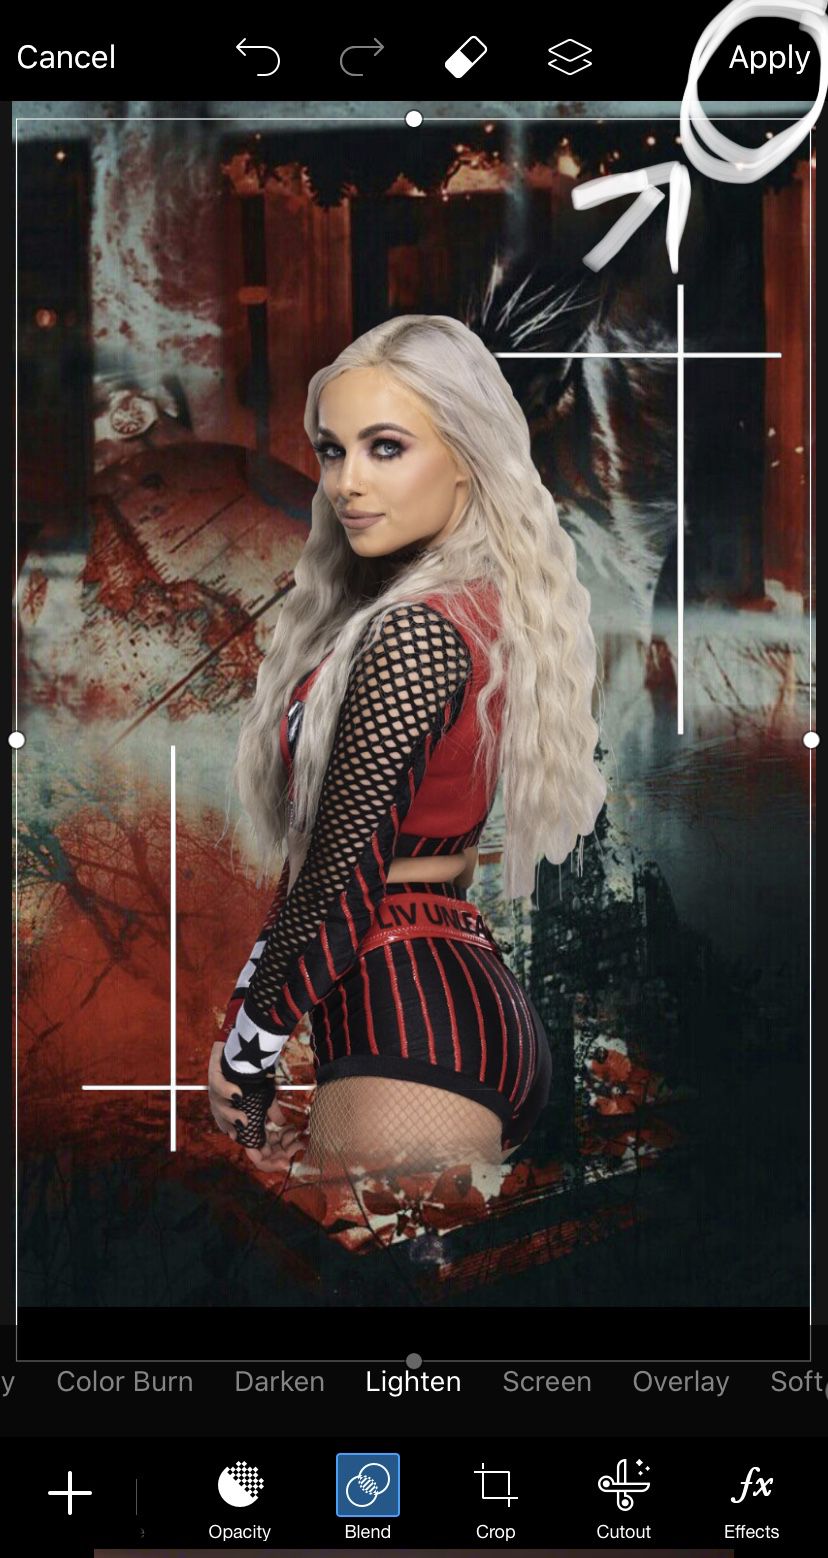
to add this overlay there will be an 'add photo' button located at the bottom! SIZE up the image! NEXT hit the blend option and scroll to 'lighten' THEN hit the eraser icon located at the top! Slowly erase the lines intersecting with the png!
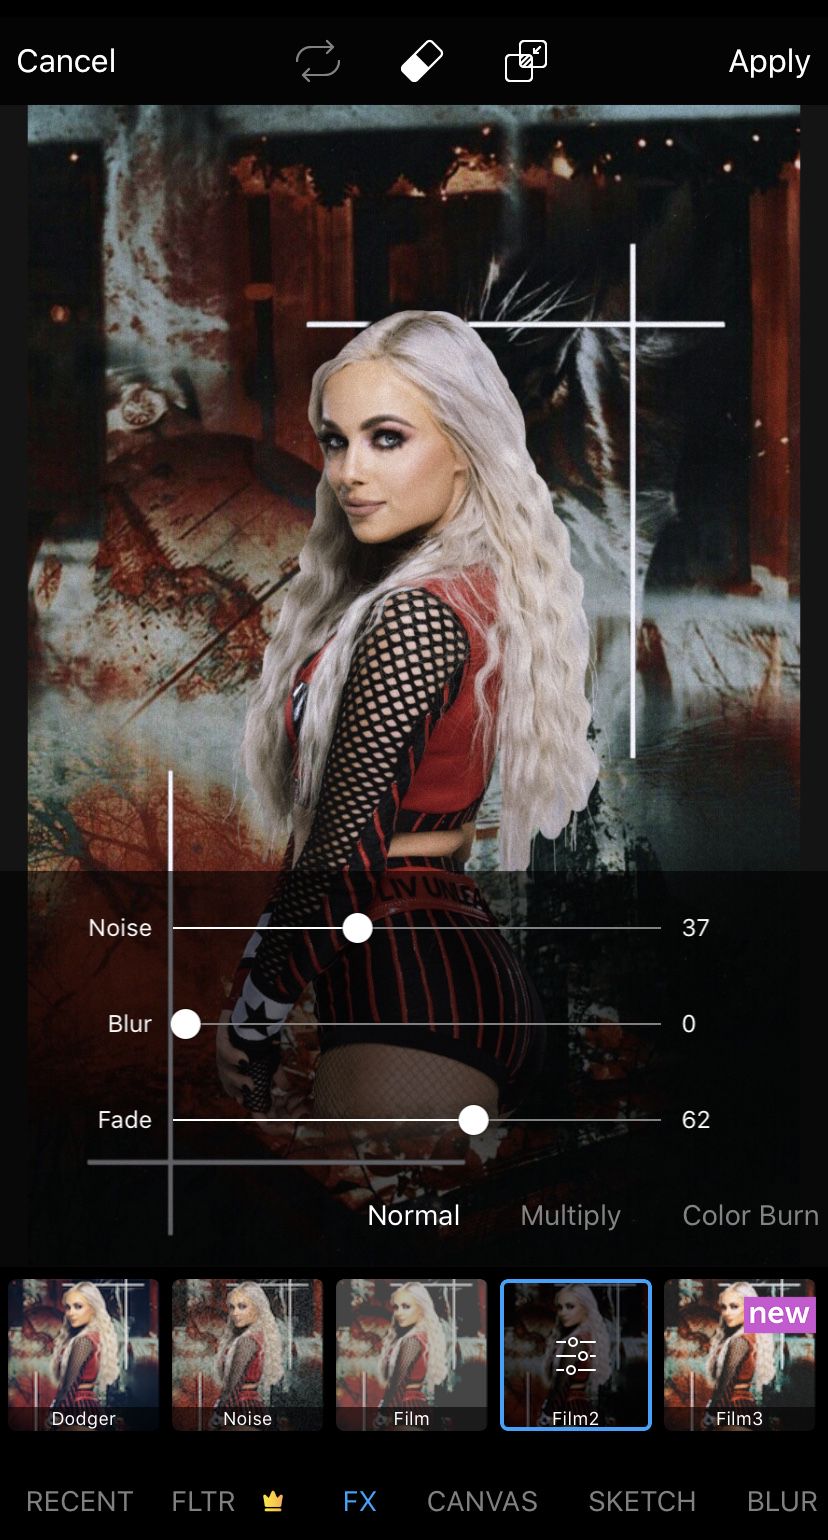
STEP 5: ADD EFFECTS!!
Tap on the effects icon located at the bottom! The effects that you choose to use are totally up to you! Make sure you browse through all of the effects! Experiment with the app and it's features!! ILL be using the 'Film2' effect! Adjust the settings to your liking then hit apply!
NOW add more OVERLAYS!! this gives the cover an better look to it! THE OVERLAYS I'LL BE USING ARE PROVIDED BELOW!
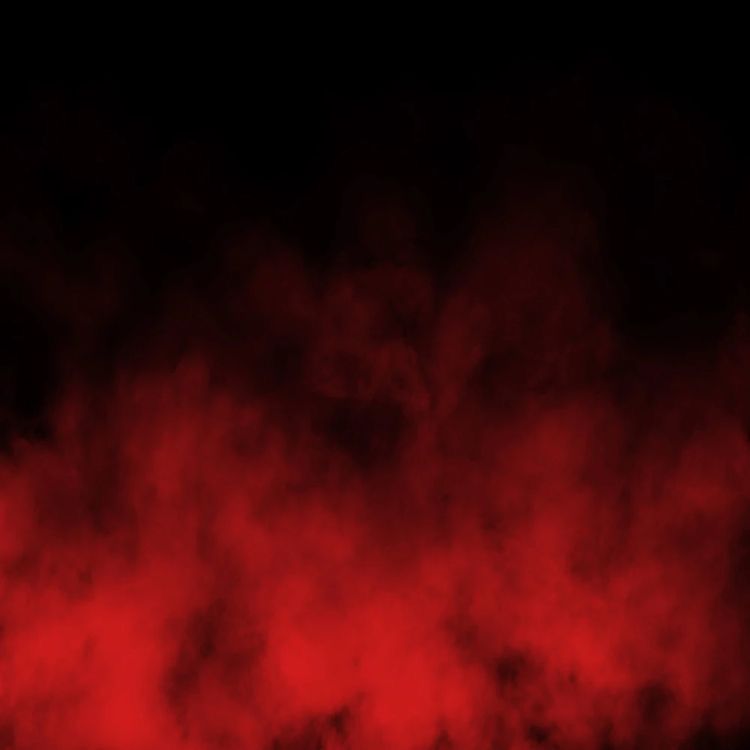
use the red fire overlay by clicking the 'add photo' option located at the bottom! SIZE up the image to fill the whole entire cover! Hit blend then choose 'soft light' THEN go over to opacity and turn it down to your liking! I turned it down to about 50.
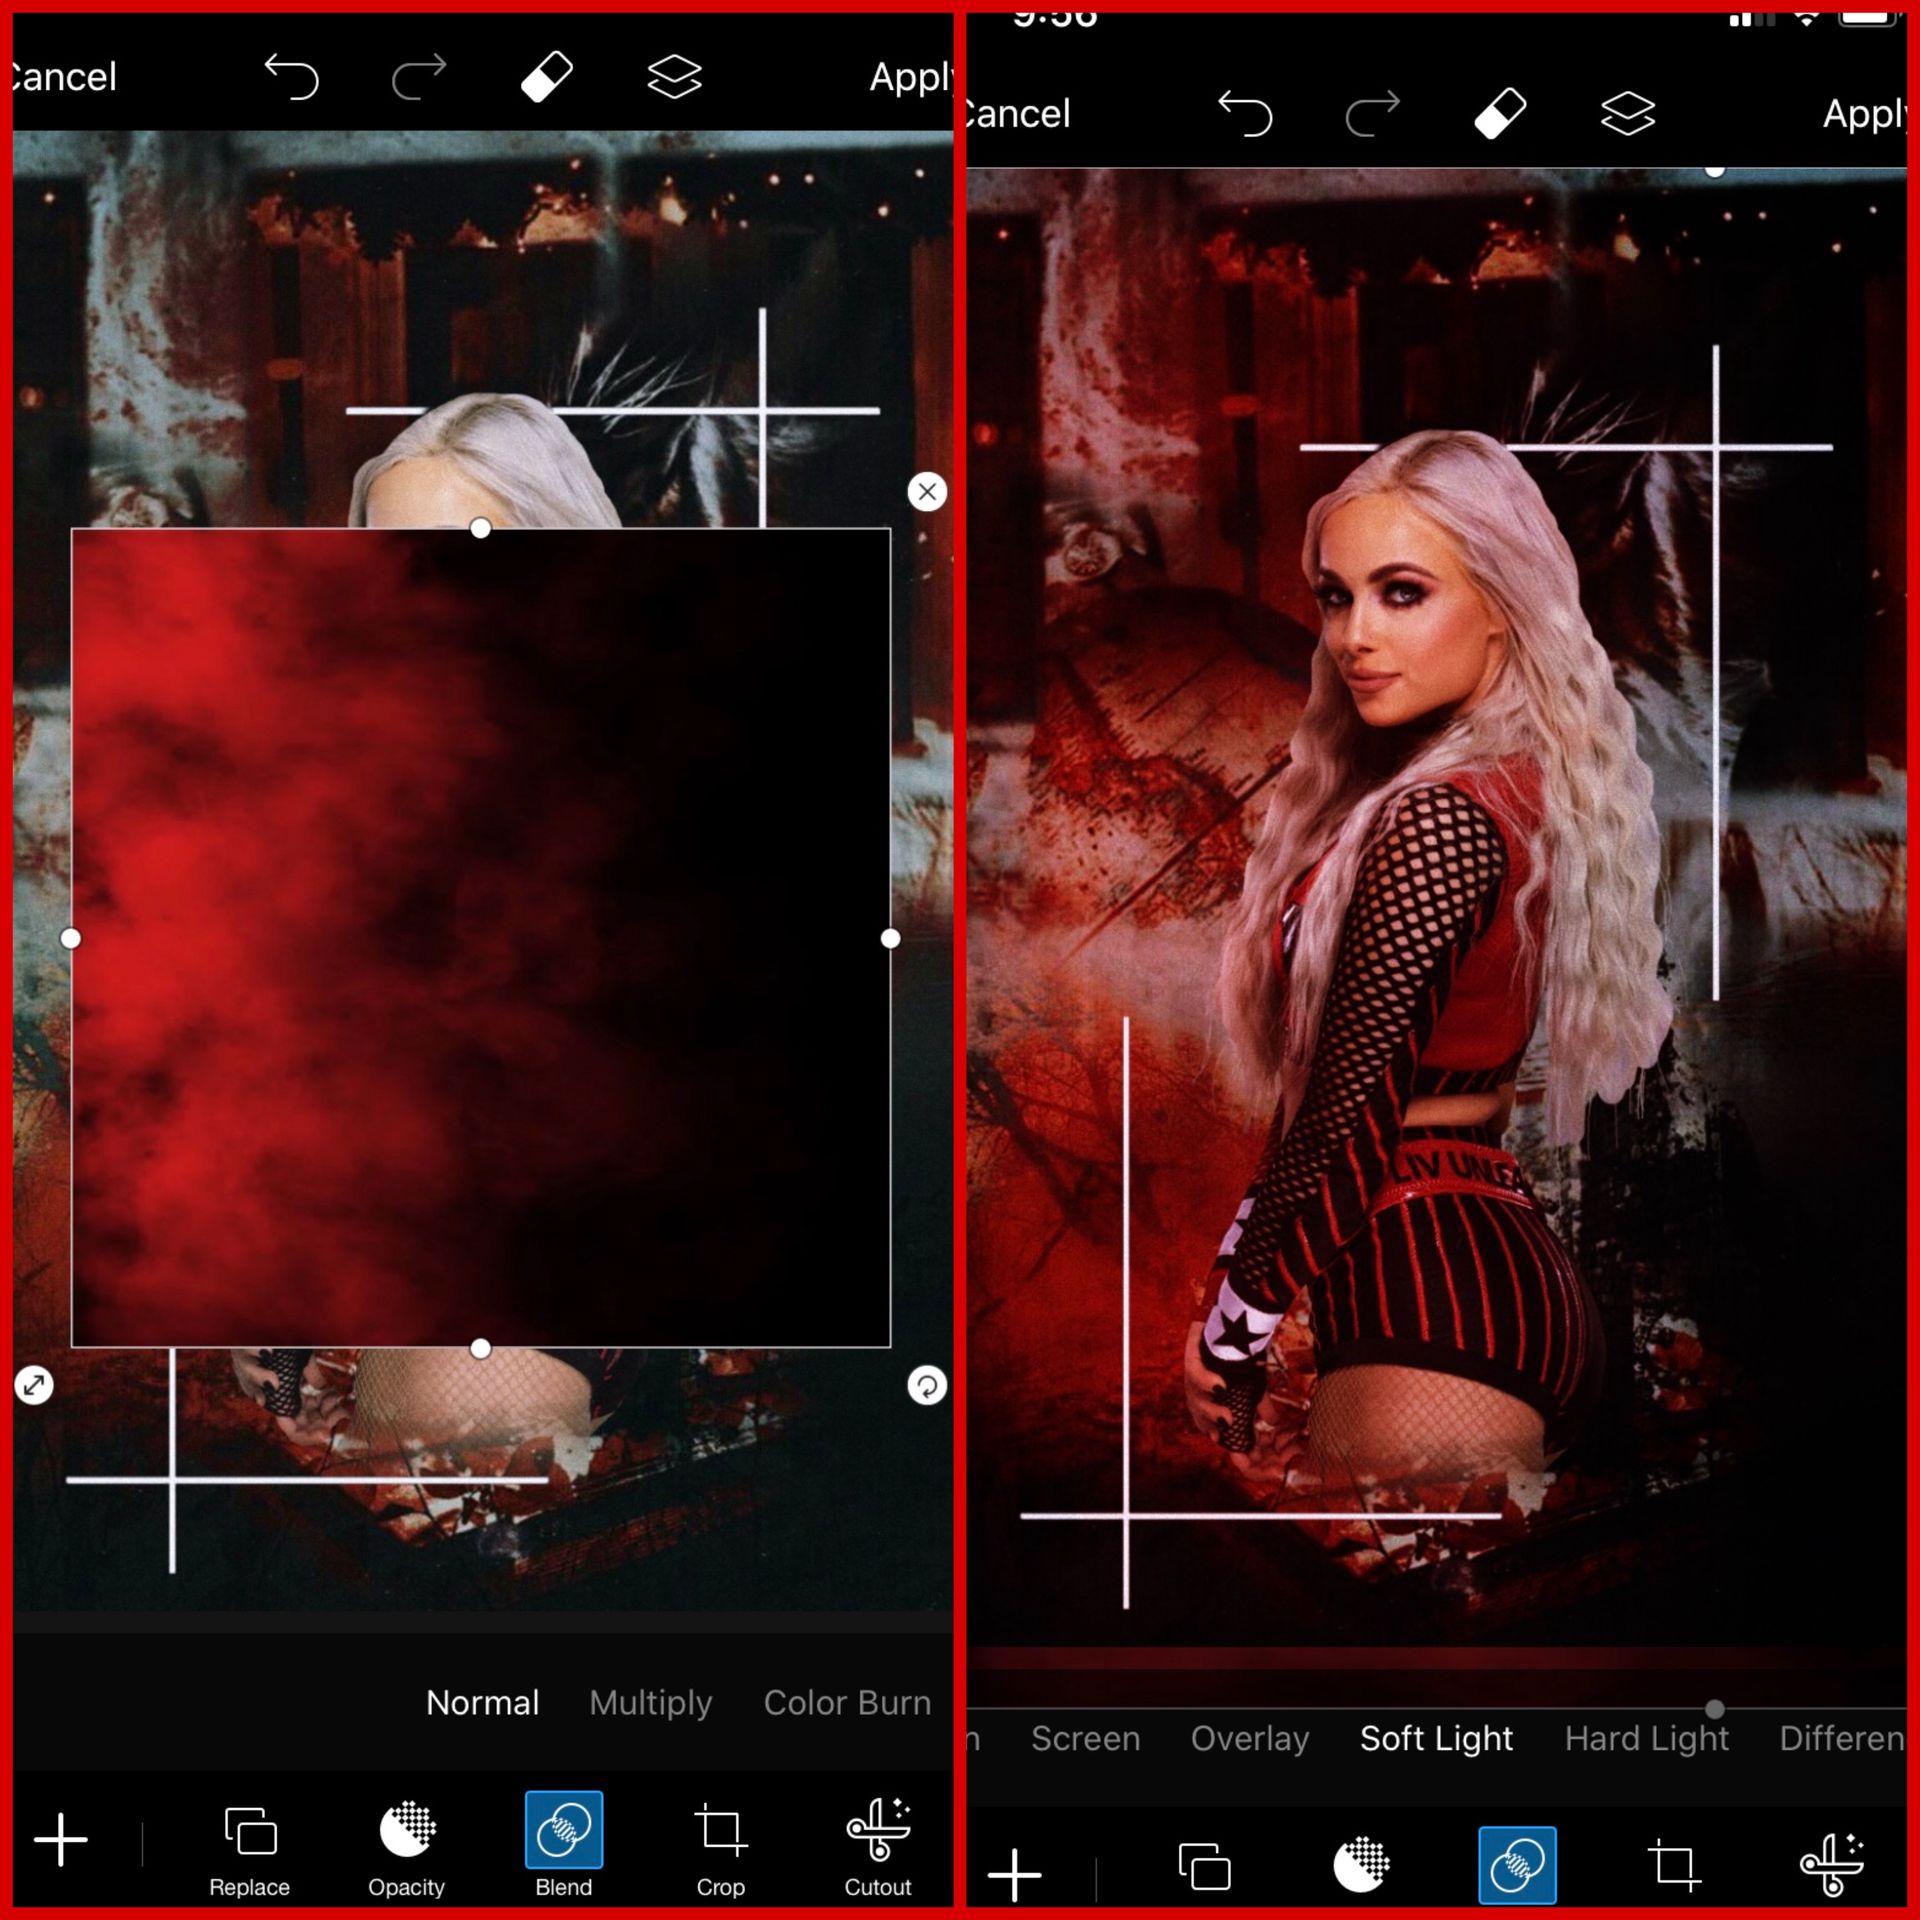
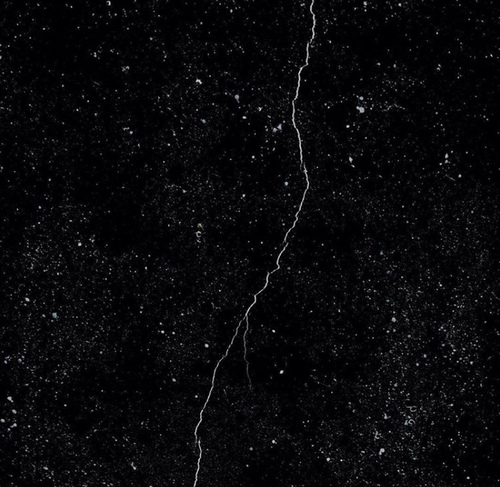
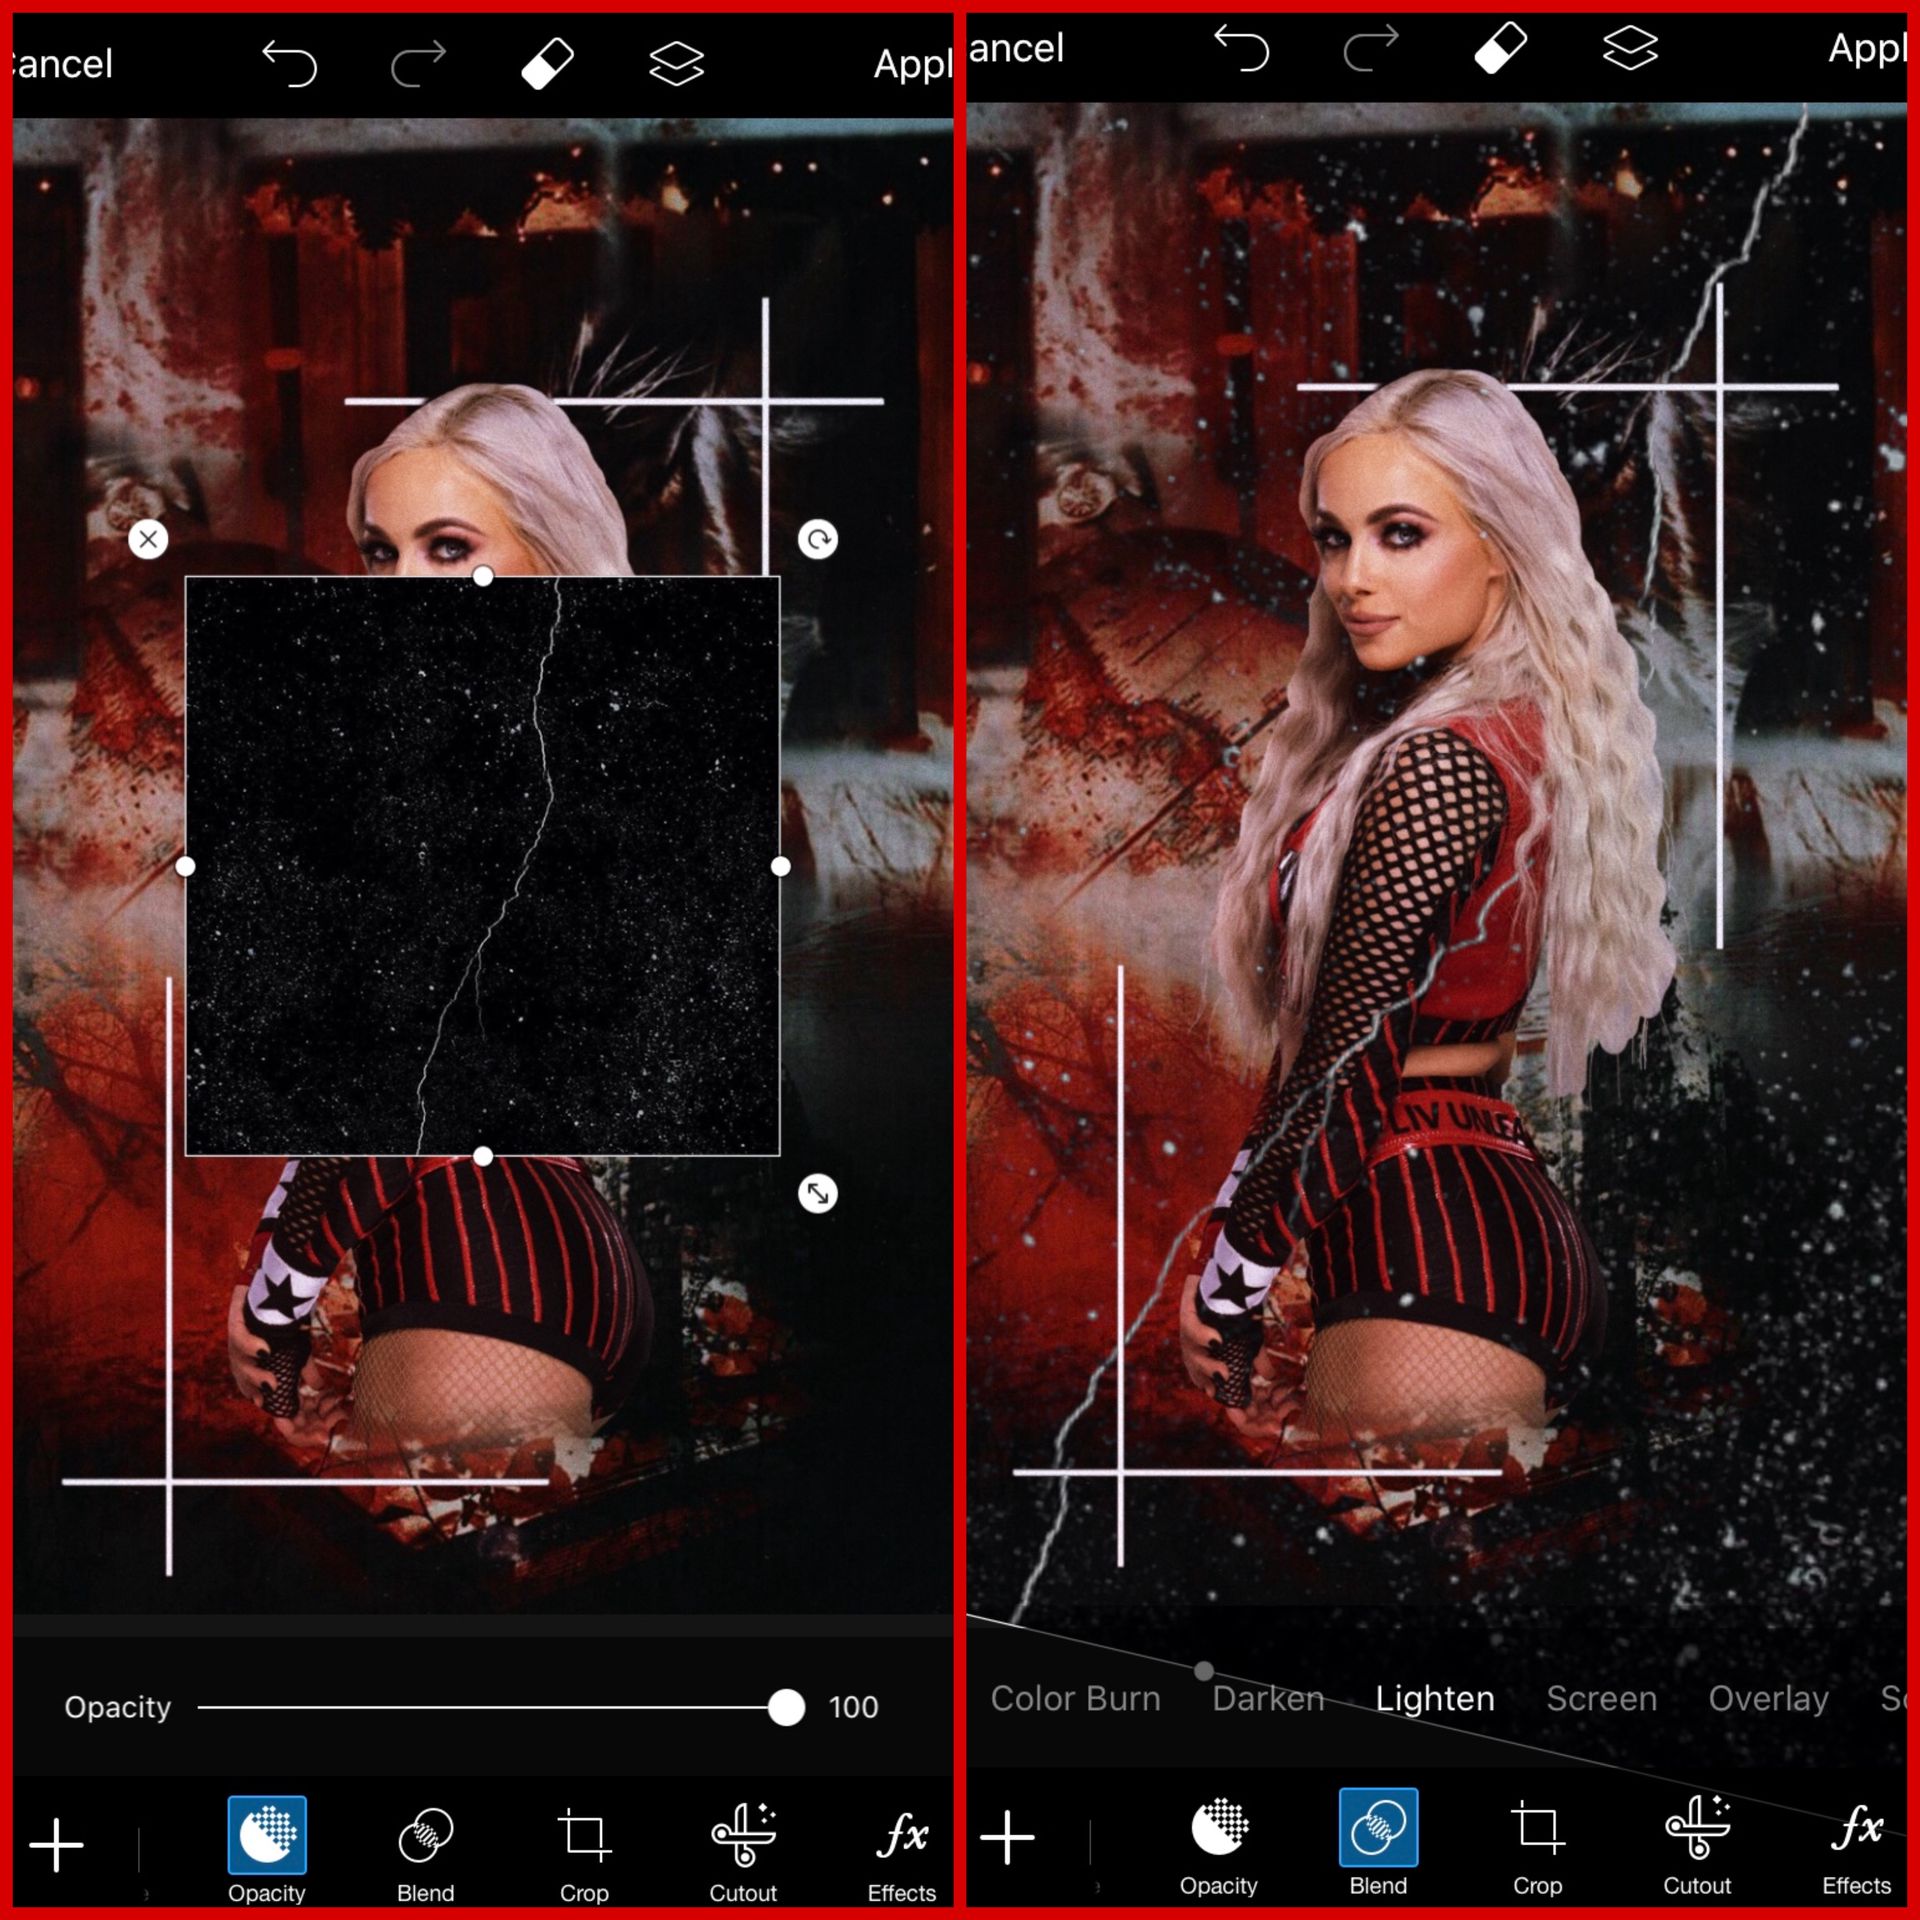
NEXT add the next overlay that I provided above! click blend and hit 'lighten' size up the image and tilt it to your liking! Turn the opacity down to your liking if it's too much! FINALLY hit apply!
STEP 6: OPEN THE PHONTO APP!
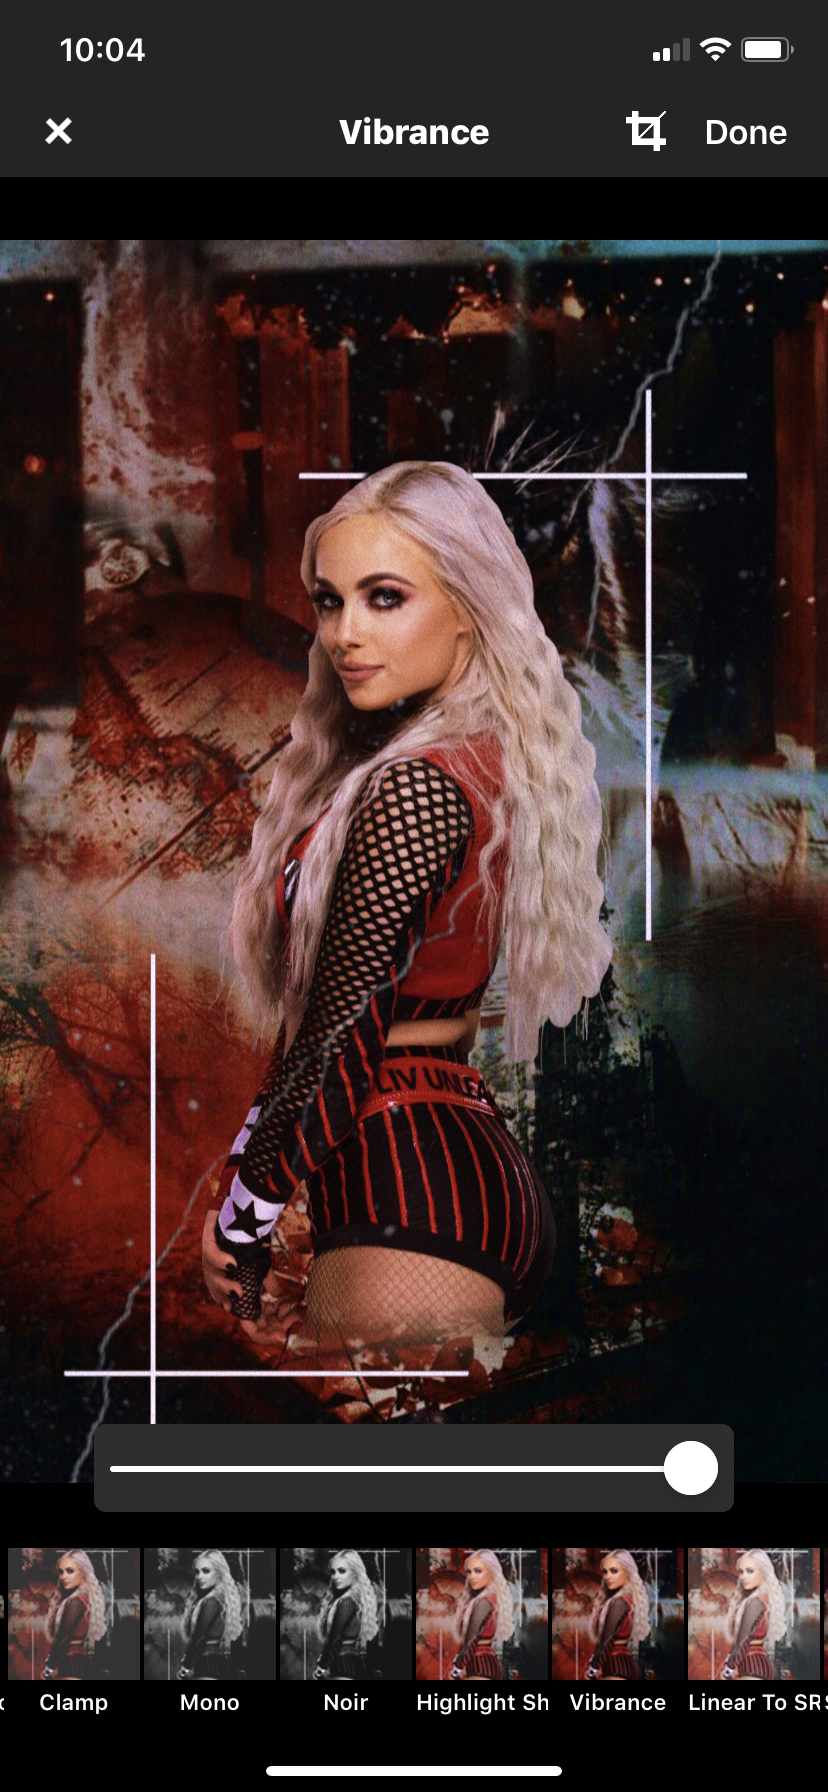
Phonto offers its own filters! I usually sometimes use the filters that the app provides but it honestly depends! I used the vibrance filter and turned it all the way up!
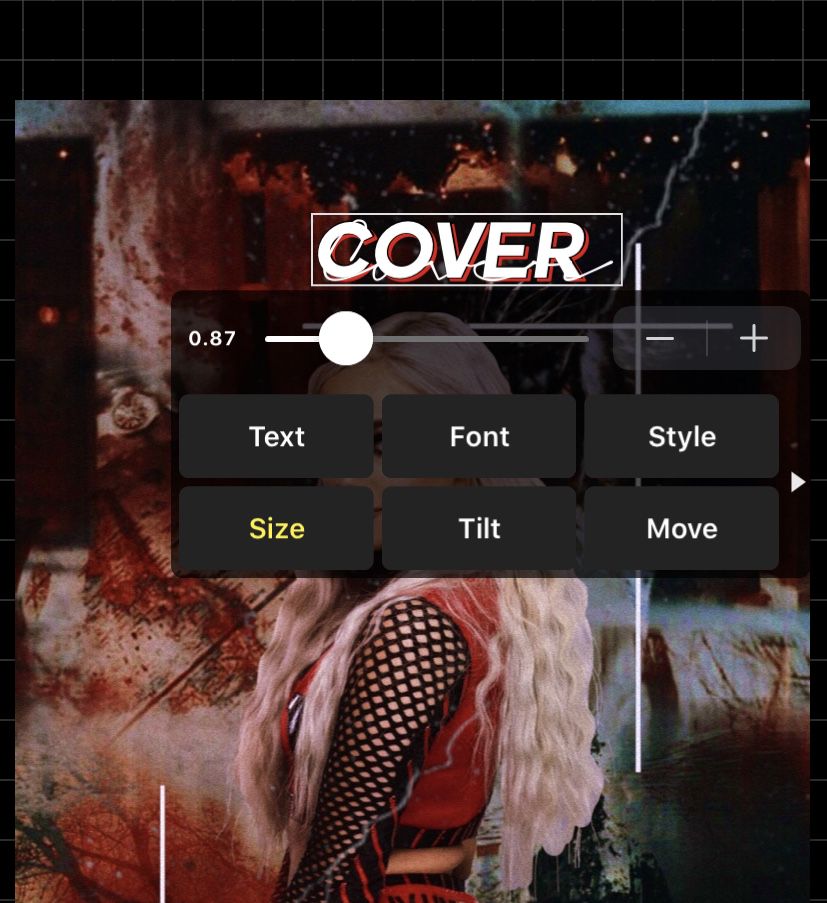
NEXT add your text! Below I've provided how I style my text! Repeat this with any other text you may add!

Using the 2nd font i retyped the word 'cover' in a different font and overlapped it on top of the first font I used! This just gives it an extra better looking appearance!
NOW add the authors name plus anything else you'd like to add! ALSO you can always go back and add more effects to your liking in the app PicsArt after you've messed around with the font and text!
I personally went back and added a few more effects and touched up the cover a bit to my liking! I ADVISE YOU TO EXPLORE THE PICSART APP AND EXPERIMENT!!
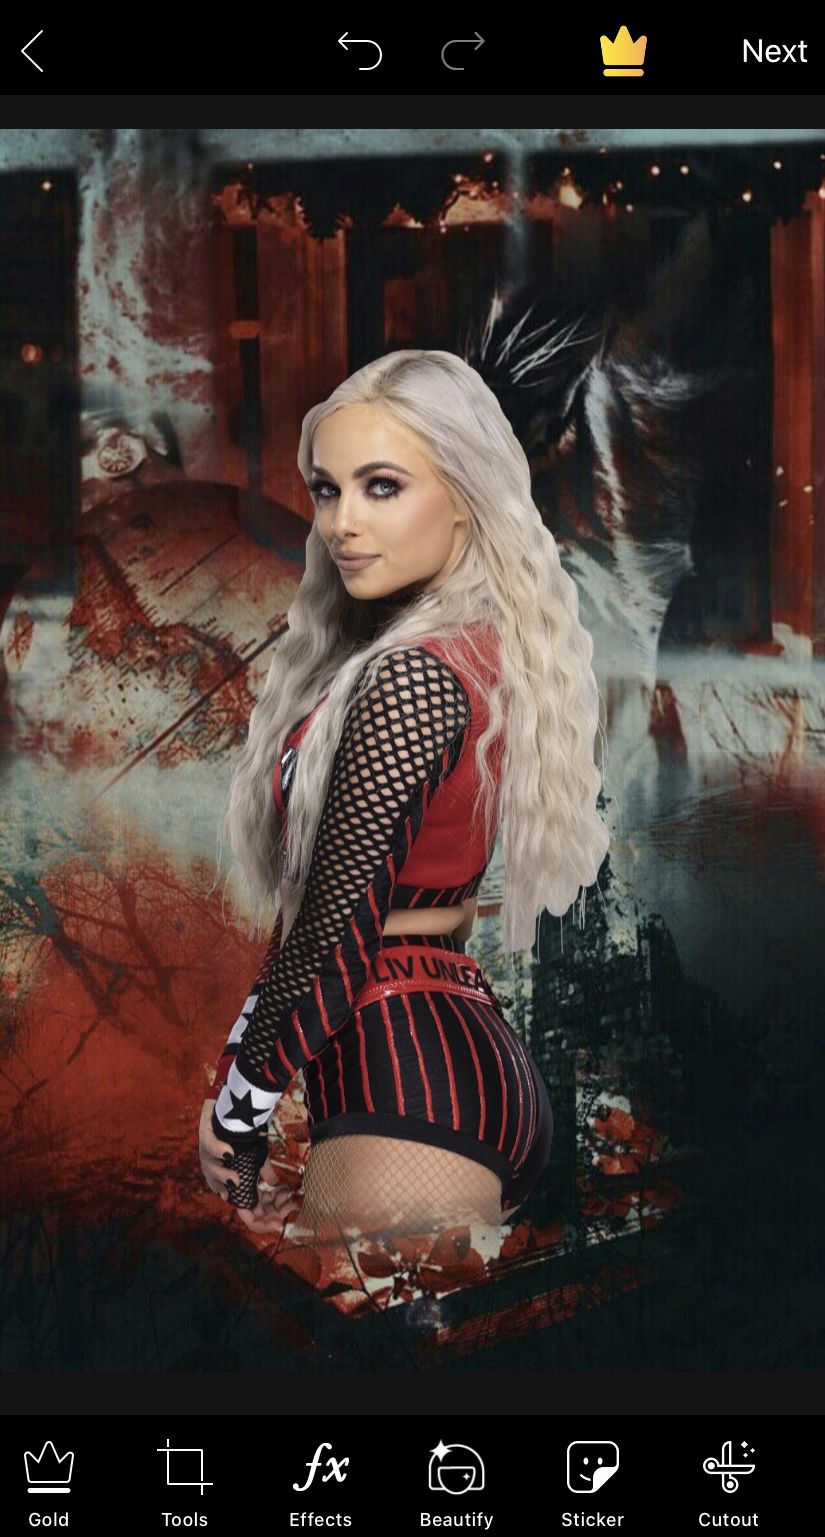
A/N: I reached the 20 photo limit so the result image will be displayed at the very top of this chapter!
⊱ ──────ஓ๑♡๑ஓ ────── ⊰
AS ALWAYS if you have any questions please ask me! I'm here to help you all! I hope that this helped you all! as always thank you so much for the love and support! ♡
Bạn đang đọc truyện trên: Truyen247.Pro