TEXT EFFECT [PicsArt]
This is a tutorial to create (somewhat) beveled or 3D
text using Phonto, a background eraser app [I downloaded mine from playstore by handy closet inc.] and PicsArt for mobile and tablet users.
Start off with phonto. Open a plain image.
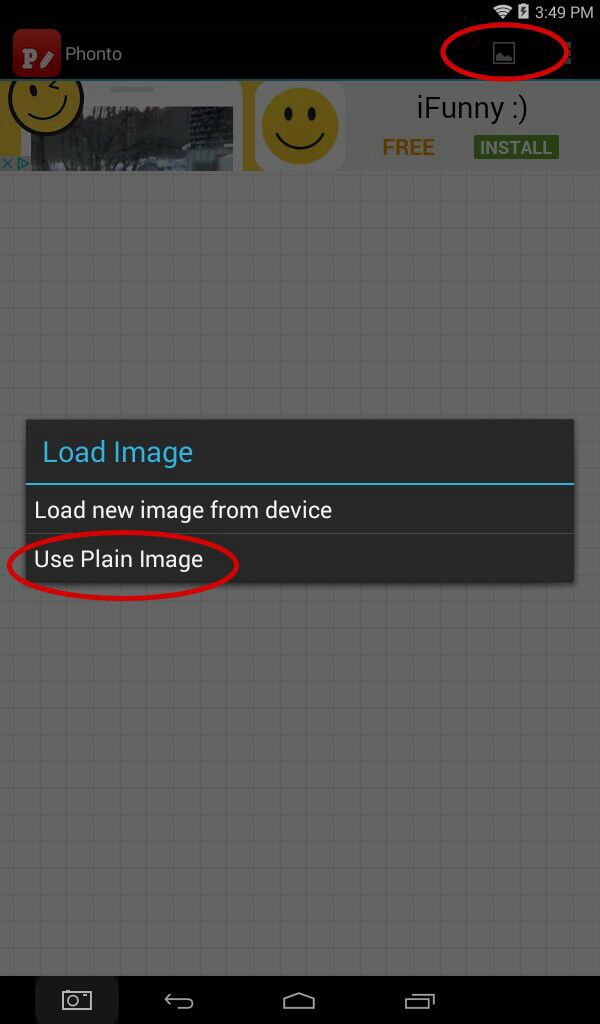
You can change the size and color of your image. I chose one of the available horizontal sizes and black color for this tutorial.

Now write the text of your choice. You can change the font too. Wider fonts works best for this effect.
I used the font 'quinn'.
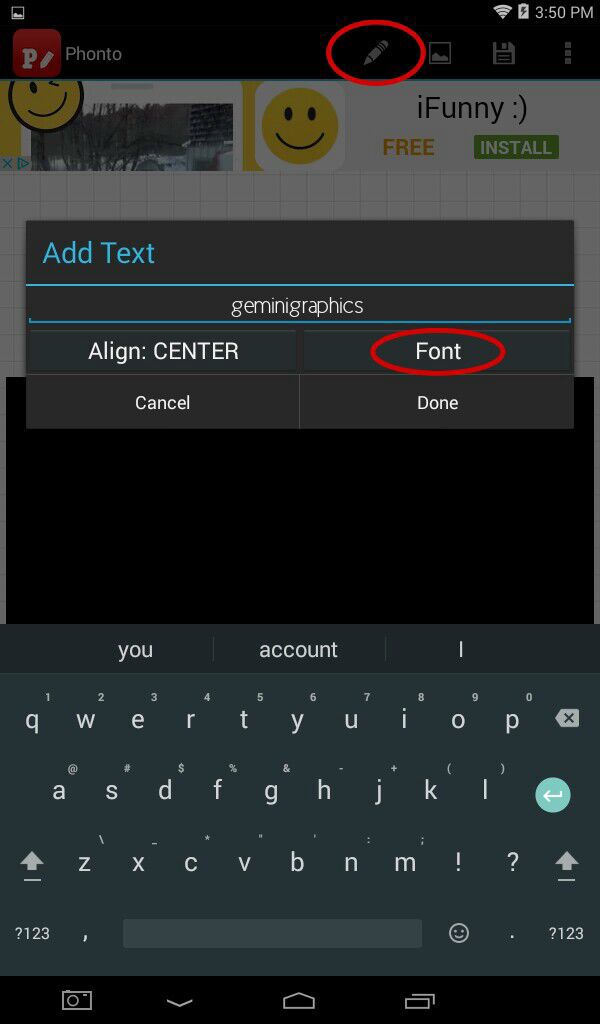
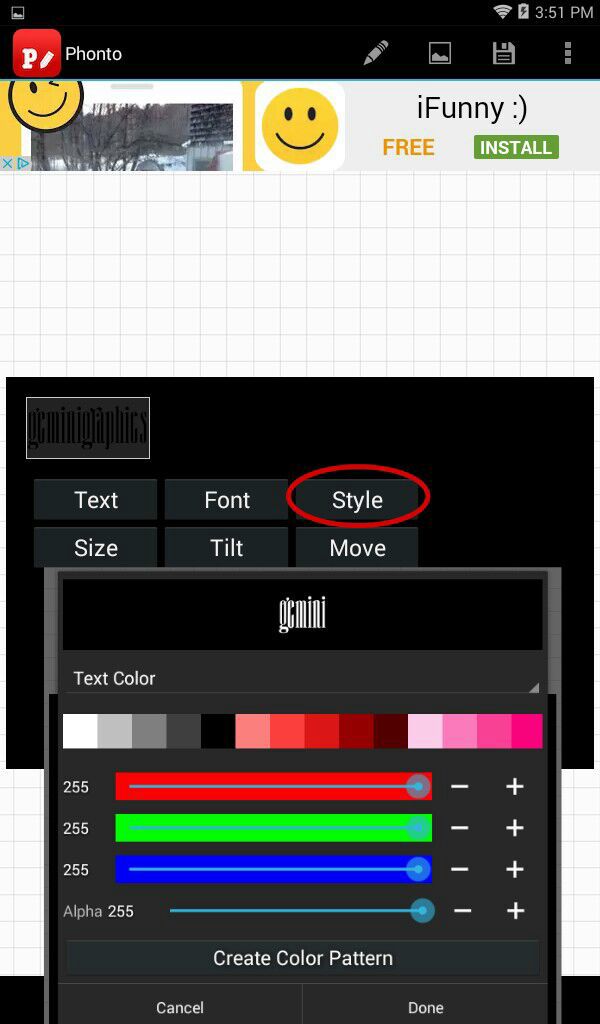
Change the color of your text to white. Adjust the opacity and other settings, if needed.
Open your text from phonto in the eraser app.
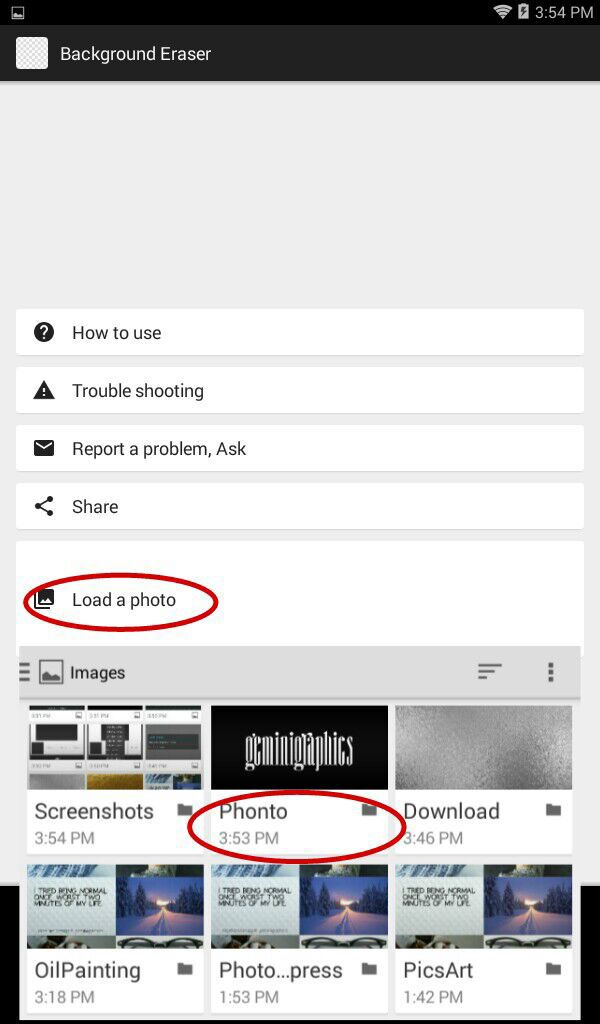
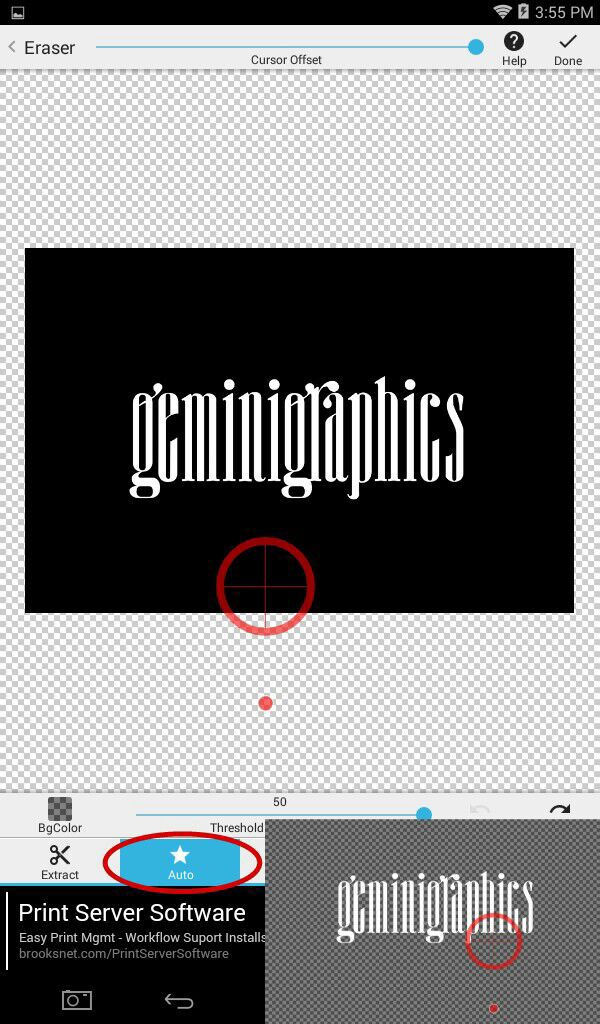
Select the auto option from the tool bar below and
remove the black part completely. You can zoom in and out for better precision. The end result will look like the image in the bottom right corner. A png of sort.
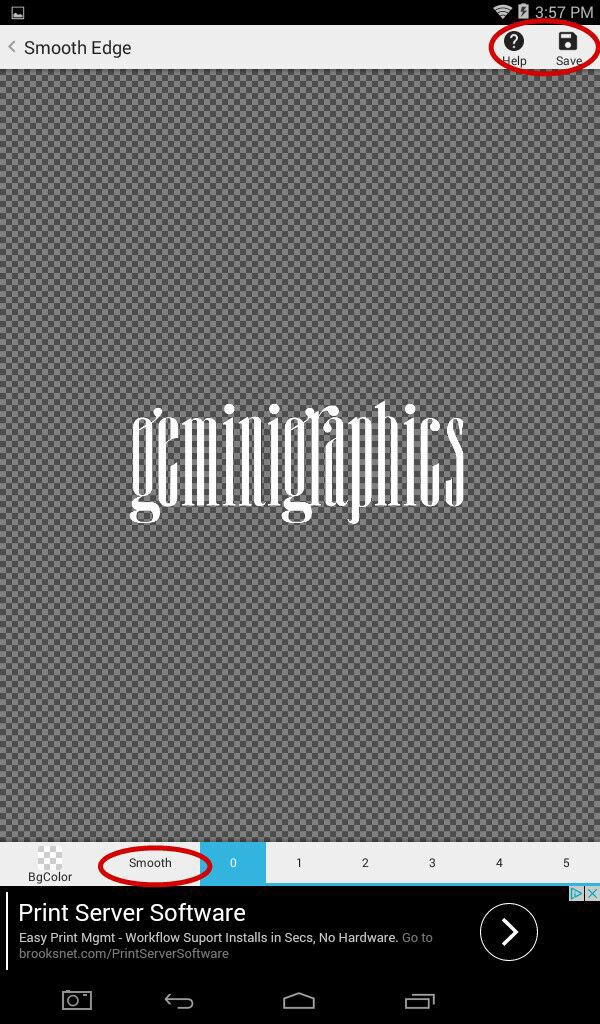
You can smoothen the edges but here it's not needed. Press save when you are satisfied or you can go back and fix any mistakes.
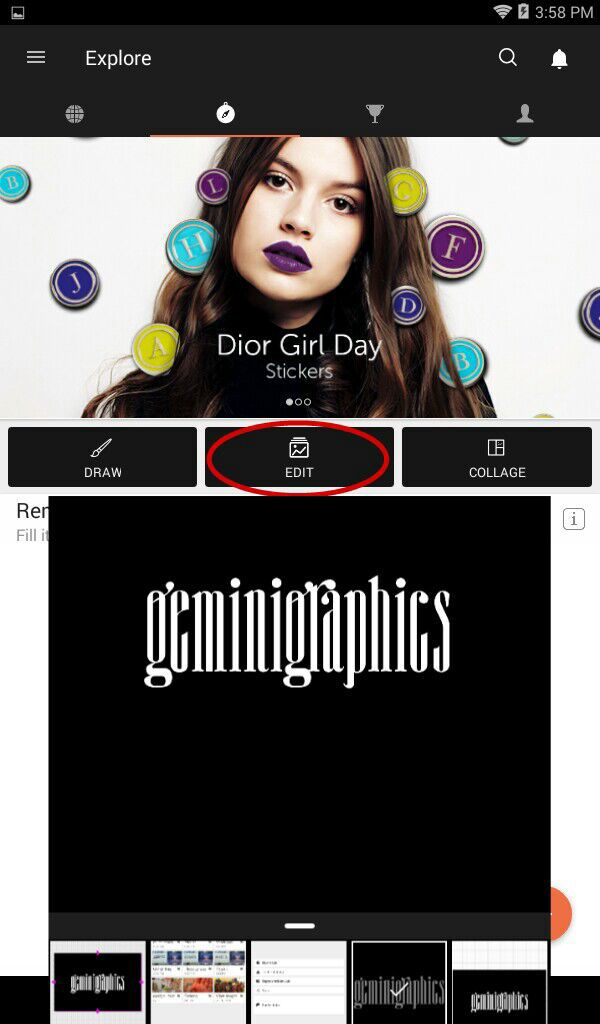
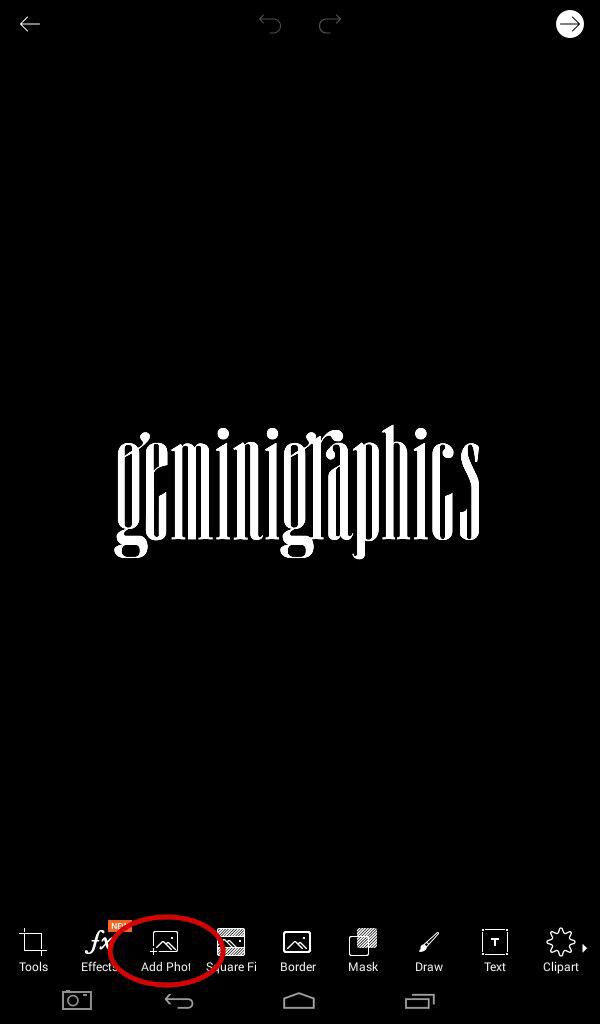
Open your image from phonto in PicsArt this time. Select the edit option and choose the image from your gallery.
From the tool bar down below, select the add photo option and add the text png from eraser app over your image. Increase its size such that the text png above covers the text below completely.
From the effects option from the tool bar, select the colors option and choose negative.
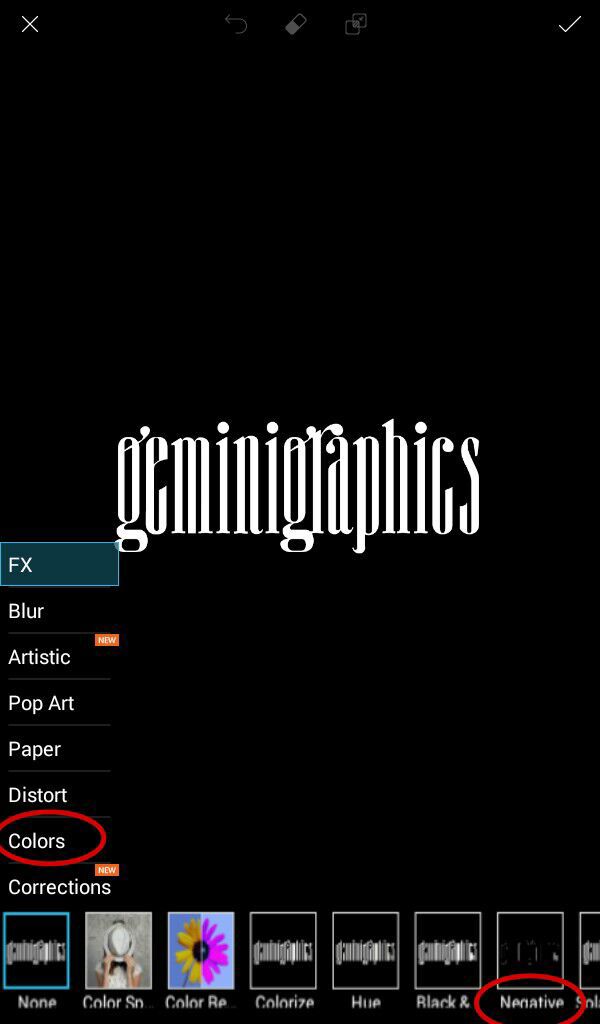
The text will now appear to be black with a white outline. That's good. If the outline is not showing, decrease the png's size a bit so you can see it.
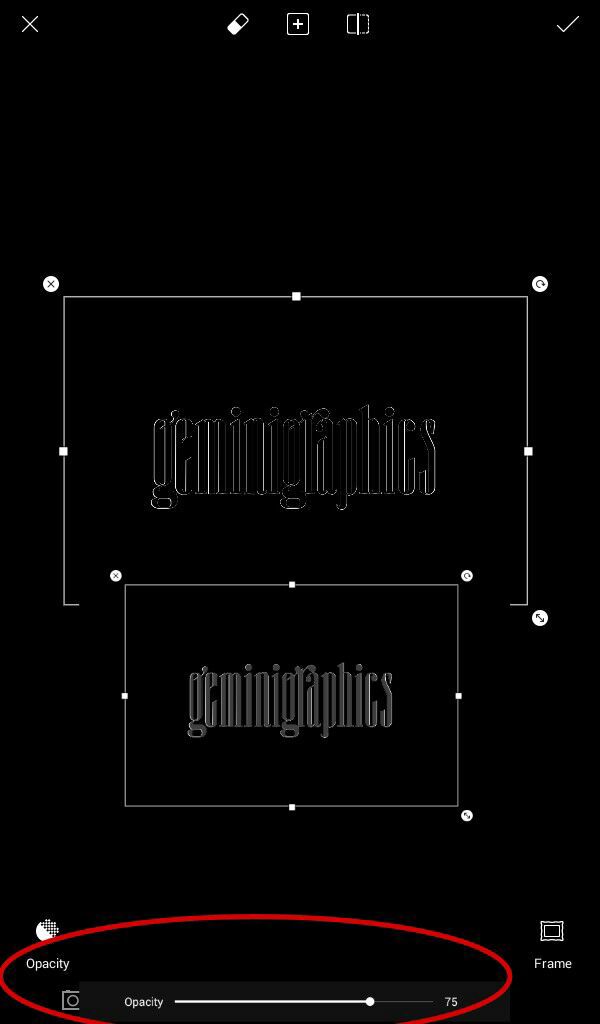
You need to decrease the opacity somewhat till the text looks significantly lighter than black, more like dark grey.
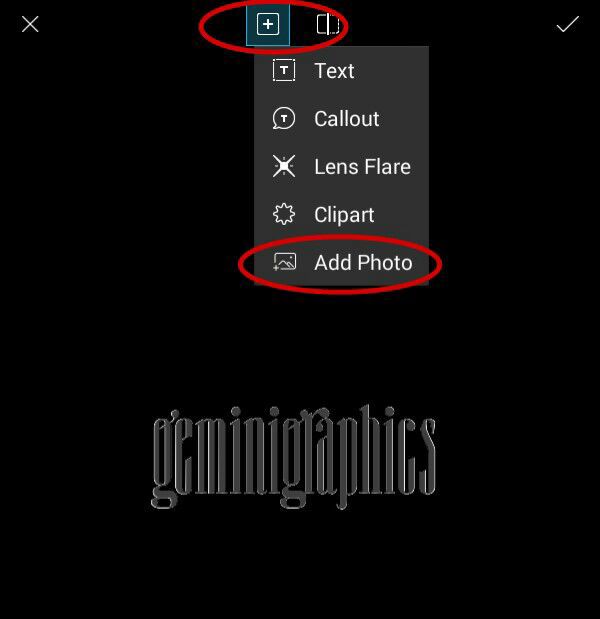
From the + option above, select the add photo option and choose a pre downloaded texture from your gallery. Put it over your image such that it covers the whole text.

From the tool bar below you can increase or decrease the opacity by moving the slider up or down. No need here.
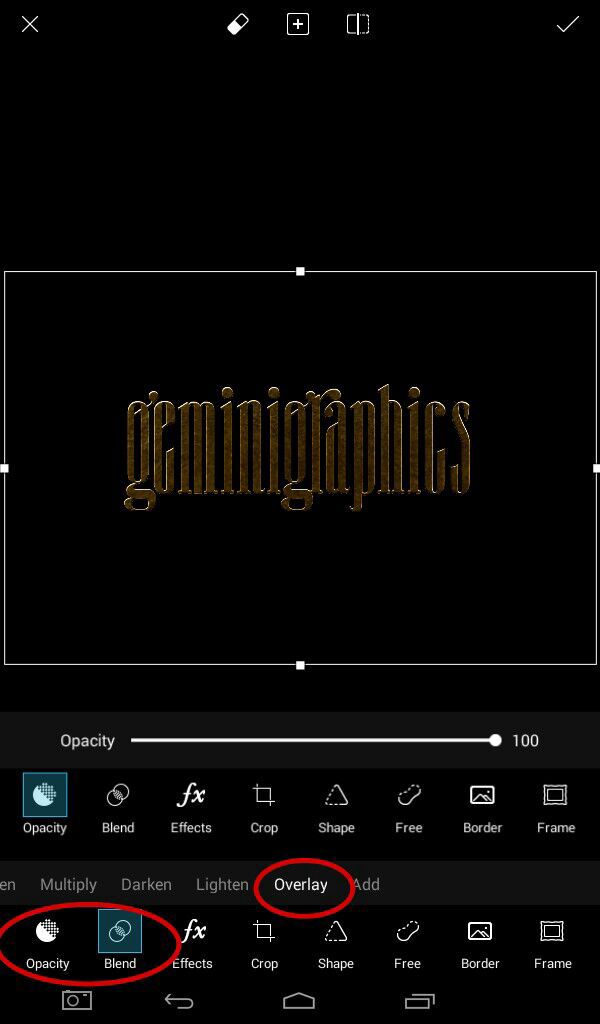
You also need to change the blending of the texture to overlay. Press the tick mark above when you are satisfied with your placement, opacity and stuff.
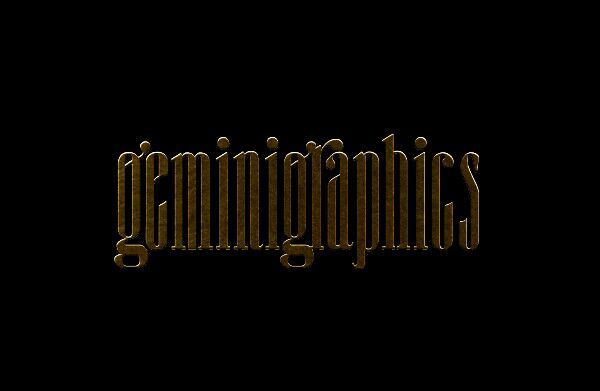
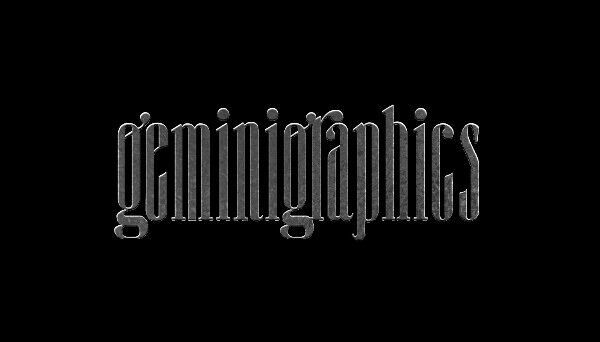
And we are done!
Here's the same look with silver texture:
The possibilities are endless! You can use this text in screen mode over darker backgrounds and in multiply mode over lighter backgrounds. Or you can go back to the eraser app and make png out of it as shown above.
Hope you guys find it helpful! Got any questions? Tag me in the comments @geminigraphics
[Tutorial by Gemie_Gem]
Bạn đang đọc truyện trên: Truyen247.Pro