
Shadow Me - Create a Shadow
You can put your PNGs on the cover, but you also need to make things look natural. There are times your PNG will need a shadow to make it appear more natural.

This is the base image I'm going to use -
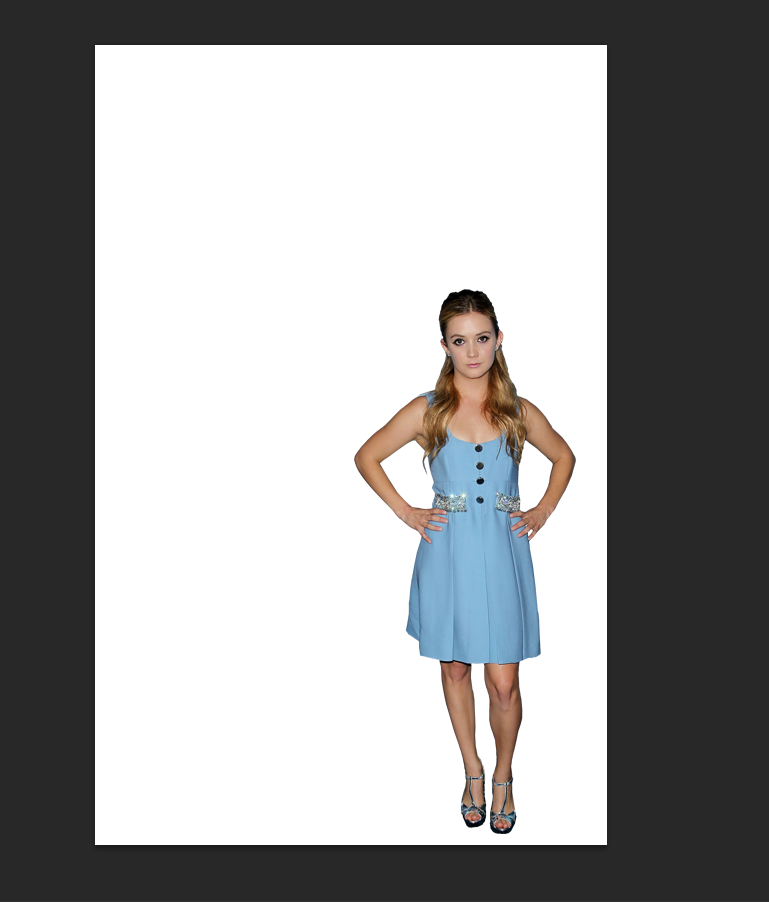
I put her on a white background just to make things easier to see. The first thing you need to do is duplicate your layer so you have two identical layers.
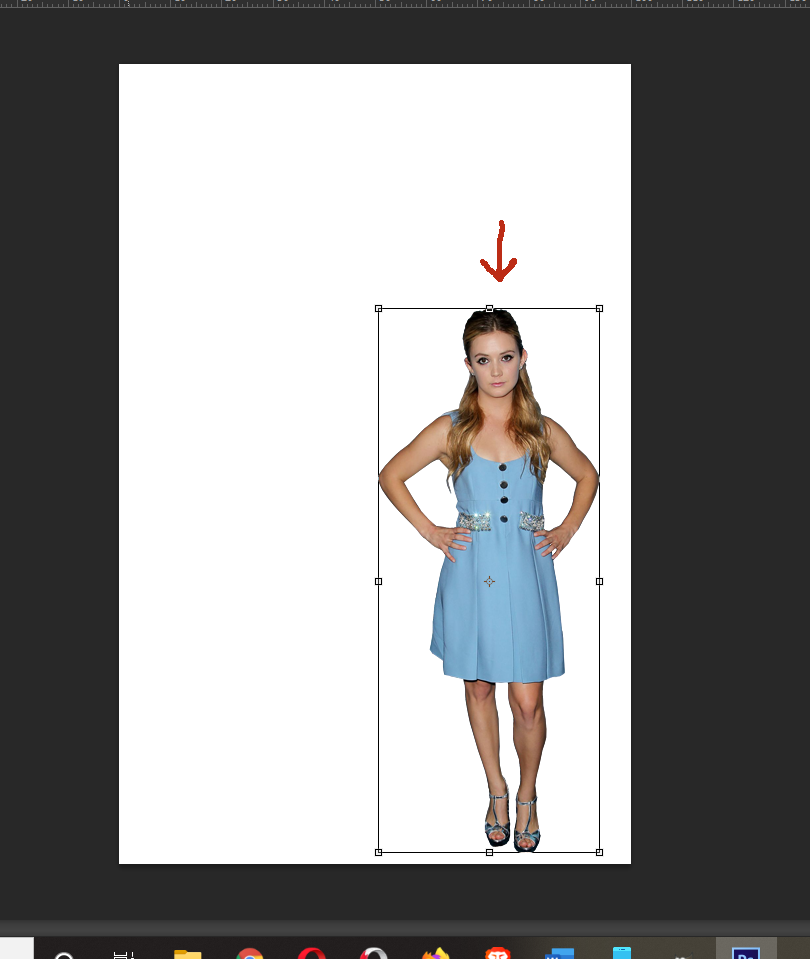
Now that you have two layers of the girl you want to free transform the bottom layer. You want to grab the middle adjustment point on the top of the box. In my Photoshop in order to move the layer the way you need to for a shadow you need to hold down ctrl while moving the box or it won't work, all you'll do is adjust the height of the PNG and squash the poor girl. Grab the point (while holding down ctrl) and lay the layer down on the ground.
You can see here I've begun to lay the bottom layer down. Because the images are duplicates, they line up so the shadow will fall where it needs to in order to be behind the image. You can move the image in any direction while holding down ctrl to lay it where you need it to be.
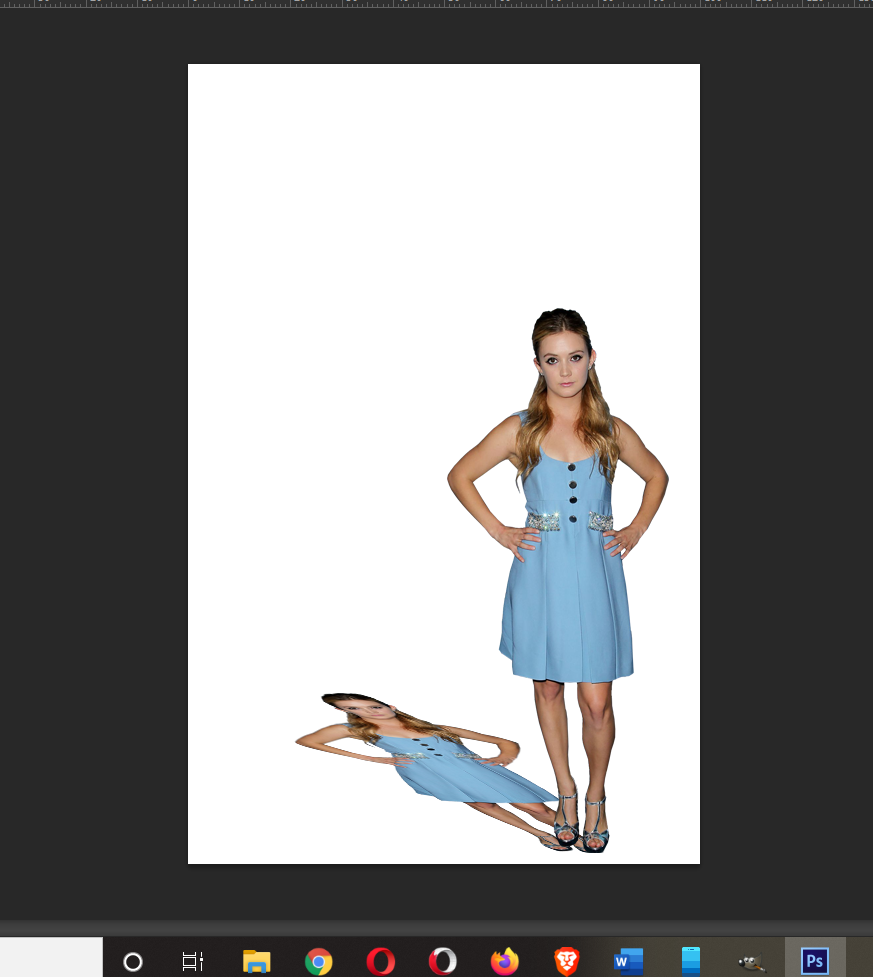
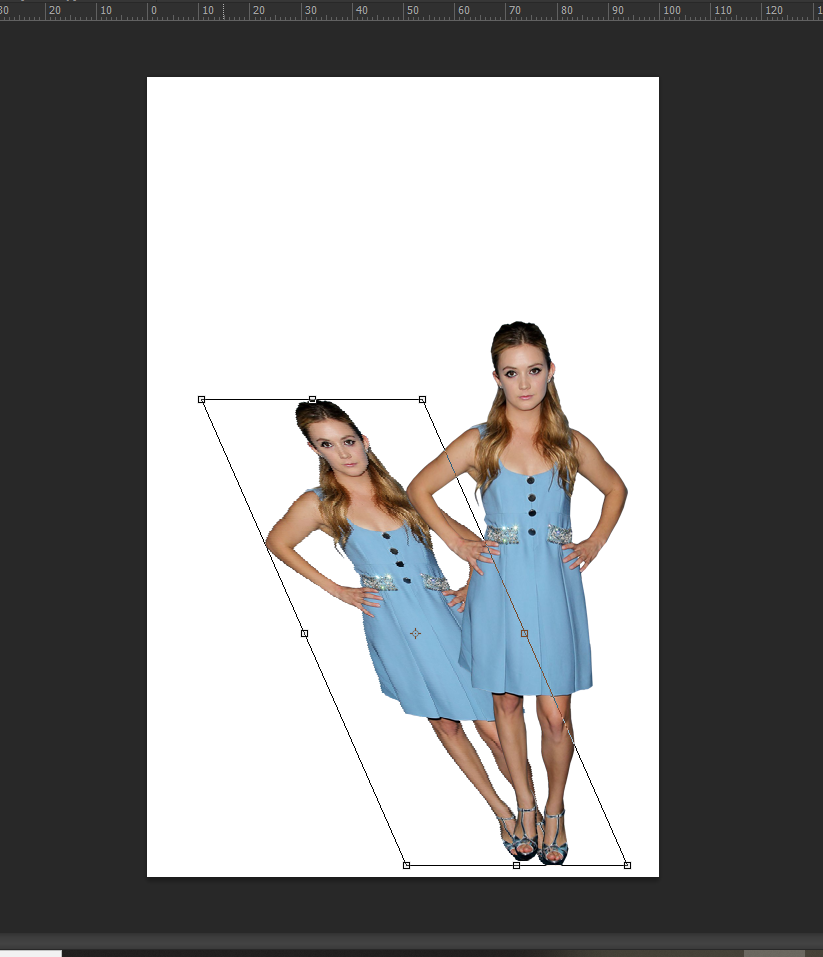
Ok, so our image is now on the ground in a shadow position. She doesn't look much like a shadow, so we need to fix that.
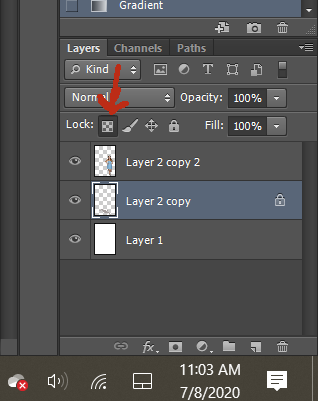
Before we move on to making her into a shadow, lock the layer. This is important.
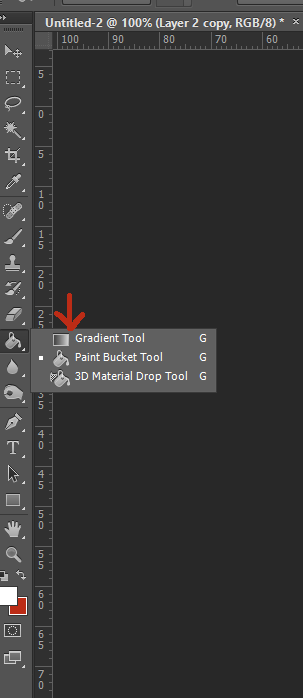
One your layer is locked, go over to your tools and pick the gradient tool. If you don't lock the layer when you add the gradient it will cover the entire cover instead of just the image you want to make into a shadow.
I apologize for the awful quality of the next image but for some reason while doing the next step my laptop decide I wasn't allowed to take a screen shot, but only for a couple of the steps no clue why. I had to use my phone to take the pictures.
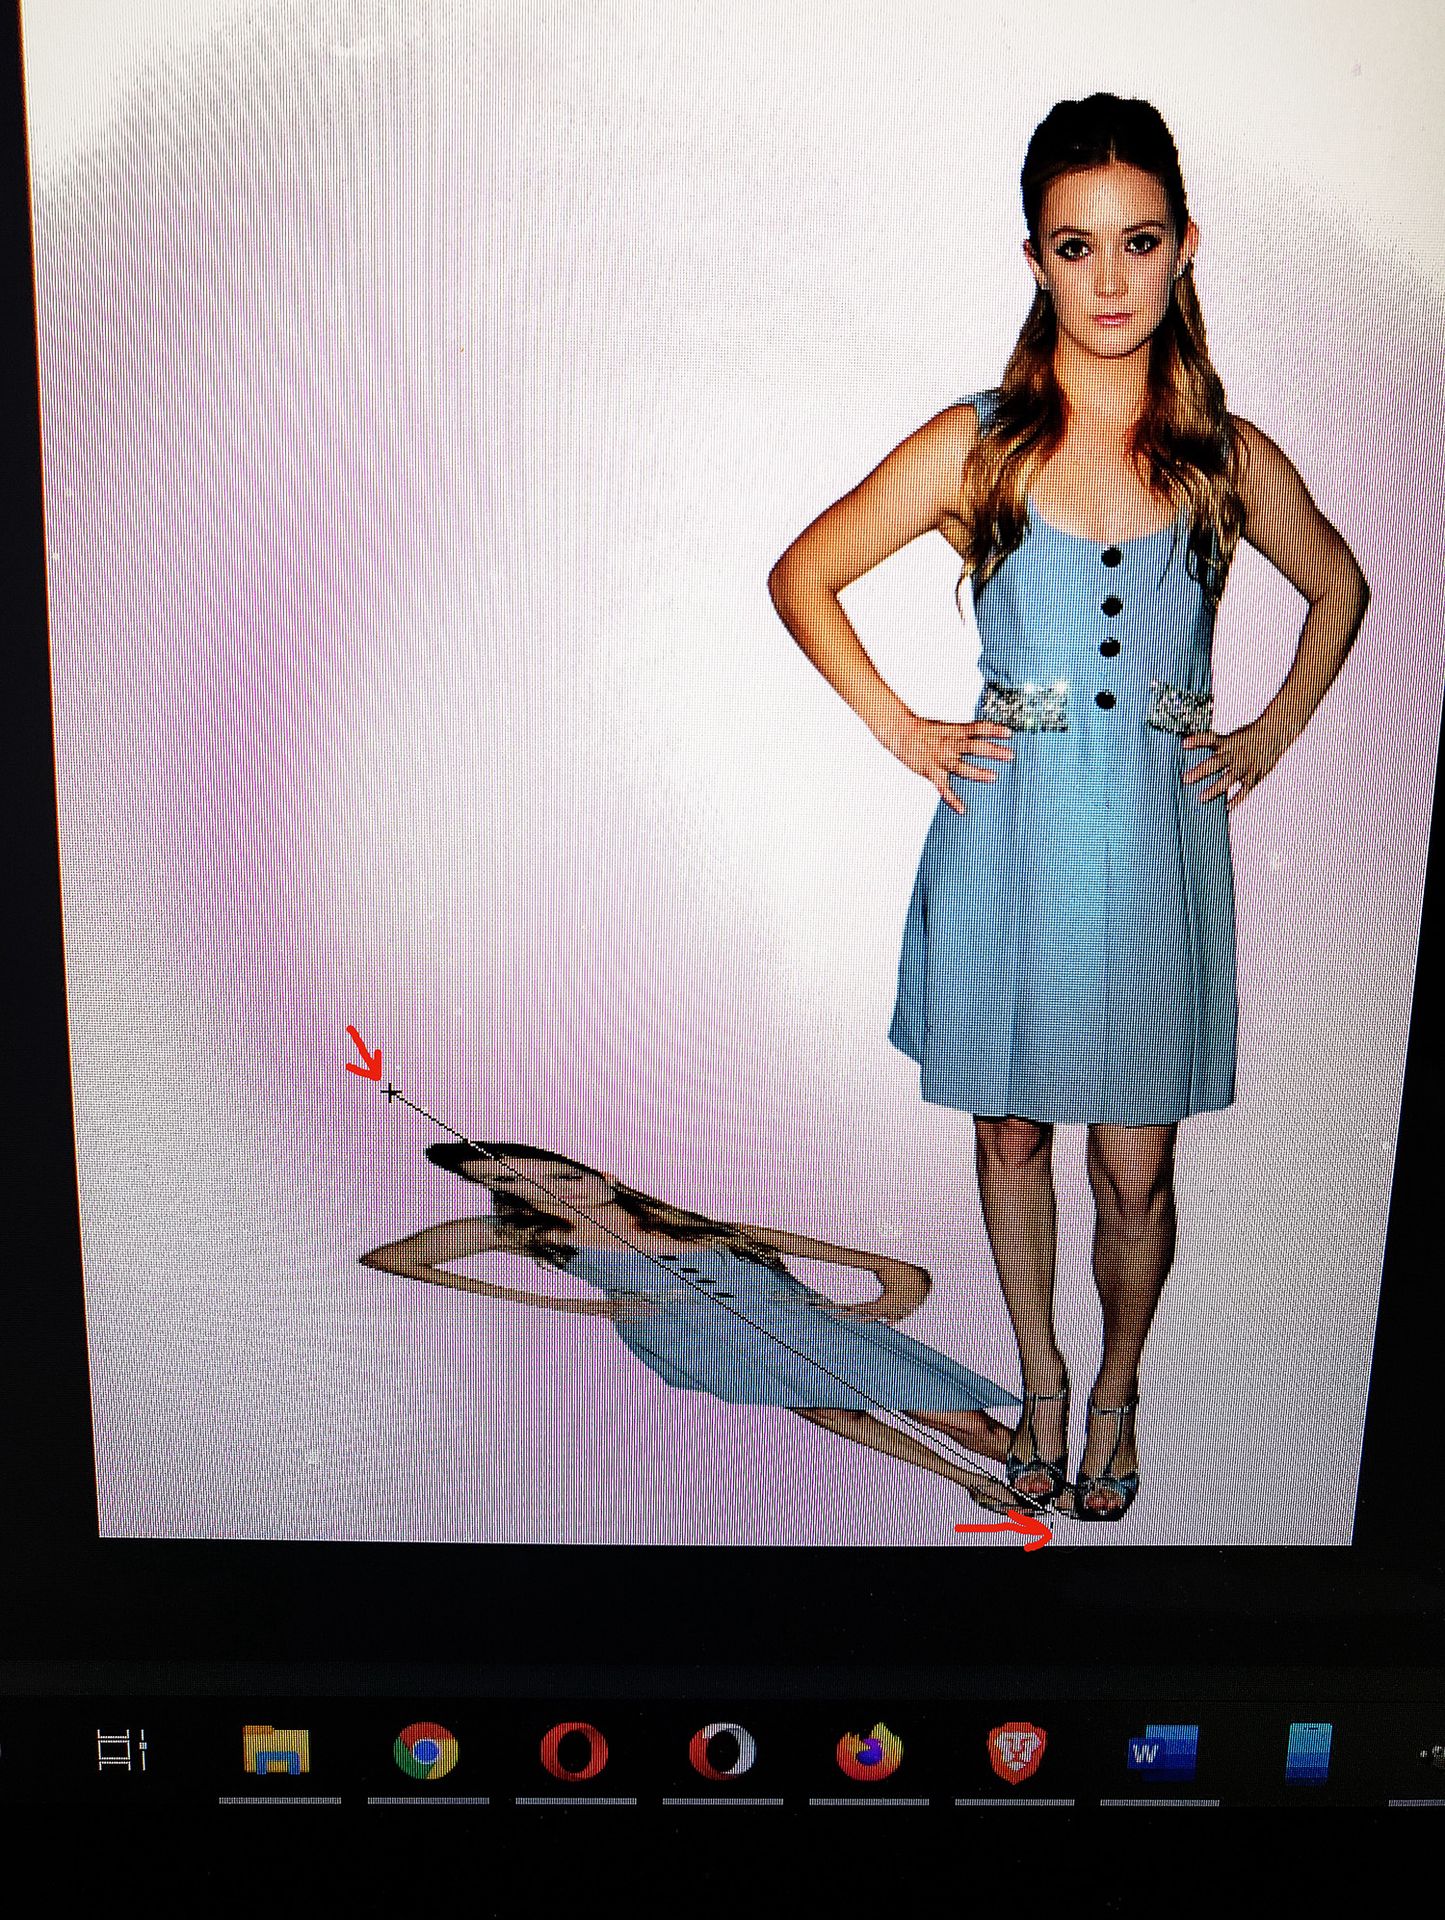
You left click, holding down on your mouse button, and drag a line from the top of the shadow image to the bottom (head to toe) down the middle of the image.
When you release your mouse button your image is now shadow colored. It isn't a perfect shadow, it's a little too there to be considered a shadow.
**This process varies in Photoshop CC. You have to create a separate gradient layer, clip it to the image for the shadow, then merge the two layers. 'Drawing' the gradient doesn't work in CC, it creates a gradient that covers the entire canvas. Once you get the layers merged you proceed in the same way to complete the shadow.**
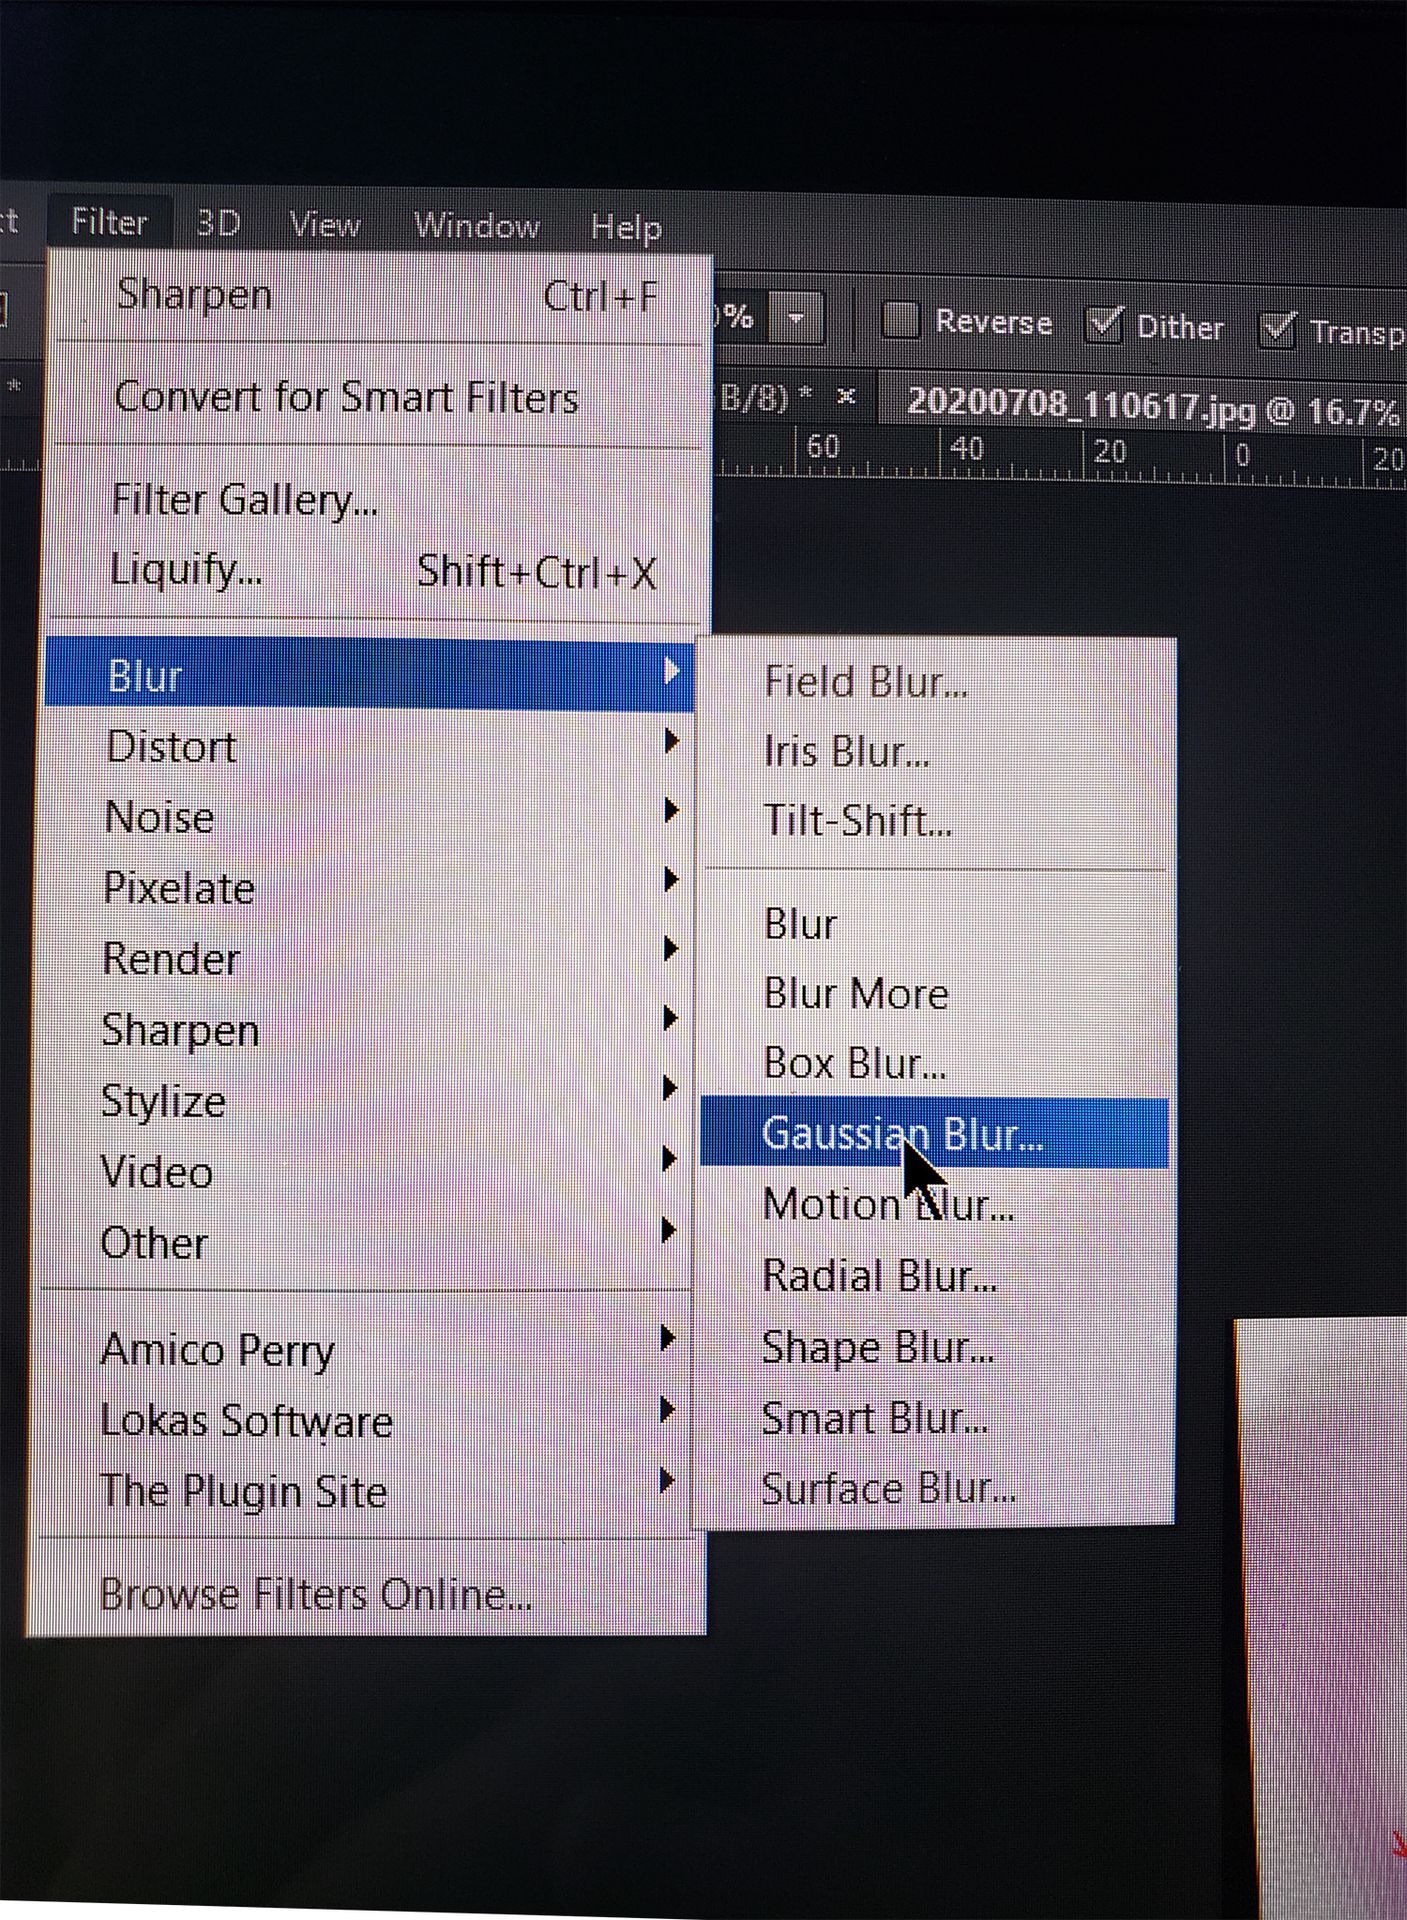
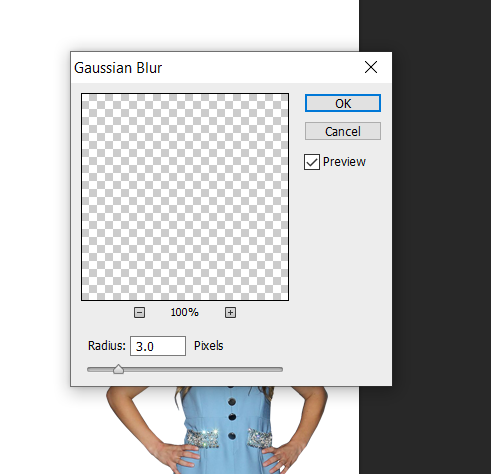
You need to go to the toolbar at the top and choose filter then Gaussian blur. Make certain the blur is set to 3.0
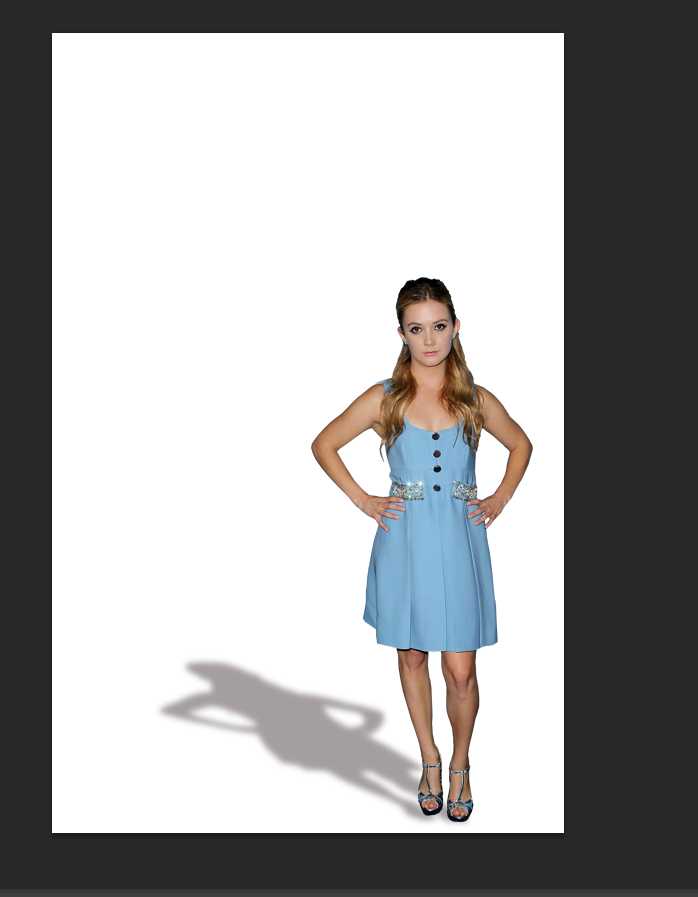
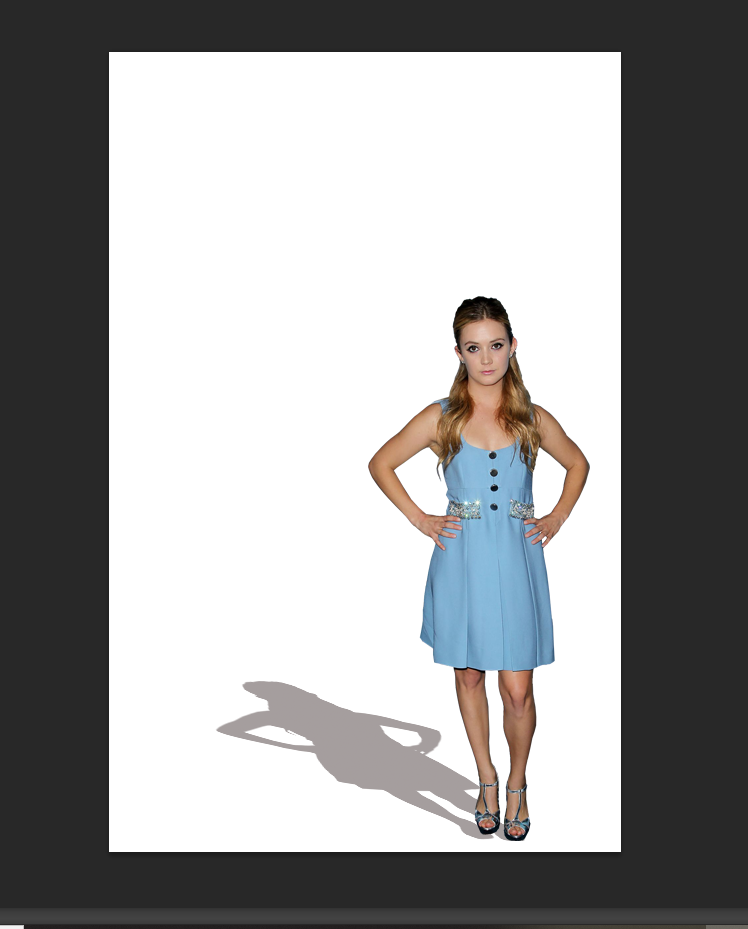
This is how it will look when you're done. You can adjust it however you'd like. Change the gradient so it's darker, fade the shadow layer, or whatever works for the image you're going for.


This cover was created for author Renee Jean. The entire series has a similar look. White background and red text. The original image of the car had a gray background so it had to be removed so the car could be used on the cover. Consequently, I lost the shadow of the vehicle when I removed the background and had to create a new one. Without the shadow, the falling car would have looked awkward.

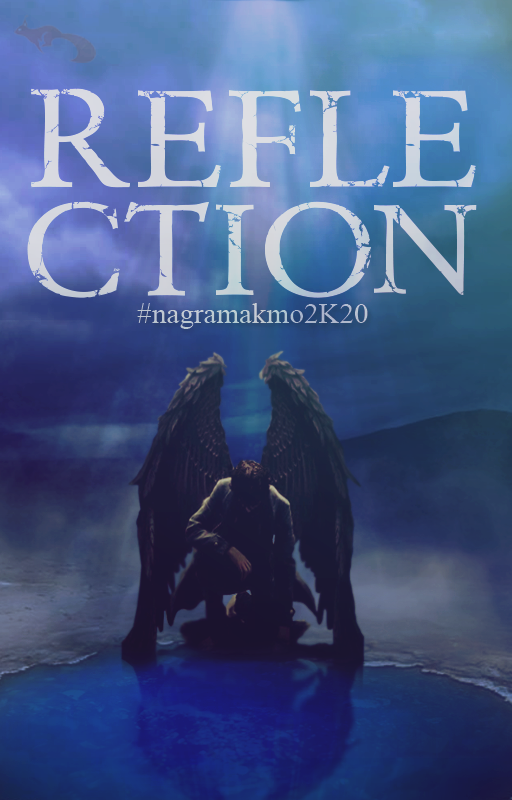
I also created the angel's shadow in the water for this cover.
It's a useful thing to know how to do and I'm glad I took the time to learn it. It makes the cover as a whole more complete. It's little things like the shadow in the water that fill in details you sometimes don't think about.
Bạn đang đọc truyện trên: Truyen247.Pro