
Break It Up
Dispersion is a great tool and can work for a few different genres. There are actions you can add to Photoshop that will make doing a dispersion extremely easy. For those of us who can't use Photoshop actions or those that don't have Photoshop, there is another way to do create a dispersion image if you have the right tools. It simply takes a little work.
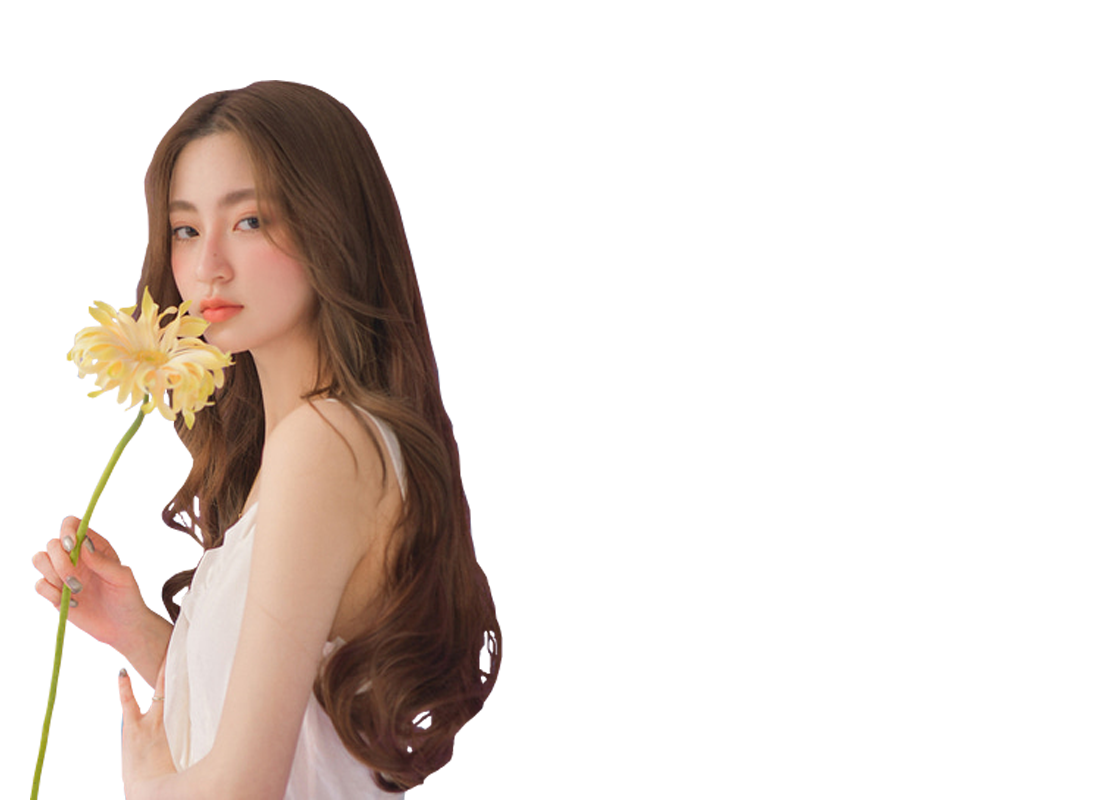
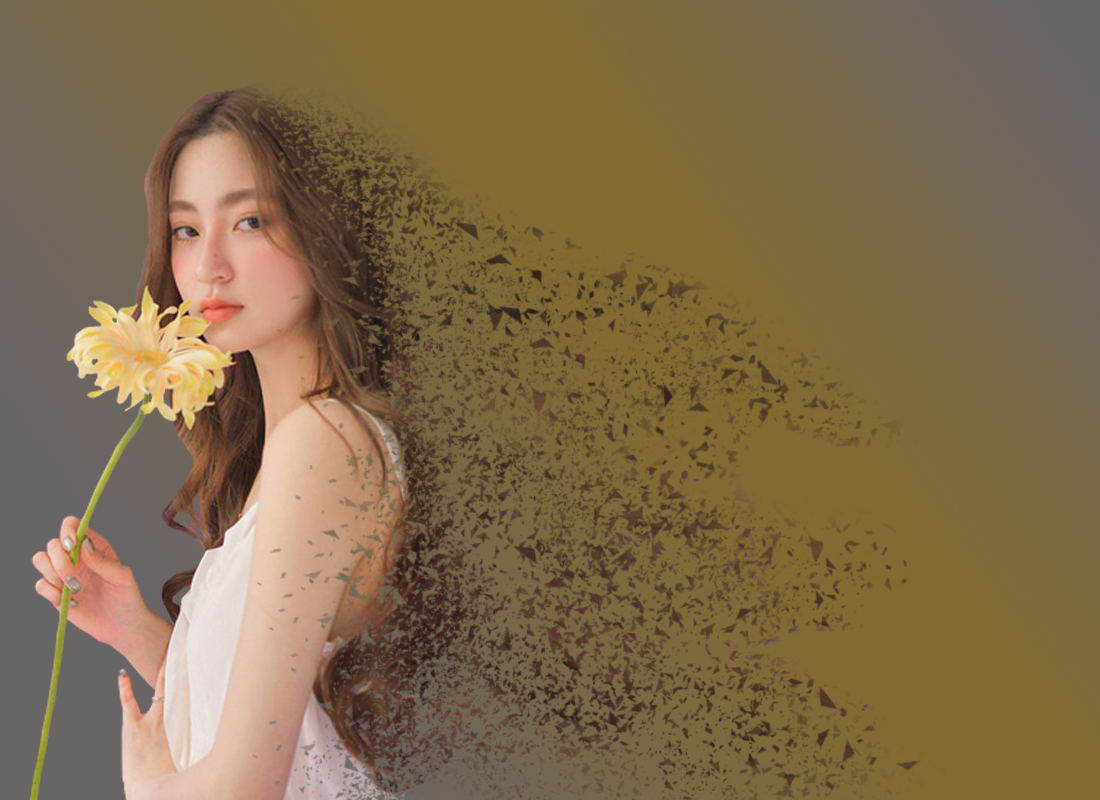
This is the image I'm going to work with
I created a canvas with enough space behind the woman to create the dispersion pattern.

The next thing you want to do is add a layer and create a background color, I threw a gradient on mine so it's easier to see what's happening. Then duplicate your PNG image. Choose the bottom image of your PNG and go to the Filter tab and pick liquify.
This is the window that will open -

Use the Forward Warp tool (it's the little hand at the top of the tool menu on the far left) and 'drag' the back side of the image outward. This is what will allow you to create the broken (or dispersed) pieces of the image.
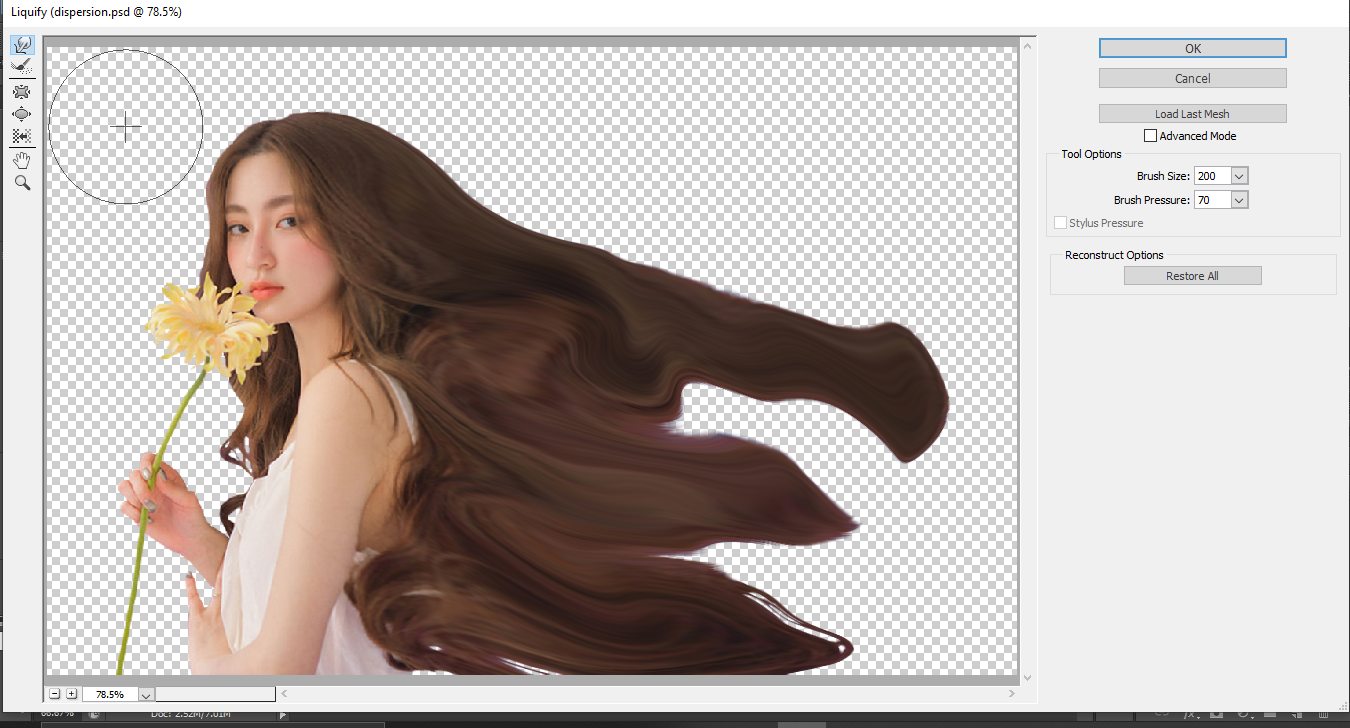
There is no right or wrong way to pull the image. You aren't going to see this entire image. This is what will allow you to create the dispersion effect. When you're done click OK and the window will close.
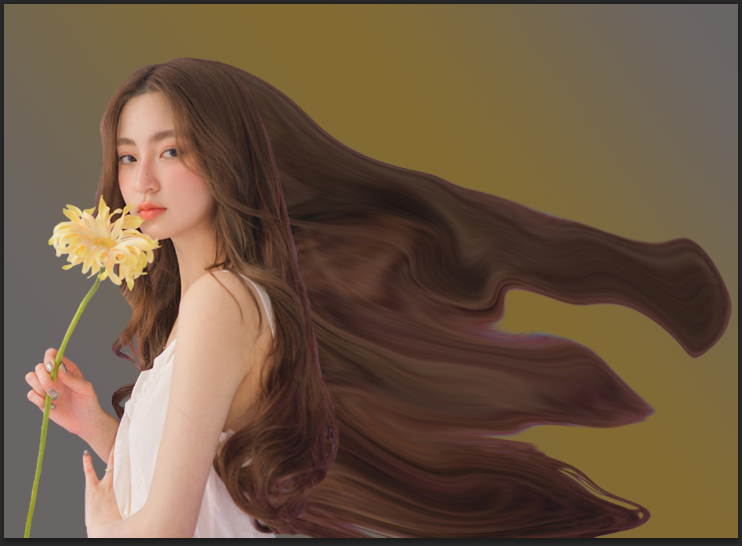
You can see where the top image ends and the bottom one begins. Don't worry we'll fix that. Add a layer mask to both your PNG images. Click on the mask for the bottom image and fill it with black. Leave the top one white. This will reverse how you paint on the layer mask, white will reveal things and black will cover things back up.

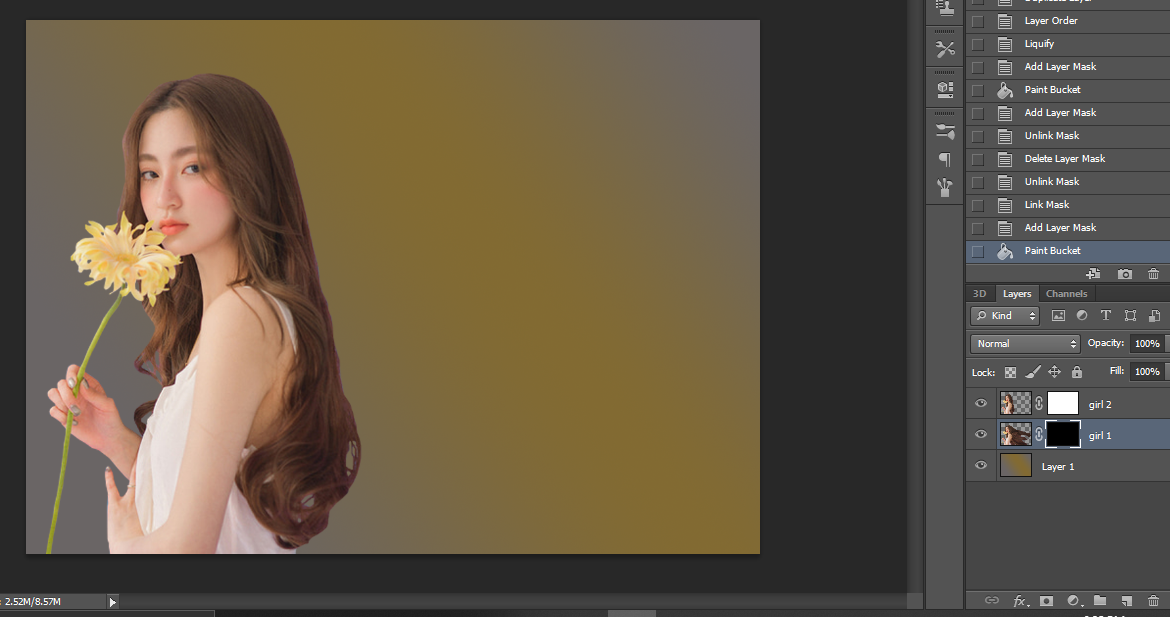
You can see when you fill in the layer mask with black it hides the image.
Next pick a brush, it doesn't matter which one you use as long as it gives a 'broken' effect when painted. You can use several different brushes of varying sizes and/or opacity to create different effects. Start with the top layer that has the white layer mask, make certain you click on the layer mask before you begin erasing the edges of the image.

Next, switch the brush to white and begin uncovering the image with the black layer mask.

Now that we have the basis for our dispersion we can refine it. Set your brush to a lower opacity and make the edge less straight and severe. Soften them up and make it appear more as if it's dispersing over the canvas. Since we're using the layer masks you can go back and erase or add as needed to achieve the look you want. You can fill things back in, redo them and fix it as many times as you want until you get the look you want.
This my the final image -
And just for the heck of it, I made a cover
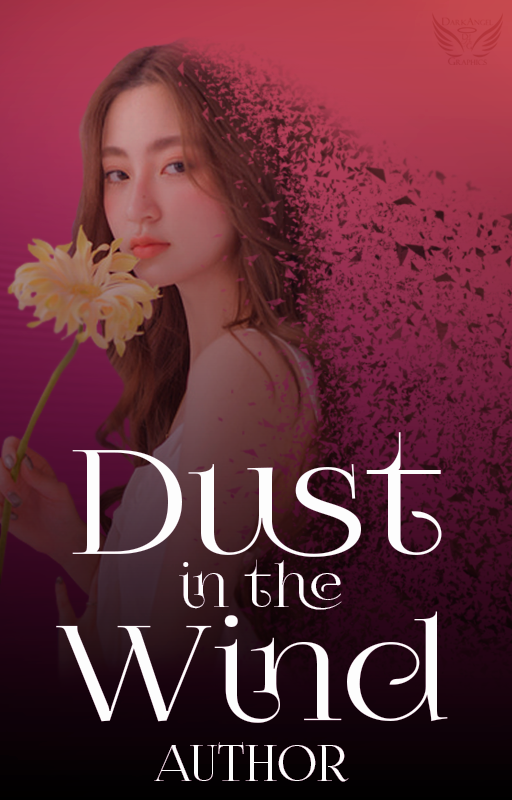
The background doesn't make me happy but after half an hour spent trying to find one and another twenty minutes fighting with my computer about resizing it I wasn't about to go find another one lol. It's just for a display so it didn't really matter in the end.
Bạn đang đọc truyện trên: Truyen247.Pro