
Behind the Mask - Layer Mask
I've mentioned layer masks a few times so let's discuss them a little bit more.
A layer mask is a tool that is offered in a few programs though it tends to work slightly differently from program to program. I use it quite a bit in Photoshop but I never did get the hang of it in Gimp.
What a layer mask does is allow you to erase things from an image and if you mess up you can easily put it back. It makes it very easy to adjust layers. In Photoshop you add your layer mask and then use your brush tool. If you have the color set to black it will erase, if it's set to white it will put back what you erased. The cool thing about a layer mask is you can make adjustments to text without rasterizing the layer. Which means you can go back and change it if need be. I use it a lot, especially when I need to change the color of things, I add a color layer, clip it, then erase using the layer mask to make certain only what I want colored gets colored. It's nice because if I decide at some point I don't like the color adjustment I did, it's easy to change it, whereas if you adjusted the actual color on the base image you'd have to begin again.
One of the things I use the layer mask for a lot is changing hair color or eye color.
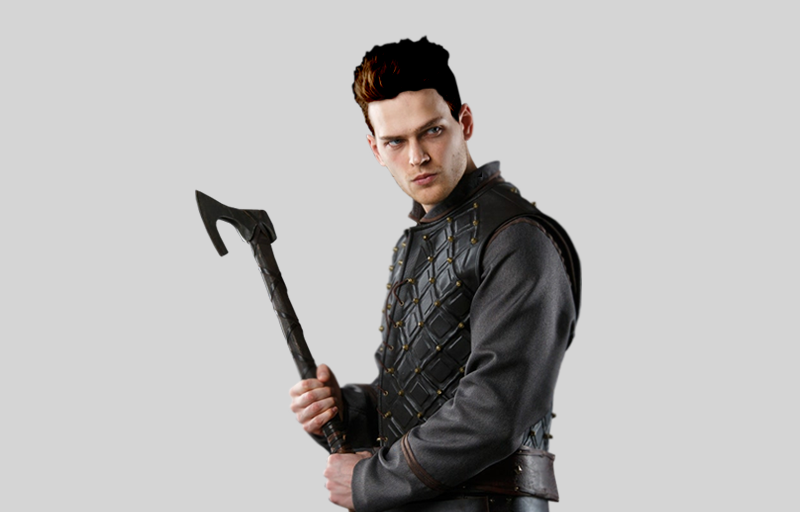
I used this PNG on a recent cover and one of the things the customer said was a must, the guy had to have black hair. He also needed to have a sword. It was difficult to find an image that would work so I had to get creative.

Now it isn't as simple as 'slap a black layer on him and poof his hair is black'. It takes a lot of work to get it to look as close to natural as you can get.

The layer mask is indicated by the white square attached to the image. The black spots you see on them are the places where I erased things. I also used a layer mask to erase the ax where it extended above his hand so I could replace it with a sword.
The layers within the bracket are all the layers for his hair. You'll notice there are two layers for the PNG of the man. The layer within the bracket Is a desaturated duplicate with everything erased (using the layer mask) except his hair. Why did I do this? Because it's easier sometimes to change certain colors if the original image is black and white. Not always, but many times. His hair was blond so when I overlaid the black layers it just wouldn't turn black.

The first thing I did was create a new layer and make it black. Right now he looks like he's in witness protection.

The next thing I did was create a clipping mask. I essentially pinned the layer to the PNG so it conforms to the edges. His face is still a problem so we need to erase the black over his face. To do that I fade the layer so I can see his face beneath it and I use the brush tool to erase all the black that isn't on his hair. You need to remember to click on the layer mask before you begin using the brush tool or you'll simply paint on the image.

All right, so now the black is only on his hair but he looks like a doll with plastic hair. It's not natural in the least. That is where the blend modes comes in.
You can see his hair won't turn black it had strange red highlights because of the blending of the blond and the black layer. So then I duplicated the PNG, desaturated it, added a layer mask, and erased everything except his hair.

Now he kinda looks like an anime character, but we have a good base to work from. The nice thing about doing a duplicate layer is it will match up because it's the same layer. If you do need to resize anything make certain you click all the layers involved before resizing.
It required several layers to get his hair to turn a decent color without him looking plastic. This is a very simple explanation, there was a lot of messing with things to get everything the way I wanted it to look, but it gives you an idea of how things are done.

The first layer made his hair slightly darker. I duplicated the color layer before changing the blending options in case I needed another one, this way I didn't have to layer mask again. The first layer is set to soft light at 50% opacity

The second layer is also set to soft light and is at 55% opacity. His hair is a little darker. We're closing in on black. Again, I duplicated the layer before changing anything just in case.

And the last layer. This one is also soft light and it's set to 65% opacity. A lot of the time when I do hair color the layers will end up set to different blending modes in order to get it to look how I want it. On the cover that I used this image on I also altered the hair color of the woman. That one required two layers with one set to multiply and the other set to hard light.
It's a lot of trial and error when you want to change things like this but the layer mask helps make things a little easier. Can you imagine having to paint things over and over to do something like this?
You can use the layer mask to change eye color as well. Paint then erase to get it exactly where you want the color and also erase so the pupil shows.
The layer mask can help out in a lot of ways when designing. So play with it and have some fun.
Bạn đang đọc truyện trên: Truyen247.Pro