2 | tilted font
Apps you'll need
Phonto
Pixlr
To make this cover you must first start off with a close up picture of a model of whomever you choose. Start by opening the picture in Phonto. Click on the image and a small box should pop up that says Add Text, click on that and type in the first word or couple of words of your title.
Click done and your text should appear on the cover. You can adjust the size by clicking on the text and choosing the option size.
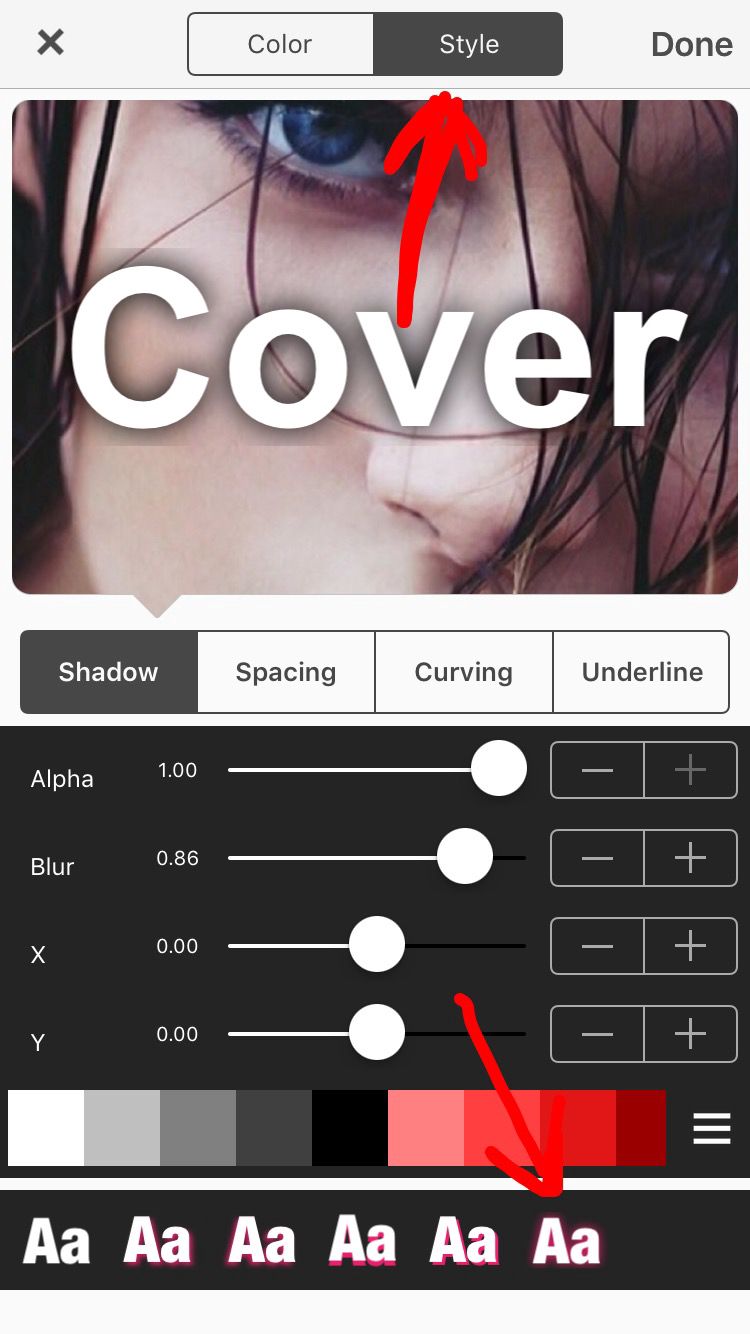
To change the color go to the style option and colors should appear. To create shadowing click the style option and then click style at the top. Once you click style again at the top, click the Aa with the shadowing of your choice but this is the shadow I used.
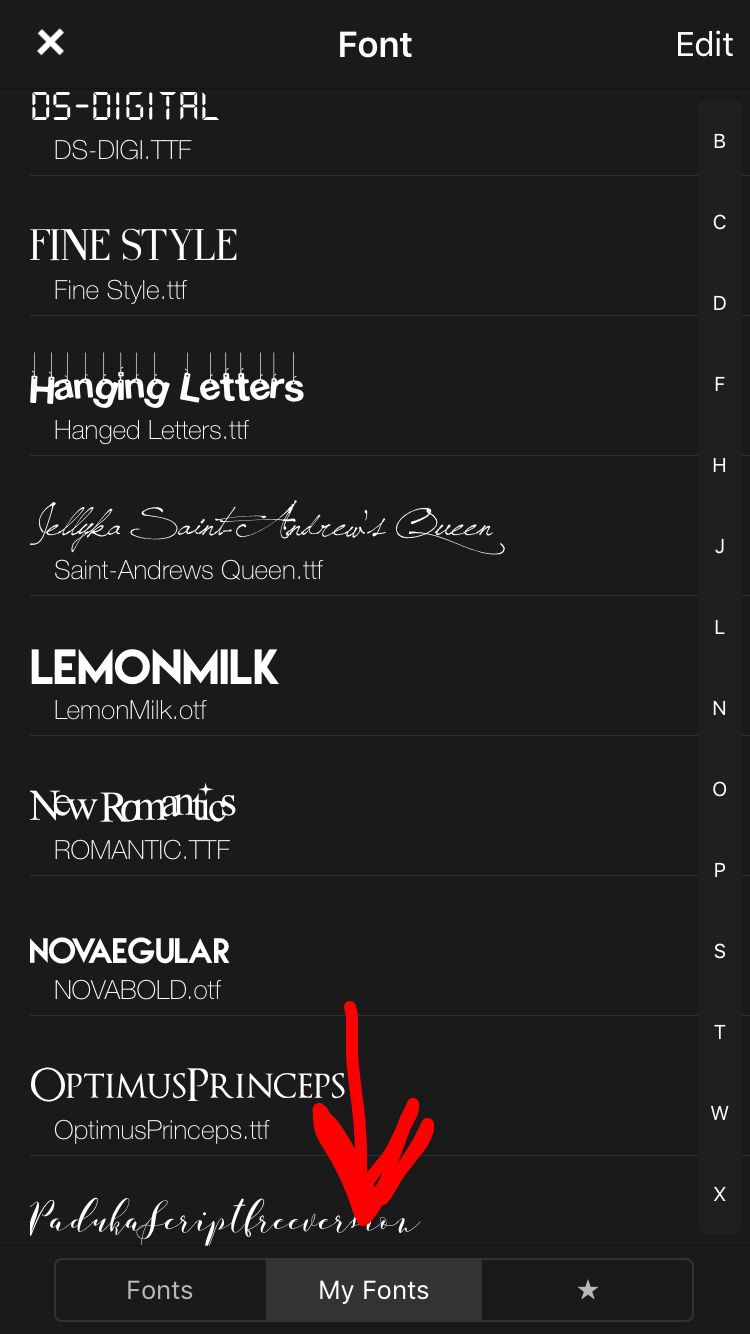
After you've done shadowing click done and you should come back to your cover. Click your text again and then click the option font. At the bottom below all the fonts click on 'my fonts' (make sure you downloaded the fonts from the previous chapter on to Phonto). Click on the font LemonMilk and then press done or it'll already exit out either way you'll end back up on your cover.
After you've changed the font you can adjust the size if you want. Click on your text again and then press tilt and tilt the image the way you would like it. I usually pick a line that appears in the face like the side of the nose.
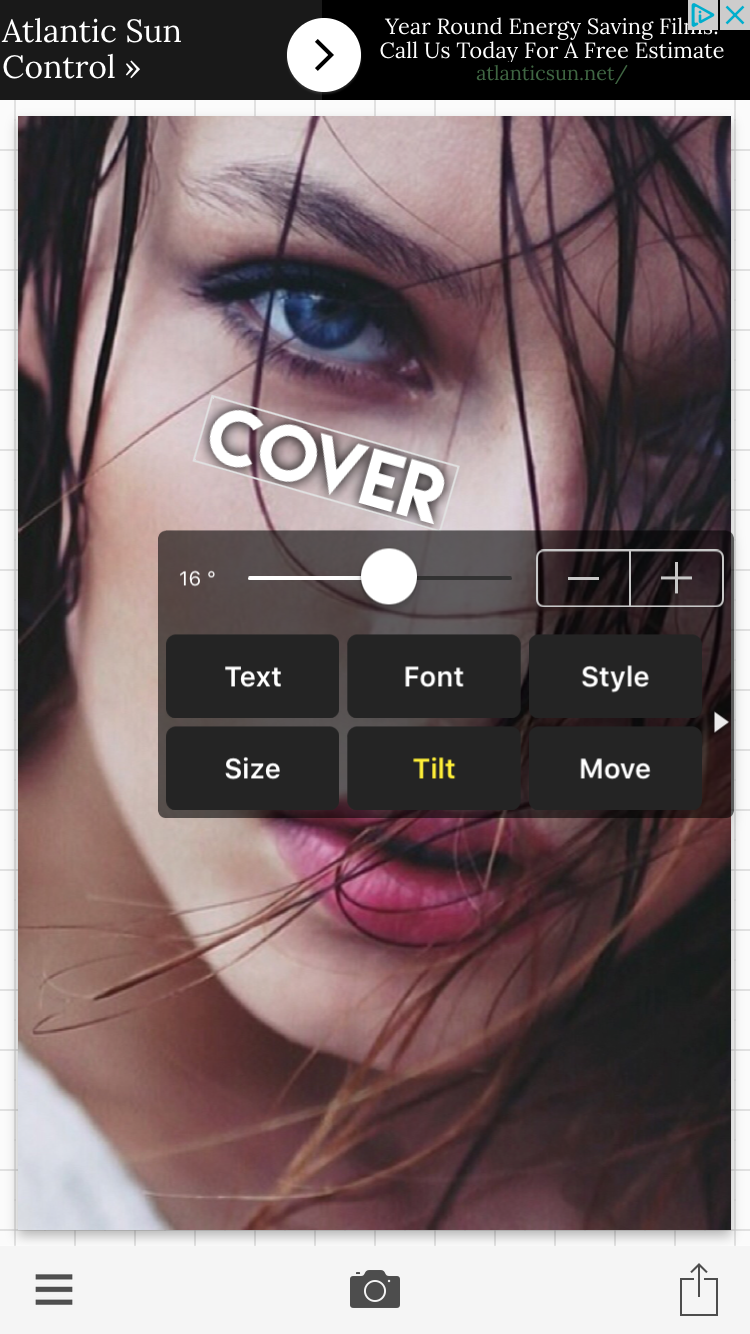
Repeat the same with the next part of your title and tilt it to match with your first part. Line it up with your previous text and make sure the size is the same or it won't look like this. There's numbers of degrees you tilt and the number next to the size changer that tells you the number and you can determine if both text are the same size and tilt angle.
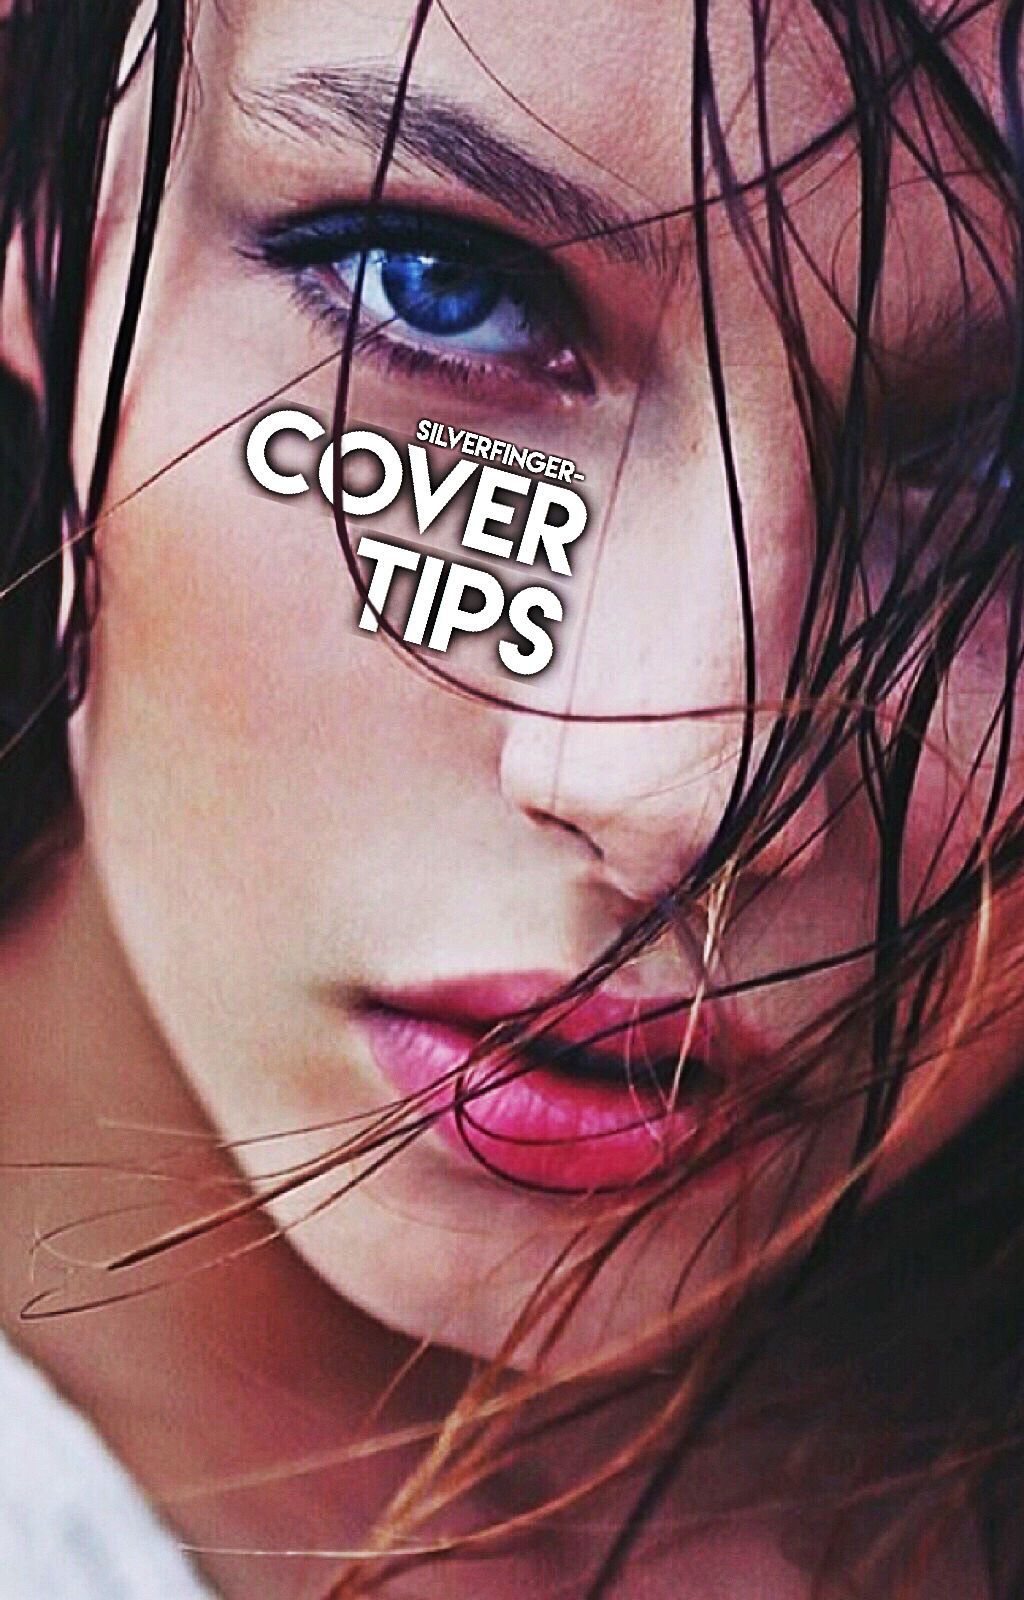
After everything it should look something like this.
If you want it to be like that then stop there or if you want the cool filter continue. Then save the cover and open it in Pixlr. Go to the option at the bottom of the screen that looks like two stacks of paper on top of each other and a bunch of filters should pop up.
Click Hagrid and adjust how much of the filter you want.

Click the check mark once you're done adjusting the filter. Then go to the icon that look like a brush and press doodle.
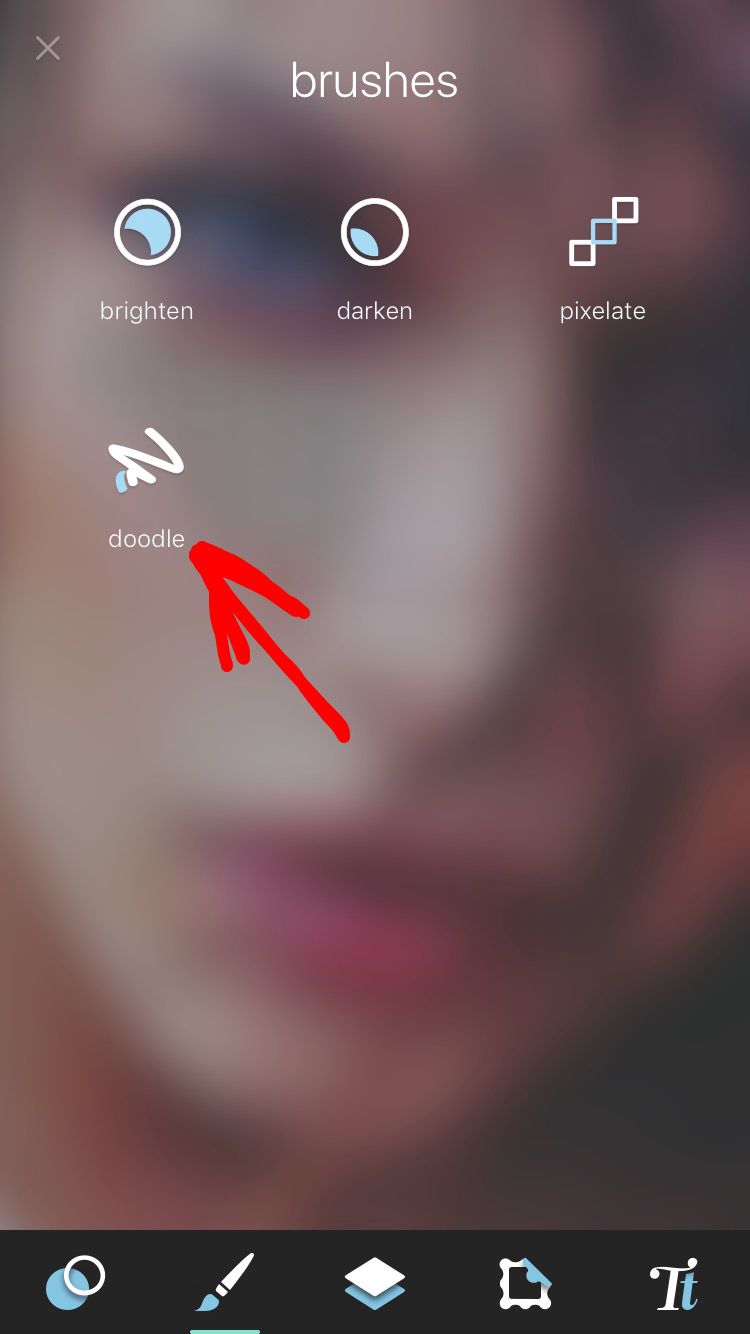
Make sure you're on brush and go to the icon that pops up and click the option Color. Then click the little button next to all the colors. I don't really know what it is so here's a picture.
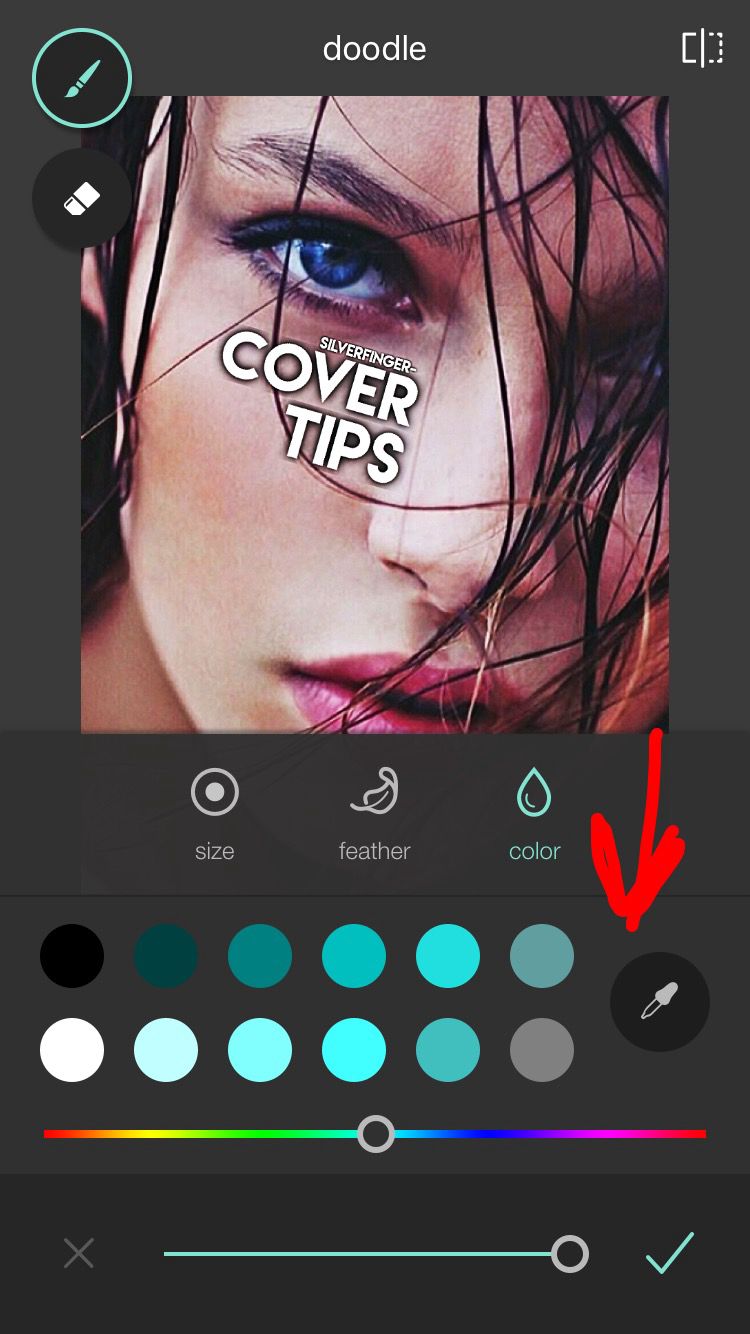
I would zoom in to get a better look. But then click the piece of hair you want running over the title and this should happen.
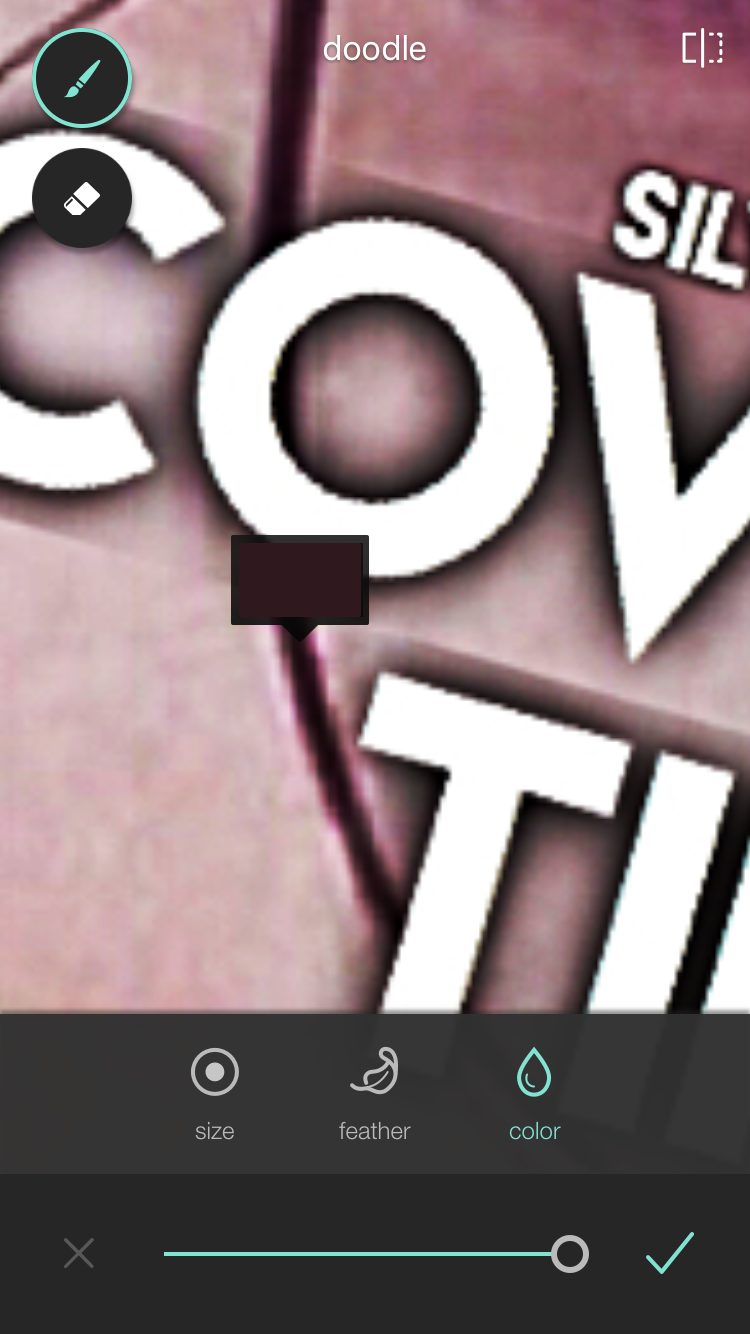
Let the little box fade once you've done that and then click size and adjust it so it's as big as the piece of hair. Press feather and put if up all the way.
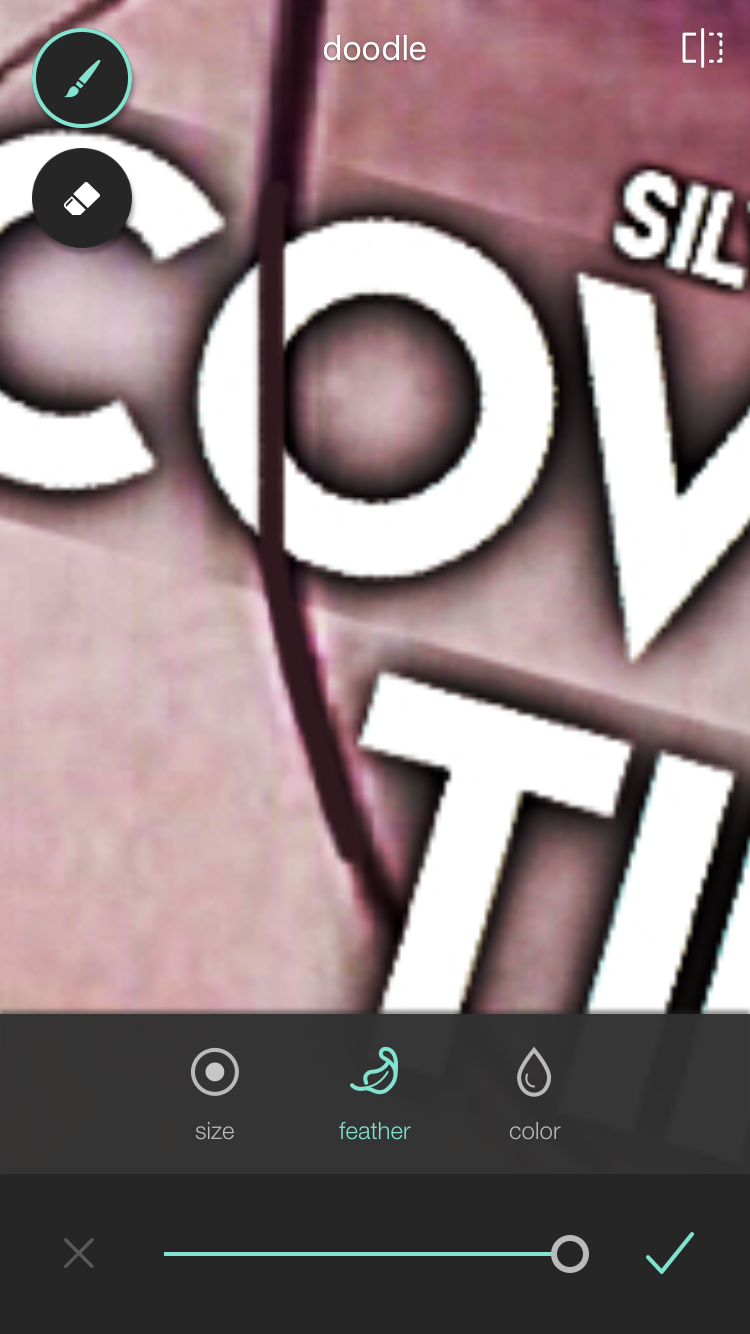
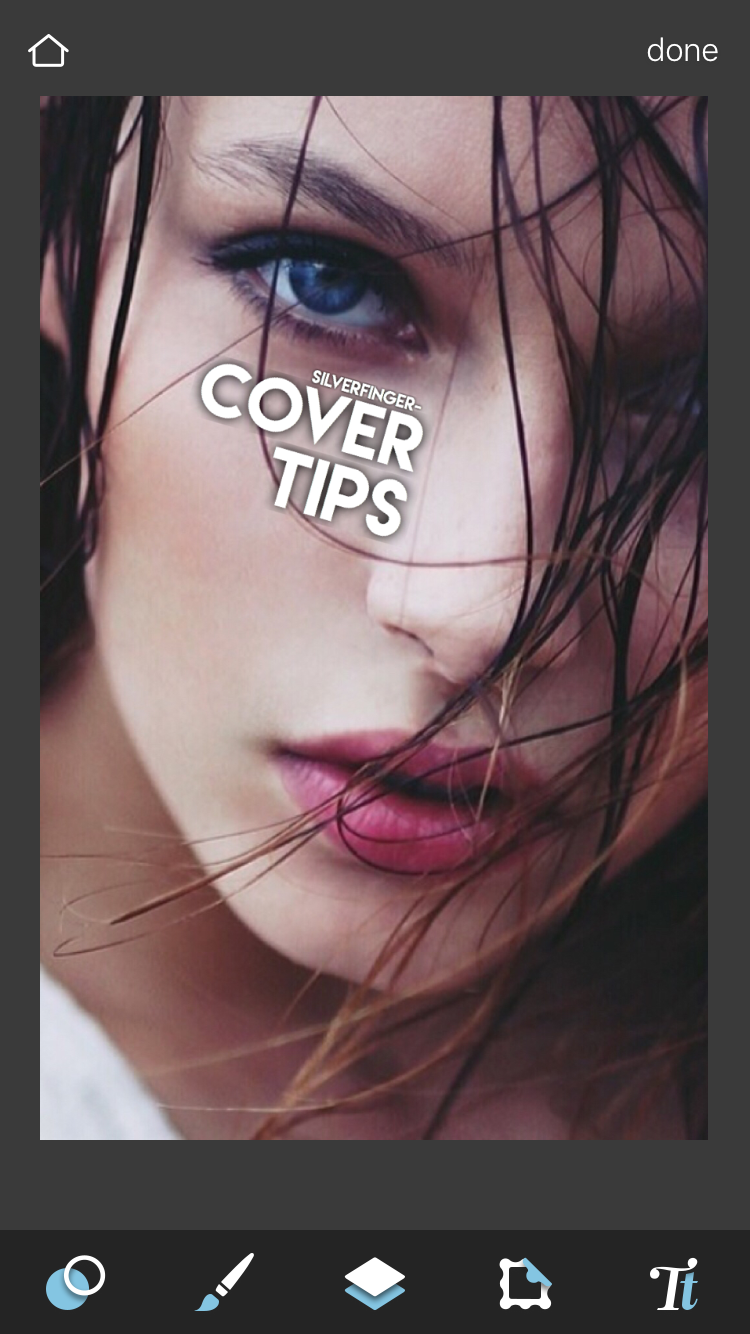
Then draw over the title from the start of the strand of hair across the letters to the end of the letters to connect it to the rest of the strand of hair. Click the check mark when you think you're done and it should look something like this.
I'll do a better tutorial on putting things over titles later but for now this is how I did it!
And if you use this tutorial to make your own cover, tag me in your story so I can see! I really want to see all your amazing covers!
Hope this helped!!!!!
~ Bri
Bạn đang đọc truyện trên: Truyen247.Pro