Headshots
Alright, you will need your supplies again, which should be self explanatory. Pencil, Sharpener, Music (for me), Paper, and something solid. I'll be using my mini desk again since I don't want to sit at the table.
And I'll be doing them all at once so I don't go over the photo limit.
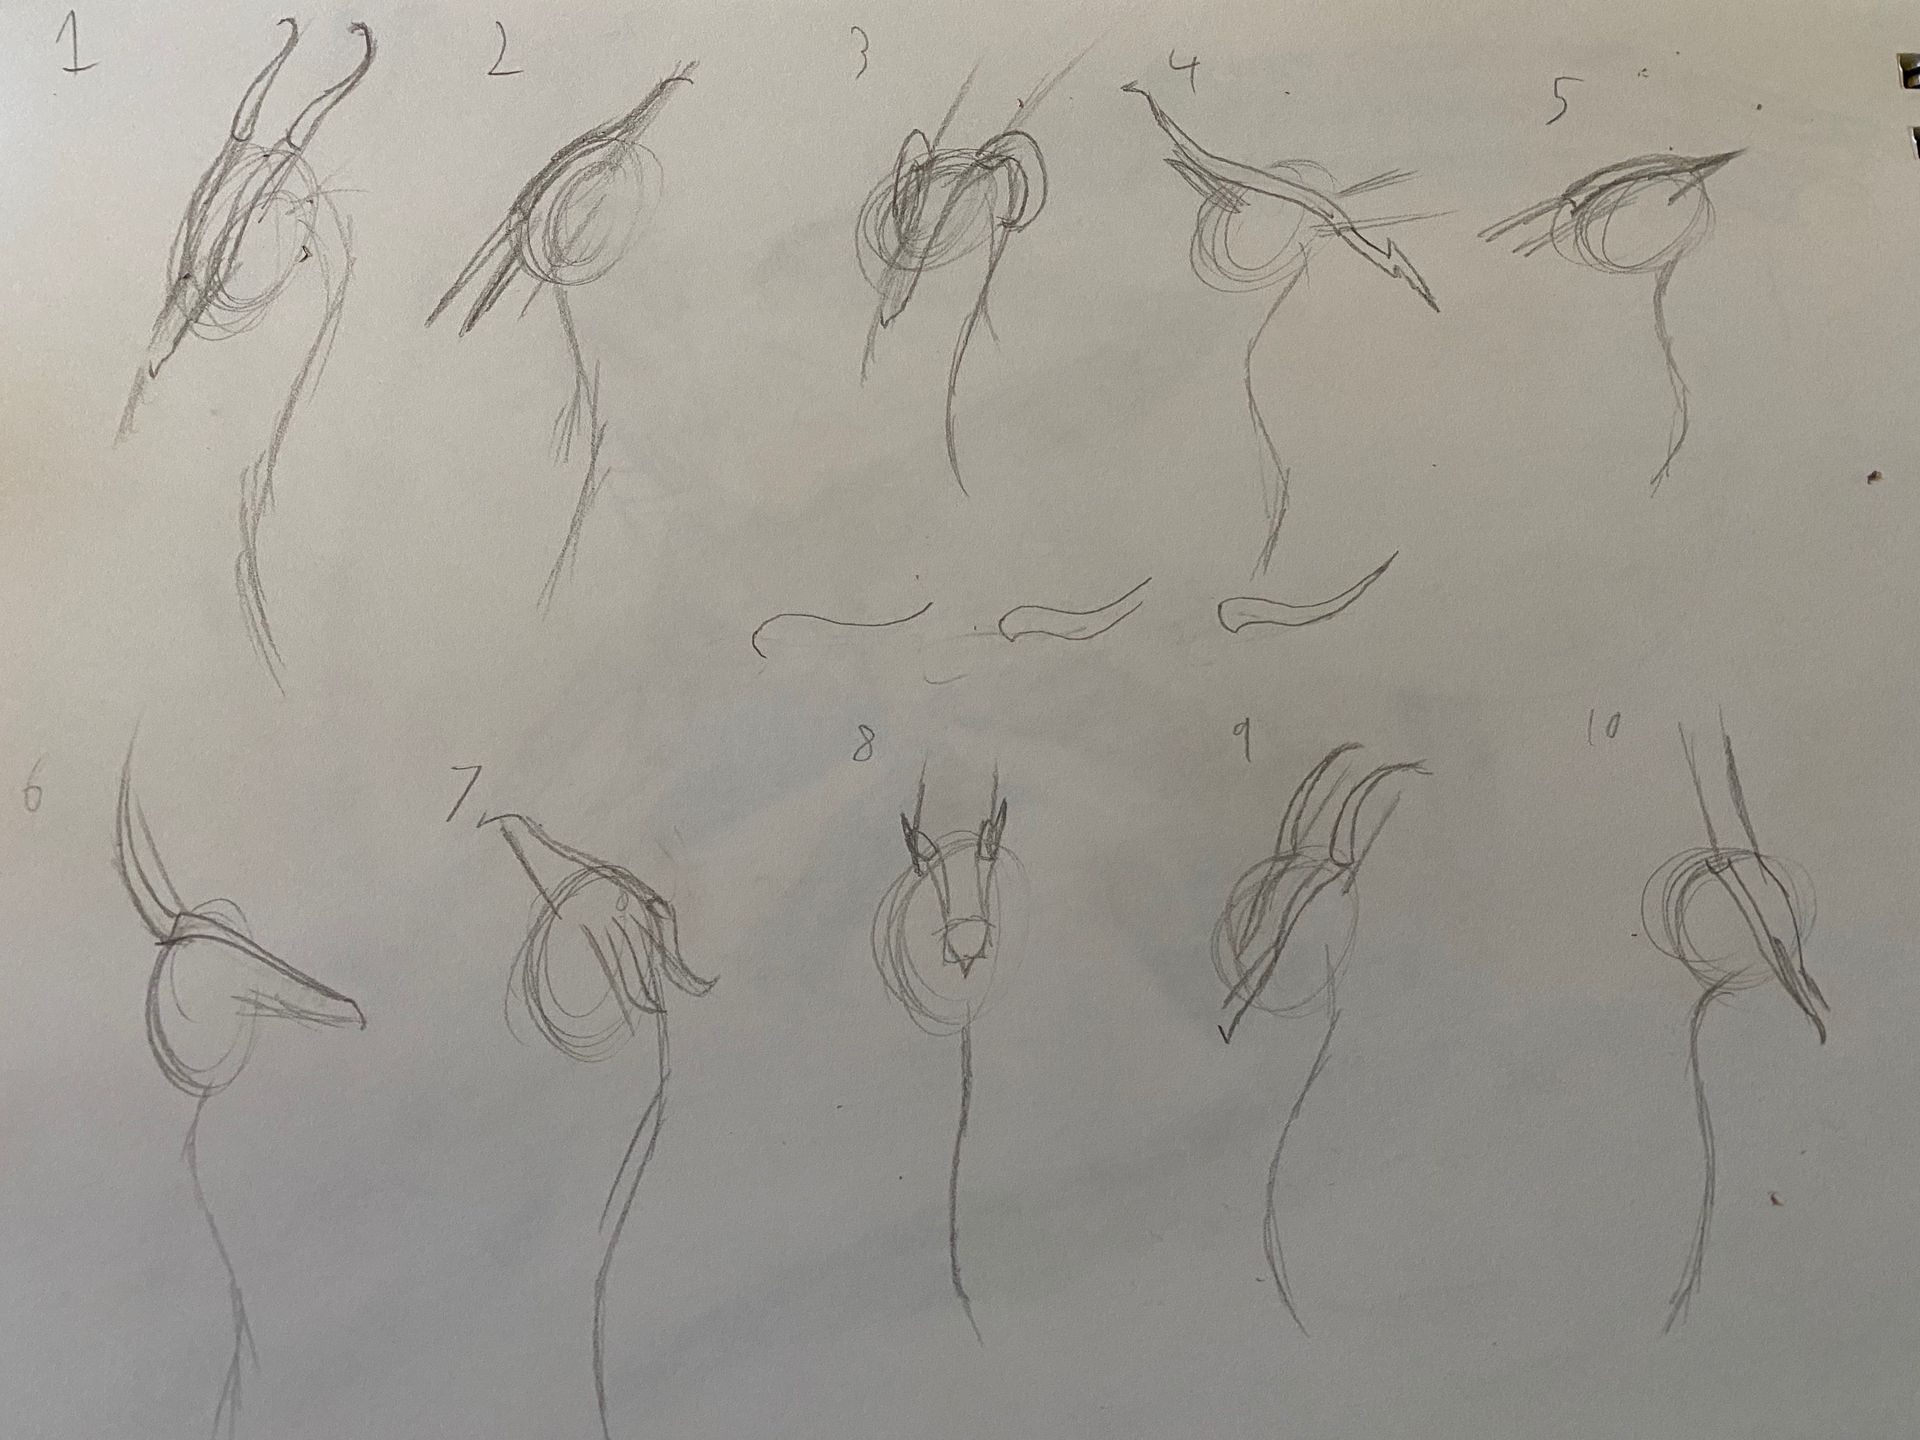
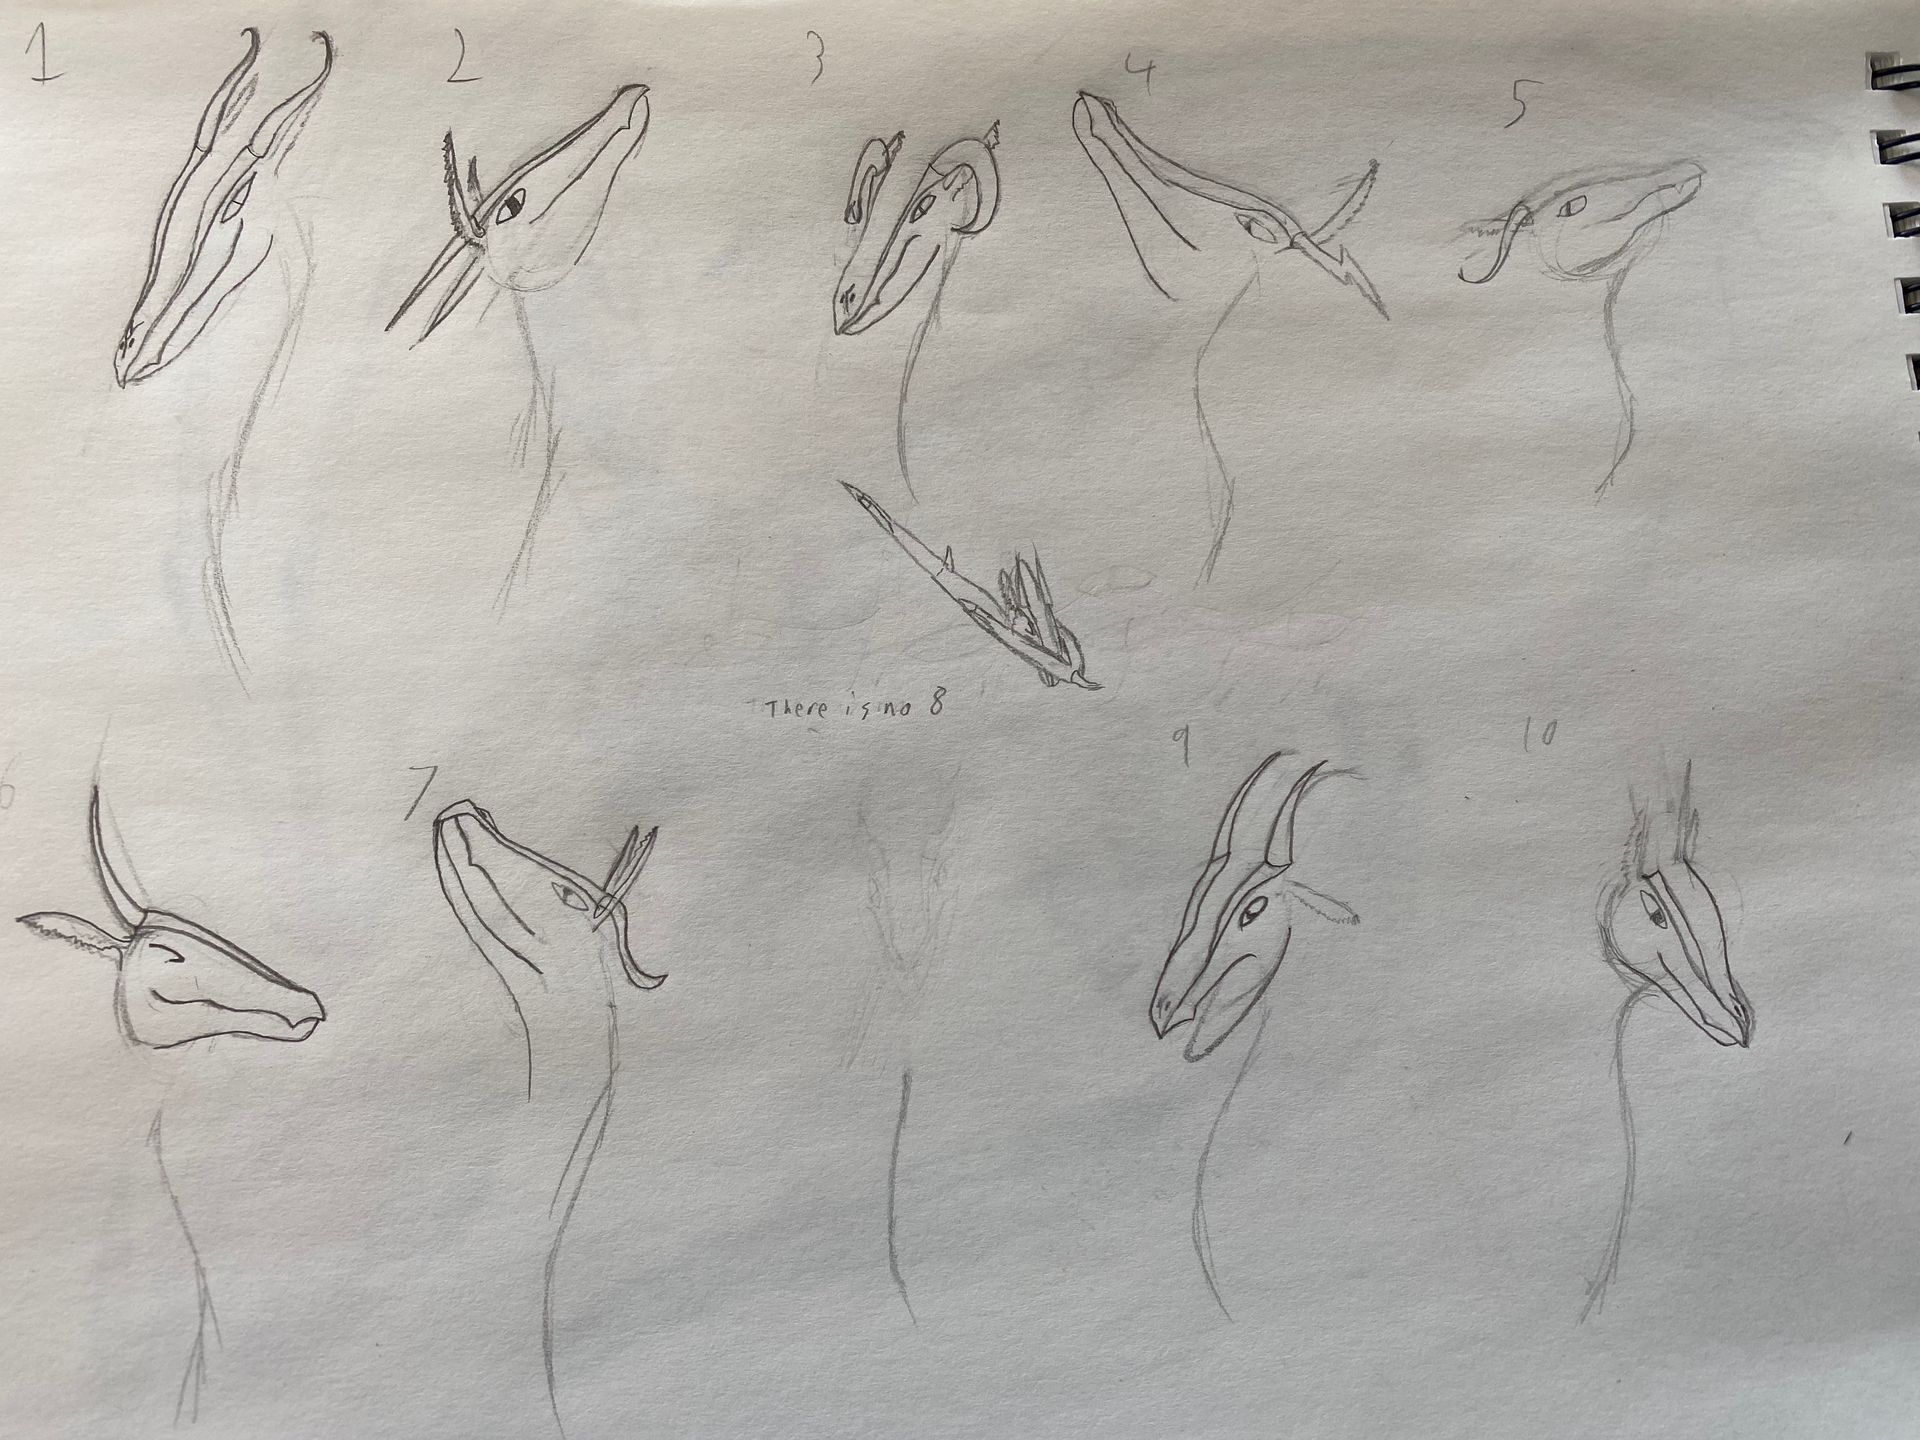
Step 1: get the super rough version done.
Remember, you just need the basics. Circle, something to help you know where the face is looking, and a line for the neck.
That's all you need.
And the only reason the first tree have a smaller circle was that I underestimated the size each will take.

Step 2: Eye ridge.
In the middle I did a quick step-by-step of how to get the eye ridge right, but this will help set the direction, position, and eye placement for the dragon as well as a start to the mouth.

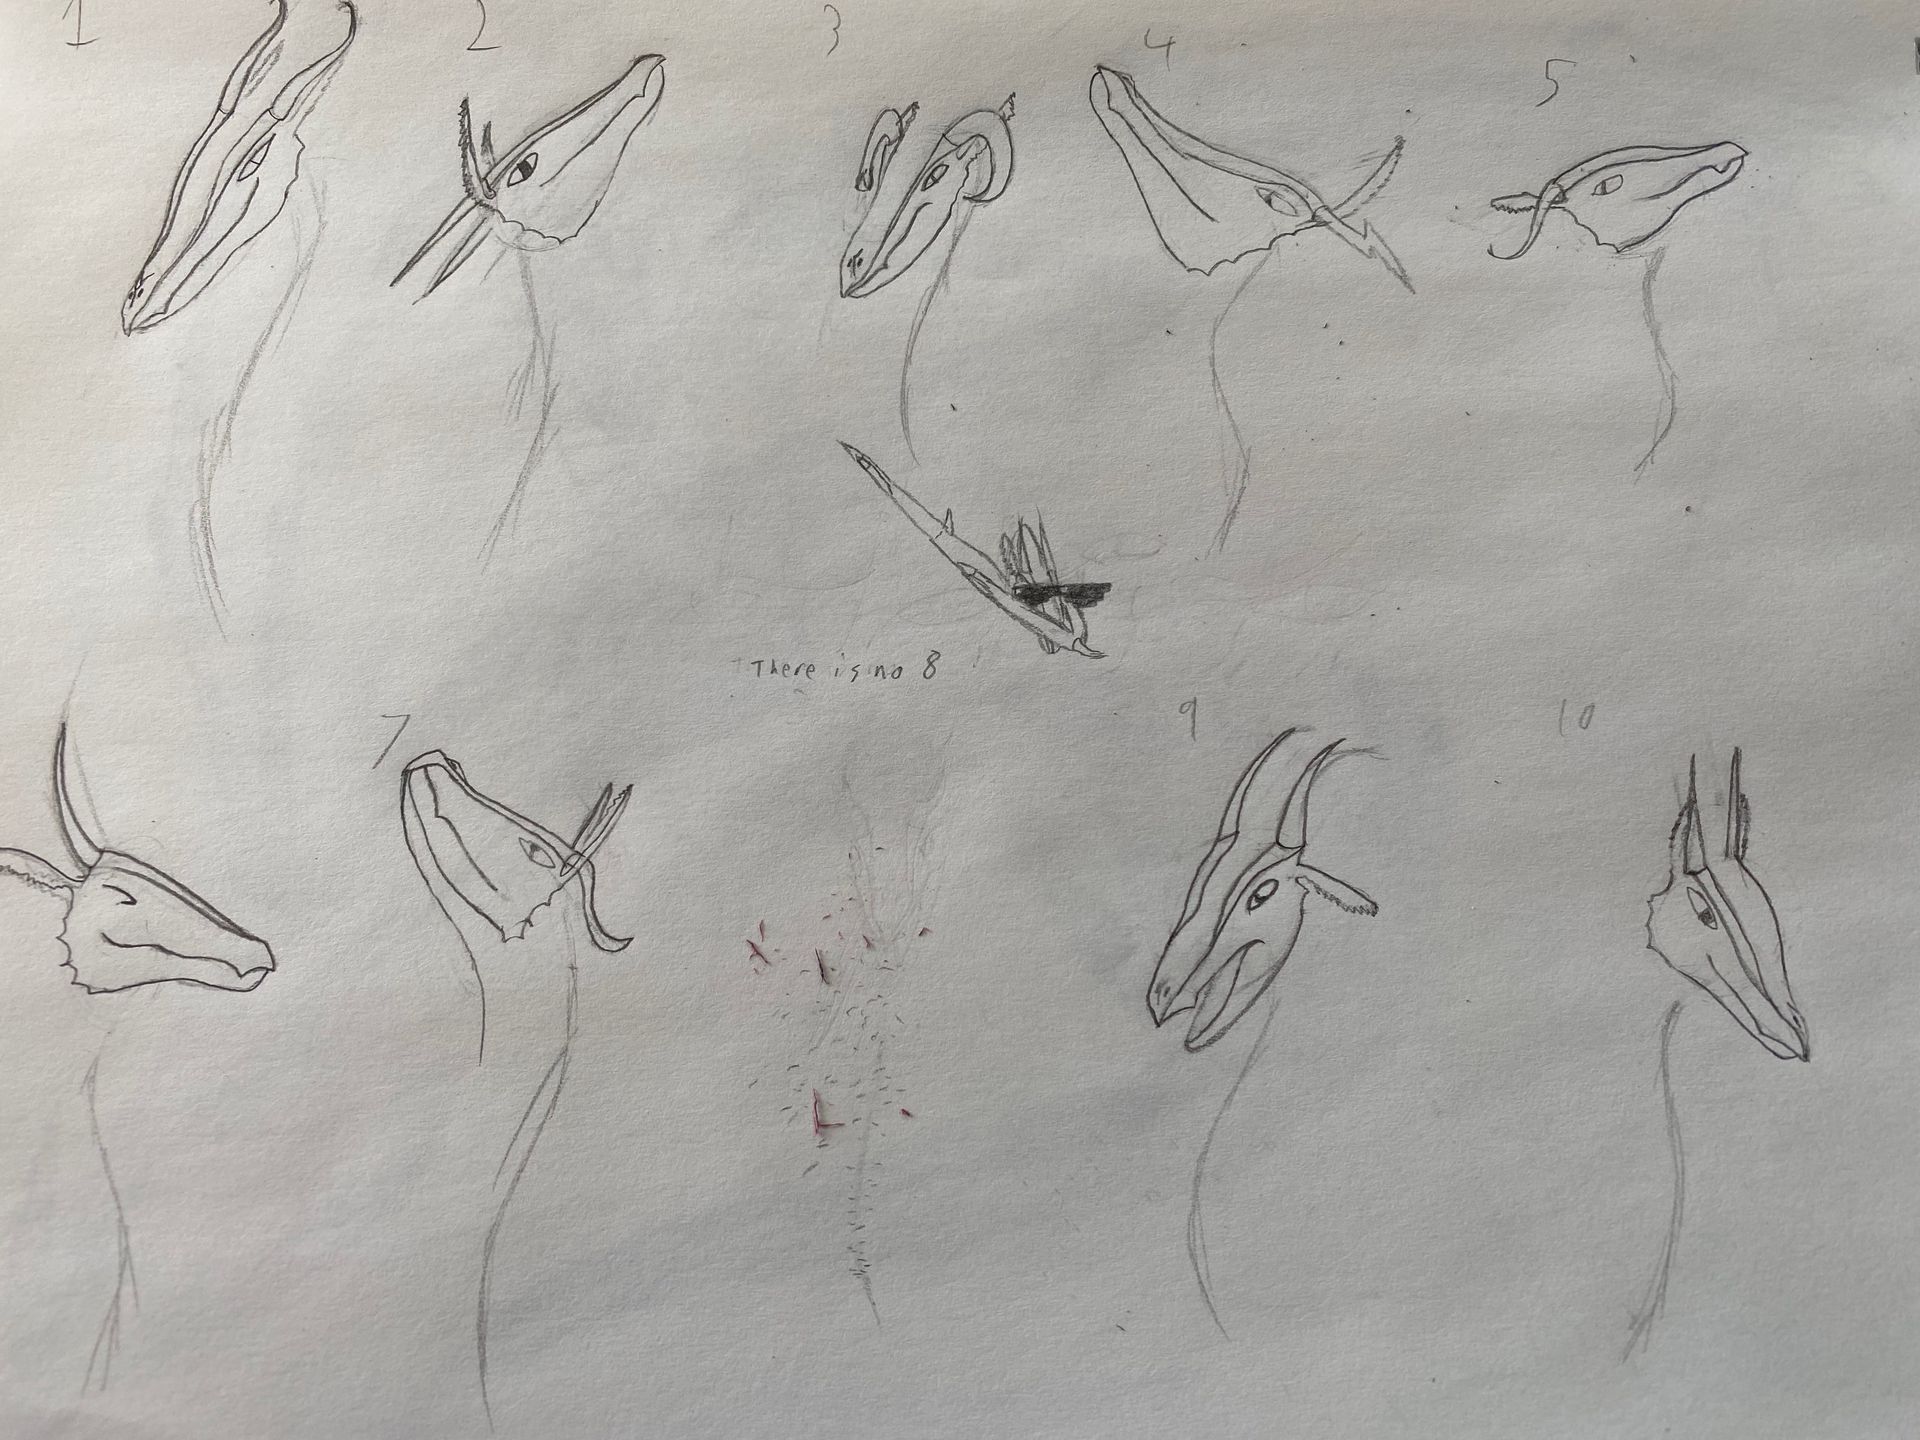
Step 3: Finish the beak and add the horns. The horns are where you can really get creative and help give a personality to your dragon.
Step four: Add the jawline. I start at the bottom or a touch above the end and head towards the eye area. About 1/4 of the way there I add a tooth (or I completely forget about it), before continuing to near the curve of the ridge.
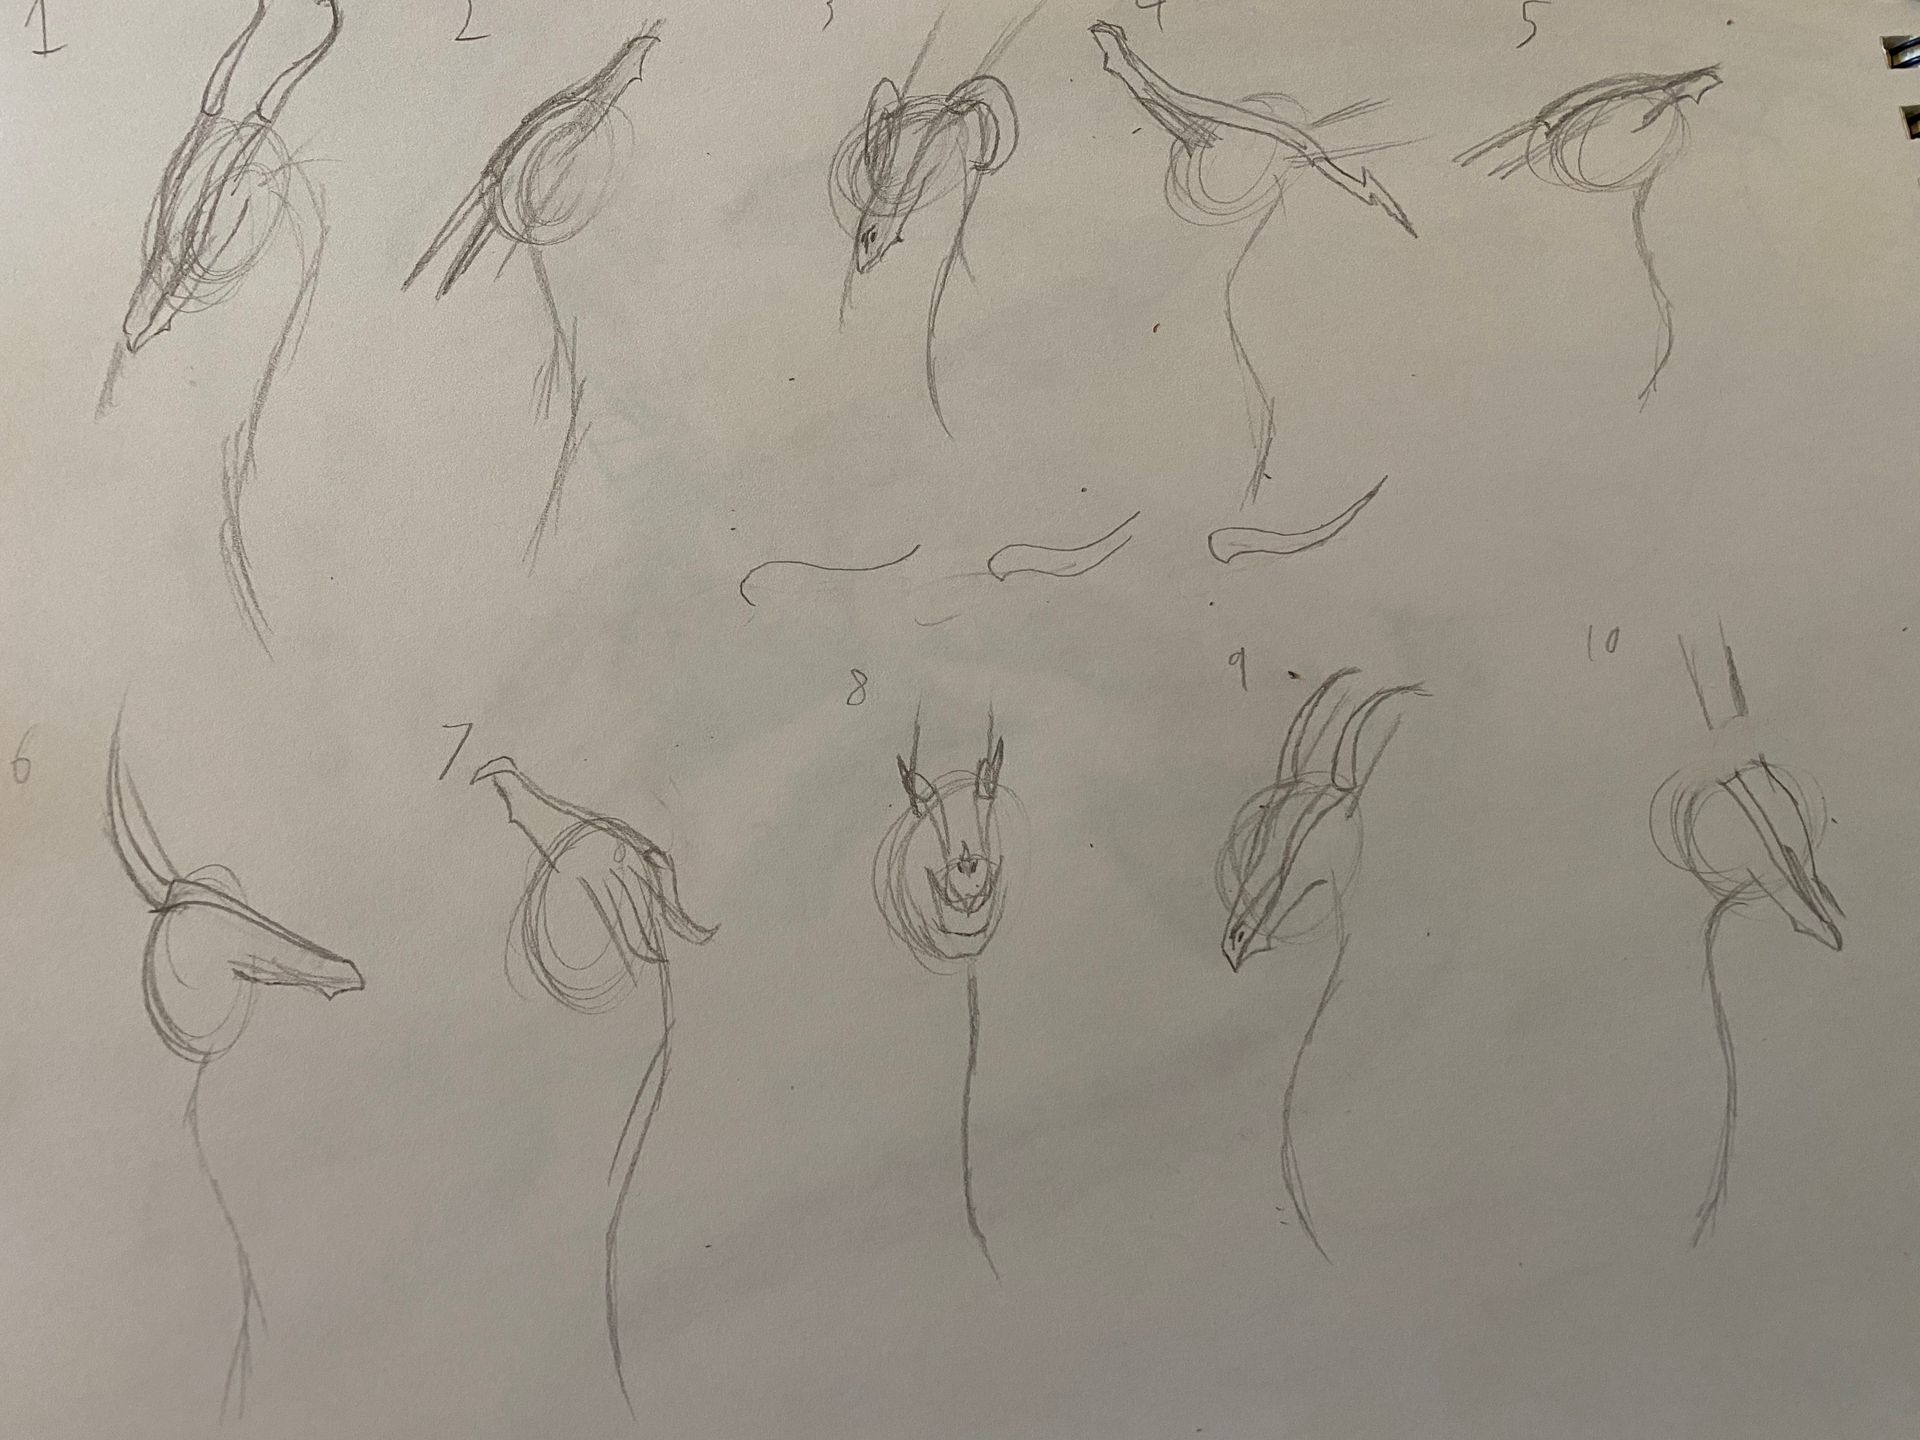
Step 5: Finish the jawbone.
On average I start where the jawline is, (#6 would be the best help for this step)
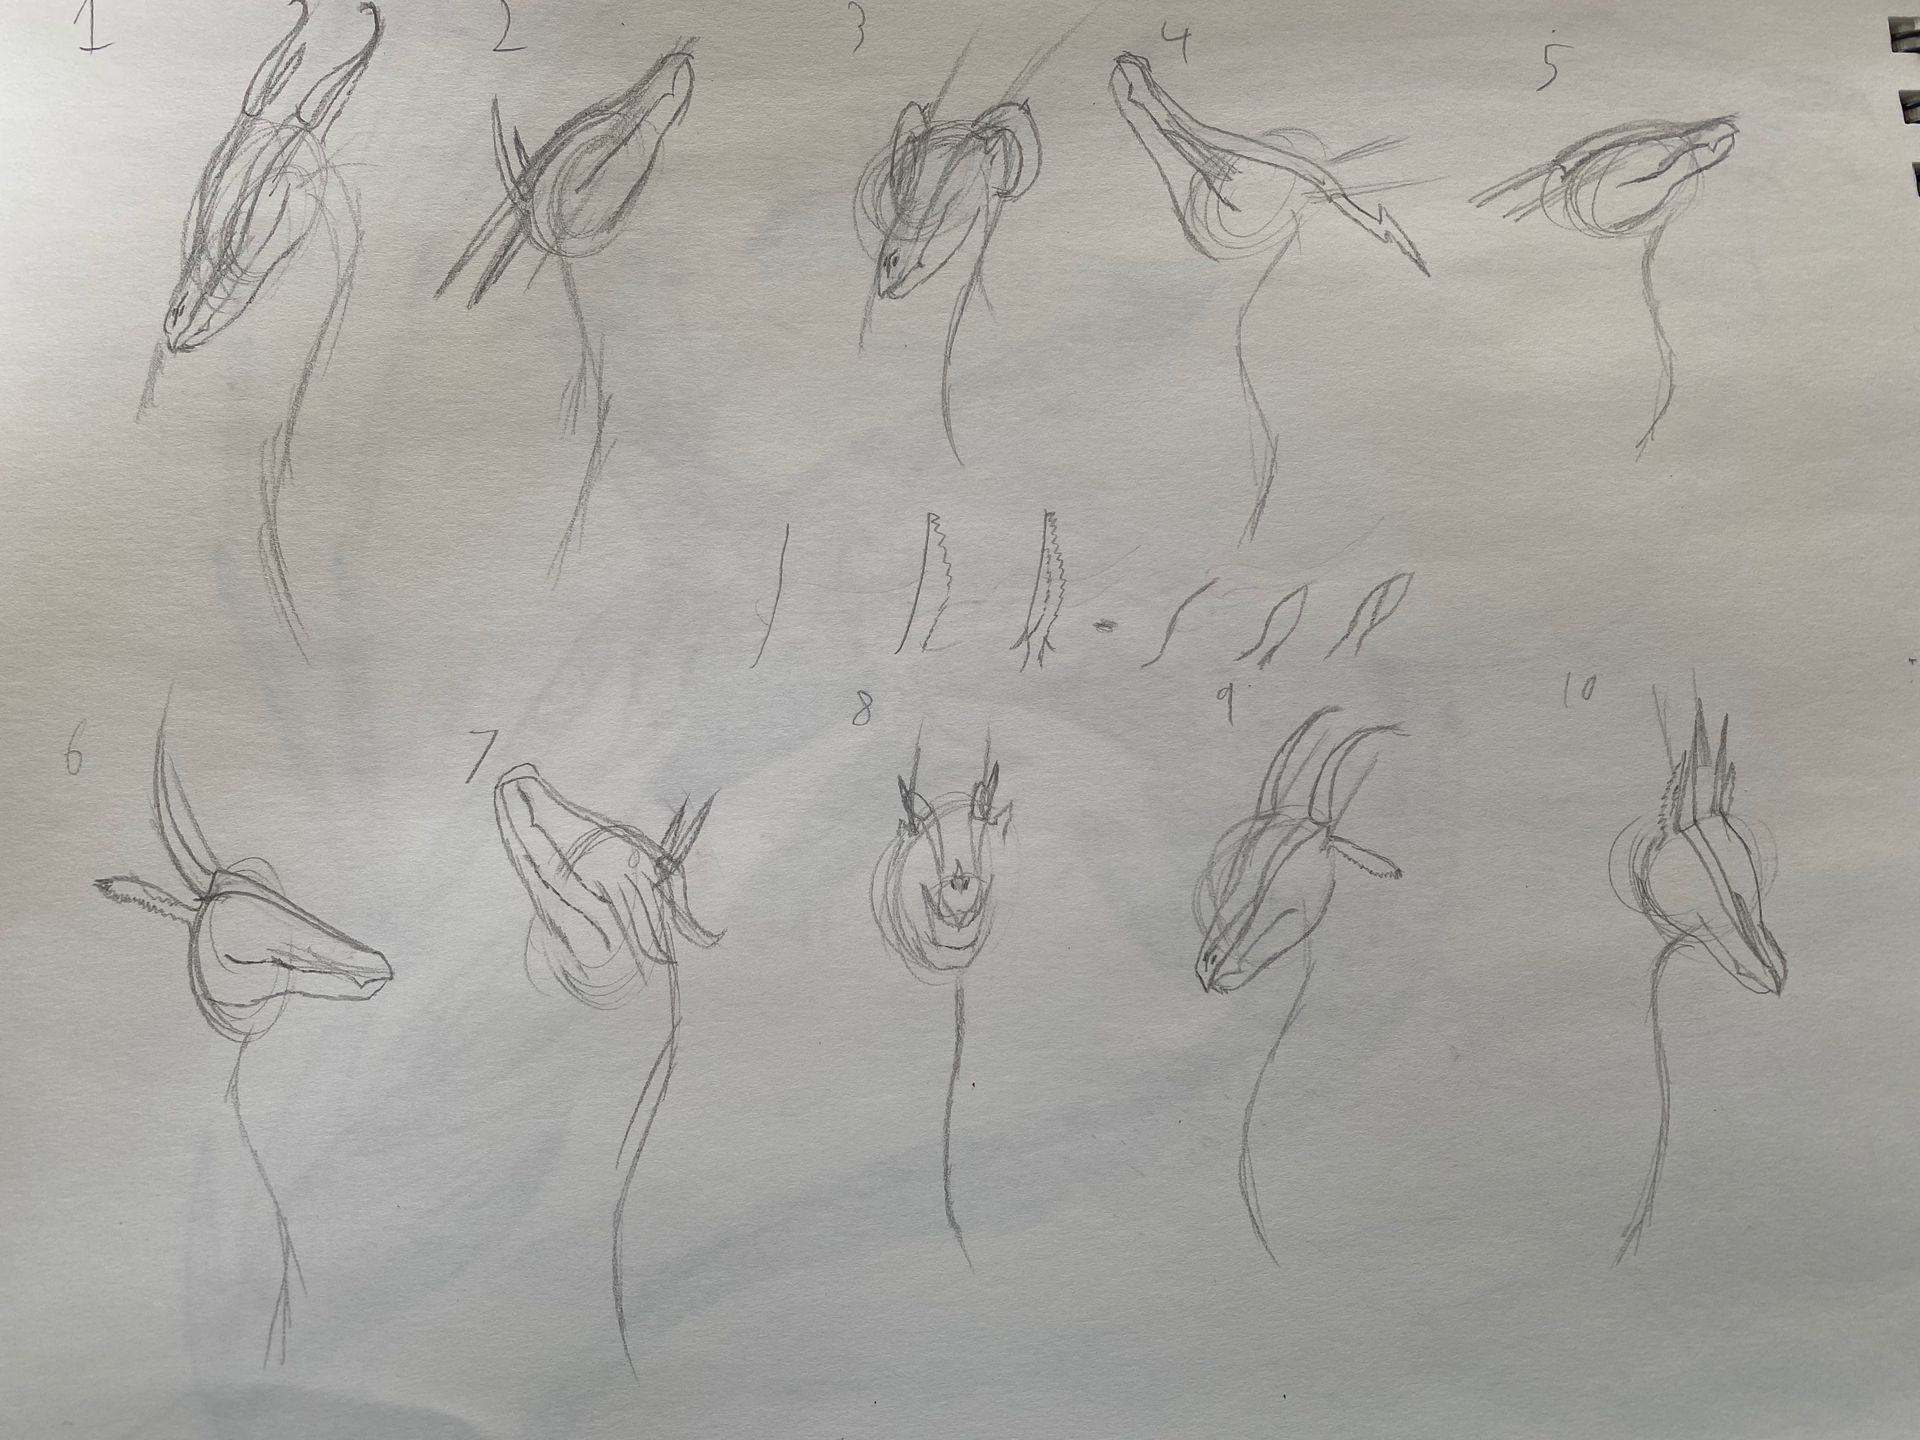
Step 6: Eyes and ears.
I like to do my ears fluffy, and the quick peek at this is in step 5. This middle section is a very basic eye.
Along with how I do the eye, I can also add to dragon's mood by positioning the ears and doing
a small upward or downward curve at the end of the jawline.
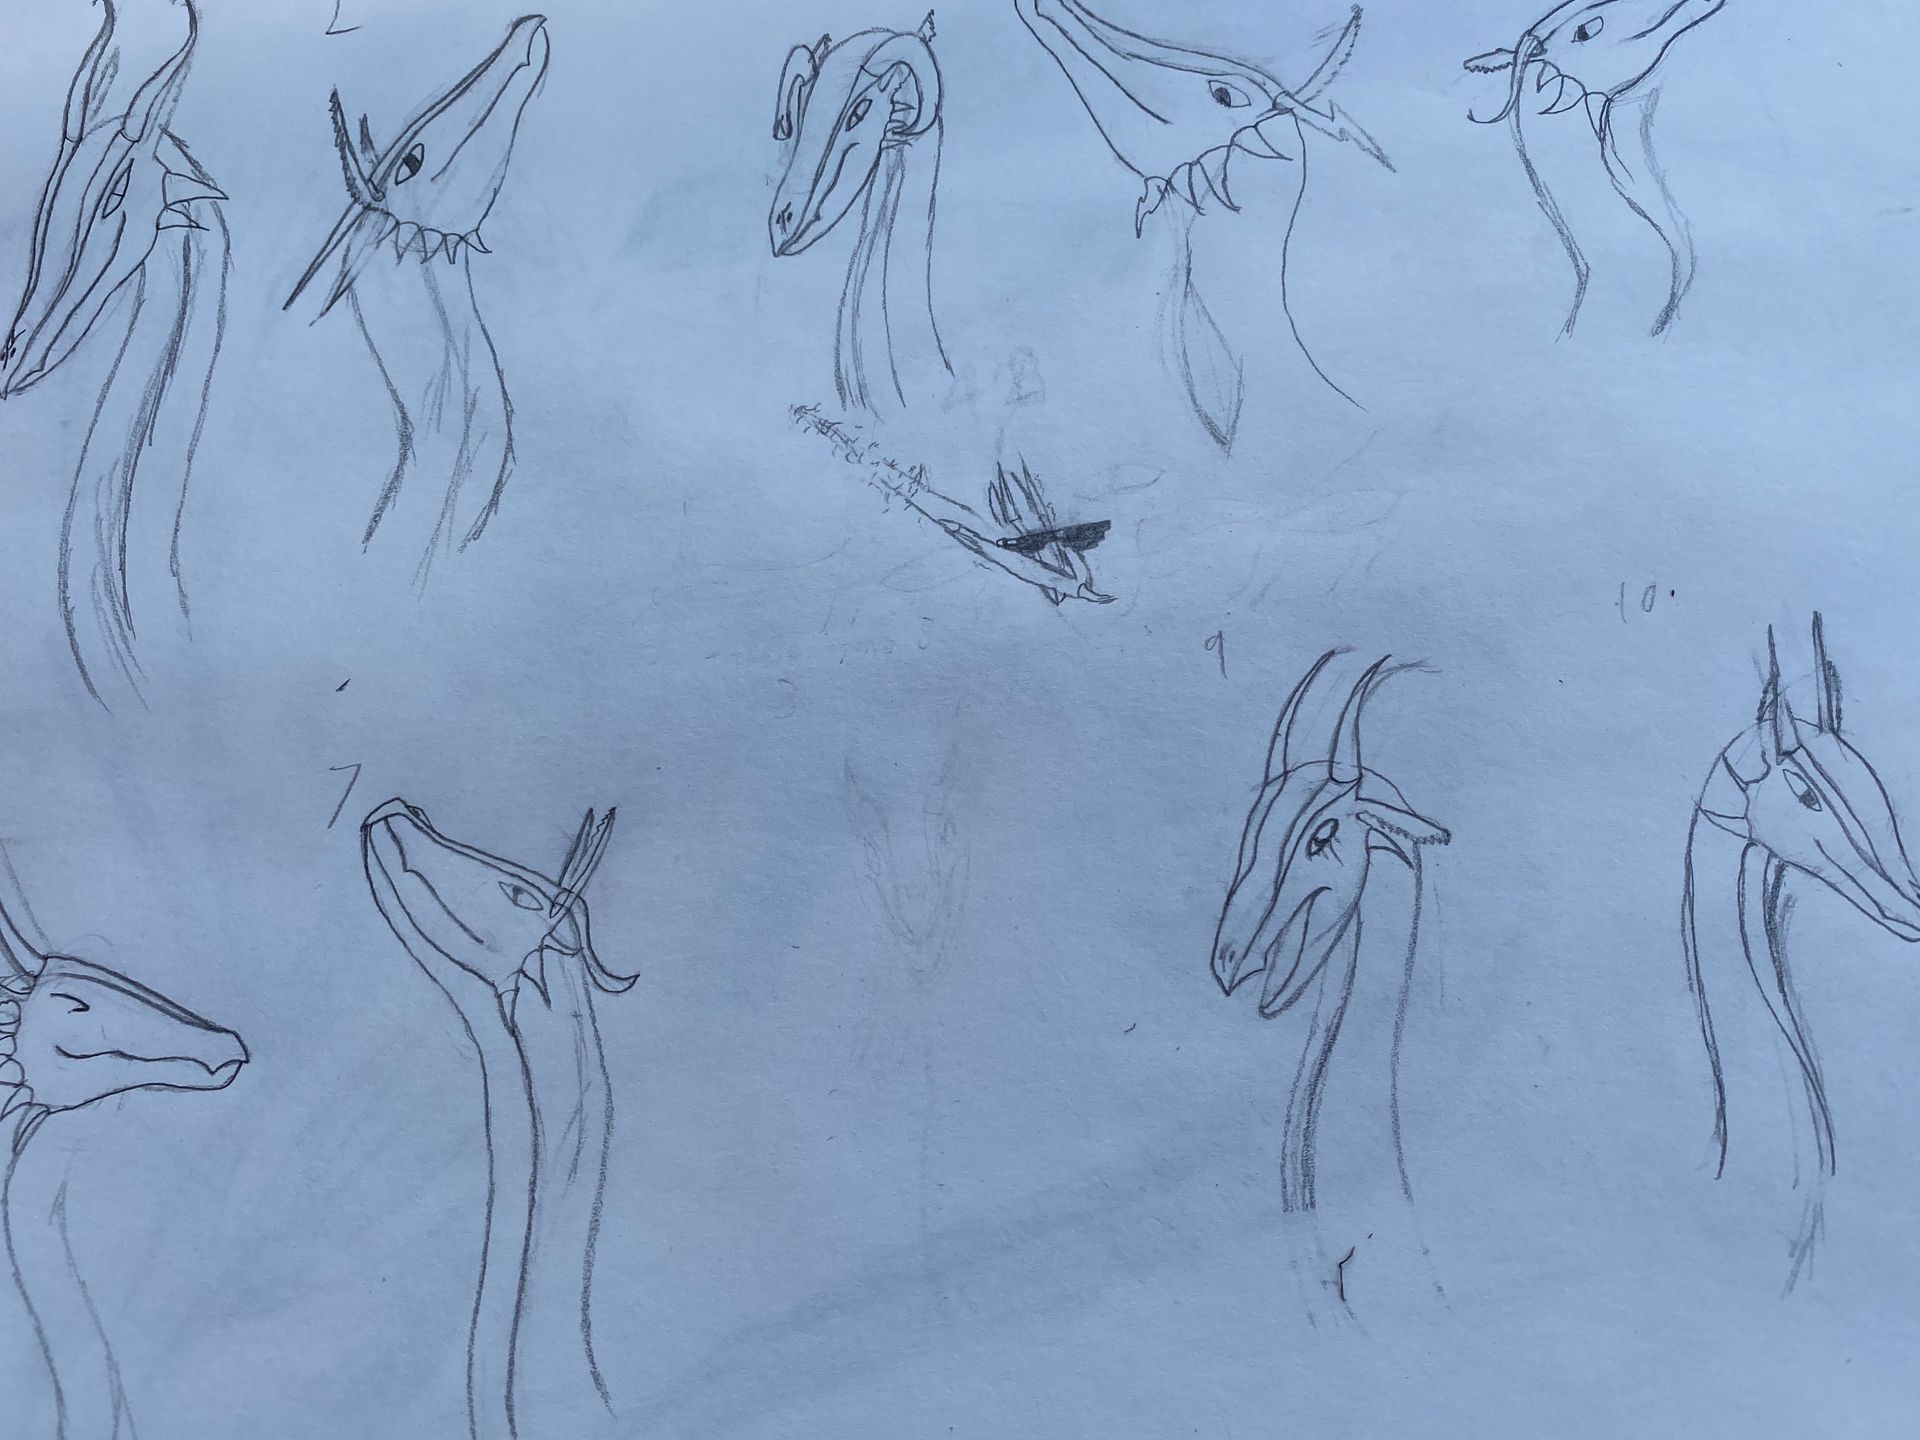
Step 7: A little clean-up. I use the same technique (if you can call it that) as earlier. Darken the lines that you want to keep, then gently rub the eraser over the entire section.
Number 9 is a really quick way to open your dragon's mouth.
Step 8: End off your head. I often use arches (#1, 5, 6, 7, and 10 give the best view) to mark where I want horns.
On nine I finished off the open jaw; not even going to worry about all the teeth, tongue, and fangs.
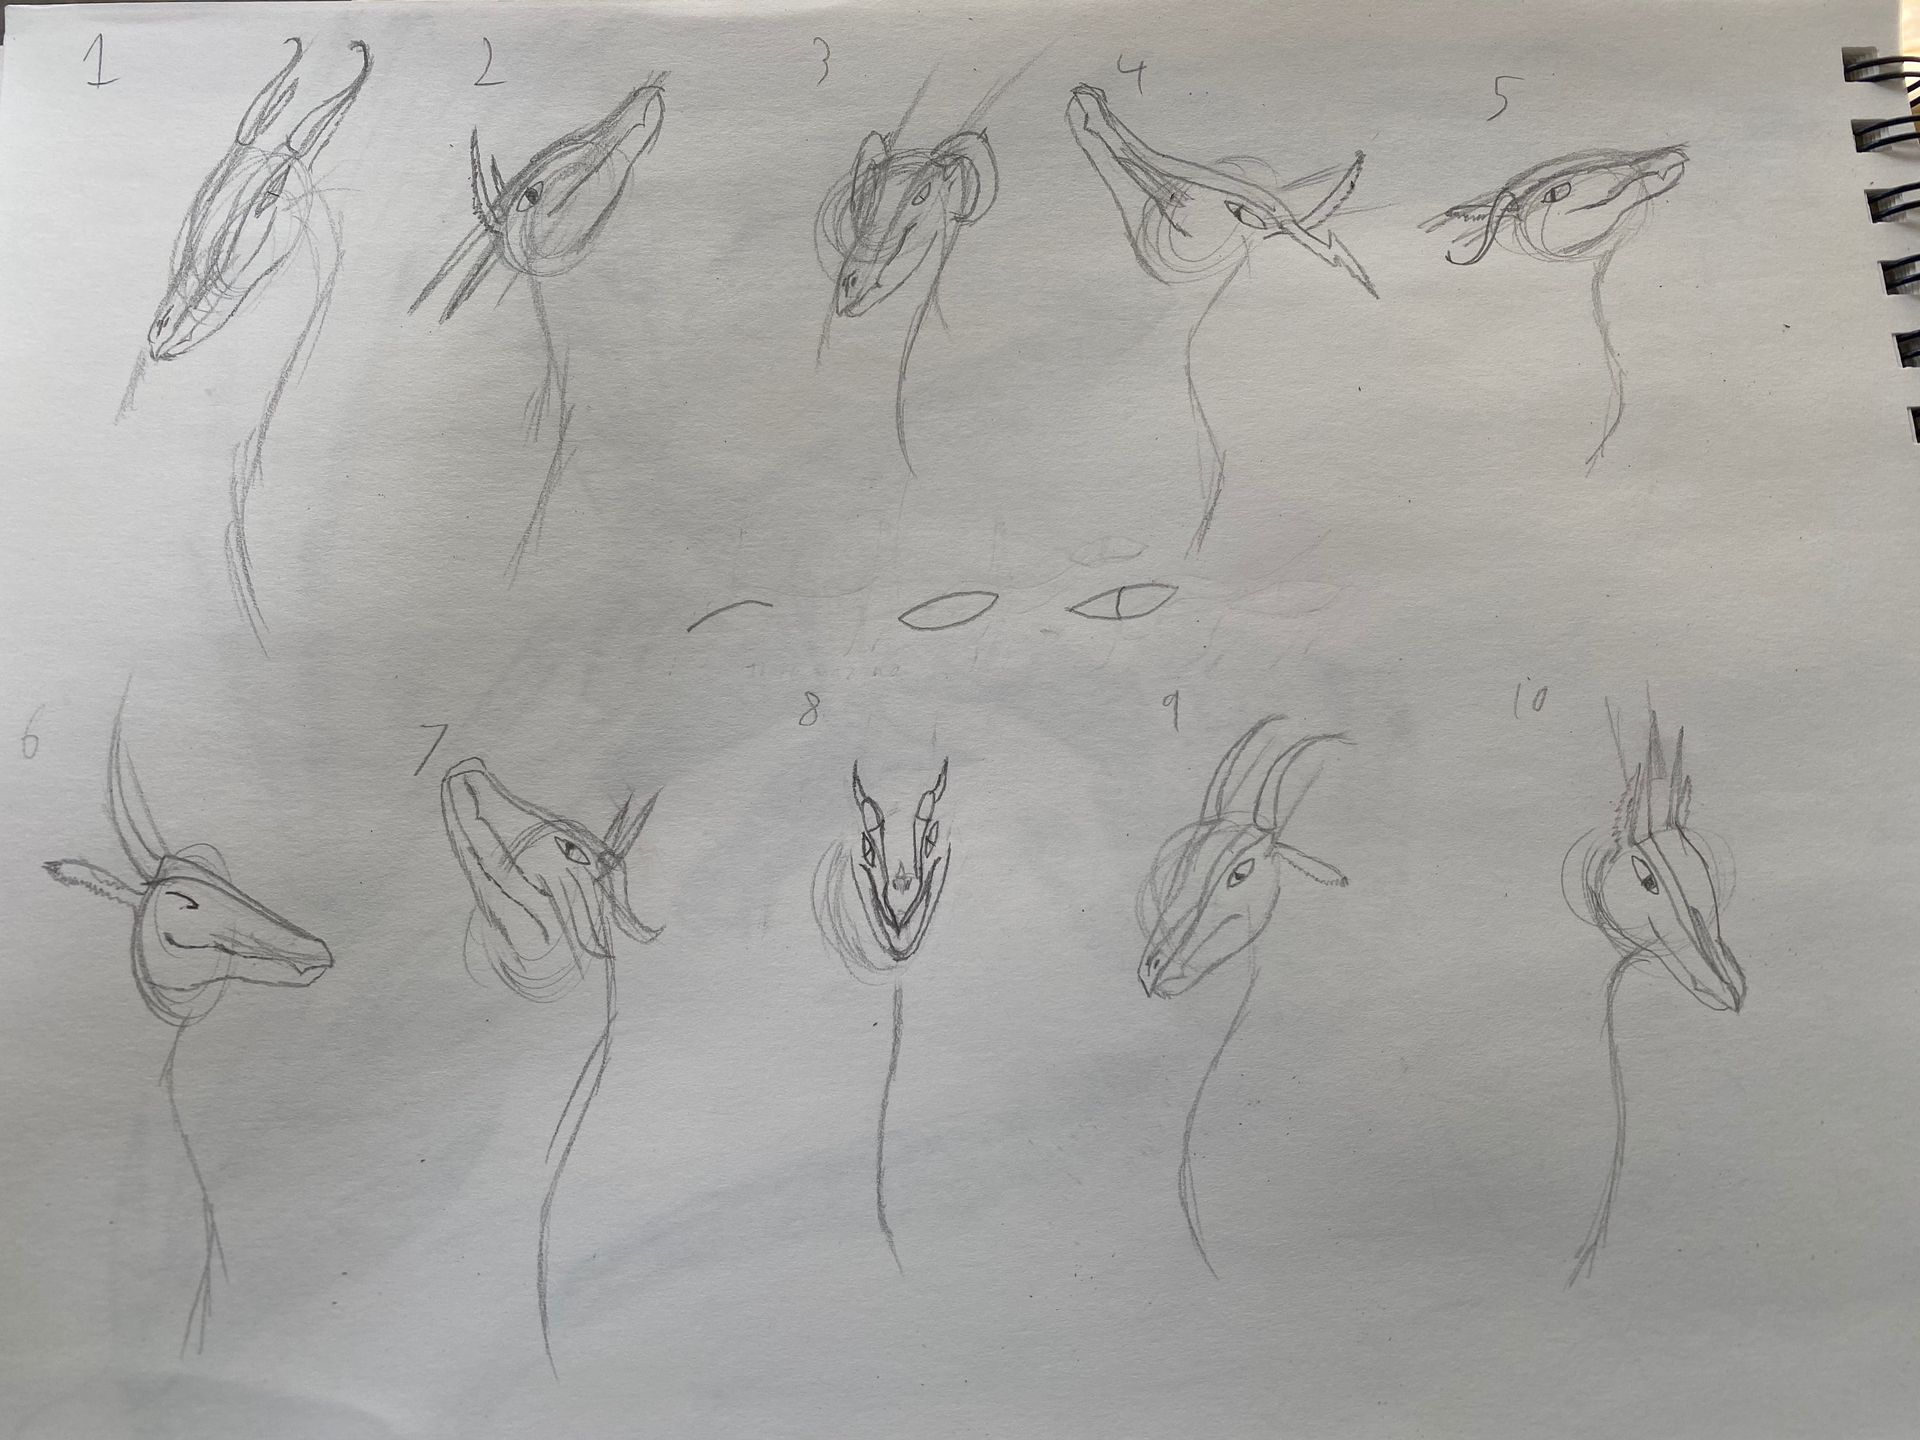
Step 10: Add in your horns (if you decide on any). For the real simple ones, just do a curve then mirror it a touch.
Note: For sharp horns, don't start the second line at the tip; start both lines at the base of the horn/claw.
If you do, it will look dull which actually might work for a younger dragon(et).

Step 11: Work on the neck!
Using that first line as a guide, start to thicken it out a bit. I find that starting at the jaw rather than the back of the head is easier to move and work with for some reason.
Step 12: Decide the underbelly.
I try to visualize the thickness of the head and translate that down to the underside. #7 might be the best of help.

Step 13: Add some sort of plates to the underside. I did a mix of both round and sharp, #3 showing how I help aline the middle if the scale/point to the underside.
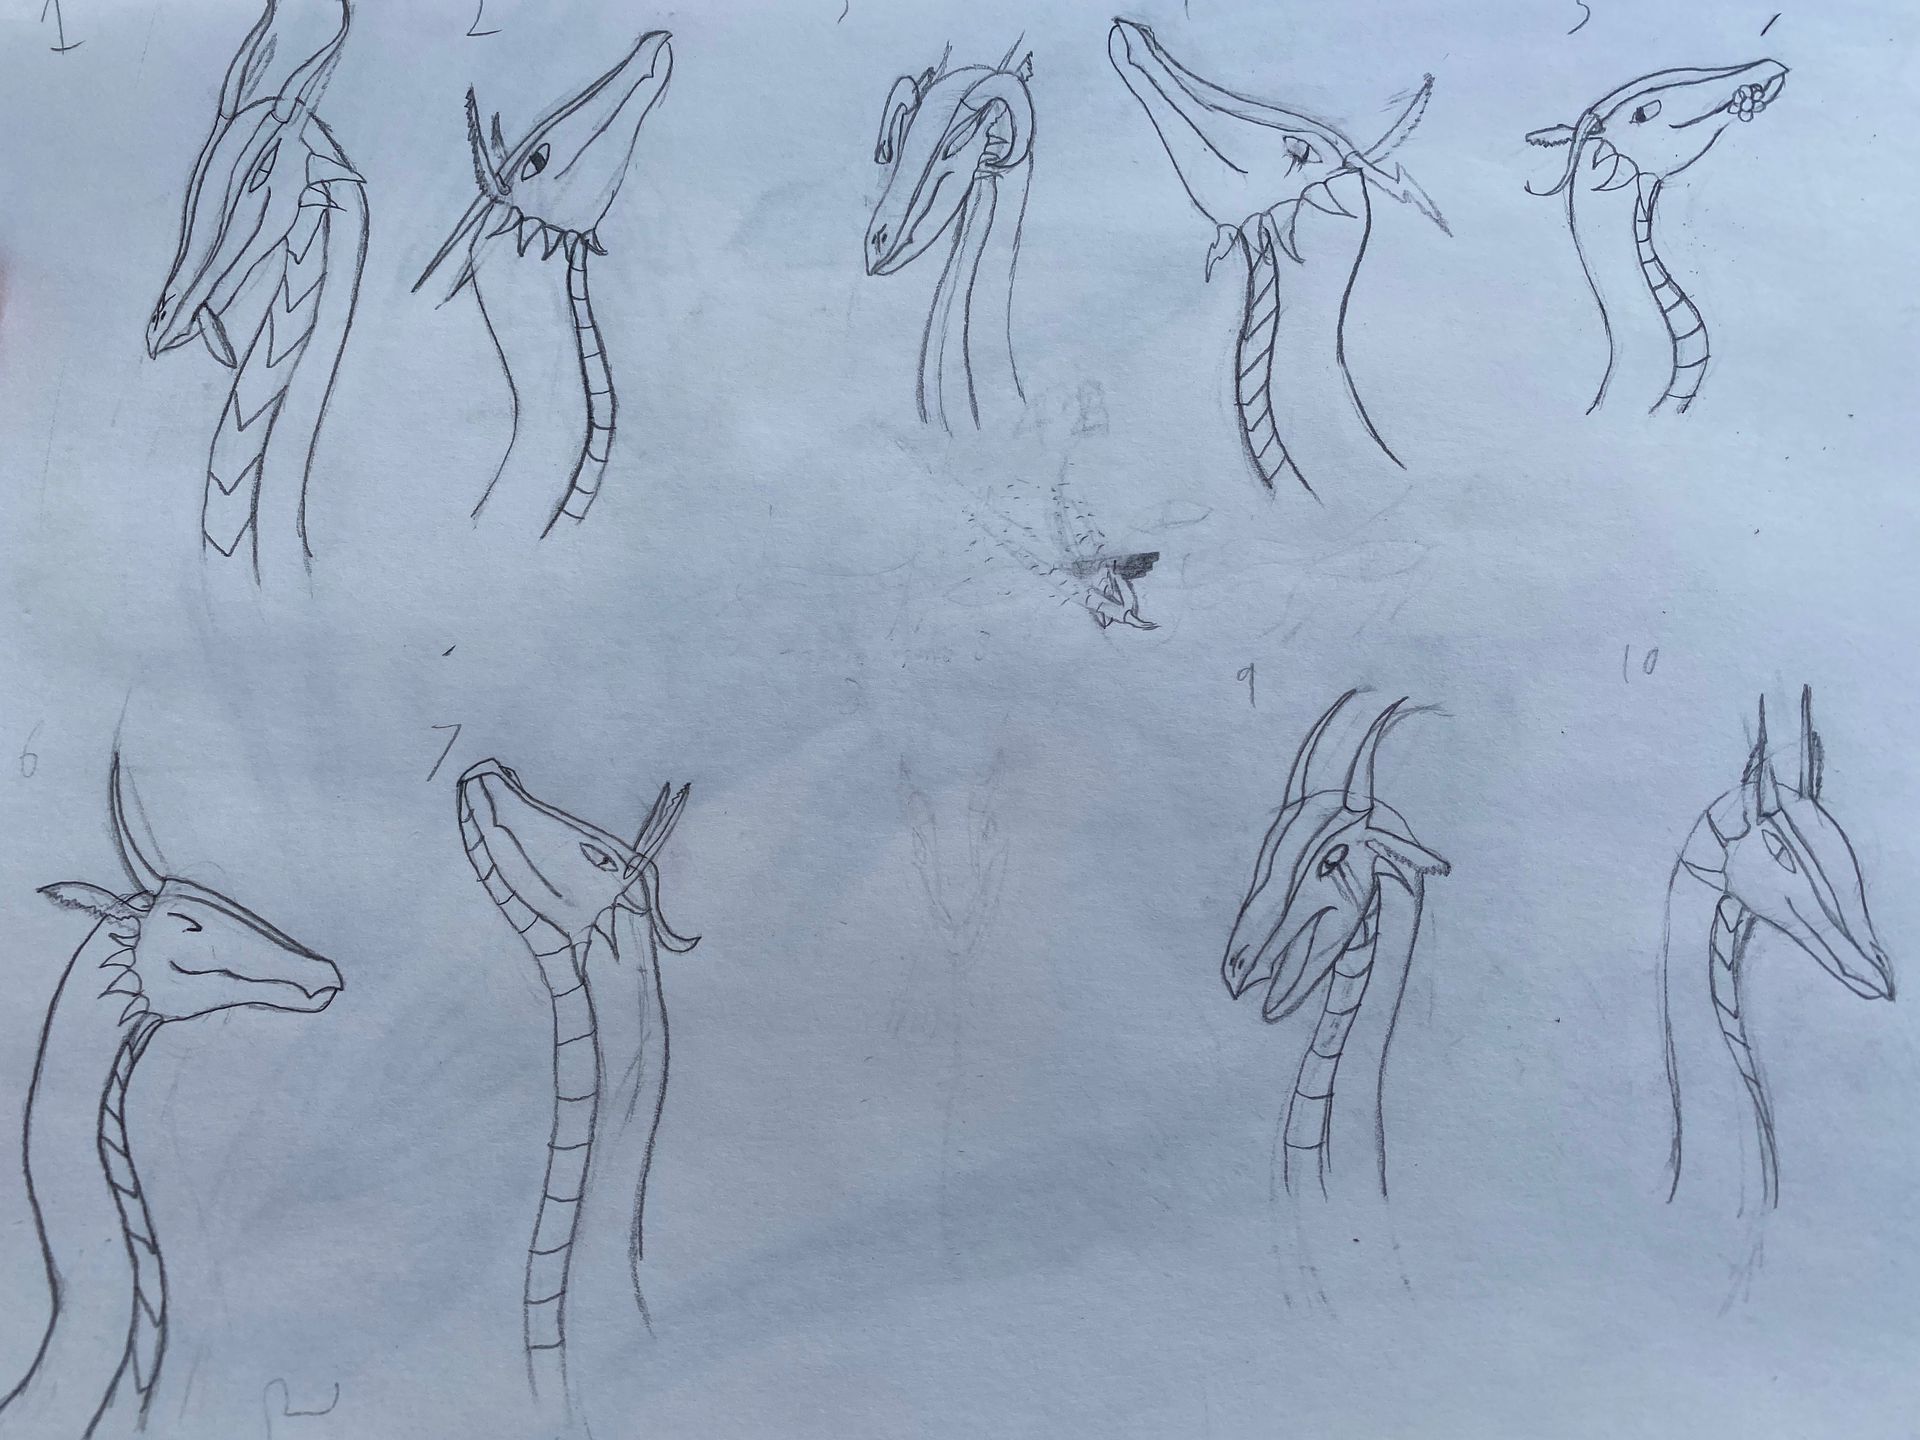
Step 14: Final cleanup and call it a day.

By the way, I had no intention at the start of this to have each dragon change their expression or line of focus. I was bored and decided to entertain myself.
And this concludes my crappy lesson on Heads.
Bạn đang đọc truyện trên: Truyen247.Pro