
How to Draw a RainWing
So the next suggestion I got was to draw a RainWing! Thank you Athena_The_Writer for suggesting this!
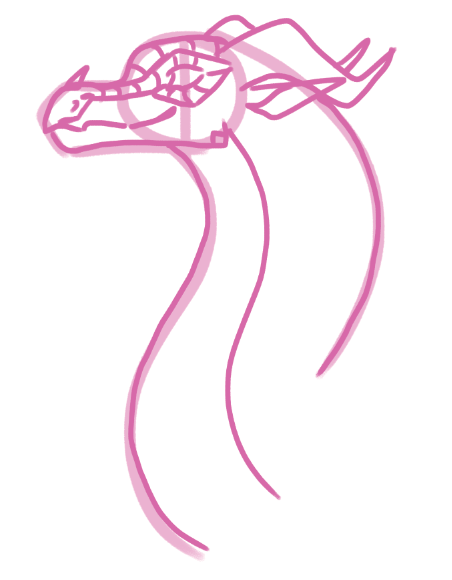
Step 1: As usual, draw a circle for the head.

Step 2: Draw a rectangle for the snout.
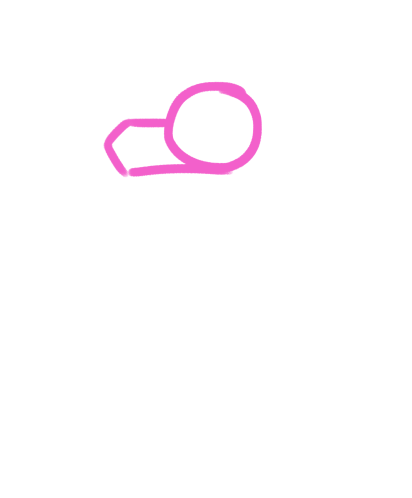
Step 3: Draw the c and s shapes for the neck.
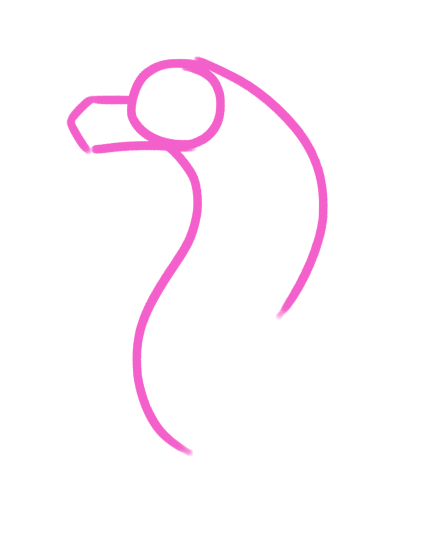
Step 4: Draw a line through the circle to mark where the eye will go, then change layers (or switch to a different pen/pencil if you're working with traditional), and lower the opacity.
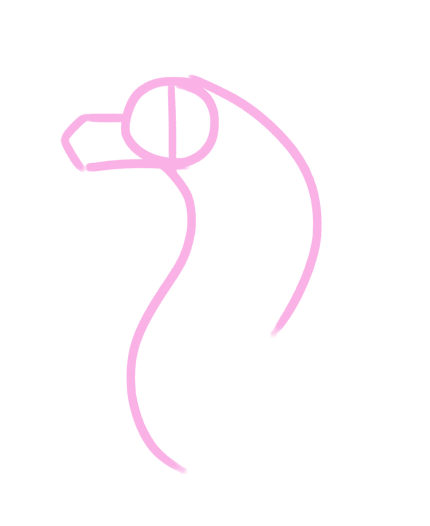
Step 5: Go over and smooth out the rectangle.
Step 6: Draw three curves for the mouth.
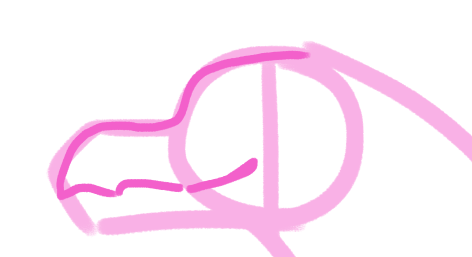
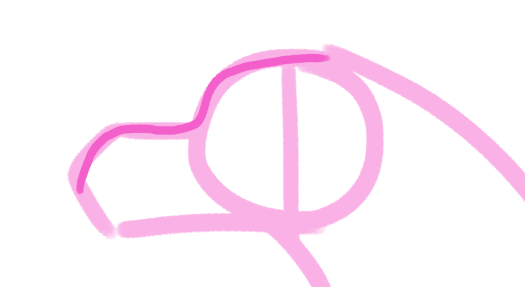
Step 7: Draw a small triangle that slightly overlaps the snout, to give it slightly more depth. This will become the nose horn.
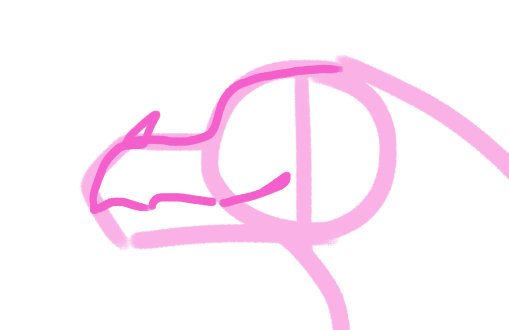
Step 8: Draw a line for the lower jaw and cheek area.
Step 9: Draw another triangle for the cheek horn.
Step 10: Draw a little hook-like line for the beak.
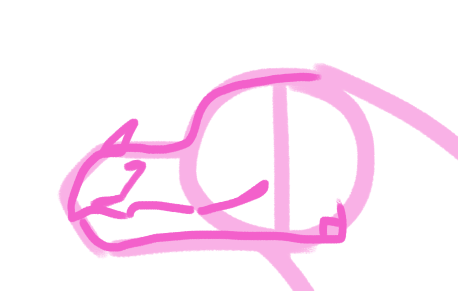
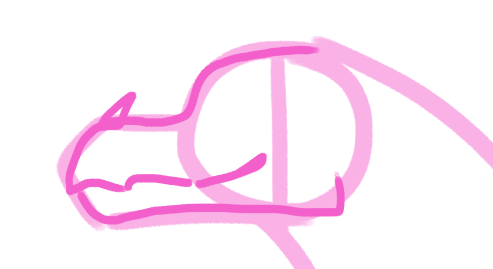
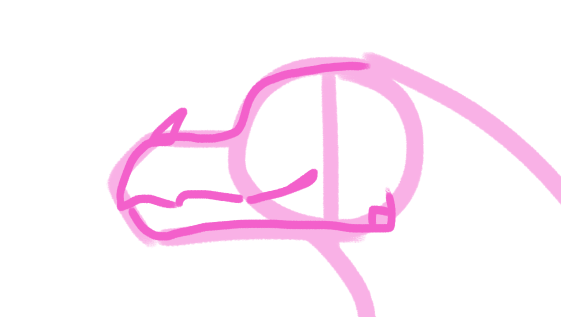
Step 11: Draw the nostril in the curve of the beak, then draw the eye.
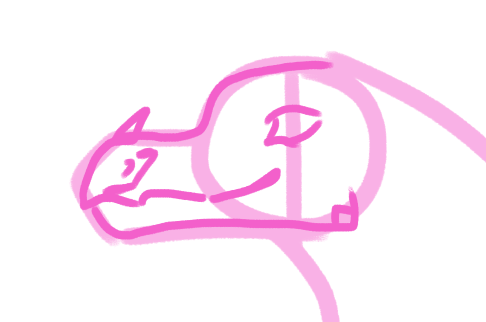
Step 12: Draw a line following the snout, then arch the line upwards and around the eye in a diamond shape.
Step 13: Draw a line under the other one to create the ridge.
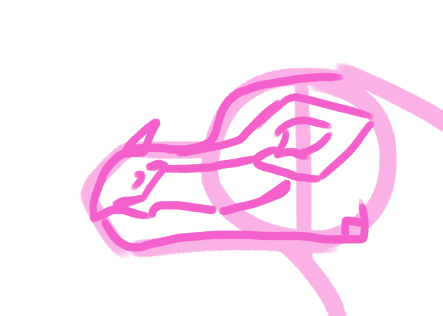
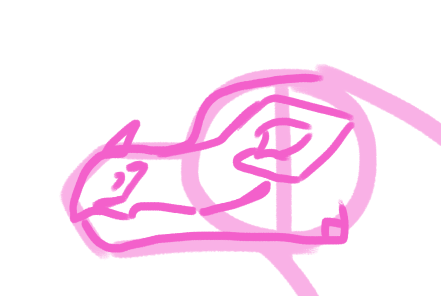
Step 14: Draw slightly curved lines in between the longer ones to make the plates.
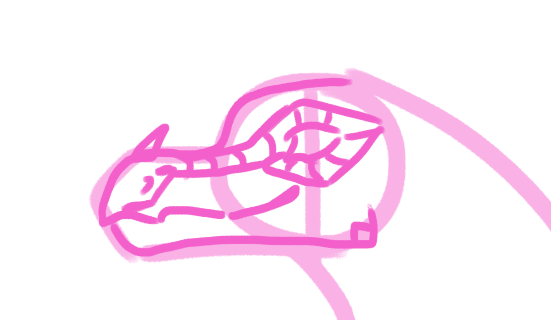
Step 15: Draw a curved line behind the diamond shape for the horn. You can connect the two lines or not, it's up to you.
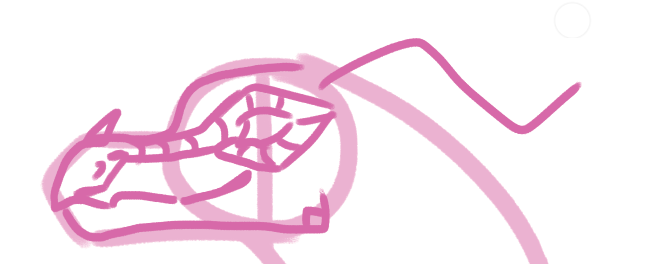
Step 16: Draw a similar line underneath the first one.
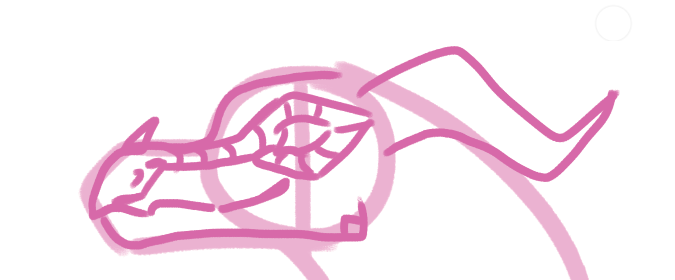
Step 17: Draw the other horn.
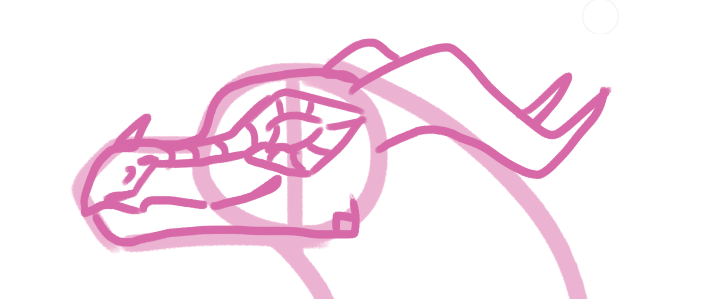
Step 18: Draw the ear underneath the horn.
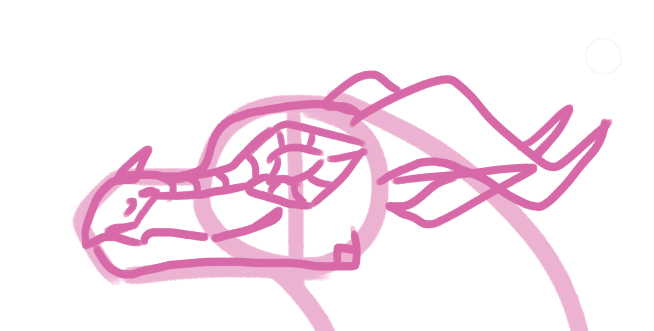
Step 19: Draw some curved lines on the head to make the back plates.
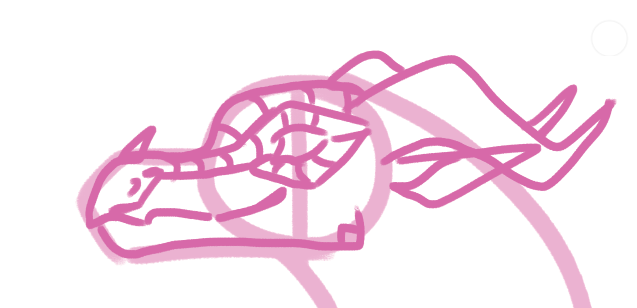
Step 20: Draw over the neck and then add in a line to mark where the underbelly plates will go.
Continued on next page!
Bạn đang đọc truyện trên: Truyen247.Pro