
❊ IbisPaint X Tools, Features, etc. [ II ]
Exploring IbisPaint X
Its tools, features, etc.
-PART 2-
< The continuation. >
V. OTHER TOOLS TAB

8. Magic Wand. Like the lasso tool, it is used to set/add/subtract to the selection but by simply clicking on the image or canvas, based on opacity or color. You can also restrict the tool in a specific layer or to the current layer rather than to the whole canvas.
9. Filter. There are 37 filter options.
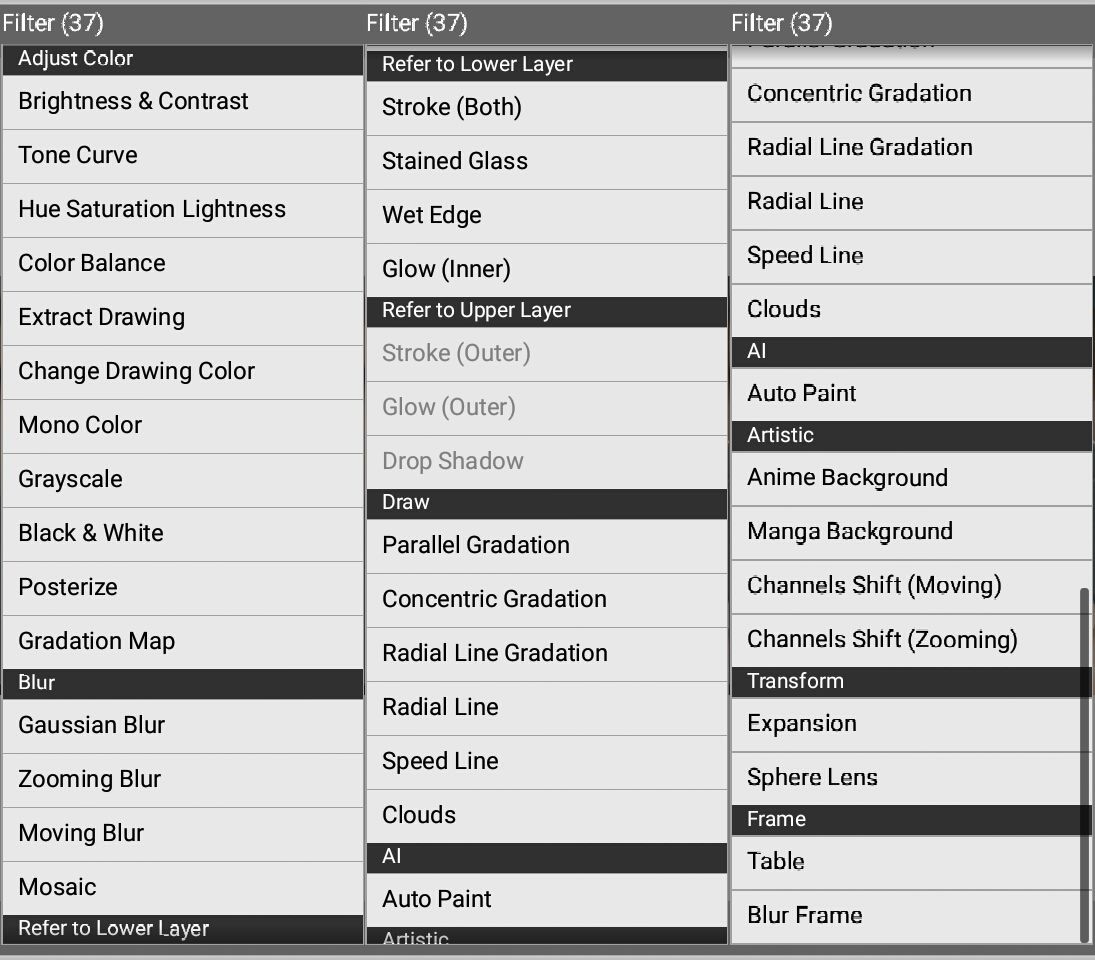
I won't be really discussing each of these 37 filters so I'm just gonna explain briefly by category. It's also good to explore them by yourself :)
Adjust Color. This include adjustments you can make when you color/filter a picture.
Blur. The word explains itself.
Refer to Lower Layer. Filters in this category will work this way: If you need to apply the filter in Layer A, you need to select Layer B which is the layer above Layer A.
Refer to Upper Layer. Filters in this category will work this way: If you need to apply the filter in Layer A, you need to select Layer B which is the layer below Layer A.
Draw. Filters here are those effects you see on webtoon or comics.
AI. It's only Auto Paint under here and I'm not very sure on how it works so I won't really explain much further.
Artistic. Under this are filters which have cool effects, the Channels Shift filters control the RGB channels of the picture.
Transform. Expansion can be used in expanding or narrowing a part of the picture with two points. The sphere lens option gives you a circle that makes a zoom in effect on the picture. I don't know how to explain them well lol, it's better if you try it out :)
Frame. Table can be used in making collages actually, or if you just want grids on your picture. Blur frame acts like the Vignette filter, it's like a black frame except that it is blurred around the edges of your canvas.
10. Eraser. Used in erasing a layer's image pixels.
11. Blur. The standard blur tool that can be applied like a brush.
12. Text. Basically to add text. You can also directly download fonts from the app, with Internet connection of course.
13. Eyedropper. This tool is used to select a color from your canvas. You can actually select a color with a shortcut by making a long-press to your canvas while using the brush tool.
14. Settings. If you want to set your stylus pen you can go here. You can also uninstall fonts and set other things.
Little feature insert:

The leftmost button will automatically switch you from using brush to eraser tool and vice versa.
VI. OTHER TABS
aka the buttons/tabs above

The two leftmost buttons are the undo and redo buttons.
The third button from the left will make this pop out:

The first four options are already discussed since they have the same functions from the ones in II. LAYERS TAB. On the other hand, the remaining three, Cut, Copy and Paste functions for the layers.
The fourth button from the left will make this pop out:
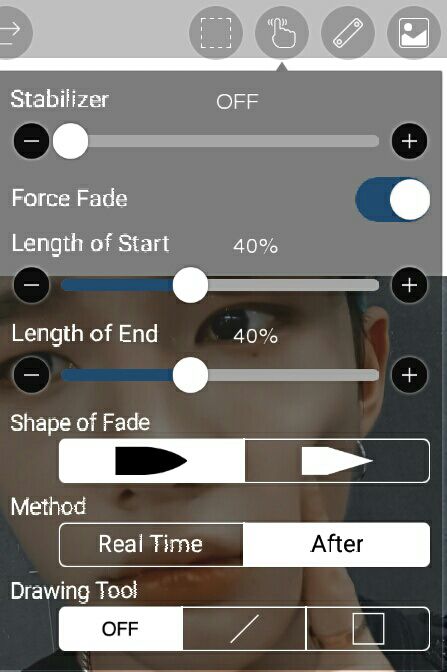
The stabilizer feature can increase its function from 1-10. It is used to make lines more stable and cleaner, rather than messy and wriggly. See this:
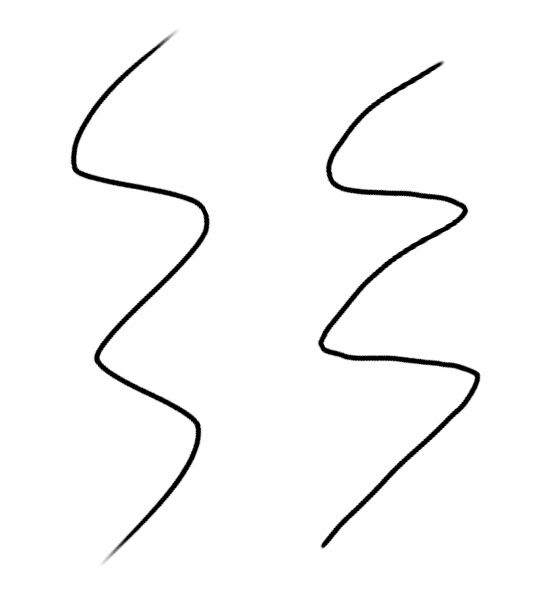
The left stroke is made with the stabilizer at 10, while the right stroke is made with the stabilizer at 0.
The force fade is the fading of the start and end of the stroke, as to the length of the faded start/end, you can adjust it from 0-100%.
The shape of fade, the illustrations/icons explain it.
With the method Real Time, you will see the effect of Force Fade immediately when you stroke it while the method After makes you see the effect after you make a stroke.
For the drawing tool, you can make a line and square/rectangle as you can see in the icons shown.
The fifth button from the left will make this pop out:

Under this are 9 rulers, but I only use the 3rd ruler under the Ruler category to make a halo. Other than that, I don't have much experiences with the other rulers so I won't explain much further.
The last button from the left will make this pop out:
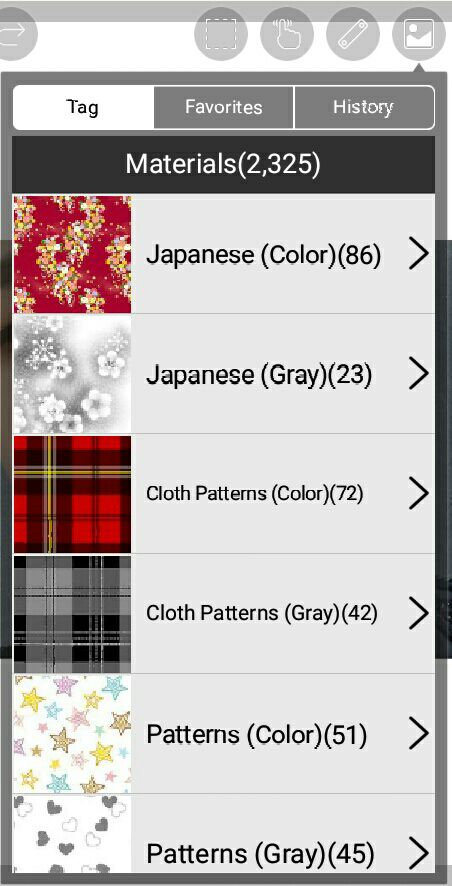
Under this tab are thousands of materials you can use as a background or whatever you can do with them. You can also add a material to your favorites by clicking the star button.
ㅡENDㅡ
That's actually it hahahahah (´ヮ') hope you guys learned or discovered something! IbisPaint X is packed with many tools/features so I'm also still learning with some of them : )
Don't forget to vote if this helped! Comment if you have any questions.
∽tine
Bạn đang đọc truyện trên: Truyen247.Pro